Expedition Master I
I had a parts list together for disconnects but haven’t gotten around to it.Did you ever disconnect your front sway bars?
Just asking because I tore the bushing and I'm debating on just saving $20 and just remove it.
Expedition Master I
I had a parts list together for disconnects but haven’t gotten around to it.Did you ever disconnect your front sway bars?
Just asking because I tore the bushing and I'm debating on just saving $20 and just remove it.
Enthusiast III
ThanksThank you! As I mentioned I went with the same size tire I was running previously which is a 245/65 17 but the Falken is much more squared off of a tire. No pictures but I’m going to have to heat up and move some plastic and some other plastic I flat out trimmed.
The shake in a 5th gen is synonymous with lifting and the issue is simply a wobble/shake around 18 mph. More of an annoyance than anything. Weak transmission mounts are nothing new to Subaru and the insert limits the ability for the stock mount to move. Super simple install on a 5th gen. Takes maybe 10 minutes installed my way.
Enthusiast III
Expedition Master I
I’m sure I’ll be commenting about the tires but I’m a fan so far.Interested to hear how you like the tires long term. I've got the trans mounts sitting here on my kitchen table, just waiting to go into the car. Need to find some free time to make that happen before our Thanksgiving road trip for sure.
Enthusiast III
Interesting. I got one of the "loaded" versions that he's now making that should be an easier fit, I think (no need to squeeze in with a vise if you pull the trans mount out). I need to get under there and see if my skid plate is in the way...if not, 10 minutes sounds easy enough. Just need to snag a bottle jack first, I should have one anyway. :)I’m sure I’ll be commenting about the tires but I’m a fan so far.
Here’s my tip for the insert. Put a bottle jack under the center trans mount bolt, jack it up, grease the insert, and push it in from the front. 10 minutes. Don’t bother with the instructions that come with it.
Pathfinder I
Interesting. I got one of the "loaded" versions that he's now making that should be an easier fit, I think (no need to squeeze in with a vise if you pull the trans mount out). I need to get under there and see if my skid plate is in the way...if not, 10 minutes sounds easy enough. Just need to snag a bottle jack first, I should have one anyway. :)
Expedition Master I
Expedition Master I
Enthusiast II
w00t! Can't wait til I can finally do this.Here’s my tip for the insert. Put a bottle jack under the center trans mount bolt, jack it up, grease the insert, and push it in from the front. 10 minutes. Don’t bother with the instructions that come with it.
I need to get under there and see if my skid plate is in the way...if not, 10 minutes sounds easy enough. Just need to snag a bottle jack first, I should have one anyway. :)
Sweet! That was a big question of mine. It might even let me put it in sooner with my (temporarily) bum shoulder, since I won't have to take the trans plate off.Can confirm Primitive skid plates are not in the way. Even with taking our the trans mount it's a pretty easy job.
Expedition Master I
Yeah there’s still plenty of room and I’d say that if you were up for trying you could install it one handed. I was going to mention that in the other thread but either way a large pair of channellocks can give you the last bit of push to get it to pop in if one side hangs up a bit.w00t! Can't wait til I can finally do this.
Sweet! That was a big question of mine. It might even let me put it in sooner with my (temporarily) bum shoulder, since I won't have to take the trans plate off.
Expedition Master I
Expo is right around the corner which is great because it's forcing me to get things done. It's not great because I've been working a lot of OT and even I need some sleep haha.
So I finally got around to redoing the previously marred trim.
View attachment 34771 View attachment 34772
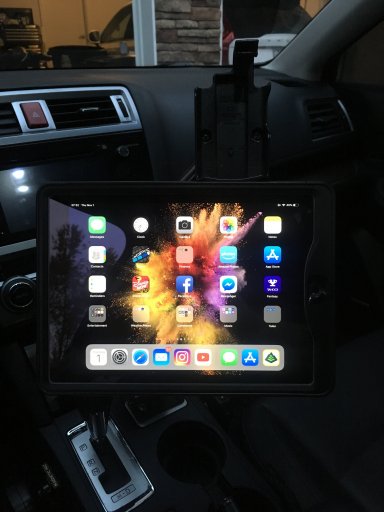
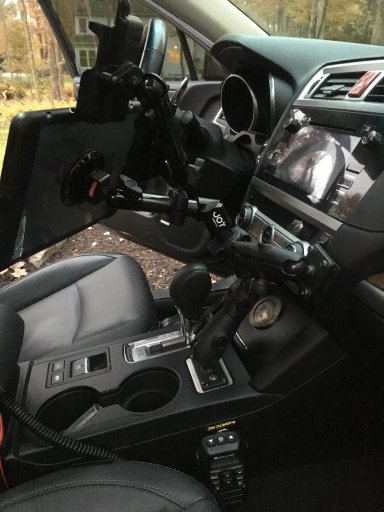
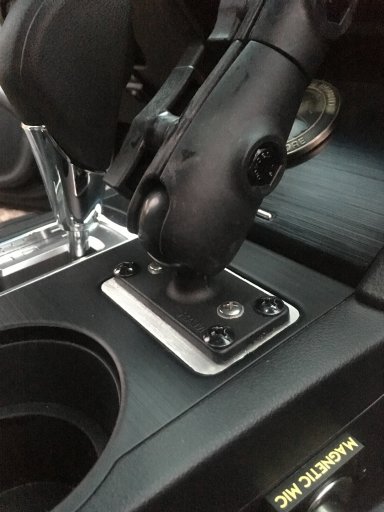
Came up with a stealthy idea for mounting my Switch Pros panel. Aside from being completely hidden when I don't need it, it faces me perfectly when I do.
View attachment 34773 View attachment 34774
I still need to add the legends but I'm loving this setup. No fuses, no relays and a host of options that can be adjusted using the panel...
View attachment 34775
or via Bluetooth.
View attachment 34776
Night lighting is super difficult to truly capture but you get the idea. I need to spend some time aiming them but I'd be lying if I said I didn't wish they were less spot and more flood.
View attachment 34777 View attachment 34778
Enthusiast III
Pathfinder I
Enthusiast III
Yeah, I’m not to sure about the kit to be honest but I was able to pick it up cheap, like less than 50% of the cost of msrp. I knew someone that had one but never installed it before trading in their gen 5. I would love to install this kit and get new springs for even more lift and clearance. Hopefully I can get some good insight into this kit...Ready Lift kits are a point of contention in the subie community right now. It is a cheaper kit for sure, but there is a reason why they include it in all others 2" kits. The caster is already kind bad on the OB's, so you'll more than likely run into rubbing issues with oversized tires or being loaded. Not sure how they can make that claim of the geometry bring the same. My 2 cents fwiw.
OP has been in the game longer than most of us 5th Gen Outbacks and is more articulate than me so I'm curious about his take.
Pathfinder I
Can't argue with that savings! Good news is you can throw on any fabricators subframe spacers if you decide to pick some up.Yeah, I’m not to sure about the kit to be honest but I was able to pick it up cheap, like less than 50% of the cost of msrp. I knew someone that had one but never installed it before trading in their gen 5. I would love to install this kit and get new springs for even more lift and clearance. Hopefully I can get some good insight into this kit...
Expedition Master I