2003 Land Rover Discovery 2 Build

  • HTML tutorial

disco_unchained

Rank IV
Launch Member

Enthusiast III

1,003
Burlingame, CA, USA
Member #

13908

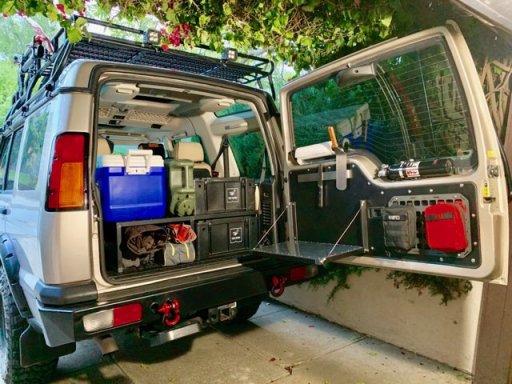
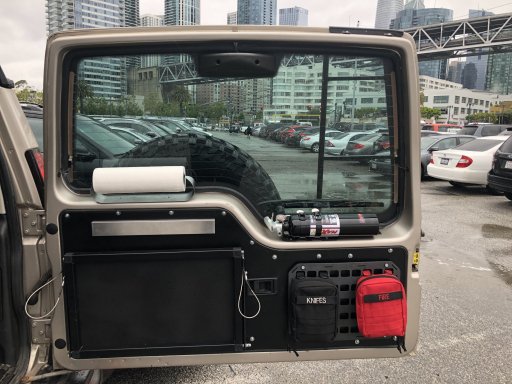
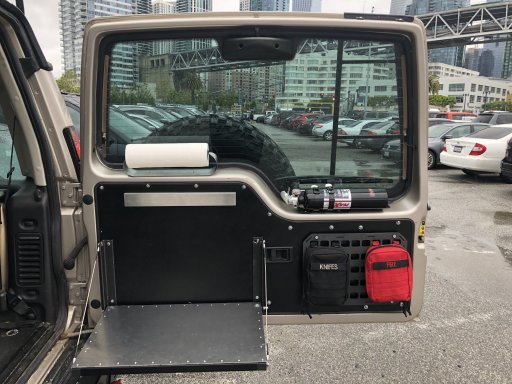
Finally got around to completing the rear cargo door tonight:
98413

98414

Used a sheet of 6061 aluminum from online metals.

Cut it to size using the factory panel as a template

Sprayed it with bed liner

Trimmed it in with some trim off of Amazon

Added a fire extinguisher mount

Added a paper towel holder

Added a knife strip

Added a rigid Molle Panel from Greyman tactical

Fashioned the drop down table out of EZTube and EZTube connectors and another sheet of aluminum, held together with rivets.

Used 3/32 stainless steel rope for the drawdown cables.

F’d up the holes in the angle brackets a bit and will redo those purely for aesthetics someday. But, for now, it works.

With stove for size as reference:

View attachment 98341

Props to Nicholas bratton’s writeup for all the ideas.
 
Last edited:

disco_unchained

Rank IV
Launch Member

Enthusiast III

1,003
Burlingame, CA, USA
Member #

13908

Does anyone have a recommendation for a rust preventing undercoat for the frame / underbody? Trying to decide between POR 15, 3M Rubberized Undercoat, Waxoyl, and Fluid Film.

Thanks!
 

disco_unchained

Rank IV
Launch Member

Enthusiast III

1,003
Burlingame, CA, USA
Member #

13908

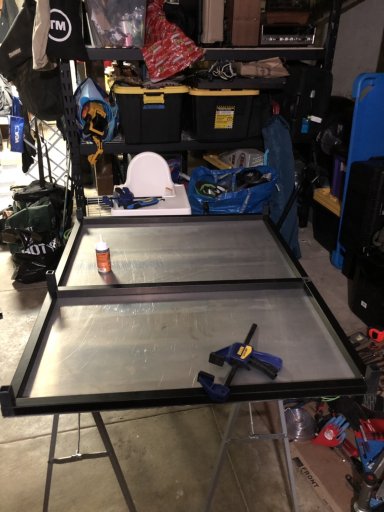
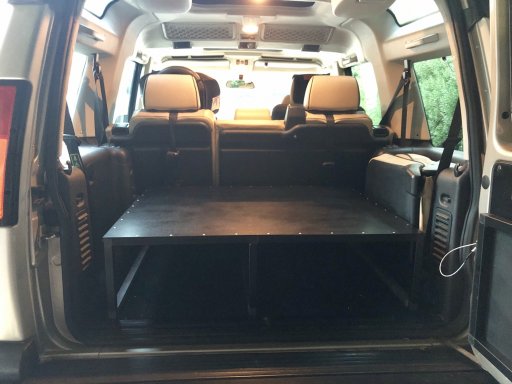
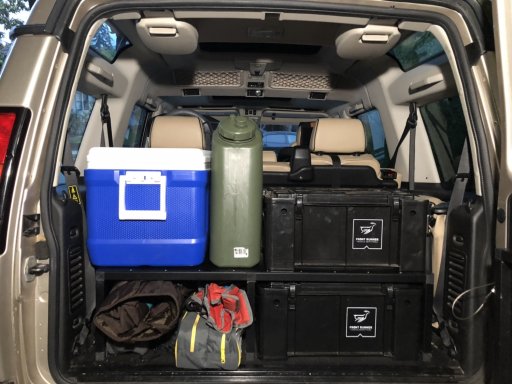
Got around to building out rear storage. Like the dropdown table, used a sheet of 6061 aluminum sheet covered in bedliner, than built the frame using eztube tube and connectors. Starting to swear by this stuff.

Designed with a slight offset to fit two front runner boxes underneath on the right and support the added weight of the cooler on the left.

A little steampunk but it’ll do:

IMG_3934.JPGIMG_3944.JPGIMG_3959.JPGIMG_2990.jpeg

Did the spark plugs and wires over the weekend as well and cursed everything on earth for secondary air and where Land Rover put the coils.

On to fixing the shelf to the floor, tie down rings for cargo and lashing next...
 
Last edited:

disco_unchained

Rank IV
Launch Member

Enthusiast III

1,003
Burlingame, CA, USA
Member #

13908

Nice build.

If you never plan on using the rear jump seats.... pull ‘em. You will be surprised at how much they weight.
Thank you! I took out the jump seat on the left and kept the one on the right. Hidden from these photos are the two car seats in the back seat. The right jump seat is our CYA if a grandparent comes in town! Look forward to dropping it as the kids grow...
 
  • Like
Reactions: Hafaday

disco_unchained

Rank IV
Launch Member

Enthusiast III

1,003
Burlingame, CA, USA
Member #

13908

Question to the fellow disco owners out there - would it be idiotic to mount the hi-lift on the hood with the 4xrac attachments as I’ve seen on some Range Rover classics? I’ve currently got it in the floorboard of the second row seats, but with kids looking for a place outside that isn’t the roof rack.
 

denverdisco2

Rank IV

Enthusiast III

1,135
Denver, CO
First Name
Will
Last Name
Howard
I think I'd mount it to your roof rack before mounting to the hood. Rather add the weight up top vs a heavy projectile attached to thin aluminum in the event of an accident, windshield nor hood are going to keep that from coming into the cabin.
 
  • Like
Reactions: disco_unchained

soarvet

Rank III
Launch Member

Enthusiast III

646
Buford, GA
First Name
Mike
Last Name
Miller
Member #

8170

Service Branch
US Army
That is one sweet Disco Brutha! I just picked up a 2002, same color. I'm using yours as a guide for mine. Don't worry I'm in Atlanta, so nobody will know I'm copying you and you won't see one that looks like yours on the road unless I come back out west or you come out east. LOL... Great work on building it out. One of the cleanest and best looking Disco's I've seen.
 

disco_unchained

Rank IV
Launch Member

Enthusiast III

1,003
Burlingame, CA, USA
Member #

13908

That is one sweet Disco Brutha! I just picked up a 2002, same color. I'm using yours as a guide for mine. Don't worry I'm in Atlanta, so nobody will know I'm copying you and you won't see one that looks like yours on the road unless I come back out west or you come out east. LOL... Great work on building it out. One of the cleanest and best looking Disco's I've seen.
Thank you! If I can help at all, let me know. Tinker and RoaminRover were huge helps to me on here.
 
  • Like
Reactions: Hafaday

disco_unchained

Rank IV
Launch Member

Enthusiast III

1,003
Burlingame, CA, USA
Member #

13908

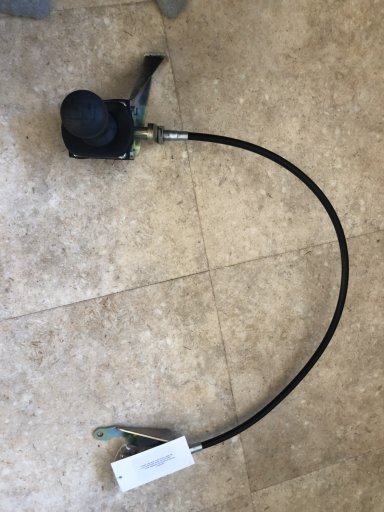
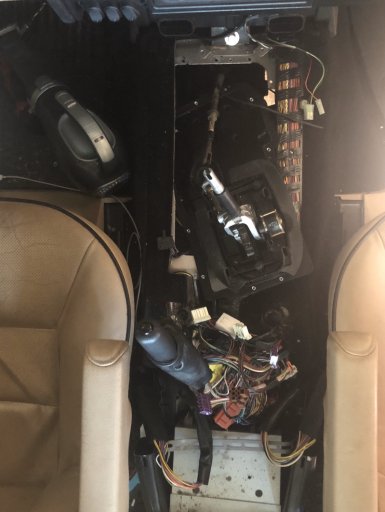
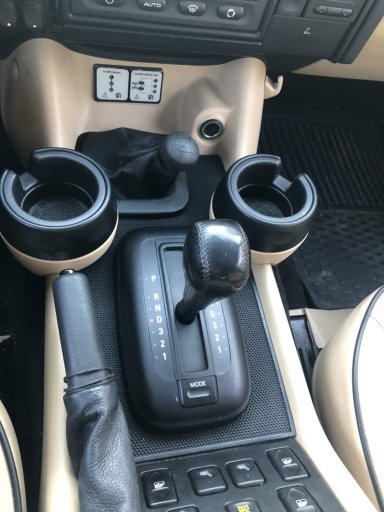
After burning a hole in my north face shell on the y-pipe reaching up to lock the diff by hand, I finally broke down and got and installed a cdl linkage:

IMG_6152.JPGAdjustments.JPGIMG_6207.JPG

As usual, nothing about the process was simple for me, but it was fun. Pretty sure I got a sinus infection from breathing 15 year old dust from under the console, but now I don’t have to get out of the truck to lock the diff!
 

soarvet

Rank III
Launch Member

Enthusiast III

646
Buford, GA
First Name
Mike
Last Name
Miller
Member #

8170

Service Branch
US Army
I don’t mean to hijack your thread, but my question is kinda Disco 2 specific. How do you like your 2” terrafirma lift? Do you have any regrets not going with heavy duty shocks or even a 3 inch? Your kit in the back has to have some good weight to it now. I’ve been reading that some people have issues with the terra Firma starting to sag a little. OME it seems don’t make a 3” lift, only a 2” and would have to use a spacer to actually get it up to 3. curious on you guys thoughts.
 

systemdelete

Rank V
Launch Member

Pathfinder I

1,798
Nashville, TN
First Name
Erik
Last Name
Rumbaugh
Member #

13761

I don’t mean to hijack your thread, but my question is kinda Disco 2 specific. How do you like your 2” terrafirma lift? Do you have any regrets not going with heavy duty shocks or even a 3 inch? Your kit in the back has to have some good weight to it now. I’ve been reading that some people have issues with the terra Firma starting to sag a little. OME it seems don’t make a 3” lift, only a 2” and would have to use a spacer to actually get it up to 3. curious on you guys thoughts.
A very conservative lift on the disco’s can get them a lot further than many will EVER go. Just look at the specs of the varying years of the camel trophy discos. None required massive lifts.
 
  • Like
Reactions: Hafaday

disco_unchained

Rank IV
Launch Member

Enthusiast III

1,003
Burlingame, CA, USA
Member #

13908

How do you like your 2” terrafirma lift? Do you have any regrets not going with heavy duty shocks or even a 3 inch? Your kit in the back has to have some good weight to it now.
I’ve read that about the terrafirma lifts, but to date, I’ve had no issues and 2” has functionally performed fine for me.

I went with a 2” over a 3” as it was one of the first mods I made. I read the 3” required new brake lines and potentially gearing, and I didn’t have much experience working on cars and wasn’t confident I could do all that.

There’s a part of me that wishes I had done a 3” for sure, but it’s purely aesthetics. I have never “needed” more. If you want a 3” check out rte-fab.

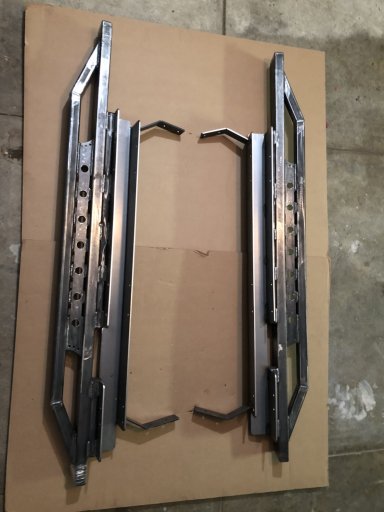
As for the weight in the back, most of what I built was aluminum and pretty light. That said, I’m about to throw some heavy sliders on. Will let you know if I need to switch to HD after that.
 

alexdnick

Rank IV

Enthusiast III

1,212
Washington, USA
First Name
A
Last Name
N
How does this handle on the freeway? Much road noise? Does it get blown around?

trying to decide between This or A Land Cruiser