Reaver's Squaredrop Camper Build!!

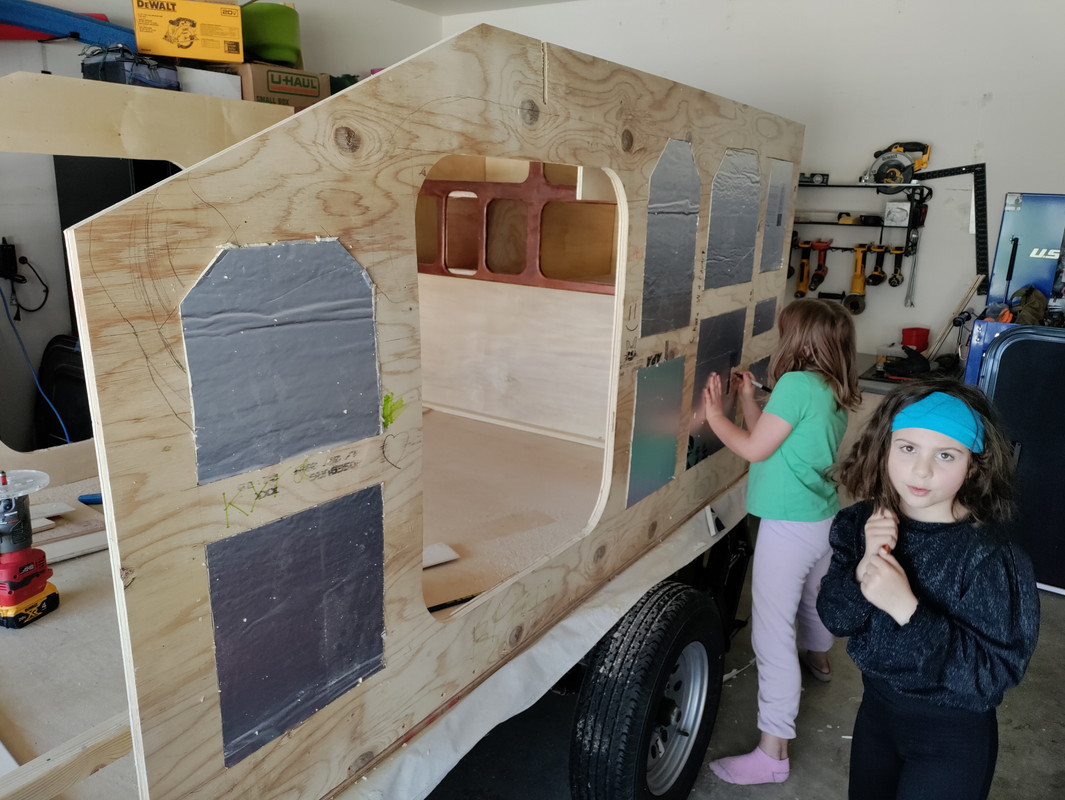
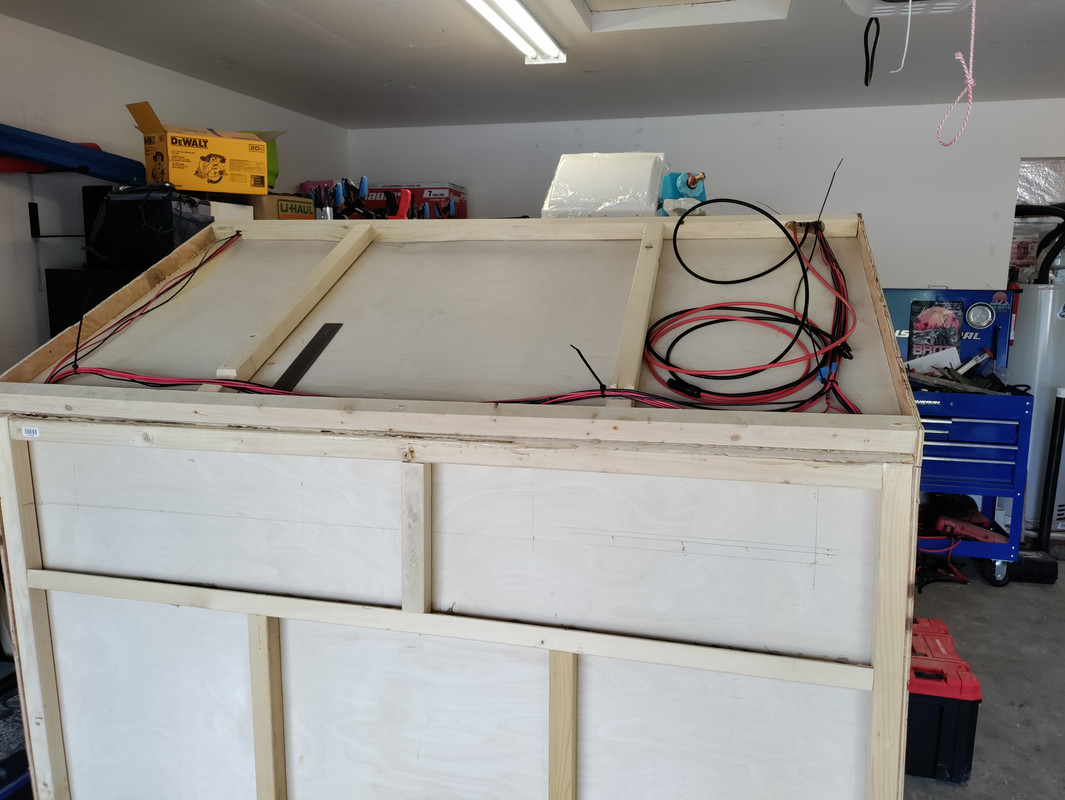
Had another great day working on the trailer today. Got the floor fully pmf'd, and flipped back over!

Using Pl premium adhesive, we attached the walls at the base, and screwed them into the 2x4s along the edge of the floor.

IMG-20240407-155111.jpg


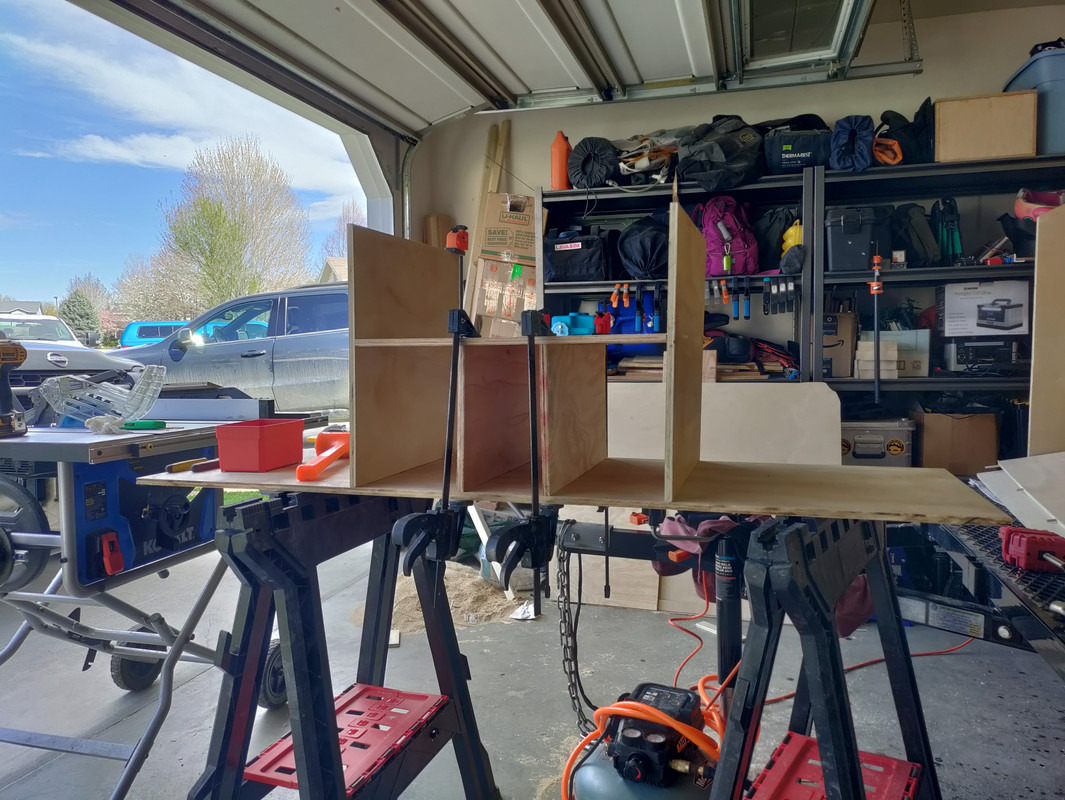
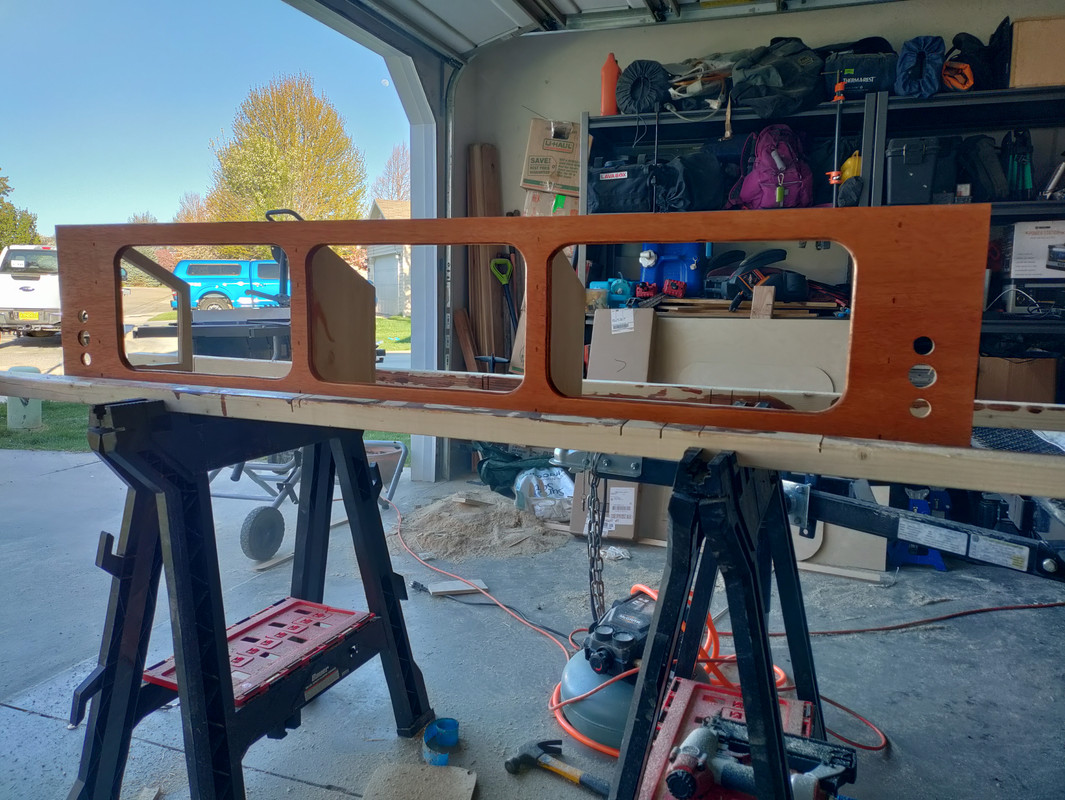
I just bought a doweling jig, and that's what I'm going to use to assemble all the cabinetry. I made some tests on scrap with the pocket hole jig, and with 1/2 ply, I just don't like the way it looks. Lots of dowels and glue will likely be stronger anyways.

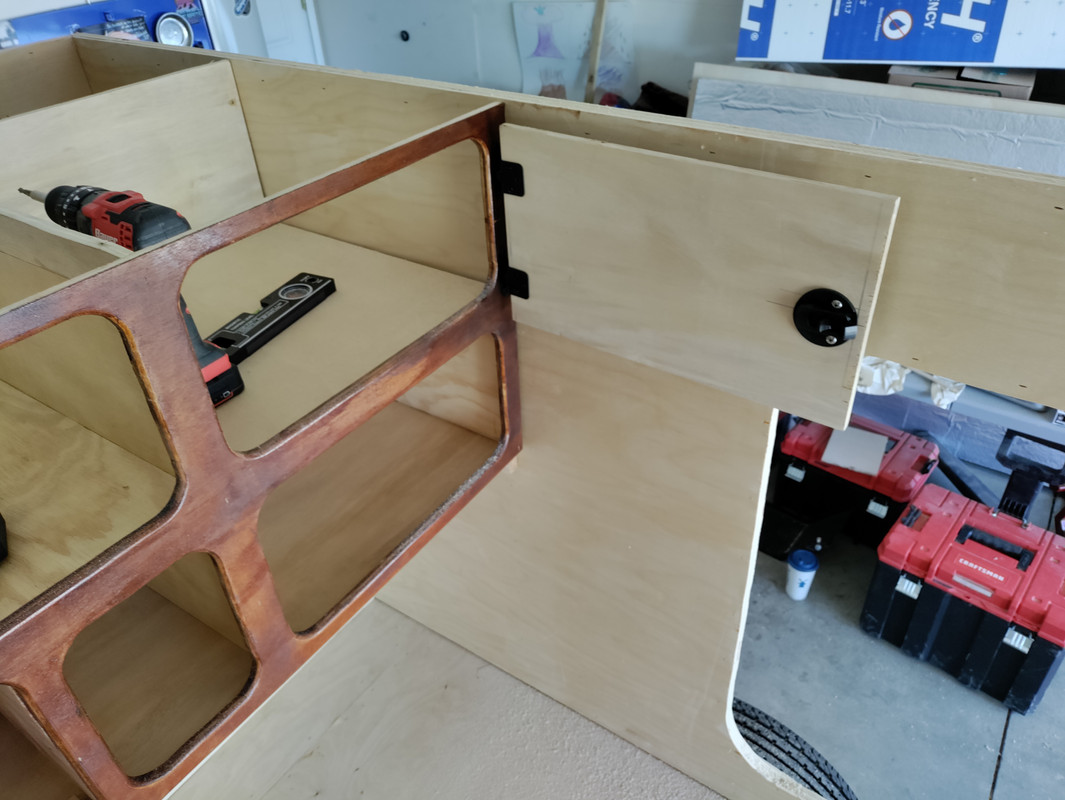
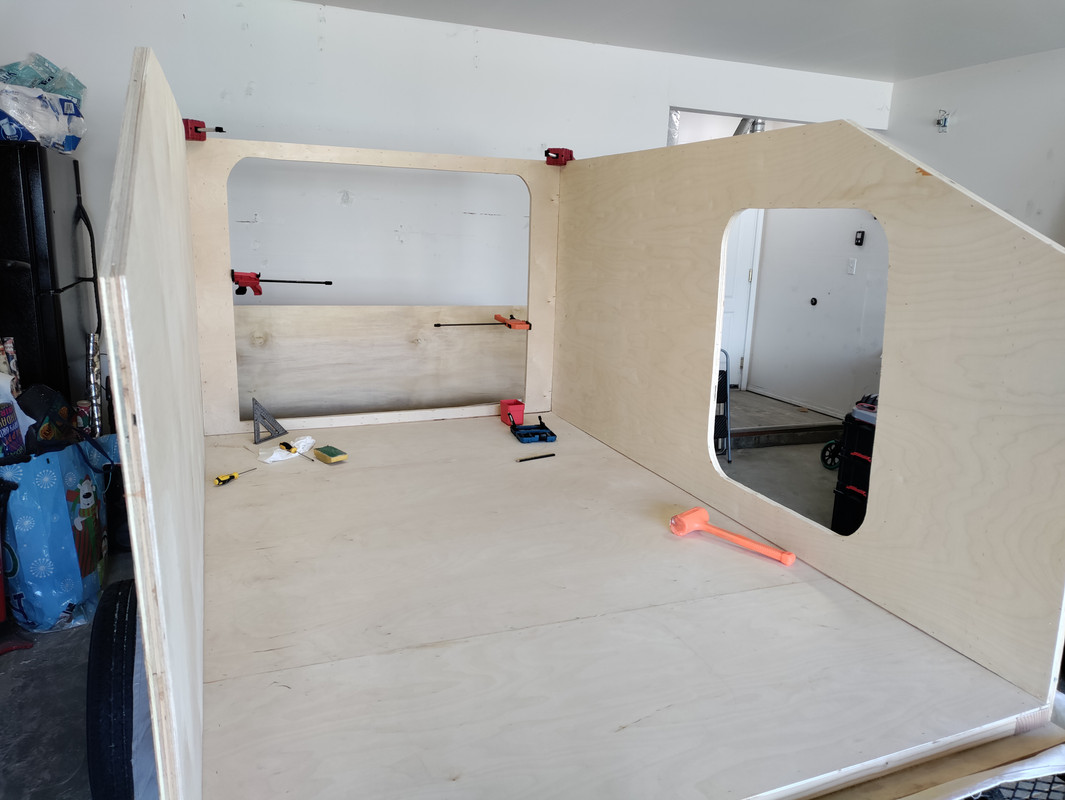
Cabinetry will be going in next weekend!
 
I managed to find some 3/4 inch rigid foam insulation board today. I had to call several places, but found some with an R5.6 rating for the side walls. Ordered it, and they'll call me when it comes in.

Friday, I start dry fitting, staining, and poly coating the interior pieces.
 
Since I'm planning on drilling and dry fitting all the cabinets tomorrow, as well as pre-finishing all the wood, I figure it was time to figure out how I was going to finish the interior of the trailer.

I knew I wanted a two-tone finish, so I took my model over to my 3D rendering software, and came up with the following two-tone finish.

Front Overhead Cabinets:

Interior-Front-Light-2.png


Rear Cabin Storage:
Interior-Rear-2.png


Galley:
Rear-Galley-Option-2.png
 
Got the interior rear shelves built and glued yesterday.

IMG-20240412-163133.jpg


I still need to stain the front piece, and cut out the openings though.

I also got all the interior wall skins poly coated.

By the end of today, the galley should be fully assembled.
 
The aftermath of this weekend is as follows...

Got the front of the main interior storage stained:

IMG_20240413_165536.jpg


After putting on a second coat of stain, we then glued and pin nailed it to the front of the main storage. After it dried, we managed to slide it onto the supports:

IMG-20240414-165734.jpg


We the focused on building the rear galley cabinets.

I forgot to take pictures of the counter supports, but cutting voids out, allowing for me to get my arm in there to run wires and water lines, leaves them weighing only a couple of lbs, at most.

We put those in, making sure we had room to clear the door frame, and glued and screwed them to the floor.

We the put the counter top on, and started working on the upper cabinets.

Got them cut, routed, glued and stapled, and set in place, prior to staining.

Very happy with them!

IMG-20240414-174057.jpg


IMG-20240414-174105.jpg


That's it for now. The goal next weekend is to get the spars and sidewall skins on, and start running wires!
 
I like the festive wrap you have there, to go on the trailer. One of a kind! Except maybe your kids will keep tearing at it... :)
 
I like the festive wrap you have there, to go on the trailer. One of a kind! Except maybe your kids will keep tearing at it... :)
Wait... What now?

**EDIT** I see what you did there. I should have put that somewhere, then poly'd over the top of it. Unfortunately, it's not mine. LOL
 
Last edited:
Got a whole bunch of small stuff knocked out that needed to be done before we put the outer side skins on today, as well as the headliner skins.

Galley is stained, and temporary switch plate is in.

These four switches control the water pump, tank anti freeze mat, overhead lights, and part lights.

IMG-20240420-192012.jpg


Dave got all the insulation cut for the sidewalls while I was working on the galley.

We also let the girls draw all over the side of the skeletons. Nobody will ever see it, but they loved it, and we all know it's there.

IMG-20240420-125801.jpg


I then proceeded to start working on figuring out how the latches were going to work on the cabinet doors.

IMG-20240420-112808.jpg

The latches have just enough room to catch, and keep the doors from opening.

I guess I can order the other 4 now.

IMG-20240420-112755.jpg


I still need to pull the door off, and decide if I want to stain it, or keep it naturally colored. And round the corners, but I now have a template for the other 3 doors.

IMG-20240420-112745.jpg


The last thing we did was worked on the front overhead storage.

Got the face stained earlier in the day, and got it all assembled.

IMG-20240420-185916.jpg


You can see a void in the skeleton on the left side... This is mirrored on the right side. These will get aluminum panels that house a 12v socket on each side. This will allow us to plug in the cpaps, and leave them up there. That way we don't have to pack theme up everytime we move.

The holes on the front are for switches and usb charger outlets.

Today, we start putting the final skins on the outer wall, and putting in the head liner.
 
So, update from sunday. Throughout this whole process, we've been dealing with warped 3/4 ply for the skeletons. Spent much of sunday morning building a frame for the front spars that would be used to basically pull the whole front to be more straight.

image0.jpg


We went through a whole 28oz tube of PL Premium adhesive gluing on the side walls, front interior wall, and framework

image16.jpg


We also slid the front interior skin in, and got the front storage glued and clamped into place.

IMG_20240421_161721.jpg


We should be able to permanently attach the rear cabin storage, and galley cabinets next weekend, as well as finish up the interior roof panels and spars. Then we start running all the wires...
 
Last edited:
  • Like
Reactions: WYWander
Big progress this weekend. I took Friday and today off, and we managed to get LOTS done.

First thing we did was run all the wires for the cabin through the roof.

IMG-20240427-175603.jpg

IMG-20240427-175613.jpg


Got all the insulation in. We had a full sheet of r5.8 3/4 Inch insulation left after doinf the sidewalls. We decided to use the whole thing, and double layer it on the roof.

IMG-20240429-162251.jpg


I then got to work moving all of my electrical components into the battery compartment. I need to make a longer connector that goes to the distribution panel, but for now, it's just running through the drawer skeleton.

IMG-20240428-124423.jpg


IMG-20240428-144030.jpg


IMG-20240428-140308.jpg


I then decided to test the cabin electrical and get it ready, so that hooking everything up was easy.

Today, I put connectors on the wires for the fan and light, made sure the cabin switches were good to go, then got to work putting the outer skins on the front of the trailer.

IMG-20240429-162240.jpg


Just two more pieces of plywood to put on, and then I can start the pmf process! (canvas will be here tomorrow).
 
  • Like
Reactions: WYWander
Looking good. Nice wiring job.
Thanks Larry! I ended up running more ground wires to the front of the cabin than I needed, do I have a spare or two, in case anything happens.

There's also two power wires that run into the rear cabin cabinets. These will power a 12v multi usb charger that will power a TV, media player, and Bluetooth speaker (eventually).

There's also three more small wires that will connect to the controller for the diesel heater, when I get it.
 
Very nice Reaver!

I intend on running a ground buss down the length of my trailer and splicing grounds in wherever needed with soldered joints. But maybe that's more work than it's worth... My prior build had individual ground wires for each thing and it just seemed like way too many wires at the time.
Personally, I don't like relying on grounding via the frame, if that's what you're referring too. If you talking about running a wire, and splicing into that for grounds, I could see that being advantageous. In my case, I have no wires down low, so that would be out of the question. I will be running the wires powering the DC-DC charger underneath the trailer, but I don't want to ground to those, as those are connector to the tow vehicle battery.

I have a ground circuit for the switches on each side, and a separate ground for the charging and accessory ports. I had plenty of room for the wires, so its not a huge deal to me.

Nope, not a fan of frame grounding either. I'm going to run the buss up top, along with the power wires. The splice is a section cut out of the buss wire (much larger gauge,) the buss wires pulled apart at the center, the incoming wire fed through that hole, wrapped around and soldered, and then a cold shrink wrap around that. Might be overkill but considering this is "expedition" and the wires will be buried under paneling, I don't wanna have to have those go bad. But I also want to keep down the # of wires running back.

Still might not be worth the fuss over running more smaller wires back...

My concern would be solder cracking due to vibrations in that instance. It might not be much of a concern, but I tend to prefer marine crimp connections for that. Now, I did use a bunch of solder seal connectors in the front overhead storage, but if they do fail, I can access and replace them easily, so overall, I'm not too worried about it. Even my overhead light and fan are grounded where I can access the termination point. I don't have any splices anywhere where I can't access them. Something to consider.