DIY Roof rack

  • HTML tutorial

ShawnR

Rank VI
Launch Member

Influencer II

3,316
Bettendorf, Iowa, USA
First Name
Shawn
Last Name
Reimers
Member #

0782

Service Branch
Army
1.5" seems a bit large in dianeter. It will be very heavy. You might be better off using 1/2" or 3/4".
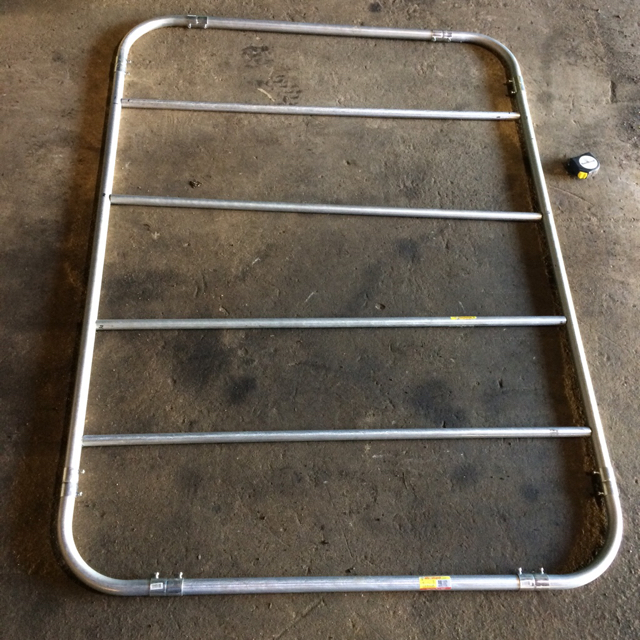
The roof rack I recently installed on my Jeep is 1.25". Here's a pic for reference. When I was looking at other racks, some were 1.75" if I remember correctly. However, this is for a Wrangler where the rack bolts to the frame. I imagine @Trotto17 , you are going to mount directly to the roof?
 

Mike G

Rank VI
Launch Member

Traveler III

3,745
San Jose, CA
Member #

1334

Working on plans for a roof rack for my 5th Gen 4Runner. This is the specs have come up with so far, what are your thoughts? QUOTE]

Looks Good, I like it! Do you know what the total weight would be and are you mounting it to the OEM rack? I think the 5th gen roof rack max weight limit is about 135# or 140#
 

spiralinguru

Rank 0

Traveler II

98
Check out using a bi-fold ATV ramp and mounting it as a roof rack. They're very light and most hold over 1,000lbs. They can be pretty easily mounted to rain gutters along the roof edges. Light and strong and rust free...


Built FZJ80
If it ain't broke, fix it again.
 
  • Like
Reactions: Trotto17

Brentski

Rank V
Launch Member

Enthusiast III

1,565
Boulder Drive, Roswell, GA, USA
First Name
Brent
Last Name
Schultz
Member #

0929

Hi
I like where you're going with this. I had the same thoughts myself, A safari rack for mine generally costs upwards of $1000 for a decent one, a little less if you attach one to your roof rack cross bars. I bought mine without the cross bars and was surprised that I would be looking at about $400 for the crossbars that only had a 100 lb rating. I decided to go the route of addressing the issue myself. I'd like to share my experience with you in hopes that it might help you decide what to do, or what not to do.

Firstly a few pics of the work...
roofrack top.jpg
Here is the top view with the faring and my old Thule soft carrier. I hurried to get this done before taking my family to Kure beach last July.

I just ran out and took this one to show how it rides every day. I took the faring off because I want to improve it.
IMG_2054.JPG

I used 3/4" and 1" galvanized electrical conduit, as well as some 1" and 1/2" square stock primarily as the building material. It is a bit heavy, (I would guess between 50-60 pounds. But since I attached it directly to the frame I think my weight capacity is over 300 lbs, so I still have a lot of room for gear. I welded the whole thing together (caveat: if you weld galvanized steel, it is very important to do so in a well ventilated area, the fumes are really bad for you) and then painted it with truck bed liner.

I used the 1" conduit as sparingly as I could as it is heavy, but I was happy to find that the inside diameter was perfect for accepting the outside diameter of the 3/4". This made reinforcing the front and back easier and stronger.

The pedestals were tricky, but when completed felt very sturdy.
IMG_2056.JPG
Again I took advantage of the inside/outside diameter coincidence to make a solid attachment. The bottom bolt is threaded directly into a nut that I found welded to the frame underneath the rain channel (I'm not sure if they are like that on all vehicles, but it's worth investigating because if nothing else, it will give you an opportunity to clean it out).

The trickiest thing I found with this project was that even though my rig looks like a nice square box, it is not. I found that the center pedestals were out and up from the line between front and back. I would say the old adage of measure twice cut once should be applied when designing this, but for me it was more like...measure twice, scratch head, measure again, draw it out, cut, weld, assemble, curse, disassemble, measure again, weld assemble.

I am proud of it, but it is a little noisy at highway speeds without the faring. Keeping the posts separate from the rack gives me versatility as to different types of rack I could make using the pedestals for a platform. I wish I was a better welder, because it was tricky welding the different thicknesses, also I would have loved to do this in aluminum. I also plan on making a tin-cloth canvas bag that will attach to it with compression straps to add versatility to what I can load on top .

I hope this has given you some ideas of what might work with your project, or might not.

I wish you better luck than I had!

Brent
 

Trotto17

Rank I
Launch Member

Member I

233
Costal South Carolina
First Name
C
Last Name
Trotto
Member #

511

Alright, so few changes as I went, but still coming out great!

#1. I switched to 1" for the frame and 3/4 for the cross bars.

#2. I shortened it so that it wouldn't reach over the sunroof. No way to support it in the front and I did not want to drill into my new truck just yet.

#3. For now I'm going to go with a stealth style rack, just a base with no sides riding up. Want to see how it effects mileage and functionality. I will probably eventually add the top part of the basket.

So all in all its coming out great, next week I will paint and fabricate mounts for it. Check it out so far!

*side note the bars were not welded at the point I took the photos, yes I did line them up and makes sure it was all square.


Sent from my iPhone using Tapatalk
 
  • Like
Reactions: Brentski and ShawnR
T

TheBarefootFamily

Guest
Just remember that 1.5" steel pipe weighs about 2.7 lbs/ft. which means going off the image you provided would make that design weigh about 168.640# where as in 1.5 EMT at .3673 would weigh about 22.754# using the same dimensions, and considerably lighter with smaller EMT piping sizes.
 
Last edited:
  • Like
Reactions: Brentski

Mike W

US MidWest Region Local Expert
Staff member
Member
Investor

Expedition Master III

3,833
Ankeny, IA, USA
First Name
Mike
Last Name
IowaLR4
Member #

538

I have a voyager rack. 1" (25mm) Cold Rolled Galvanized Zinc Steel, Tubing is .40mm thick. Prepped in an acid wash and zinc treated before powder-coated black. 900lb load rated. It is mounted on steel 1.5" standoffs in 8 places directly to the roof.

I've got plastic chicken coop flooring from farmtek on mine.. here is my dad walking and jumping on it to test. It flexes maybe 1/4" with my 6'4" father on it.... and the rover has a glass roof.. so you know I trust it. I don't have an exact weight, but it is over 100lbs, probably no more than 125.


Mike W

US MidWest Region Local Expert
Staff member
Member
Investor

Expedition Master III

3,833
Ankeny, IA, USA
First Name
Mike
Last Name
IowaLR4
Member #

538

Also.. looking at your first post, I would stay away from the mesh steel flooring, even powder coated, it rusts. That is why I went with the plastic farmtek stuff. It is really hard to coat that stuff well.
 

Mike W

US MidWest Region Local Expert
Staff member
Member
Investor

Expedition Master III

3,833
Ankeny, IA, USA
First Name
Mike
Last Name
IowaLR4
Member #

538

Looks good. I really like the idea of using chicken coop flooring for a platform!


Are you sure? That's only 0.015" wall tube, or about 3-4 sheets of paper.

I didn't cut it open to check it, but that is what the voyager website says. It doesn't seem thin when I have beat on it.
 

Mike W

US MidWest Region Local Expert
Staff member
Member
Investor

Expedition Master III

3,833
Ankeny, IA, USA
First Name
Mike
Last Name
IowaLR4
Member #

538

You are right though... that can't be right can it? .4 mm?
 
  • Like
Reactions: Steve

Advocate II

I'm looking at using composite fence pickets for the floor in my rack once it gets the extension and added floor braces. I read a post from a guy in Arizona on a different forum thats had it in his rack in a redwood color for over two years and no warping or discoloration or any other problems. I thought about the coop flooring too but I think I like the composite better.