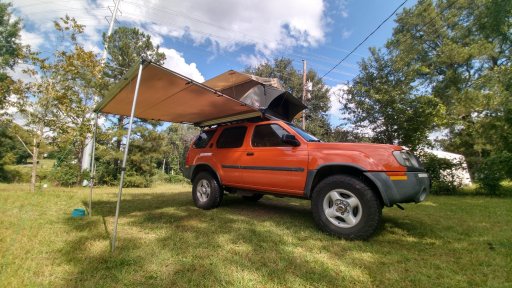
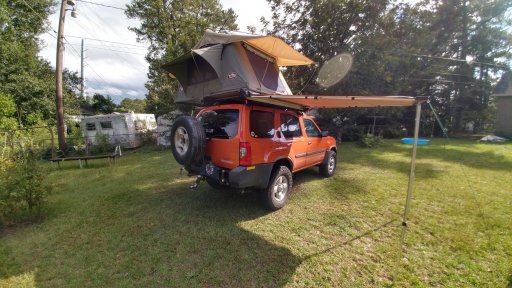
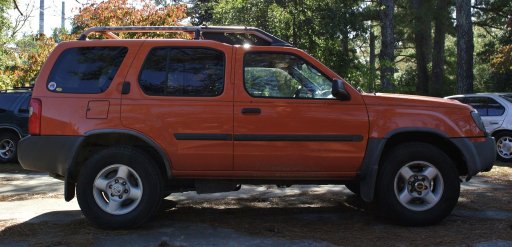
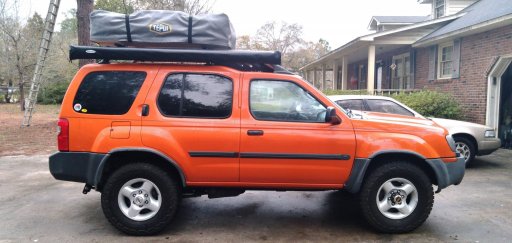
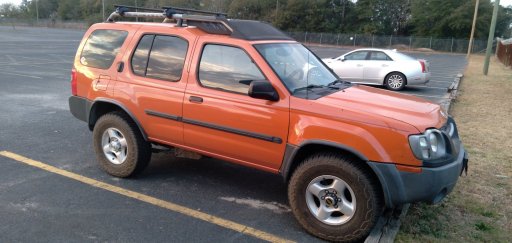
2003 Atomic Orange Nissan Xterra 4X4 Overland Build (Codename : Tigger) Picture Heavy

  • HTML tutorial

ryno9562

Rank VI
Member

Influencer I

3,610
Cayce, SC, USA
First Name
Ryan
Last Name
Heath
Member #

28028

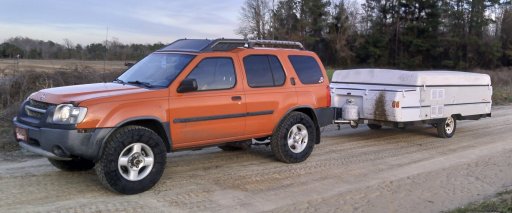
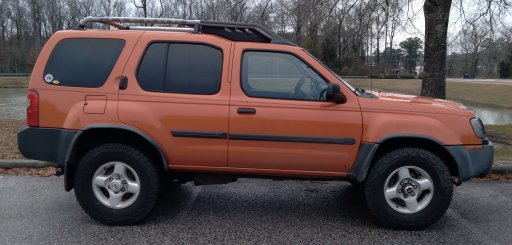
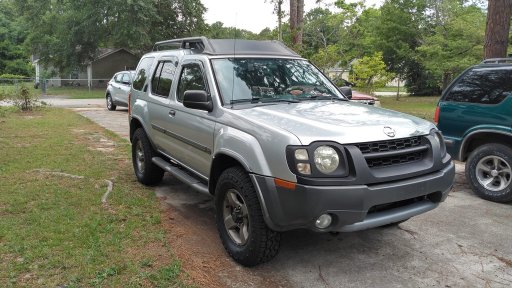
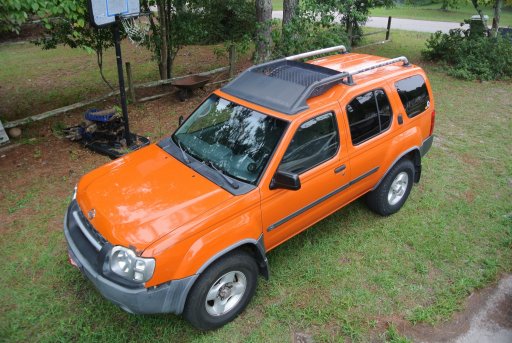
So i finally decided to start a build thread on my Nissan Xterra. He is a 2003 Nissan Xterra XE 4X4 Auto in the incredibly rare Atomic Orange (only 993 ever built). At the time of purchase (February 2020) he only had 127,000 but kinda sorta neglected by the previous owners. I managed to scoop this rig up for $2650 so no complaints thus far. There is some rust but runs decent, 4WD works, a/c and heat work, shifts smooth so overall not too bad.

Condition as purchased:
F5DCC496-48B8-4360-BD4A-3C708301FE67.jpeg

Current state: As of 158,000 miles

1636821289867_1_KIMG0382.JPG

2_KIMG0380.JPG

Current specs and mods:
3.3l normally aspirated S.O.H.C V6 (vg33e)
4spd auto
Traditional 4x4 with hi/lo floor shifter
R200 front differential and H233B rear axle with 4.90:1 final drive
Warn premium manual locking hubs (29091)
PML (Poor Man's Lift) along with full chassis overhaul
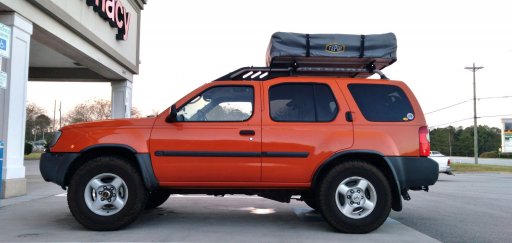
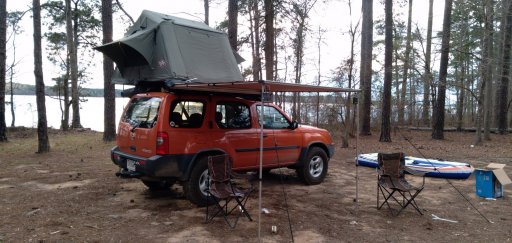
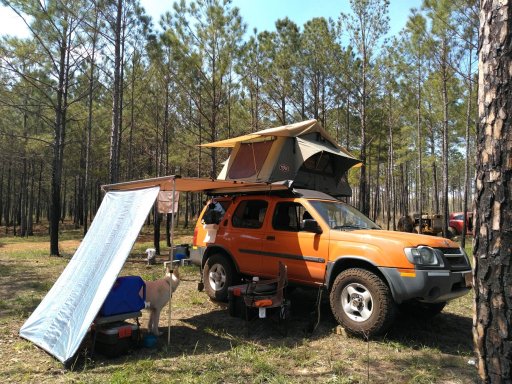
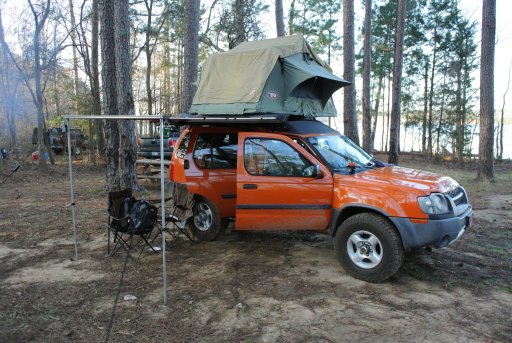
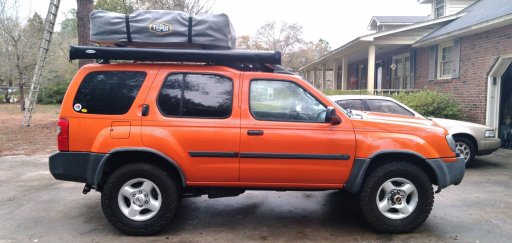
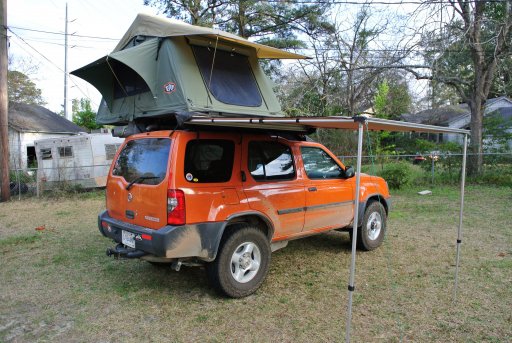
Camping Set-up (Tepui Kukenam 3 & Smittybilt Awning)
Rear Differential Breather Extension Mod
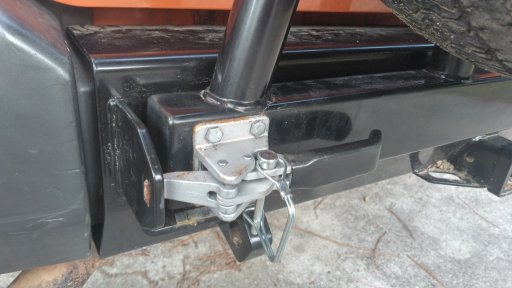
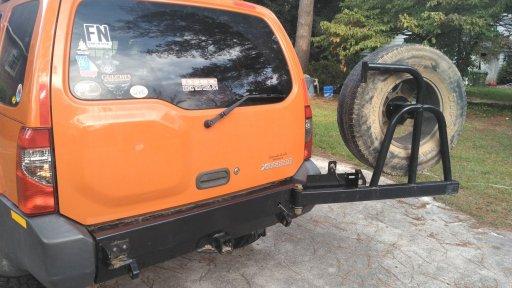
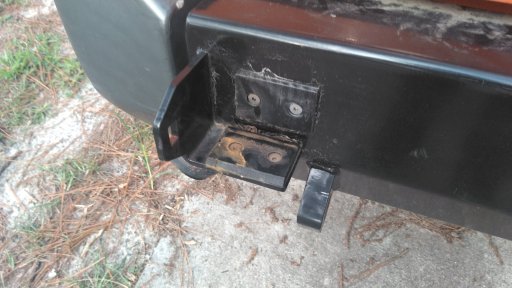
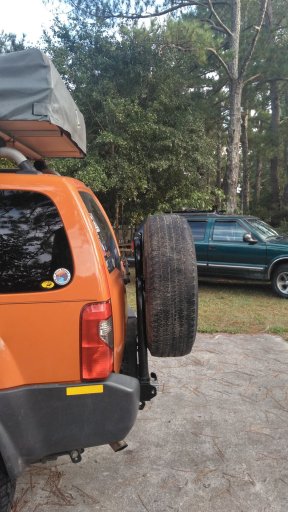
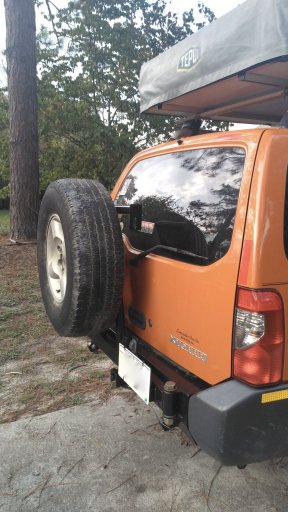
Rear tire carrier bumper

Future mods (as the wallet permits):
Performance exhaust with ceramic coated headers
Stage 1 cams
5.14 gears with arb lockers
Front bumper with 8000lb winch
Rock sliders
Skid plates
Snorkel
Drawer system

I will do my best to document the progress of this build so please follow along.

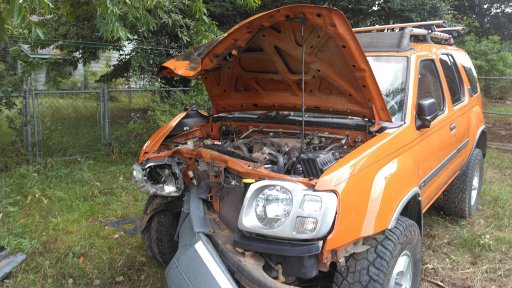
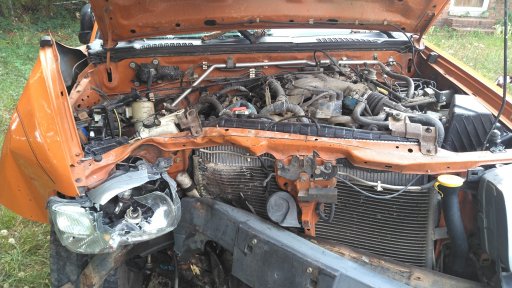
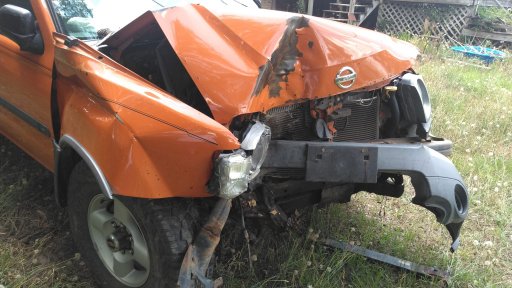
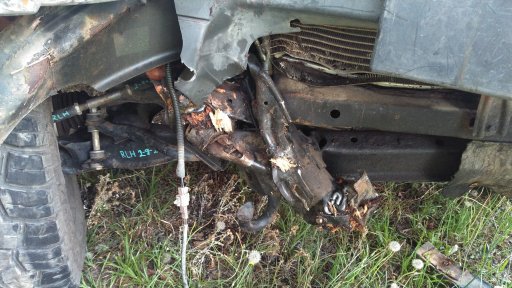
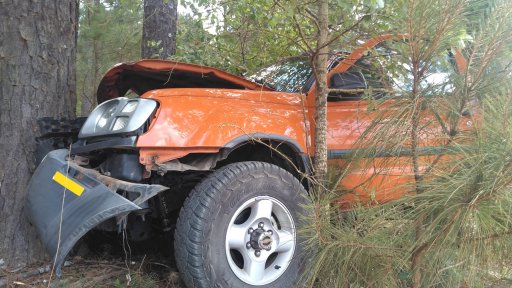
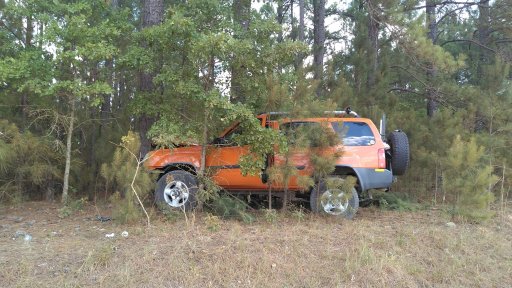
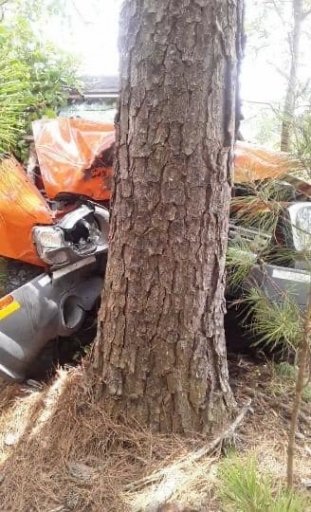
The situation that no overlander ever wants to be in. Luckily I was not on a trip and was only 30 minutes from the house.
R.I.P. Tigger
 
Last edited:

ryno9562

Rank VI
Member

Influencer I

3,610
Cayce, SC, USA
First Name
Ryan
Last Name
Heath
Member #

28028

PML (Poor Man's Lift) along with full chassis overhaul

Well here he is all fixed up and riding like new again!

Before
4CAE48E6-5019-4C90-8543-DEE291470DEB_1_201_a.jpeg

After
4168DA03-E829-4AF5-BC02-A9BE012FEC02.jpeg

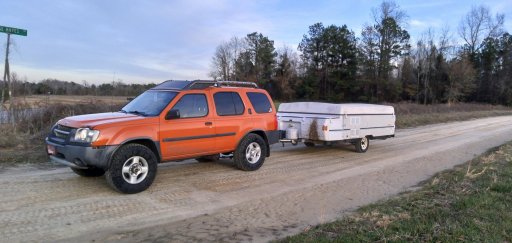
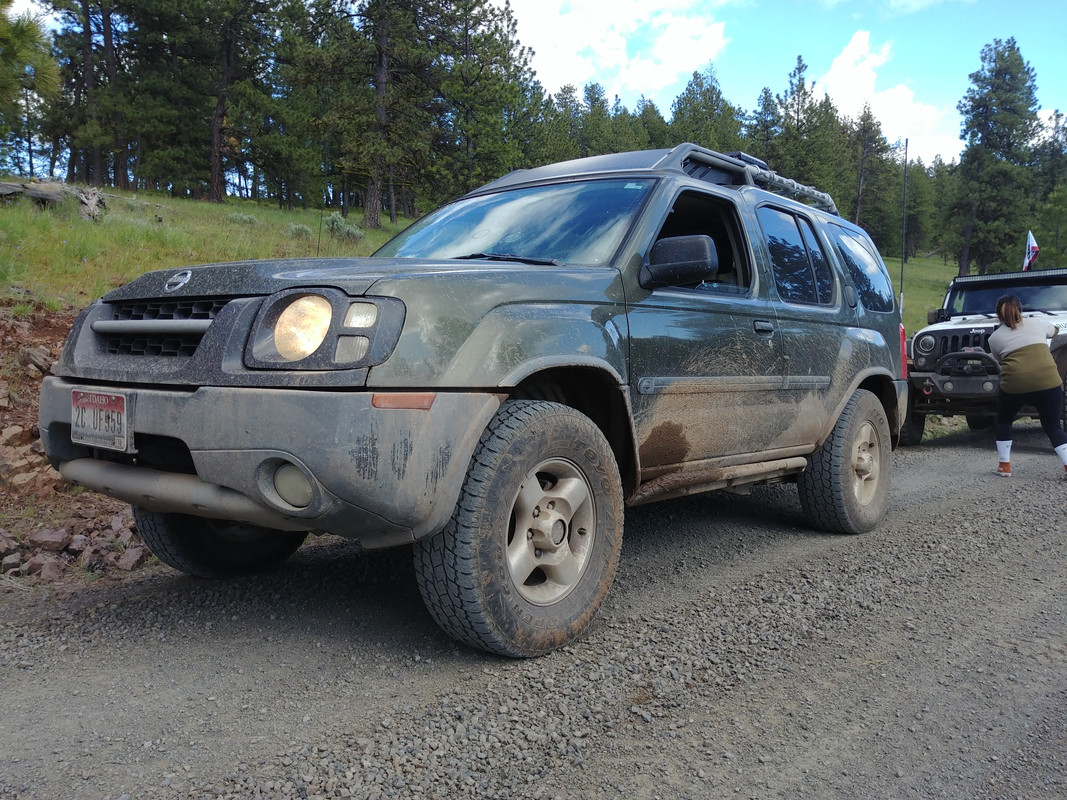
The additional height in the rear was intentional. I do tow a camper with this vehicle and did not want the rear squatting too much when towing. While pulling my camper and loaded with gear for three adults for a week it pulled great and still had about 1/2 inch more height in the rear. I will also note that my local repair shop was able to get the suspension in alignment with no issues. Don't mind the mud lol. My back seat driver tricked me into going down a really nasty dirt road with a mud hole half the length of a football field. He thought i would get stuck but i sure proved him wrong lol.

F96552B2-B30A-44F4-BFF4-5FFDAE8395ED_1_201_a.jpeg

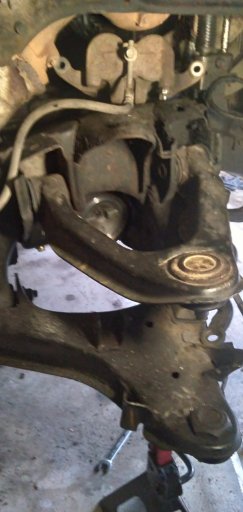
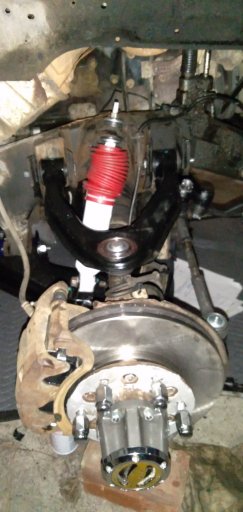
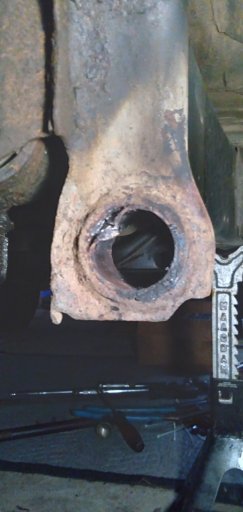
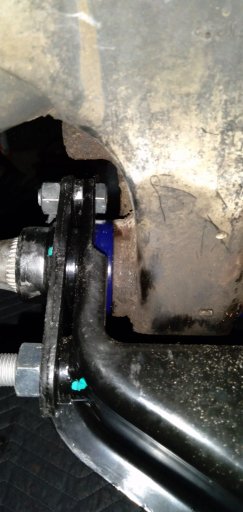
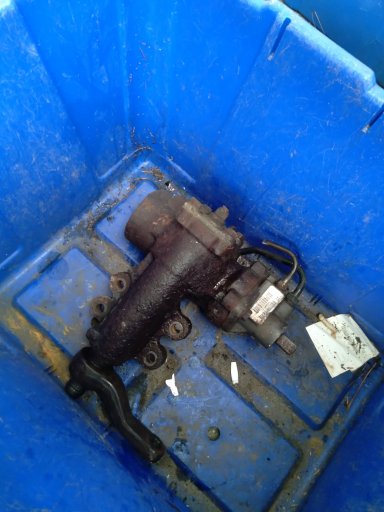
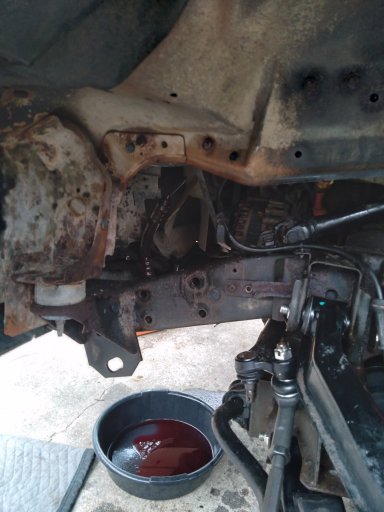
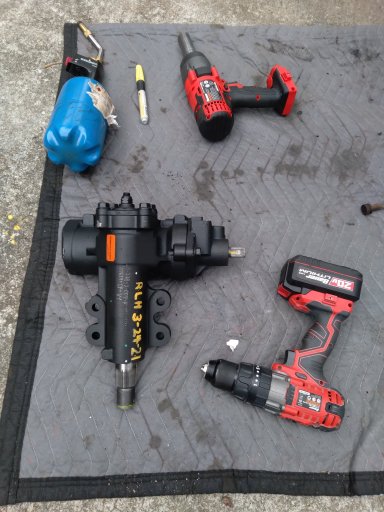
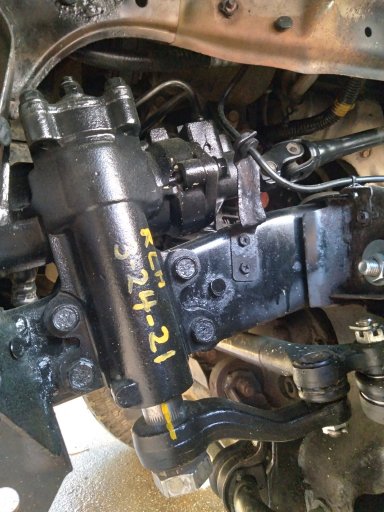
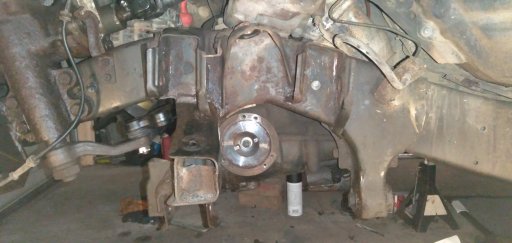
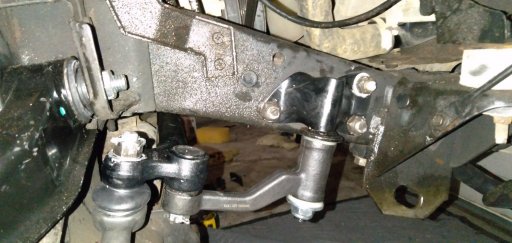
Here are some pictures of the progress. I torched out the original lower control arm bushing to replace with urethane. and basically replaced the entire suspension and steering with all new parts, I had to remove both torsion bars so I got all new hardware related to those (going with hd ones along with 4x4parts.com UCA in the near future), replaced 2 broken wheel studs on passenger front, new upper and lower control arms, Rancho 5000x shocks all 4 corners(love these shocks by the way), adjustable rear shackles, new GREESABLE tierod ends and adjusters, new center-link, new GREESABLE idler arm (IAB coming very soon), replace bearings and races, new pads and rotors. I was determined to not have to go back in there in the future. Due to not having a lift or air tools at my disposal and also having to work around work schedule and parts shipments it took my fiance and i 1 1/2 months to do this rebuild. I had to take a saws-all or grinder to almost every bolt in there due to this vehicle being in the north for most of its life. Overall i am very happy with the outcome and i love the tires that i chose.

6BA4A39B-CB5B-400E-BF5F-4AC8EB74CFA0.jpeg DD4CA837-C970-4276-9E75-C77A8B566838.jpeg 90300828-875F-43E0-AE9C-0623B24932BC.jpeg 41D50225-945F-4343-9BEF-FFC6C93787A3.jpeg
1756F86A-4615-4303-A557-5D806F5A4188.jpeg 08A67FCF-F3FD-47A4-915C-0523D4E41D1D.jpeg F299B84C-7768-4CF7-80EB-3D943D065EEC.jpeg A5ADC3FB-4C4A-4295-BCB6-96471265DDA7.jpeg
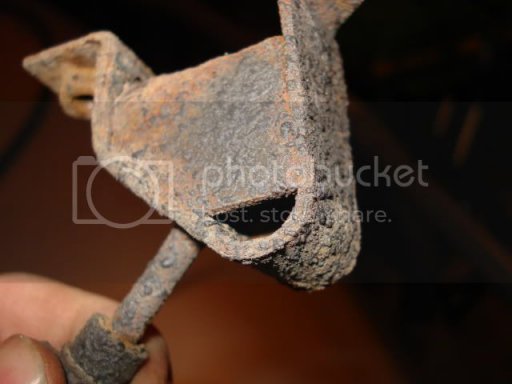
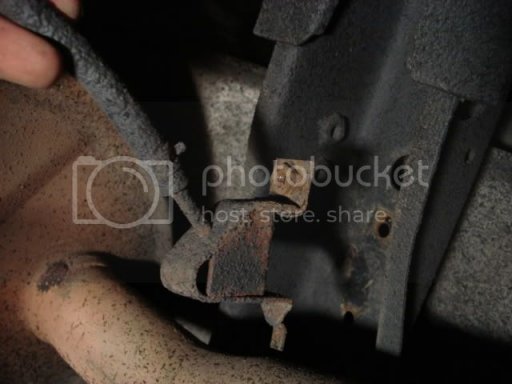
As you can see i could not remove the pitman arm or the lines due to the rust so I had to get a new pitman arm and nut and all the hard and soft power steering lines had to be replaced. iam probably going overboard with this rig but i want it right and 100% reliable.

FC53C807-2815-463E-A60A-A4334263806E.jpeg

59FDEB7D-9868-428D-83E3-9AE482B980A7.jpeg

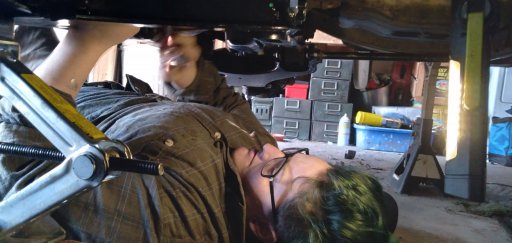
My fiance helping me reinstall the cv shafts. The scissor jack was there just as a helper when setting the torsion bars.
Yes we did have the vehicle on 3 ton jack stands. I might be a little crazy at times but I am not an idiot.

ECF10AEB-D57E-4C6D-AE52-B41165DF4EB8.jpeg

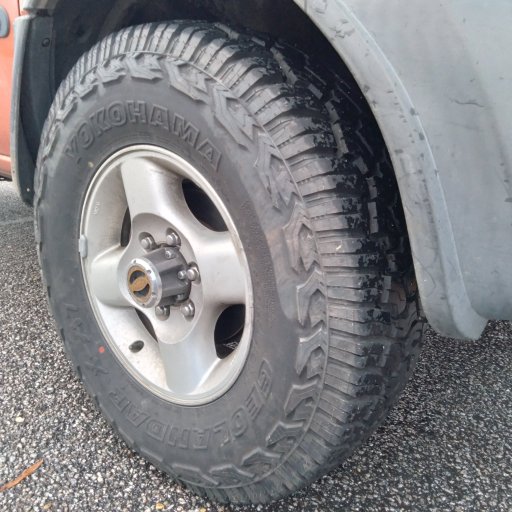
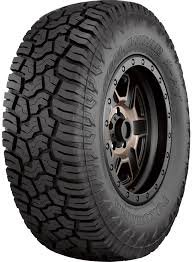
Yokohama GeoLander X-AT 265/75r16 Load Range E
Very minimal trimming needed to fit these tires

96C3F871-61D6-49C2-B02B-0D522E4F909D.jpeg

After all this work it drives like a brand new vehicle. The best part is it's paid for!
 

Attachments

Last edited:
ryno9562

Rank VI
Member

Influencer I

3,610
Cayce, SC, USA
First Name
Ryan
Last Name
Heath
Member #

28028

Camping Set-up (RTT & Awning)

So i did a thing! (March 2021)

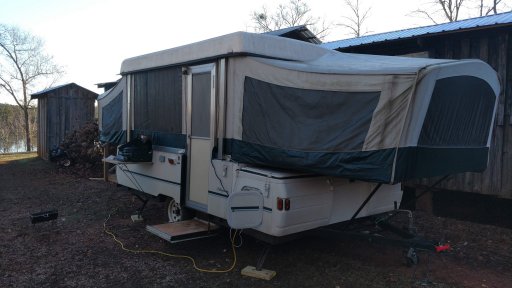
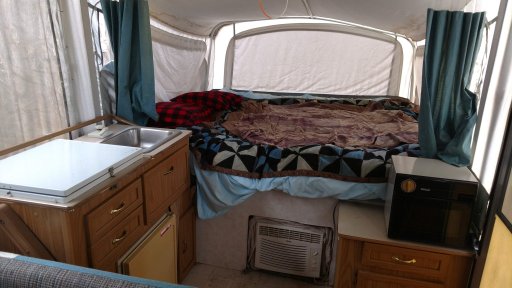
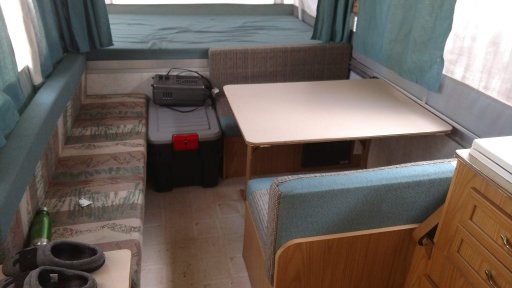
After dragging my 1998 Coleman Cheyanne Pop-up 150 miles to the beach and burning almost a whole tank of gas, I said "time for camper to go by-by"

20210106_165054.jpg IMG_20191231_084851031.jpg
IMG_20200101_100620816.jpg IMG_20200101_100630067.jpg

So as you can see, it was not a bad camper just didn't have a need for it anymore. So up it went to Facebook Marketplace for $2500. In less than 10 hrs someone came to my house and gave me $2000 cash for it! OH YEAH!

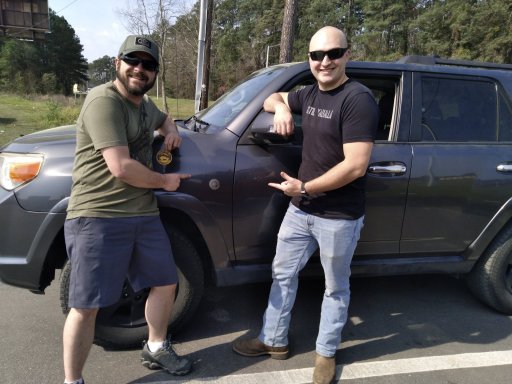
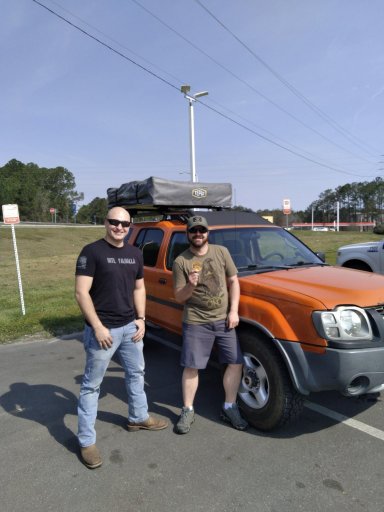
The next day i find a Tepui Kukenam 3 and a Smittybilt 6ft Awning on Facebook Marketplace and sealed the deal! i found out when i got there that the owner was a fellow Overland Bound Member!
Trotto17 #0511 This was my first in person meet with a fellow member.

20210315_112240.jpg 20210315_112203.jpg

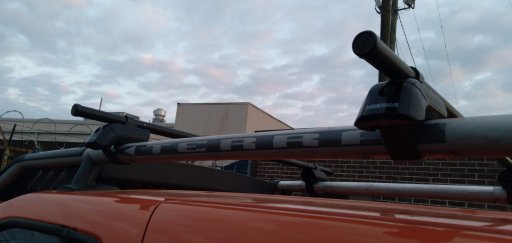
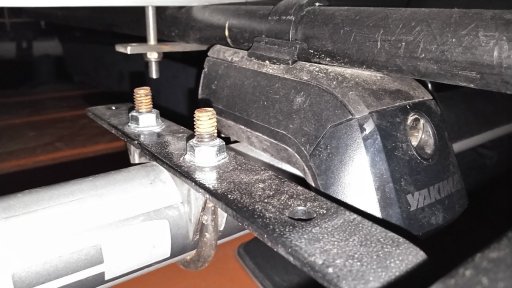
I needed better crossbars because the factory Xterra ones are junk so i got the Yakima Timberline Towers, SKS Lock Cores and Round Bar SL Adapters mounted up to the factory rails then the tent bolted to the crossbars.

59D7EB23-3F27-47AB-AEF6-51982BB81D21.jpeg A723770E-D722-431A-AE02-9C655AAE966B.jpeg

8F43E729-6507-48DA-B6D2-3486293E025A.jpeg 4168DA03-E829-4AF5-BC02-A9BE012FEC02.jpeg

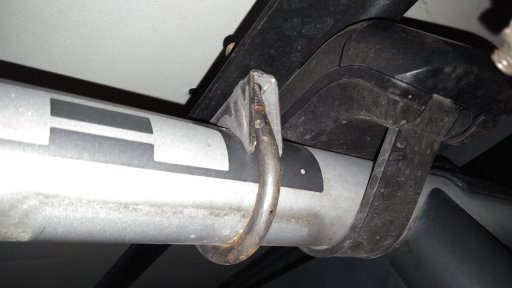
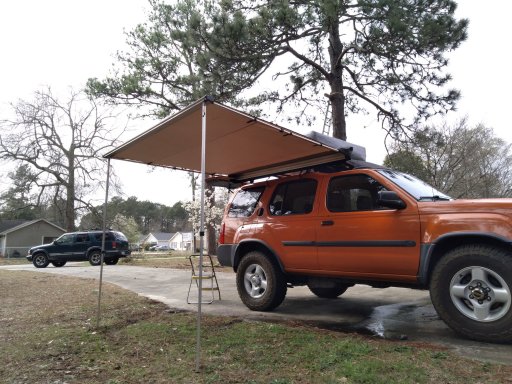
I also needed a way to mount my awning. Luckily, Nissan Xterra & Frontier factory rails are a common 2 inches in diameter so i got some 2 inch exhaust clamps and drilled out the L brackets that came with the awning to match. This ended up being a perfect fit with the awning tucked up nicely just underneath the tent. YEAH BUDDY!

KIMG0045.JPG KIMG0046.JPG

Tent & Awning in action

20210317_153928.jpg 1E6FB69D-34F6-484B-94F6-01867BD4A51E.jpeg

20210319_185949.jpg 203.jpeg
 

Attachments

Last edited:
ryno9562

Rank VI
Member

Influencer I

3,610
Cayce, SC, USA
First Name
Ryan
Last Name
Heath
Member #

28028

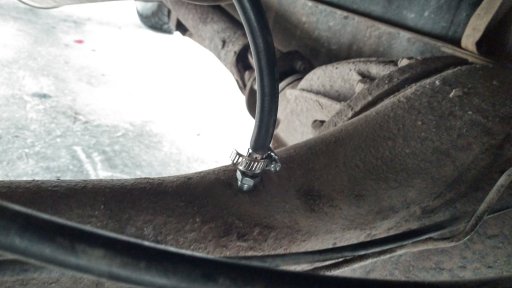
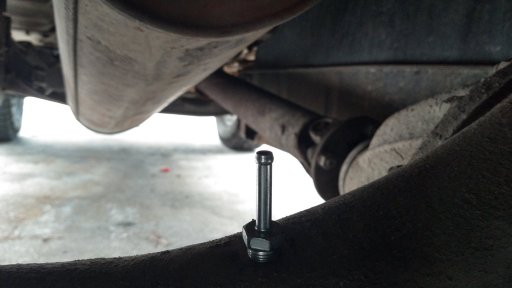
Rear Differential Breather Extension Mod

So this is a common mod in the 1st gen Xterra community. The 1st gen Xterras had 2 factory options for rear diff breathers. Iam not sure what determines which vehicle gets what.

Option 1: Better of the two, this one mounts to the underside of the rear floor. roughly about 30" of fording depth.


DSC09968.jpg DSC09965.jpg

Option 2: The crappy one which is right on top of the axle tube. The one mine came with. Only allows for about hub deep water.

KIMG0054.jpg


Now on to the mod

Parts used are as follows:

Basic Worm Gear Fuel Hose Clamp. I used the smallest one from this pack.
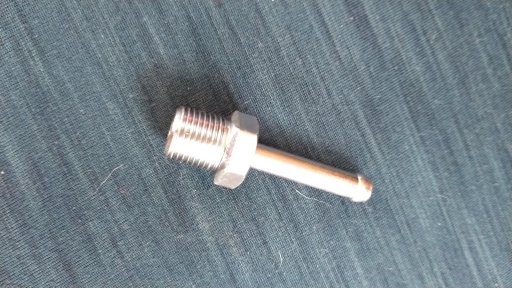
Nissan Breather Hose Connector 38323-C6010
McMaster-Carr Low-Pressure Hydraulic Hose 1/4 ID x 7/16 OD About 8ft
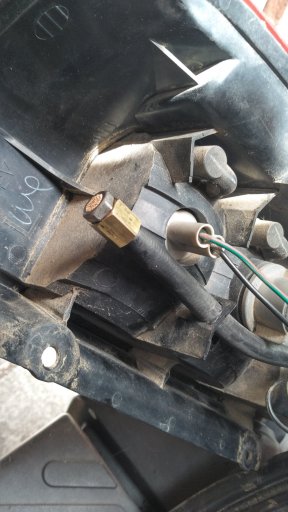
McMaster-Carr Sintered Bronze Filter 1/8 NPT Male
McMaster-Carr 1/4 ID x 1/8 NPT Female

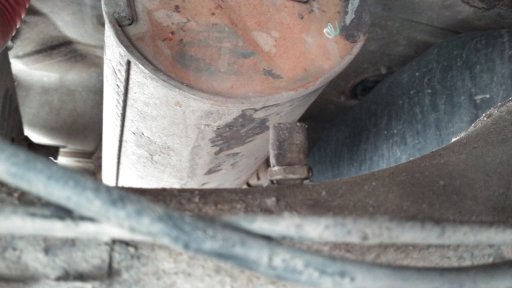
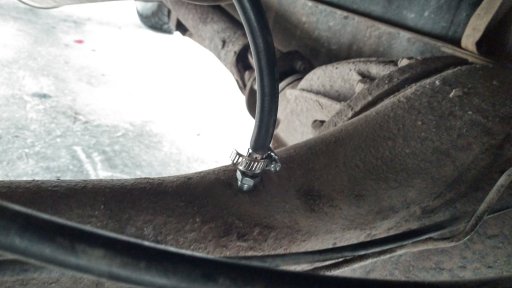
I started out with swabbing out the breather for the new connector from Nissan.


KIMG0058.jpg KIMG0061.jpg

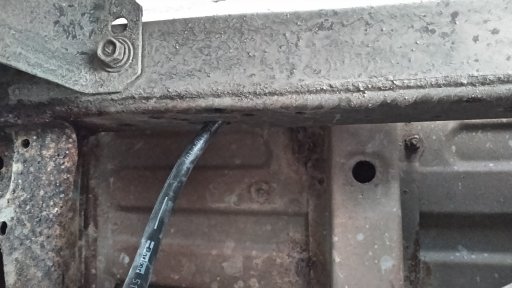
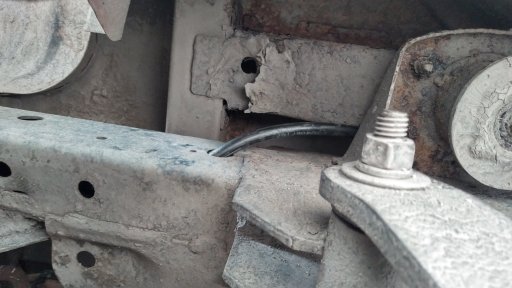
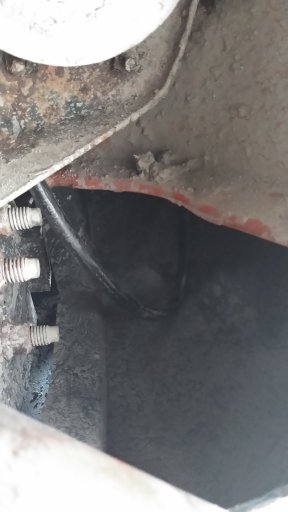
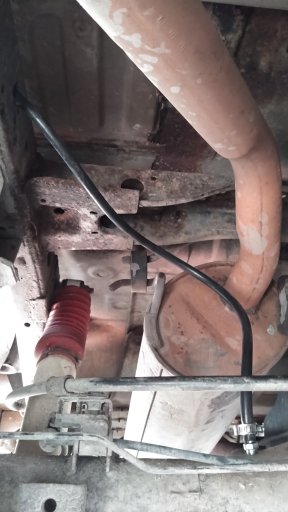
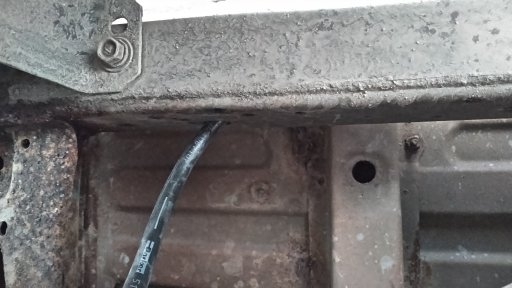
I then ran the hose up inside the drivers side of the frame and out behind the shackle.

KIMG0063.jpg KIMG0064.jpg
KIMG0062.jpg

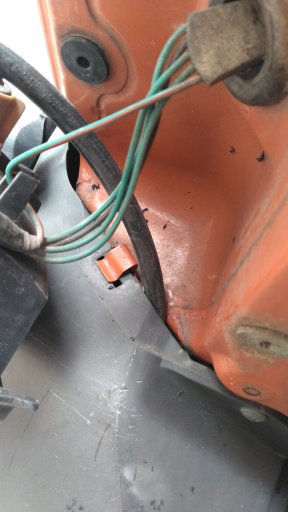
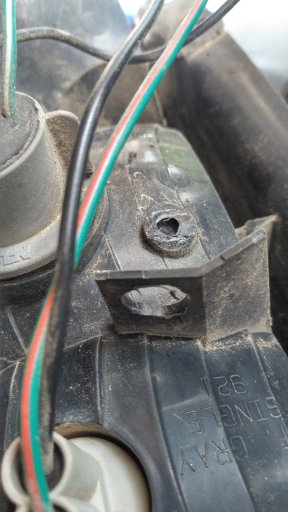
After that I fed it up behind the drivers side taillight housing and drilled a hole big enough for the hose to fit through in a plastic tab on the back of the housing. When you do something like this make sure the hose does'nt rub on anything or touch any part of the exhaust. also make sure there is enough slack to allow for full droop on the suspension.

KIMG0071.jpg KIMG0057.jpg KIMG0056.jpg KIMG0055.jpg KIMG0070.jpg

Overall this was a very easy and inexpensive mod. this was specific to my vehicle but I'm sure the basic Idea of this can be adapted to work with any vehicle.
 

Attachments

Last edited:
ryno9562

Rank VI
Member

Influencer I

3,610
Cayce, SC, USA
First Name
Ryan
Last Name
Heath
Member #

28028

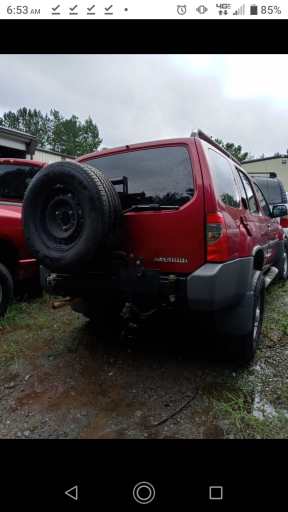
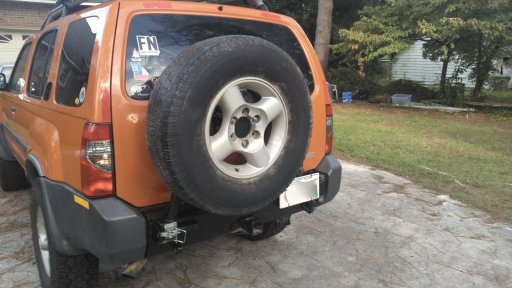
Rear tire carrier system

So back in September I was chillin' at the house watching some Youtube and cruising Facebook marketplace when i stumbled upon a wrecked Xterra being parted out in Gainesville, GA and this is the first picture I see!

809E704B-678A-4D68-958A-523C44F78F95.png


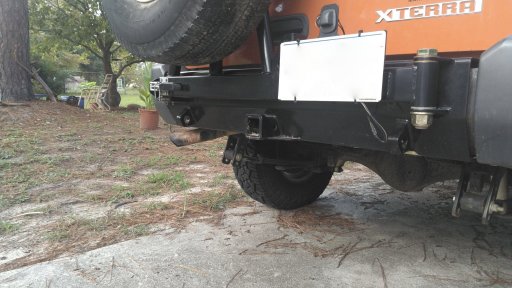
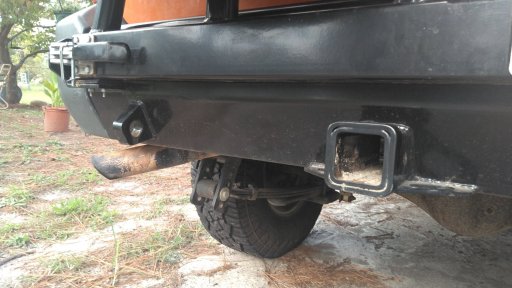
Yes! That is a Shrockworks Rear Tire Carrier Bumper. So I immediately called the business that listed it. These guys are awesome by the way.

Mom's Truck Parts Warehouse
1619 Gibbs Dr
Gainesville, GA 30507

When I asked the guy if the rear bumper was still available i got the biggest s*** eating grin ever!
Guy on phone: Yes sir, $150 without the tire.
Me: I'll be there this Thursday!
Guy on phone: Ok, I'll have my guy remove it and have it ready for you!

I had just struck off-road bumper gold! This was so worth a 3.5 hr drive! These bumpers are hand build one at a time to order and almost $1500 shipped with a 3 to 6 month lead time. The build quality on their stuff is top notch. 3/16 in plate steel with integrated and reinforced 2 in receiver rated to 5000 lbs. I was not letting this one slip through my fingers!

Oh yeah, don't worry. I did get a better tire for the spare hahaha!

5CE27802-33A9-435B-9F7F-A02D3FFA78F9_1_201_a.jpegBF5E55D5-F502-4A0C-89E6-25B8EF9DCBC7_1_201_a.jpegF0E58E3B-5AF2-410C-814E-8AE81A249376.jpeg9EE8831E-9905-4A4A-9572-9031325211A9.jpegA5BC9EF1-07F5-4FCD-B678-D6B7B4E27251.jpegD4BD169C-E694-432A-AD56-FC0B195ED7AC.jpeg075D21D0-DD90-49E9-B27C-297A12C5775D.jpeg6A2CB230-F966-464F-894F-CA7D3FDD6A5A_1_201_a.jpeg
 
Last edited:
  • Like
Reactions: Dusther210

ryno9562

Rank VI
Member

Influencer I

3,610
Cayce, SC, USA
First Name
Ryan
Last Name
Heath
Member #

28028

R.I.P. Tigger

Sorry for the delay on posting this. Life has been kinda hectic lately but, as of June 13, 2022 my pumpkin X is no longer with us
This is all because some idiot decided to fly around a blind corner on a back country dirt road on my side of the road and ran me off the road into a 16in pine tree. No they didn't stop and I don't even think they know I crashed. It all happened so fast that I couldn't get a description of the driver or vehicle. I am very fortunate and thanking God for this. They do not build vehicles like they used to because this Xterra took a head on direct hit to the passenger side frame horn into a 16in pine tree at about 20 m.p.h. and I walked away from this with ONLY a bruised right foot and some very mild whiplash. The airbags and the seatbelt did exactly what it was intended to and this Xterra saved my life. This was my dream 4x4 and I may never find another Atomic Orange 4x4. Nissan only produced 997 of these and not all were 4x4. R.I.P "Tigger" you brought me lots of joy and so many adventures. You will be missed dearly.

Now for some more good news!

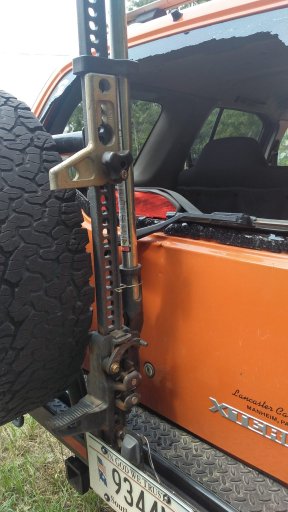
I had it towed to my house and i was able to get all my off-road goodies except the tires and the rear shackles

Rear Tire Carrier, Warn Premium Hubs, Yakima Timberline Mounts and Jetstream Cross-bars, Hi-Lift Jack and all my off-road recovery gear. So if i had to guess i got roughly $3,000 worth of stuff off of Tigger before my insurance came to pick up. They did deem it a total loss and my payout was actually pretty good considering this was a 19 year old SUV. I got just over $5,600 from my insurance. I was able to find another 1st Gen Xterra so all the stuff that came off this vehicle will go on the new one and I am working on a new build thread for the (new to me) Xterra so stay tuned for that and I will have the link to that forum posted in this forum.

310A64DC-360B-4673-B83D-78862F125DA9.jpeg 9F5303B0-89F4-46B8-B660-3283D8151189.jpeg

813AF4A1-0679-4BFA-8038-2F2C843D1755.jpeg A7437B66-BED0-4E6F-B306-57A4AA1EE355.jpeg

60A154BB-2051-4ABE-AB98-0ACDE2D1026C.jpeg 015BEC34-1E47-4ACA-9DDA-7E1F996172AB.jpeg

B78AF7E1-9334-4F4B-A416-BA96D9C47D47.jpeg 3A7BFE2E-0701-4F4C-9304-31C847FE585C_4_5005_c.jpeg

Here is a little sneak peak at the new rig!

75BE57A4-CCCF-48E0-A08E-E91E797514D6.jpeg
 
Last edited:
reaver

Rank VI
Member

Explorer I

3,680
Caldwell, ID, USA
First Name
Brian
Last Name
McGahuey
Member #

23711

Ham/GMRS Callsign
GMRS WRMV941
Good looking first gen!

The first thing I would do is make sure the timing belt gets changed, if you haven't done so already. Being an interfere engine, if it breaks, it could take the engine with it.
So, if you're unable to confirm that it was done before 105k,id do that before doing anything else.

Sliders have saved my bacon at least once. I bought a hardcore offroad weld together rear bumper kit for 200 bucks (plus 80 bucks shipping) and a buddy helped me weld it together. Bought a tire carrier hinge, and steel to build a swing out. $500 total and a day worth of work. If you have the ability to weld, or know someone who does, it's a great option.

I'd also recommend getting an idler Arm brace from 4x4parts.com. The idler Arm on these isn't super strong, and is prone to bending without some reinforcement. The stock Centerlink is also prone to wear as well, and the best replacement is a Grassroots center link. Otherwise you'll likely be replacing the stock one about once a year.

These are fantastic rigs. Every bit as good as a 4runner,in my opinion. The only weak link is the steering. Centerlink, idler Arm brace, and if you want, some heavy duty tie rod adjusters, and you've fixed the steering weakness.

Gonna be following your build.
 

ryno9562

Rank VI
Member

Influencer I

3,610
Cayce, SC, USA
First Name
Ryan
Last Name
Heath
Member #

28028

Timing belt was done by p.o. and I do plan on beefing up the steering down the road. Eventually I will be getting UCA and IAB from 4x4parts. I got all my urethane bushings, Rancho 5000x shocks and adjustable shackles from them already. I'm currently rebuilding the suspension as we speak. Should ba done in a few days. After today I don't go back to work until Jan 8th so hoping to get some wheeling in soon. I have a camping trip planned for gulches offroad park on new years weekend.
 
  • Like
Reactions: reaver
reaver

Rank VI
Member

Explorer I

3,680
Caldwell, ID, USA
First Name
Brian
Last Name
McGahuey
Member #

23711

Ham/GMRS Callsign
GMRS WRMV941
Nice! I got like 12 pages of service records with mine when I bought it.

I'm really looking forward to seeing this progress.
 
  • Like
Reactions: ryno9562

reaver

Rank VI
Member

Explorer I

3,680
Caldwell, ID, USA
First Name
Brian
Last Name
McGahuey
Member #

23711

Ham/GMRS Callsign
GMRS WRMV941
Btw, when you're ready to build a drawer system, there's some great plans on xterraNation.com. I used those dimensions to design mine, and it fit perfectly. Just an FYI.
 

reaver

Rank VI
Member

Explorer I

3,680
Caldwell, ID, USA
First Name
Brian
Last Name
McGahuey
Member #

23711

Ham/GMRS Callsign
GMRS WRMV941
Do you have a link?
Sure do!

How-To: Cargo Drawers (2000 - 2004)

I built mine a little different, but used this as a starting point.

For the platform, I used 1/2in plywood instead of 3/4. It's plenty strong enough with the center support in there. I also built it as a single unit instead of a box for each drawer.

For the vertical supports, I used a single 1x8. This allowed me to buy a single sheet of plywood, since my dad had some we used for the bottom of the drawers.

I also added a slide out table on one of the drawers. At the back of the drawers, on a shelf under the platform, I have my water pump, relay box, and auxiliary fuse block.
 

ryno9562

Rank VI
Member

Influencer I

3,610
Cayce, SC, USA
First Name
Ryan
Last Name
Heath
Member #

28028

Great news! After working on Tigger till 2 am I finally finished and he's at the shop getting aligned! Super stoked! He's been sitting on Jack stands since November 4th. I'm so glad to be able to drive my own vehicle again.
 

ryno9562

Rank VI
Member

Influencer I

3,610
Cayce, SC, USA
First Name
Ryan
Last Name
Heath
Member #

28028

265/75r16 Yokohama geolander x-at. Load range e
4 tires and alignment 950 out the door at my local mechanic
 

Attachments