Member III


I got the base for my drawer system/bed platform mostly finished up. Took awhile, but will definitely be worth it in the end
Member III
Member III
Looks good and with lots of storage. Is that a piano hinge in about the middle for access to storage behind the seat?View attachment 137626View attachment 137627
I got the base for my drawer system/bed platform mostly finished up. Took awhile, but will definitely be worth it in the end
Member III
Looks good and with lots of storage. Is that a piano hinge in about the middle for access to storage behind the seat?

Enthusiast III

Member III
Hinged or not it's great that you have access to all that space. Thanks for getting back to me.It’s actually just a piece of aluminum angle, the front piece is fully separate so it can be removed for the back seats. I wanted it wider than the box, so unfortunately I couldn’t hinge it back over the drawers. The way it is at the moment I just lift it up to get under the front section, I just have a wooden “T” under it for support, so it’s mostly open under there.

Advocate III
20990
I have the same napkin, it resides as my log book in my Bronco.Installed a new head unit out of the 17-20 super duties into my 16 and planned out brackets for installing my new bump stops on the truck.
Here are the napkin designs.
View attachment 137637
Enthusiast III


Member III
16986
Really nice job and should help. Wish my LRD2 was as easy to solve, It took a new off road bumper for me.Getting tired of pushing snow with the bumper View attachment 136785
So I did a little trimming , still need to do a little more shaping and then paint it black after I get the fog lights remounted to it but hoping it will help
View attachment 136786

Member II


Off-Road Ranger I
16968


Enthusiast III

Influencer II
I would seriously consider security nuts on those lights. Those will disappear in a heartbeat in the wrong place. I use these for my IPF's, but I prk outside year round in a downtown. No issues yet.Swapped out the Rigid Hyperspots for KC Flex LED Quads. Hella bright. Better fitment for the size of the Tundra as well. Diggin it.
Hyperspots will go behind the grill soon. They reach out far, really far, and extremely bright.View attachment 137532View attachment 137533View attachment 137534View attachment 137535
Enthusiast III
View attachment 137626View attachment 137627
I got the base for my drawer system/bed platform mostly finished up. Took awhile, but will definitely be worth it in the end


Enthusiast III


Advocate I


Traveler III


Enthusiast II


Member III
Enthusiast III
Finalllly got the dual battery setup completed and xtra usb ports and aux power front to rear!


Enthusiast II
Thanks! Have you thought about putting a cargo rack up top? I have my awning mounted to the side of my safari rack!LOVE the switch/monitor setup. Very clean.
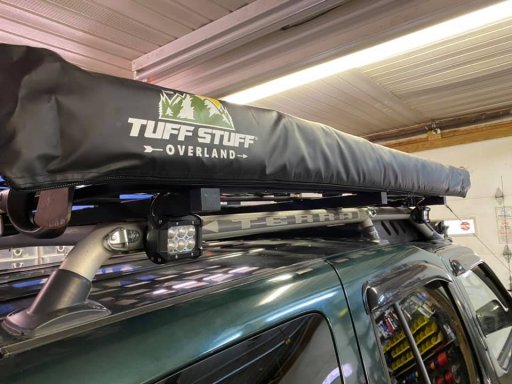
Today I took a few minutes and flipped the L-brackets for my 6ft awning “upside down.”
Old:
View attachment 138412
New:
View attachment 138413
I’m hoping that this will be sturdier and more aerodynamic. It definitely lowers the profile and brings it closer in to the footprint of the vehicle. This way I’ll be encouraged to leave the awning mounted full-time and get more use out of it. In addition, when I had it mounted upwards setting up the RTT involved bending the rain fly poles around the awning which took more time and effort than the rest of setup combined.
The trade-off, obviously, is that now the awning is down at face level and requires that I either stoop to get under it and sit down or set it up at an incline to get to standing height. Time will tell how much it bothers us and maybe adding a mild lift to the rig will become a higher priority.