03 Grand Cherokee Overland Build

Overview:

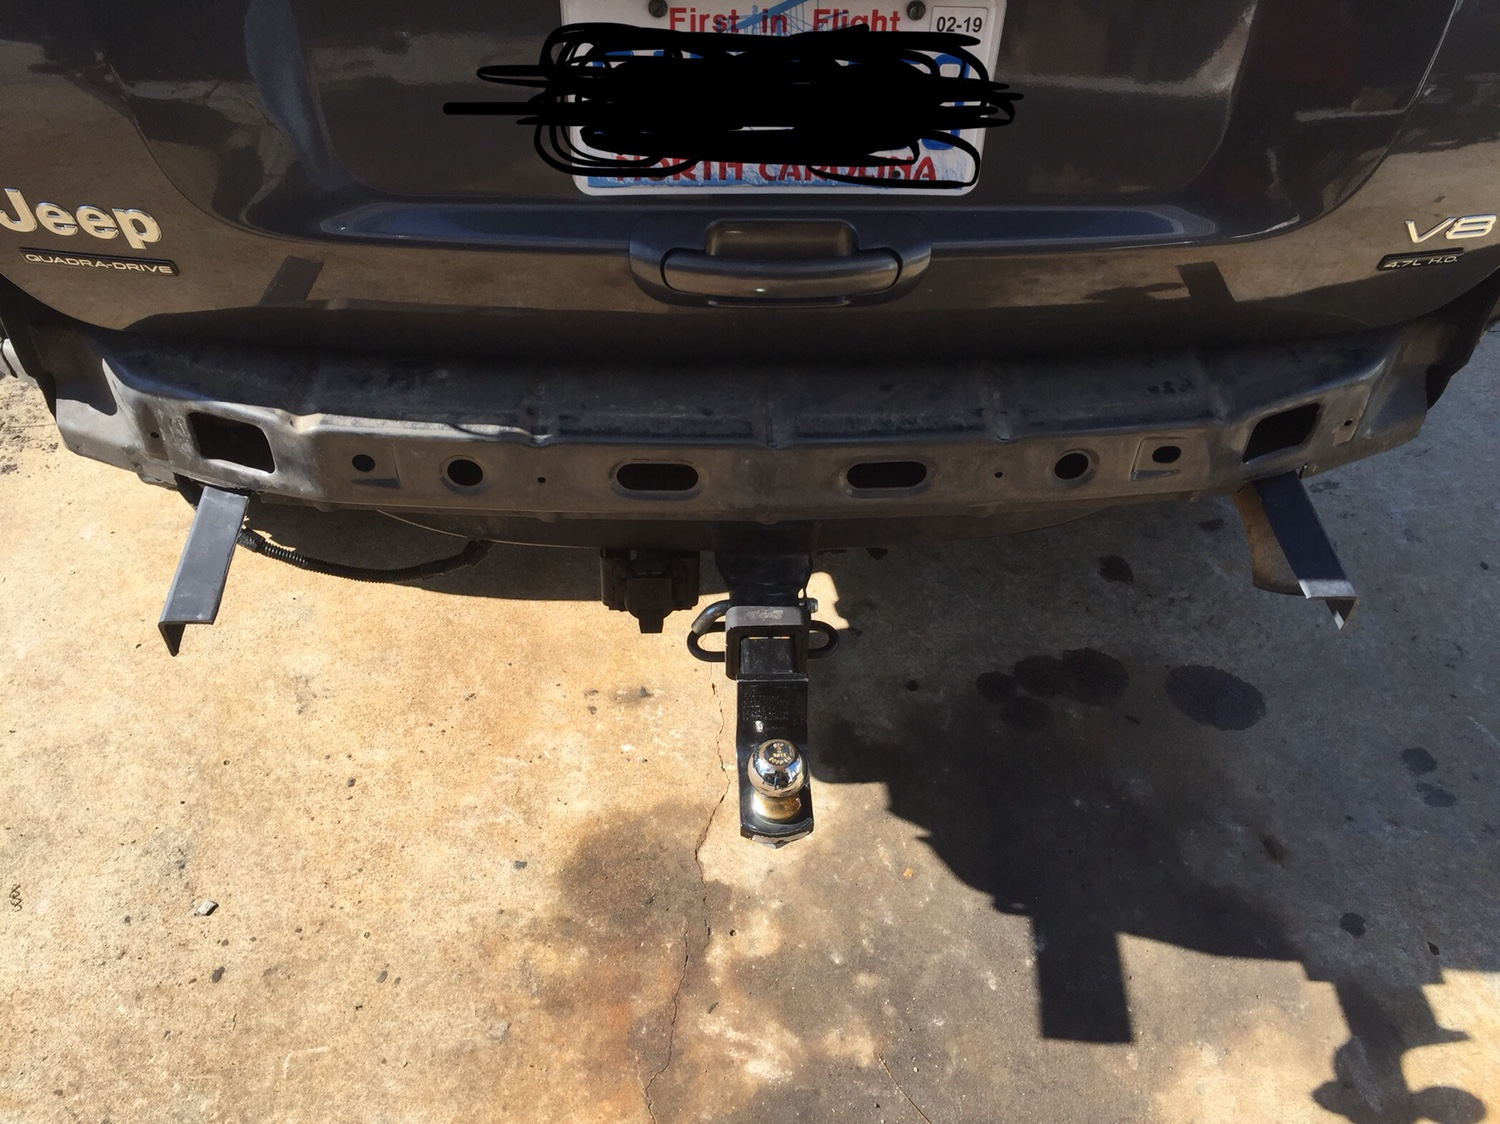
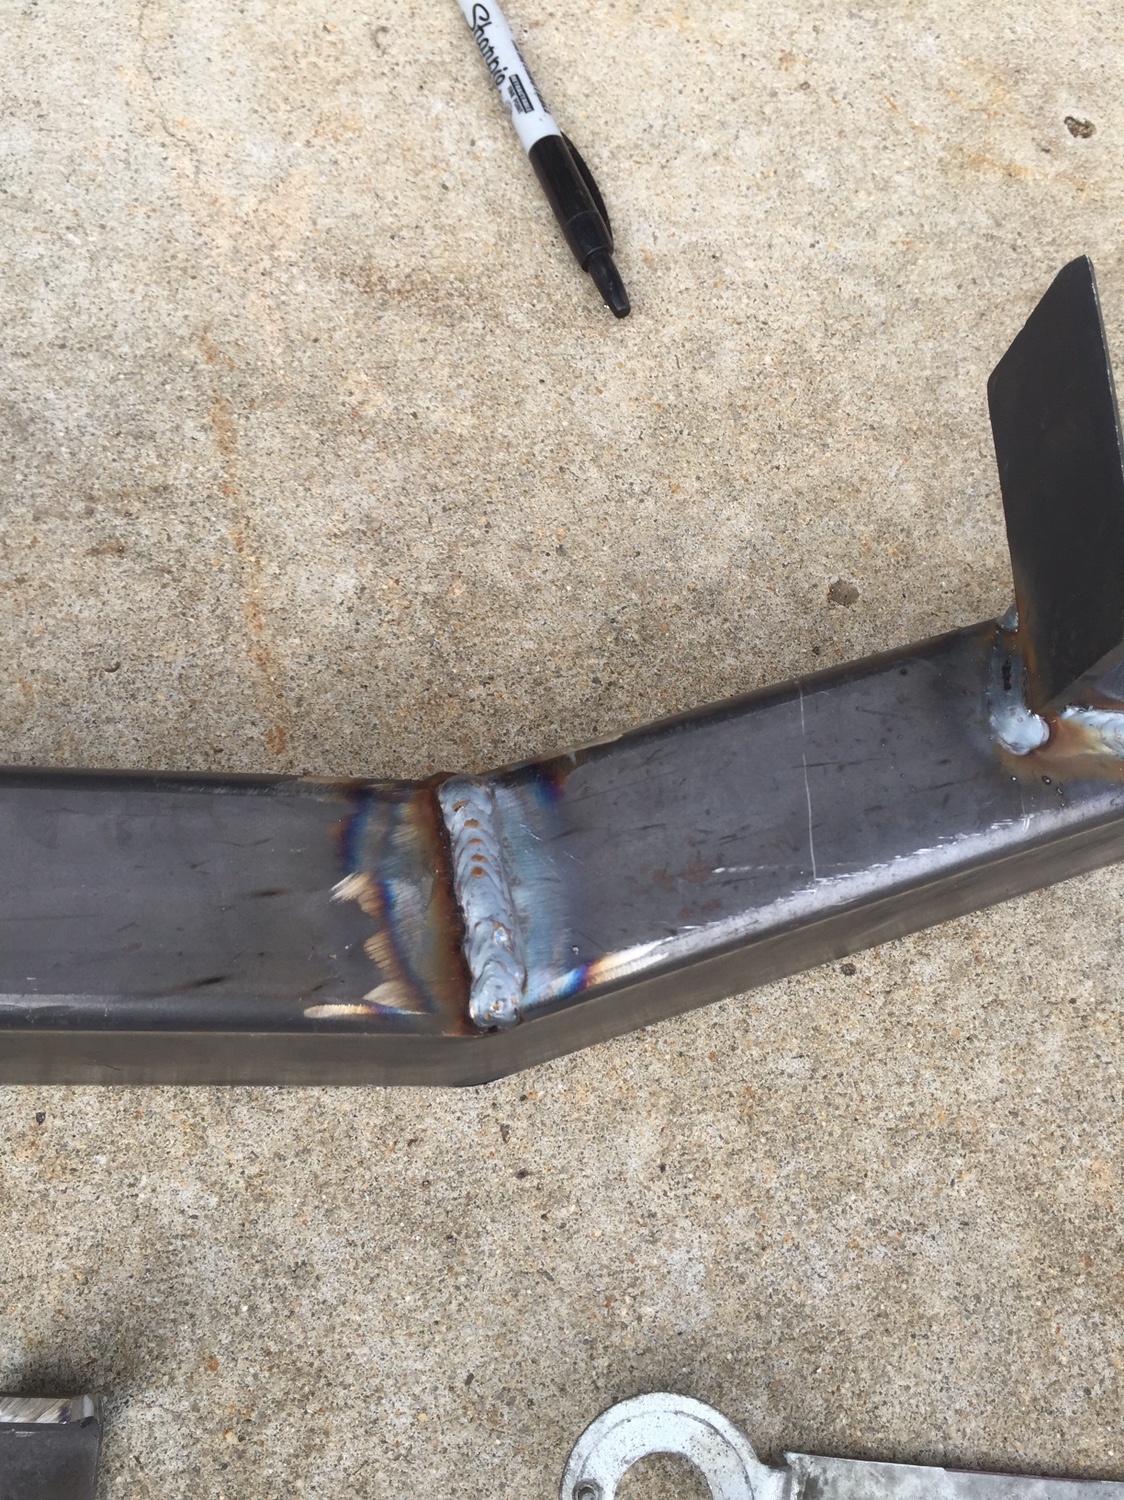
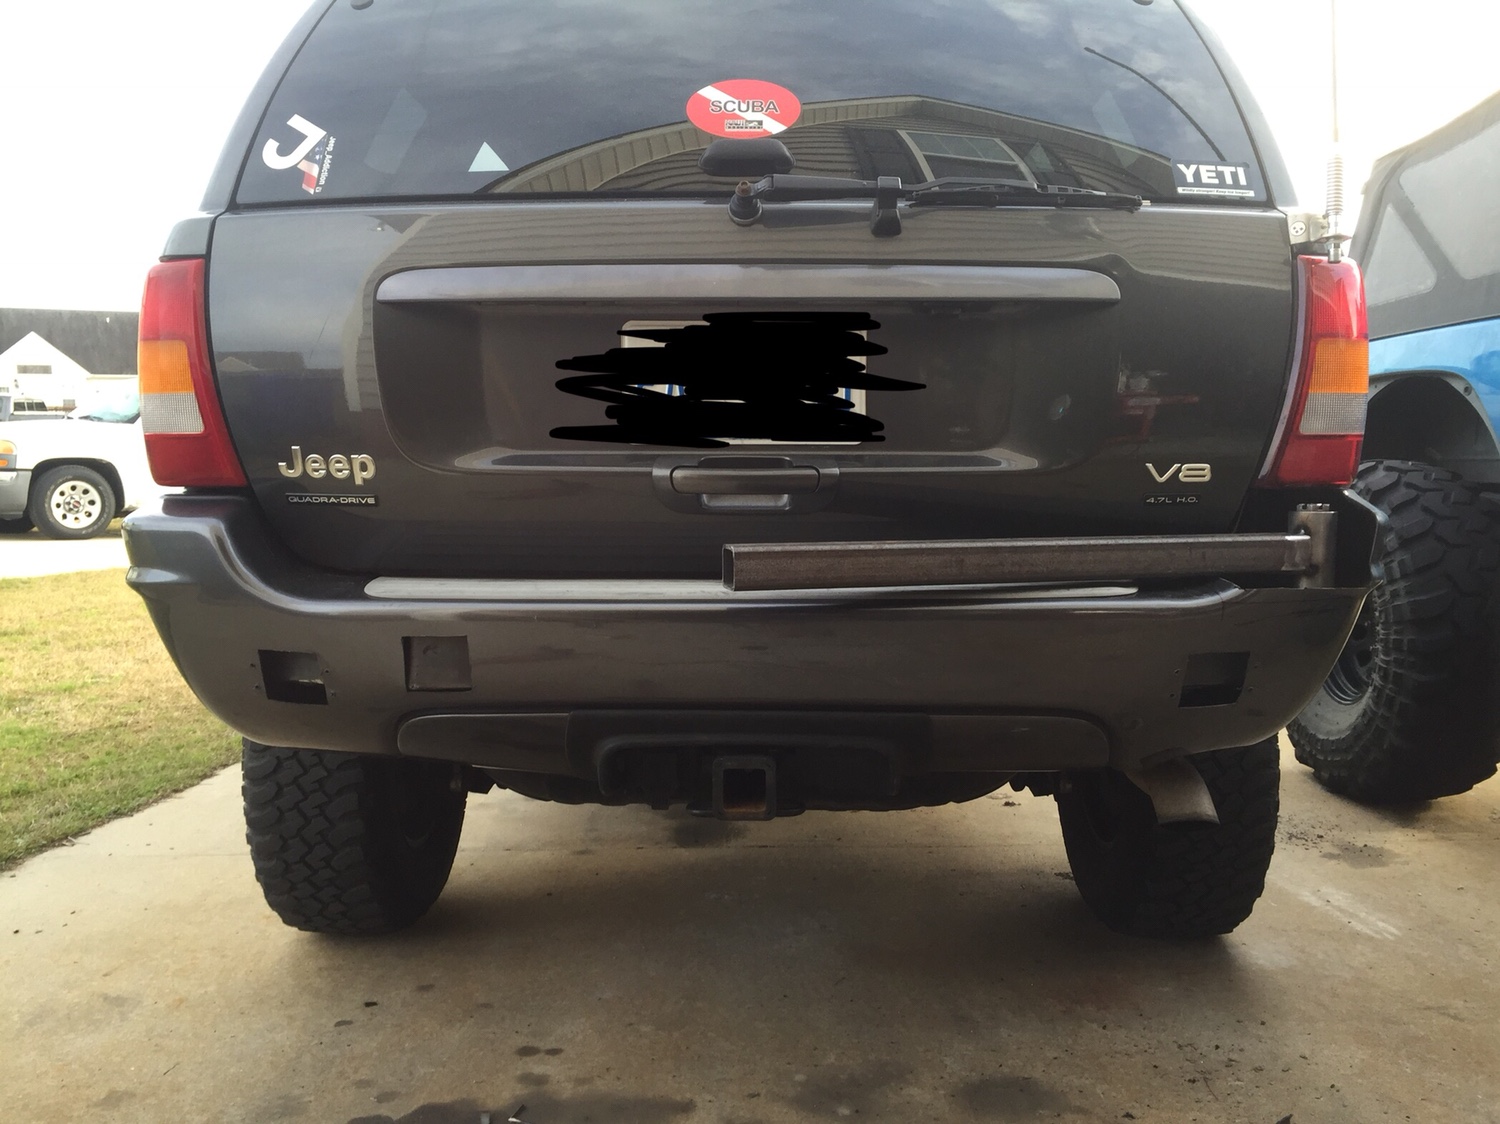
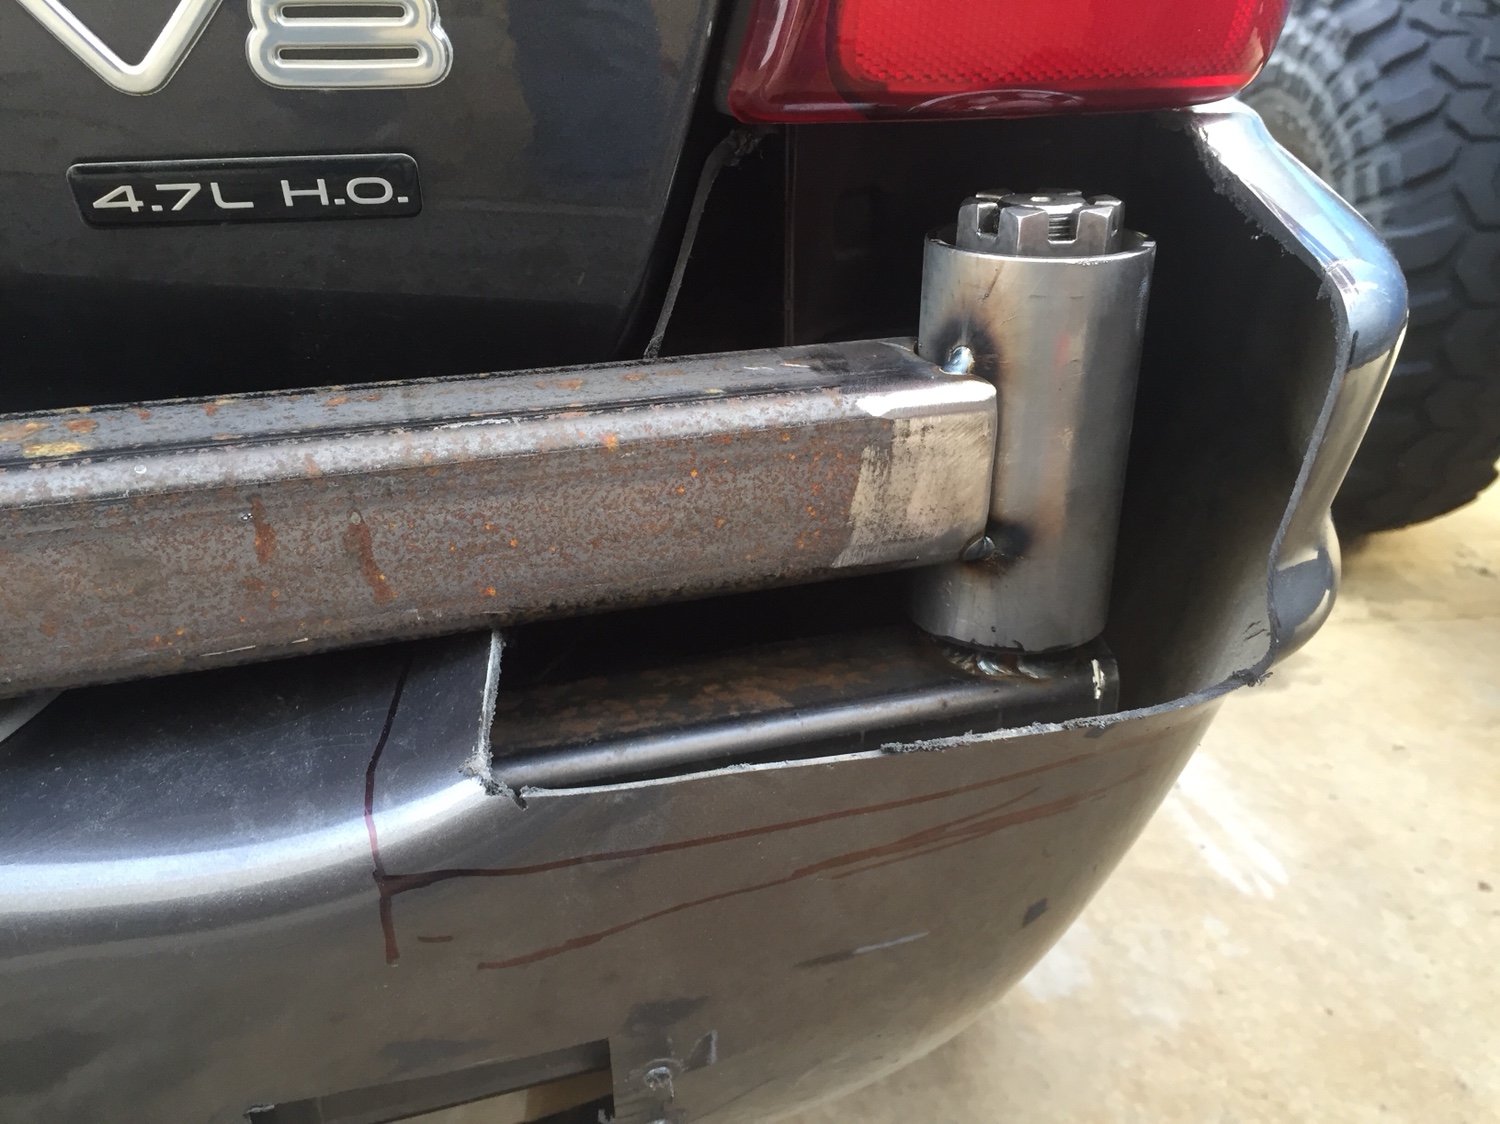
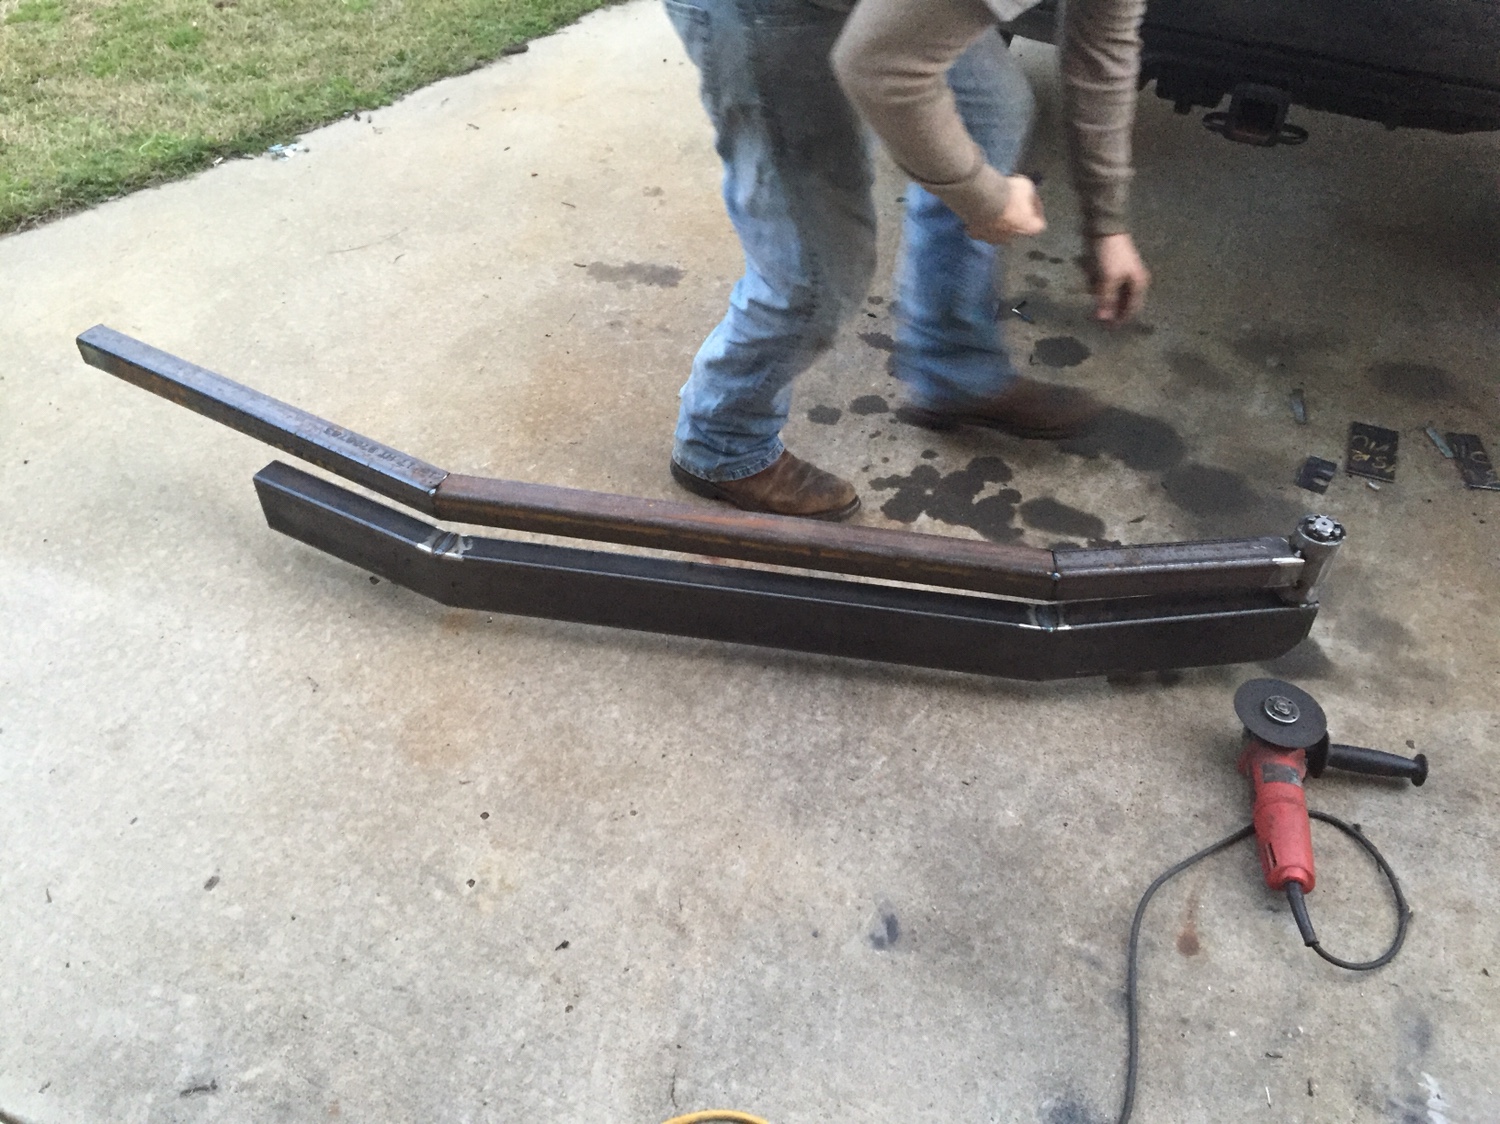
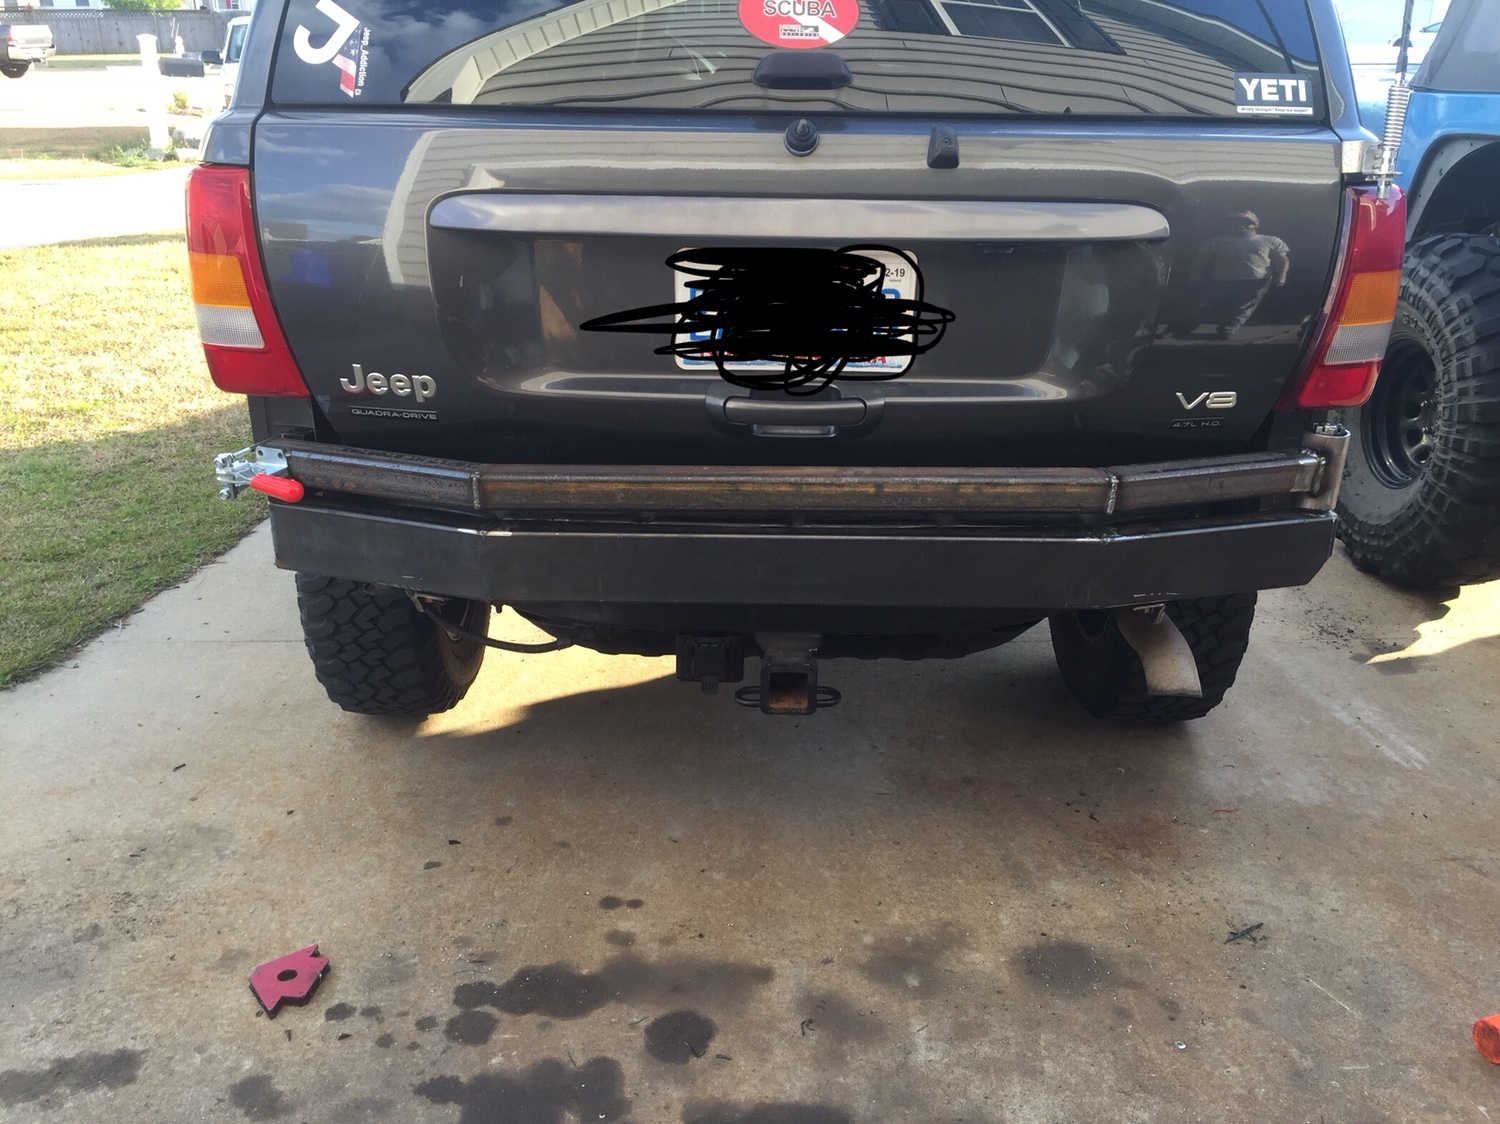
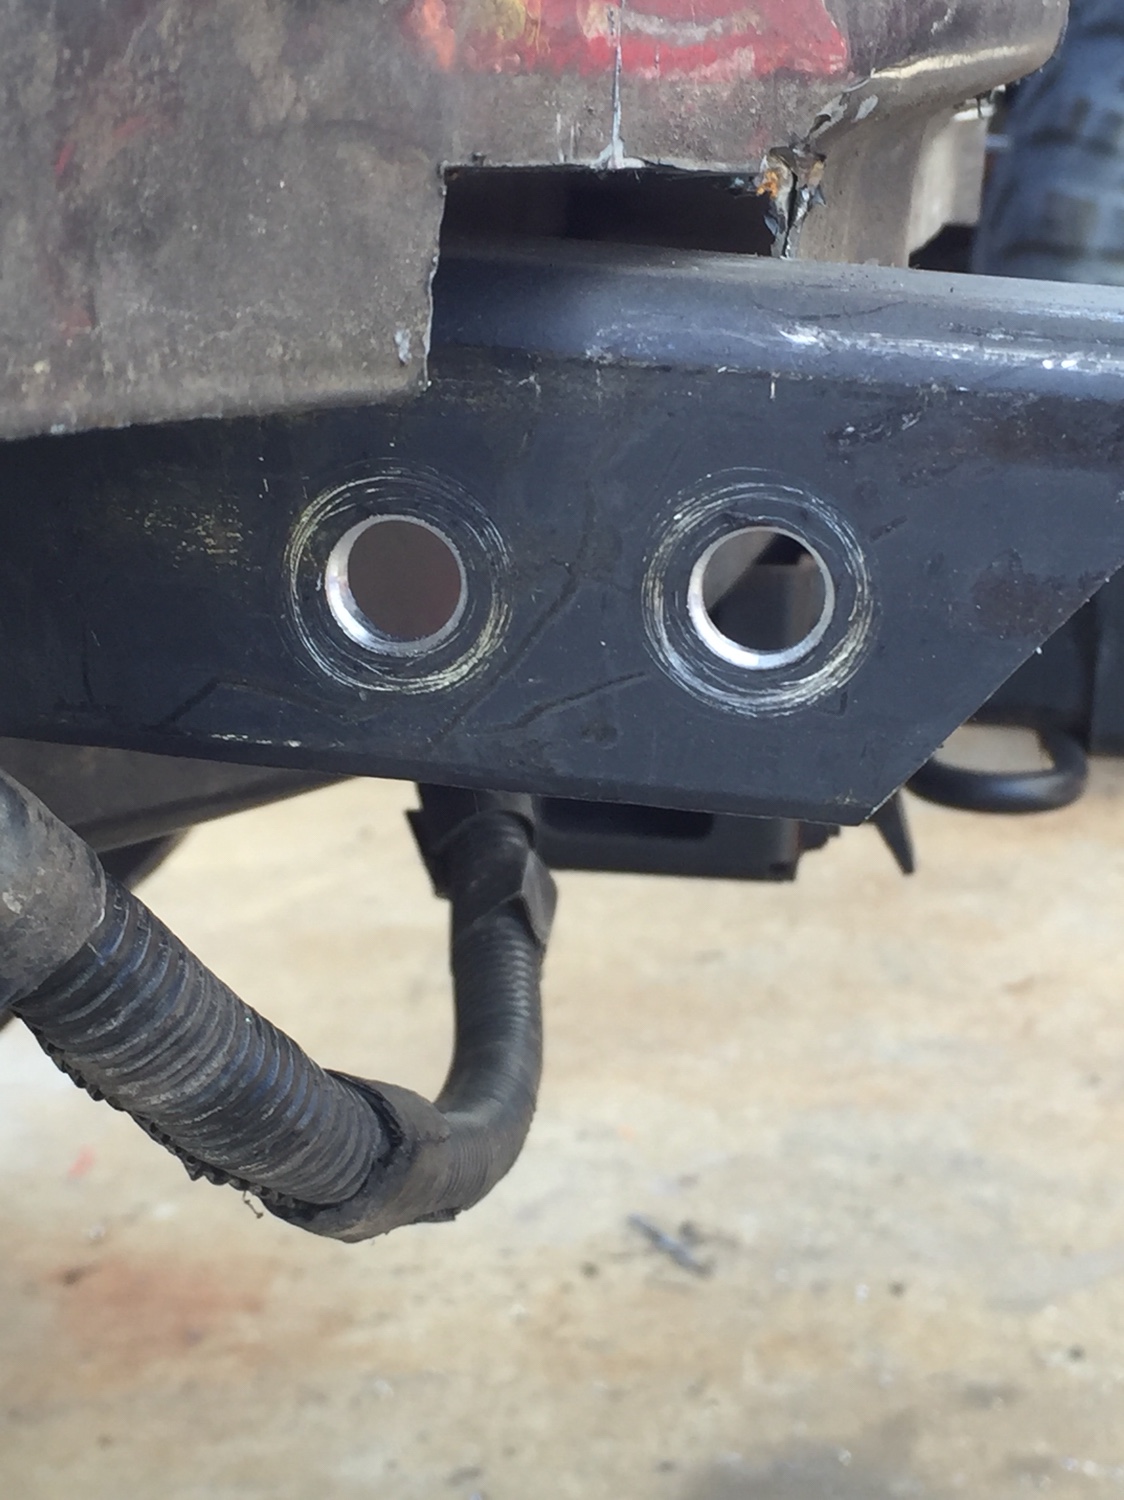
Going to make a build thread to document building my swing away tire carrier on my 03 Overland. I’m planning on cutting out a part of the rear crossmember to weld in doubled up 2x2x 3/16” square tube to strengthen it that area and weld through shackle mounts. These will stick through the stock bumper cover. The spindle will be on the passenger side with the latch on the driver side. The tire is going to be offset closer to the spindle for weight stress purposes and on the left I will make a cargo rack eventually for jerry cans, water or whatever else. I would like to have the spare tire angled to the rear window with enough room under the tire to install the license plate light and plate. I might have enough room under it with the tire vertical but won’t know for sure yet.

Parts:
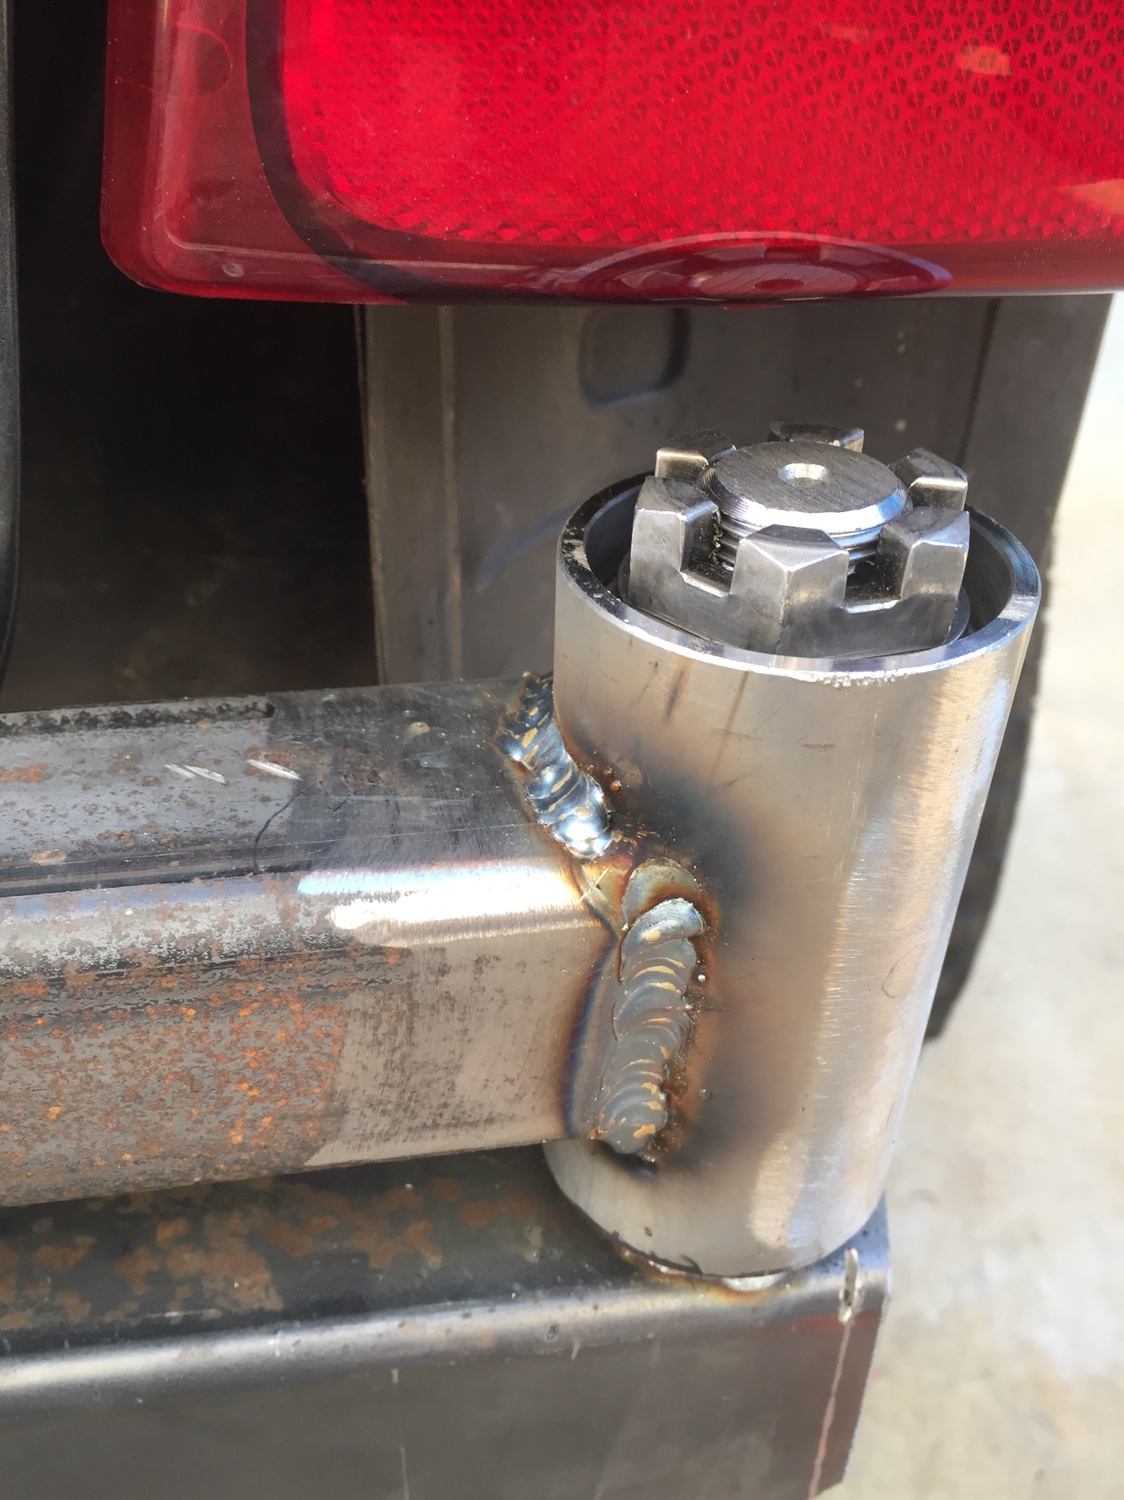
I ordered my tire carrier kit from EMS off-road.-$100

I also bought the t handle and plate from comp4x4 to stock the tire from rotating all around freely. $40

24’ 2x2x 3/16” square tube-~$110

Sold 9’ to a buddy and bought a 2x4x.120 Wall for $45 plus shipping from metal depot

5c9d85b7036419f396e4d86df7d06b59.jpg


I’ll post a link here once I get going.


Sent from my iPhone using Tapatalk
 
Last edited:
  • Like
Reactions: Aussie571
Yesterday I ordered a 8 bolt led lights fir rock lights and a trailer license plate light for the license plate because it’ll be mounted on the tire carrier.


Sent from my iPhone using Tapatalk
 
Worked on the tire carrier some this week. It’s been slow with the weather but so far so good. The angle is welded to the hitch mounts and the 2x4 will be welded to the angle and tacked to the crossmember. The bumper cover still fits over everything so that’s a big plus.
45e93aaa894fcab8cb341e15ba29d5c8.jpg
41b809649a0bc6007349d931f5788cce.jpg
a4354545efe563c9a638ee6a6546bbca.jpg
0c13e13218c78af9c110a63f426535eb.jpg
600072f2feb1fbc4932034d12fcab7b4.jpg
c1c6b0f0178ac83e8d24a1966fb57589.jpg
637516031b44c2de87d540dd563e7ade.jpg
d1990570124e67cd6e76686abbdc1f09.jpg
0c6aa6c610f6d3151f6456e2e0396b05.jpg


Sent from my iPhone using Tapatalk
 
  • Like
Reactions: Aussie571
Great build! I love the WJ's, the last of the capable Grand Cherokees. I used to have a 97 ZJ lifted 3.5" on 31's, and that thing surprised a lot of people with where it could go and what it could do.

I'm thinking of building a more trail oriented rig, and the WJ is on my list. I'd go the route that you did, with the Overland or at least the LTD, to get the V8 with the Variloc diffs. I feel like that's the next best thing to being fully locked, and buying one so equipped is very cost effective when compared to the cost of adding 2 lockers or ltd slips after the fact.

How's the reliability of the H.O. been for you so far? Also, does it require premium fuel?

I enjoy it. Plenty of power and torque. I’ve pulled trailers and it’s not bad. I’m considering a heavy duty transmission oil cooler because It gets hot occasionally. The engine does burn some oil and leak some via the valve gaskets so check those when buying. It’s a greatly capable vehicle with some bigger tires and more ground clearance. And it recommends premium but I use regular. Currently near 190k I think

I’m hoping I get this job after my final interview this week which would make this a trail rig. I’m planning a 3 link front, 4 link rear, 6-8” lift and 35s with some more trimming possibly.
 
  • Like
Reactions: StuntmanMike
Update on the tire carrier. Burned in mostly everything. Test fit everything and the 2x4 clears. The spindle is welded in and the swing out arm follows the same lines as the 2x4.
3e4c27c2bde60220f67f4953bf5d8885.jpg

b6fda405c4ec257fb0996b76c5f352c8.jpg
8928d76ba3fcb924e7cce90e62f702be.jpg
eeafbb86046c5a8f34a3e31a8c85bd83.jpg
730c7743929245dcdbf3442d5137a0f9.jpg
f5d6a0c9edbb6ac12f800bcb9d90ee49.jpg
0359813a2af5566158651c7d8695e68c.jpg
84b6f5255ec82c9fec3e735eaaa1769e.jpg
1c62336f27402ed89235183ce32b58fd.jpg
935db7442753c19788552f346e5cf523.jpg

3e93da7308a139ffa0cabf42d3af76bb.jpg
e2f62f588b54bf0726ee7bf7a6249244.jpg


Sent from my iPhone using Tapatalk
 
  • Like
Reactions: Aussie571
Just one observation, try to locate the tire as close to the pivot as possible, in this way, the horizontal load on the support would be less. however, it would block you more the vision of the mirror, if you have any.

Anyway, I like how the project is doing. very clean and simple.

You should write the measures for those who wants to copy your work!! (ME, cough cough)
 
  • Like
Reactions: tsteb112
Just one observation, try to locate the tire as close to the pivot as possible, in this way, the horizontal load on the support would be less. however, it would block you more the vision of the mirror, if you have any.

Anyway, I like how the project is doing. very clean and simple.

You should write the measures for those who wants to copy your work!! (ME, cough cough)

Yeah the plan for the tire to be offset the the right and following the lines of the window. The left side will have the jerry can rack.


Today we fabbed up some brackets to mount up the isolator and latch and burned in everything. We also drilled the holes to mount the bumper carrier to the hitch. This allows the whole thing to be removable in 1,2 or 3 pieces. The swing arm, 2x4 and the hitch are all independent but tied together. Here are the pictures from today. Any questions please shoot.

7789496e666064203120fbdf1f09f28a.jpg

4f740a5ce4e8f828f7cbe64bc4fdadef.jpg
c2dceb0ae80925dfd48d5de0d9262890.jpg
aadae801686e4512bae2425a99fb4bce.jpg
dc76c38e78e23e03cdb4446c335b69db.jpg
cd6da9f94d24c1d14202fcac9fa9843c.jpg
fa790cac135905728fc5690c832b6fec.jpg


Sent from my iPhone using Tapatalk
 
I’m looking to get a welder when I move out of the apartment. I can’t wait to do stuff like this on my own. It’s cool to see how everything takes shape.


Sent from my iPhone using Tapatalk
 
Lately I’ve been working on the tire carrier but the other day decided to improve me electronics/accessory wiring so I pulled all the wires that I ran initially and built a switch plate for the little useless cubby. The plate is just aluminum and I got the 12 switches on eBay. They are going to be be powered by a Blue Sea distribution block that I just got in last night.

Question for anyone with knowledge of electronics... the switches say 20A on the side. I have 3 rows of 4. Each row is piggy backed to the switch beside it. Does this mean for 4 switches they draw 80A?
9f3a8fe0cc9d87af1d2d8614d577ae1a.jpg
8345093af7bb70db5bb1ff8638895109.jpg
1bac5a53f24fa86ddf2e13e07b1bbf0d.jpg


Sent from my iPhone using Tapatalk
 
yup, 80A will be the max. Amp. Output for row.
But you can put a 60A Fuse, to keep it safe at 75%.

After talking to a few others they have said that the switches can handle 20A but don’t require 20A because they are just lighting the little LED indicator. If I’m running something that has more than 20A I’ll use a relay too


Sent from my iPhone using Tapatalk
 
After talking to a few others they have said that the switches can handle 20A but don’t require 20A because they are just lighting the little LED indicator. If I’m running something that has more than 20A I’ll use a relay too


Sent from my iPhone using Tapatalk

Of course, if you connect a aux fan or a compressor you will require at least 15A and you will need relays!
Even for the light, I used relays, just to be safe.
 
Worked on the tire carrier and wiring up the switch panel and fuse box yesterday. The box is going under the center console where there is an empty space. All wires run through the transmission tunnel. I just need to ground them and I’ll be good to go. I’ll post pictures when done.
We have two more pieces to weld up to finish the tire carrier, then gusset it and add dimple dies to the gussets and build a jerry can rack. The bar in the middle won’t be there when done. It was just to get the top piece level.
96d8cf581ea32d7f610225e3dca44de0.jpg
2710693c4e9e5fa895627f26bfbf413d.jpg


Sent from my iPhone using Tapatalk
 
Today I finished up the switch panel. The fuse box is under the center console. The power wire to the battery I ran through the grommet by the brake booster. All the wires are run through the transmission tunnel.
218c163e616458f9574ba2700de3703e.jpg

38e0a4b3a4527e578f2c1e2bb2d71a1b.jpg
1559e50f4d56901f4b5c4bab60602d54.jpg
22d97fe04ed73efbc9c00deb5e4390dd.jpg
f48d5f6166fcab45937ccd03bd3b43b8.jpg
fa02ae3af79349d07ac810b1aa29fd74.jpg
baa6e2903d413a37a7eaffcce285541b.jpg


Sent from my iPhone using Tapatalk
 
  • Like
Reactions: WJ - Firefly