"Nanuuq" my Land Rover Discovery 2 diesel swap, ...forever a project!

  • HTML tutorial

Tinker

Rank V
Launch Member

Off-Road Ranger I

2,357
West Michigan
First Name
Mike
Last Name
Klemish
Member #

5606

I finally made the big move! Packed up pretty much every bit of the Rover parts I've amassed & stuffed it all into/onto the truck. Even though I've been distracted by the engine build, seemed like time to relocate the truck to it's new home for the swap before things started freezing up.

I had intentionally left it complete after the rebuild to make relocating possible without requiring a tow/trailer. Still had a cracked block, so it wasn't as if I expected the trip to be without it's challenges... but it did turn into a little "adventure" of it's own.

Made it ~3-4 miles before the temp gauge maxed out & I could make out the sound of a rolling boil coming from the heater core. Thankfully I had the ability to bleed off the exhaust gases that were being pumped into the cooling system with the upgraded thermostat housing I had tapped an air-line draincock into. Of course the drizzle of rain had to go monsoon on me in the midst of letting old faithful cut loose:


Turns out there's no real way to talk that big a chunk of metal into speeding up it's cooling off on account of my getting soaked through by 40 degree rain. But ah well, at least I forgot to put my window up & had a nice frosty puddle on my seat to look forward to sitting in for the remainder of the drive. And better yet, the battery decided it was the right moment to go flat on me... :confused:

Luckily a good friend was doing me a solid & acting as a chase vehicle, now also a recovery vehicle. After jumping it alive again I was getting in a mood to throw safety to the wind & just drive it regardless of what any of the gauges had to say about it. This is when I learned that Land Rover coolant temperature gauges can uhhh... roll over... Yup, you read that right. By the time we got to the shop the gauge's needle had flipped completely around & managed to destroy itself somehow :laughing:

The rubber coolant hoses had so much pressure in them that you'd swear they were filled with concrete, no matter, we made it without a tow!

 
Last edited:

Tinker

Rank V
Launch Member

Off-Road Ranger I

2,357
West Michigan
First Name
Mike
Last Name
Klemish
Member #

5606

Got my hands on a download of the Cummins "Troubleshooting & Repair" manual so I could verify some questions I had in regards to the timing of the injection pump. Went forward with a pretty basic method of adjusting, but it gets the job done! Added 4 degrees of timing advance & put together a 2min video of the process:


Last edited:

MS_Disco

Rank IV
Launch Member

Advocate II

1,337
Madison, MS
Member #

3799

Got my hands on a download of the Cummins "Troubleshooting & Repair" manual so I could verify some questions I had in regards to the timing of the injection pump. Went forward with a pretty basic method of adjusting, but it gets the job done! Added 4 degrees of timing advance & put together a 2min video of the process:

View attachment 38909

This is going to be one for the ages!! The suspense is killing us!

OB#3799
 

58-fc170

Rank IV

Pathfinder I

I could have just brought my trailer up and hauled it to its new home and saved you the "adventure" in the 40 degree drizzle. But where is the fun in that I guess. :grin:

I like the degree wheel, nothing fancy but straight up functional.
 

Tinker

Rank V
Launch Member

Off-Road Ranger I

2,357
West Michigan
First Name
Mike
Last Name
Klemish
Member #

5606

DERP! :flushed:

(I forgot about a valve spring that I had squished down tight in the compressor tool... well it slipped out, zoomed just past my arm, & put a decent sized dent into that door in the background... OOPS.)


Tinker

Rank V
Launch Member

Off-Road Ranger I

2,357
West Michigan
First Name
Mike
Last Name
Klemish
Member #

5606

Heavy duty valve spring upgrade done! Should take care of any issues with valve float at the higher RPM's the new governor springs will allow (from 2800 to 4000 max) as well as resist the increased boost I'll be pumping thru it (from 12-17 to +35psi).


A ~3min walk thru of improving the 4BT's top end with Cummins 60lb HD valve springs:

 
Last edited:

Tinker

Rank V
Launch Member

Off-Road Ranger I

2,357
West Michigan
First Name
Mike
Last Name
Klemish
Member #

5606

And adjusting to the factory valve lash specifications:


Last edited:
  • Like
Reactions: Jimmy P

k9sar

Local Expert, Georgia USA
Member

Enthusiast III

1,503
Rydal, GA
Member #

1648

Ham/GMRS Callsign
KK4EKF
I'm really enjoying your build. The videos are great!

Following..
 
  • Like
Reactions: Tinker

Tinker

Rank V
Launch Member

Off-Road Ranger I

2,357
West Michigan
First Name
Mike
Last Name
Klemish
Member #

5606

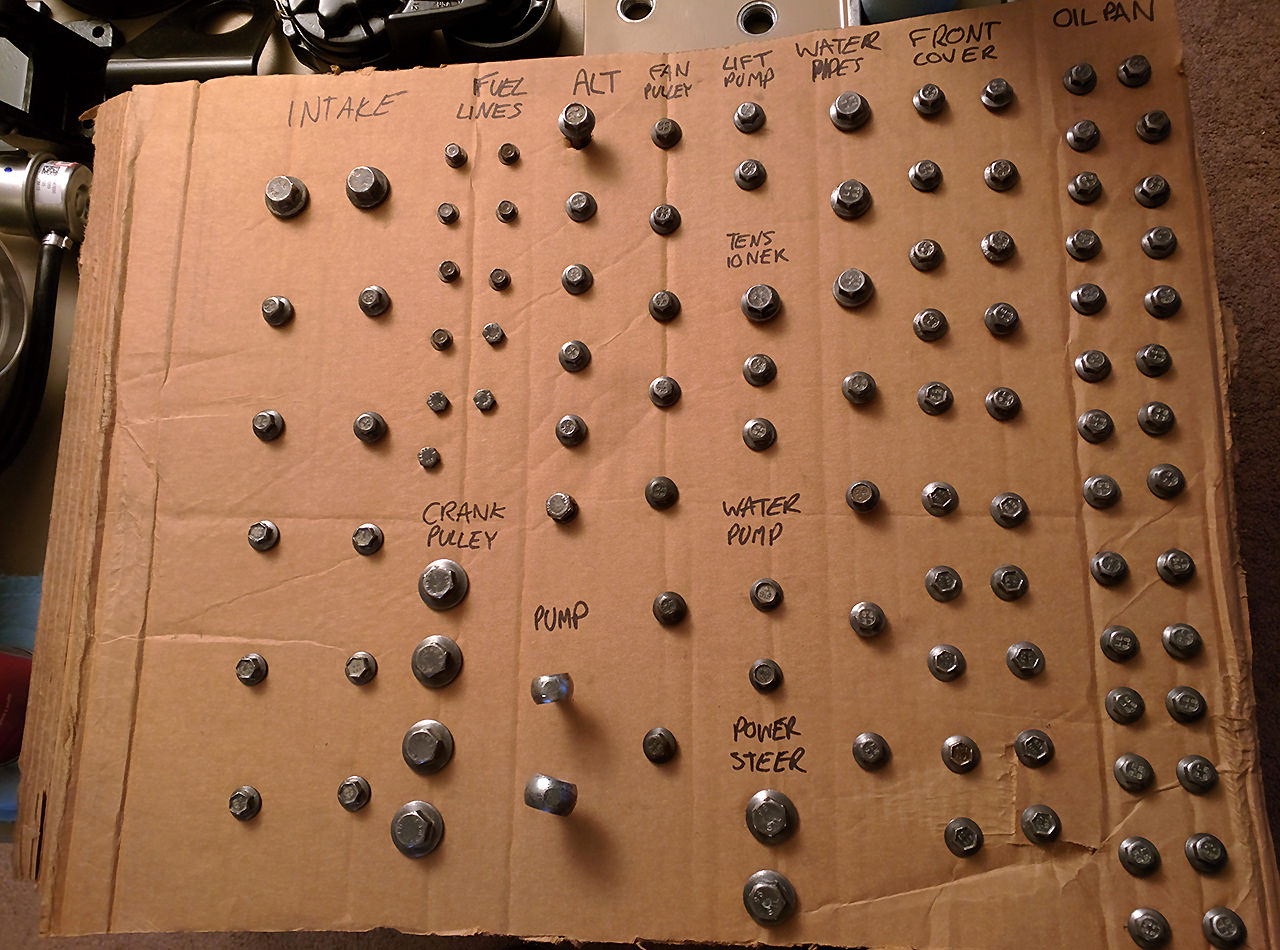
Today was one of those days where I just had to shut my brain off & turn the music WAY UP... because I reached a point where to move forward I had to wire-brush several hundred bolts & assorted small hardware. Not the most fascinating work. But it had to be done. Everything was splattered in all manner of fluids/filth, not to mention mismatched layers of differing paints. Could I have dropped a few hundred bucks on new hardware instead of grinding away 6+ hours? Sure, but that would be even further delays in getting this thing back together, & there's been no shortage of those.

Here's one of the boxes I stabbed all the cleaned bolts into, before paint & after:


Tinker

Rank V
Launch Member

Off-Road Ranger I

2,357
West Michigan
First Name
Mike
Last Name
Klemish
Member #

5606

Started digging into the injection pump today & while it doesn't sound like much as far as performance it happens to be what makes this version of the 4BT special. The piston pump (aka P-pump) engines have a huge amount of headroom for power. Some mods are even as simple as turning a few screws, shaving off a bit of metal, or replacing a single washer.

Easiest place to start was in the governor springs. They limit fueling based on a surprisingly simple flyweight system, just a quick spring swap & you go from a 2800 rpm limit to a 4000 rpm limit!

Many thanks to the cummins engineer that decided to build in a port to access the governor spring sets:


Springs on the left are destined for the spare pile, while the 3 on the right get a new home:


~3min buzzing thru the job:
 

Tinker

Rank V
Launch Member

Off-Road Ranger I

2,357
West Michigan
First Name
Mike
Last Name
Klemish
Member #

5606

Last up of all the pump modifications is a big one, the "fuel plate". It serves as wide open throttle fuel control... so of course I have to fiddle with something involved in wide open throttle :smile:

Thankfully the 6-cylinder version of my engine is so widely modified for big power in the Dodge trucks that I have no shortage of resources to look to for my specific goals with this build. After some thorough research I came to a decision to cut my original fuel plate down myself & save a a hundred bucks or so.

Here was my plate's original profile:


The final product after attacking it with various abrasives:


Lastly, a rapid walk through (~3min) of the modifications:
 
  • Like
Reactions: Ventsan and Jimmy P

Tinker

Rank V
Launch Member

Off-Road Ranger I

2,357
West Michigan
First Name
Mike
Last Name
Klemish
Member #

5606

Next up was conversions to the oiling systems. Pretty straight forward stuff but necessary work for it's new home.

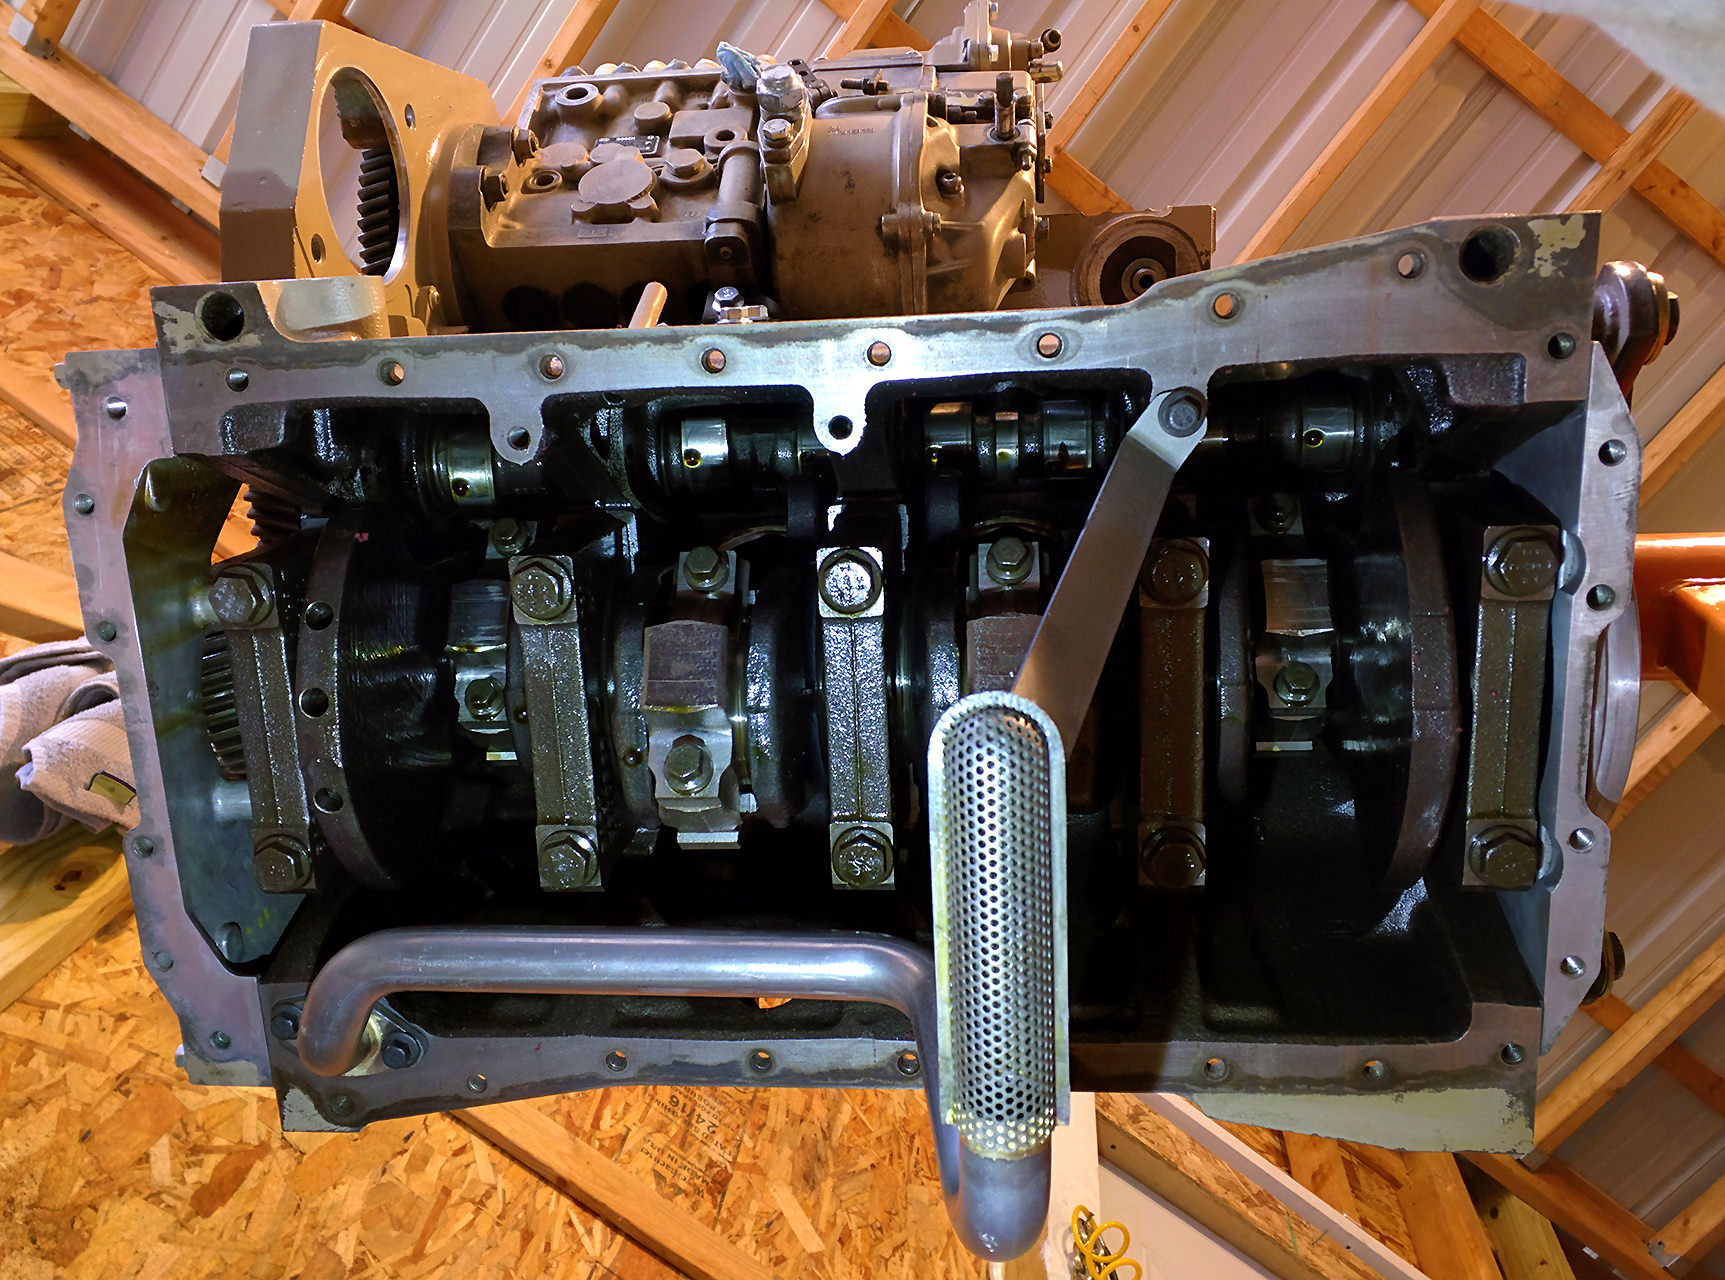
Tossed the front sump pickup tube for the rear sump variety:


Kudos to the cummins engineers for designing the oil pan to fit with the sump front OR rear, here it is flipped to the rear:


Punched out the block plug & stabbed in a new dipstick tube with a shorty dipstick. Capped off the old dipstick tube until I know for sure I don't want it for something:


My engine came with the horizontal oil filter plate, so of course that had to go for the vertical plate to save me the massive mess when I want to spin off the filter for a quick oil change:


And here the process in 61 seconds!
 

Tinker

Rank V
Launch Member

Off-Road Ranger I

2,357
West Michigan
First Name
Mike
Last Name
Klemish
Member #

5606

Engine's mostly complete at this point, & this last week has been a constant hunt for all the odds 'n ends required to wrap it up. But I suppose this is how it goes with a big build. Thought you were done with this phase? ...Nope! You need these half dozen little things & their part# are all written in a dead language on a scroll buried in the antarctic! :tongueclosed:

Did get my hands on a salvaged intake grid heater from a Dodge 6-cylinder. It takes the place of glow plugs (thankfully!) on these cummins engines, just another 1 of many reasons I'm a fan of these engines. Those windings you see in there will get glowing red hot in 2 stages to help on below zero startups:


Vacuum pump mounted, & I'll need to make some mods (pie cut, weld back up) to the fill neck of the power steering pump to fit under the monstrous injection pump:


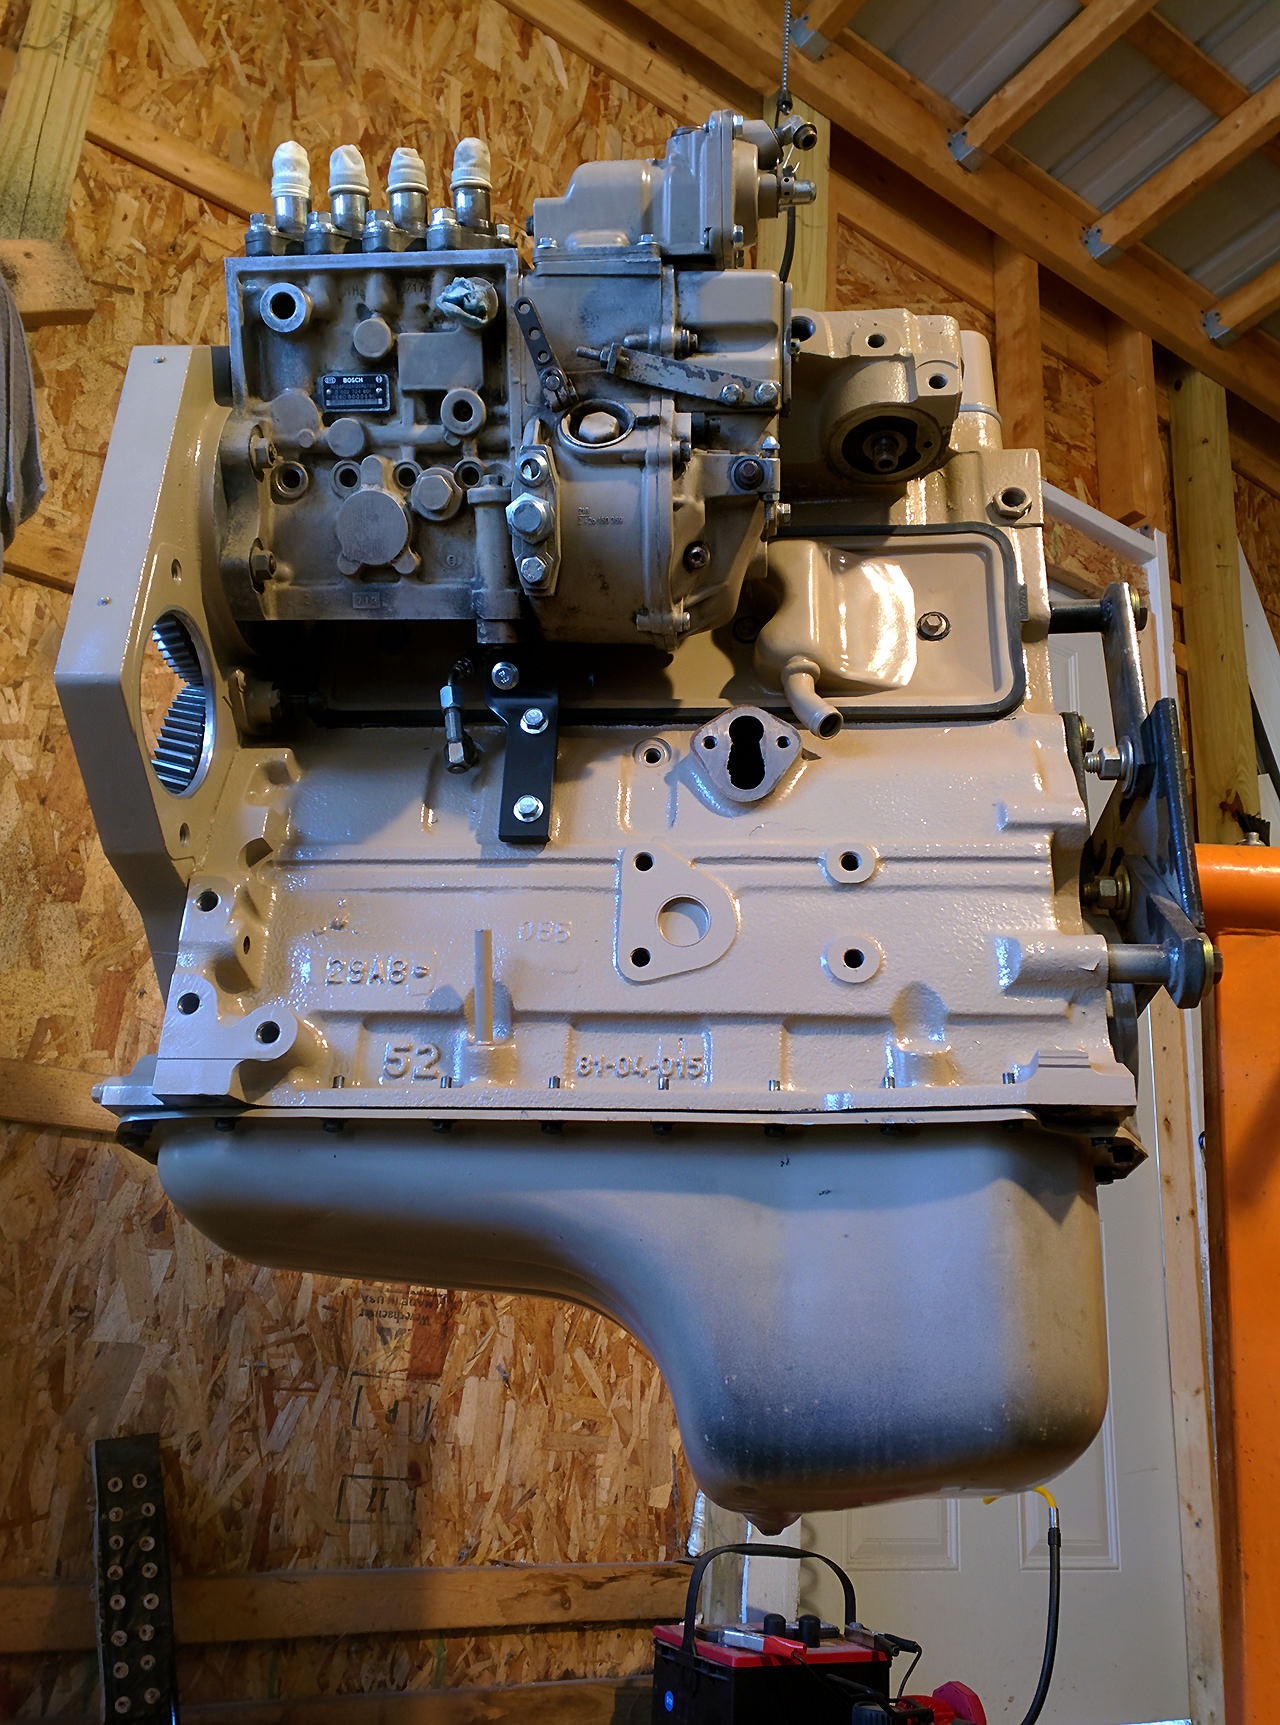
Bolted on all sorts of smaller parts: Water pump, water pipes, alternator, tensioner, belt, lift brackets, freeze plugs, intake horn, shutdown solenoid, boost tube, fuel injector lines, also pipe plugs & bolts to fill every spare hole in the block:
 

Tinker

Rank V
Launch Member

Off-Road Ranger I

2,357
West Michigan
First Name
Mike
Last Name
Klemish
Member #

5606

looks good... still missing that large boxy white engine stand though.
Haha! You're not wrong, some fool's left a mess of tea 'n crumpets in there that I've been thinking of creative ways to be rid of...
 

Tinker

Rank V
Launch Member

Off-Road Ranger I

2,357
West Michigan
First Name
Mike
Last Name
Klemish
Member #

5606

Progress! Engine build is finally complete after a few minor delays.

Big turbo is on, & manifold to match:


Upgraded clutch went on easily, but I swear the flywheel's made of lead... nearly pinched a finger off fumbling with it:


It is complete! :smiley:


And with some help I moved the roughly ~1200lbs of engine, transmission, & transfer case over to meet the Disco: