
Nice. Do they add much width, if any?I had a colonoscopy then went home and saw FedEx dropped off my new Freedom Offroad UCAs so I took a nap then installed them. Install was relatively easy but GM placed the nuts for the UCA bolts inside the spring mount so I had to unbolt my coilovers to shift them around and make room for a wrench. If not for that step I'd have been done in 30min instead of 2hrs. lol
I'm testing these very inexpensive units to see how they hold up to abuse. They run $380. The next cheapest brand is $750 and they only go up from there. I have not read of any failures yet.
Freedom Offroad UCA on top of OEM
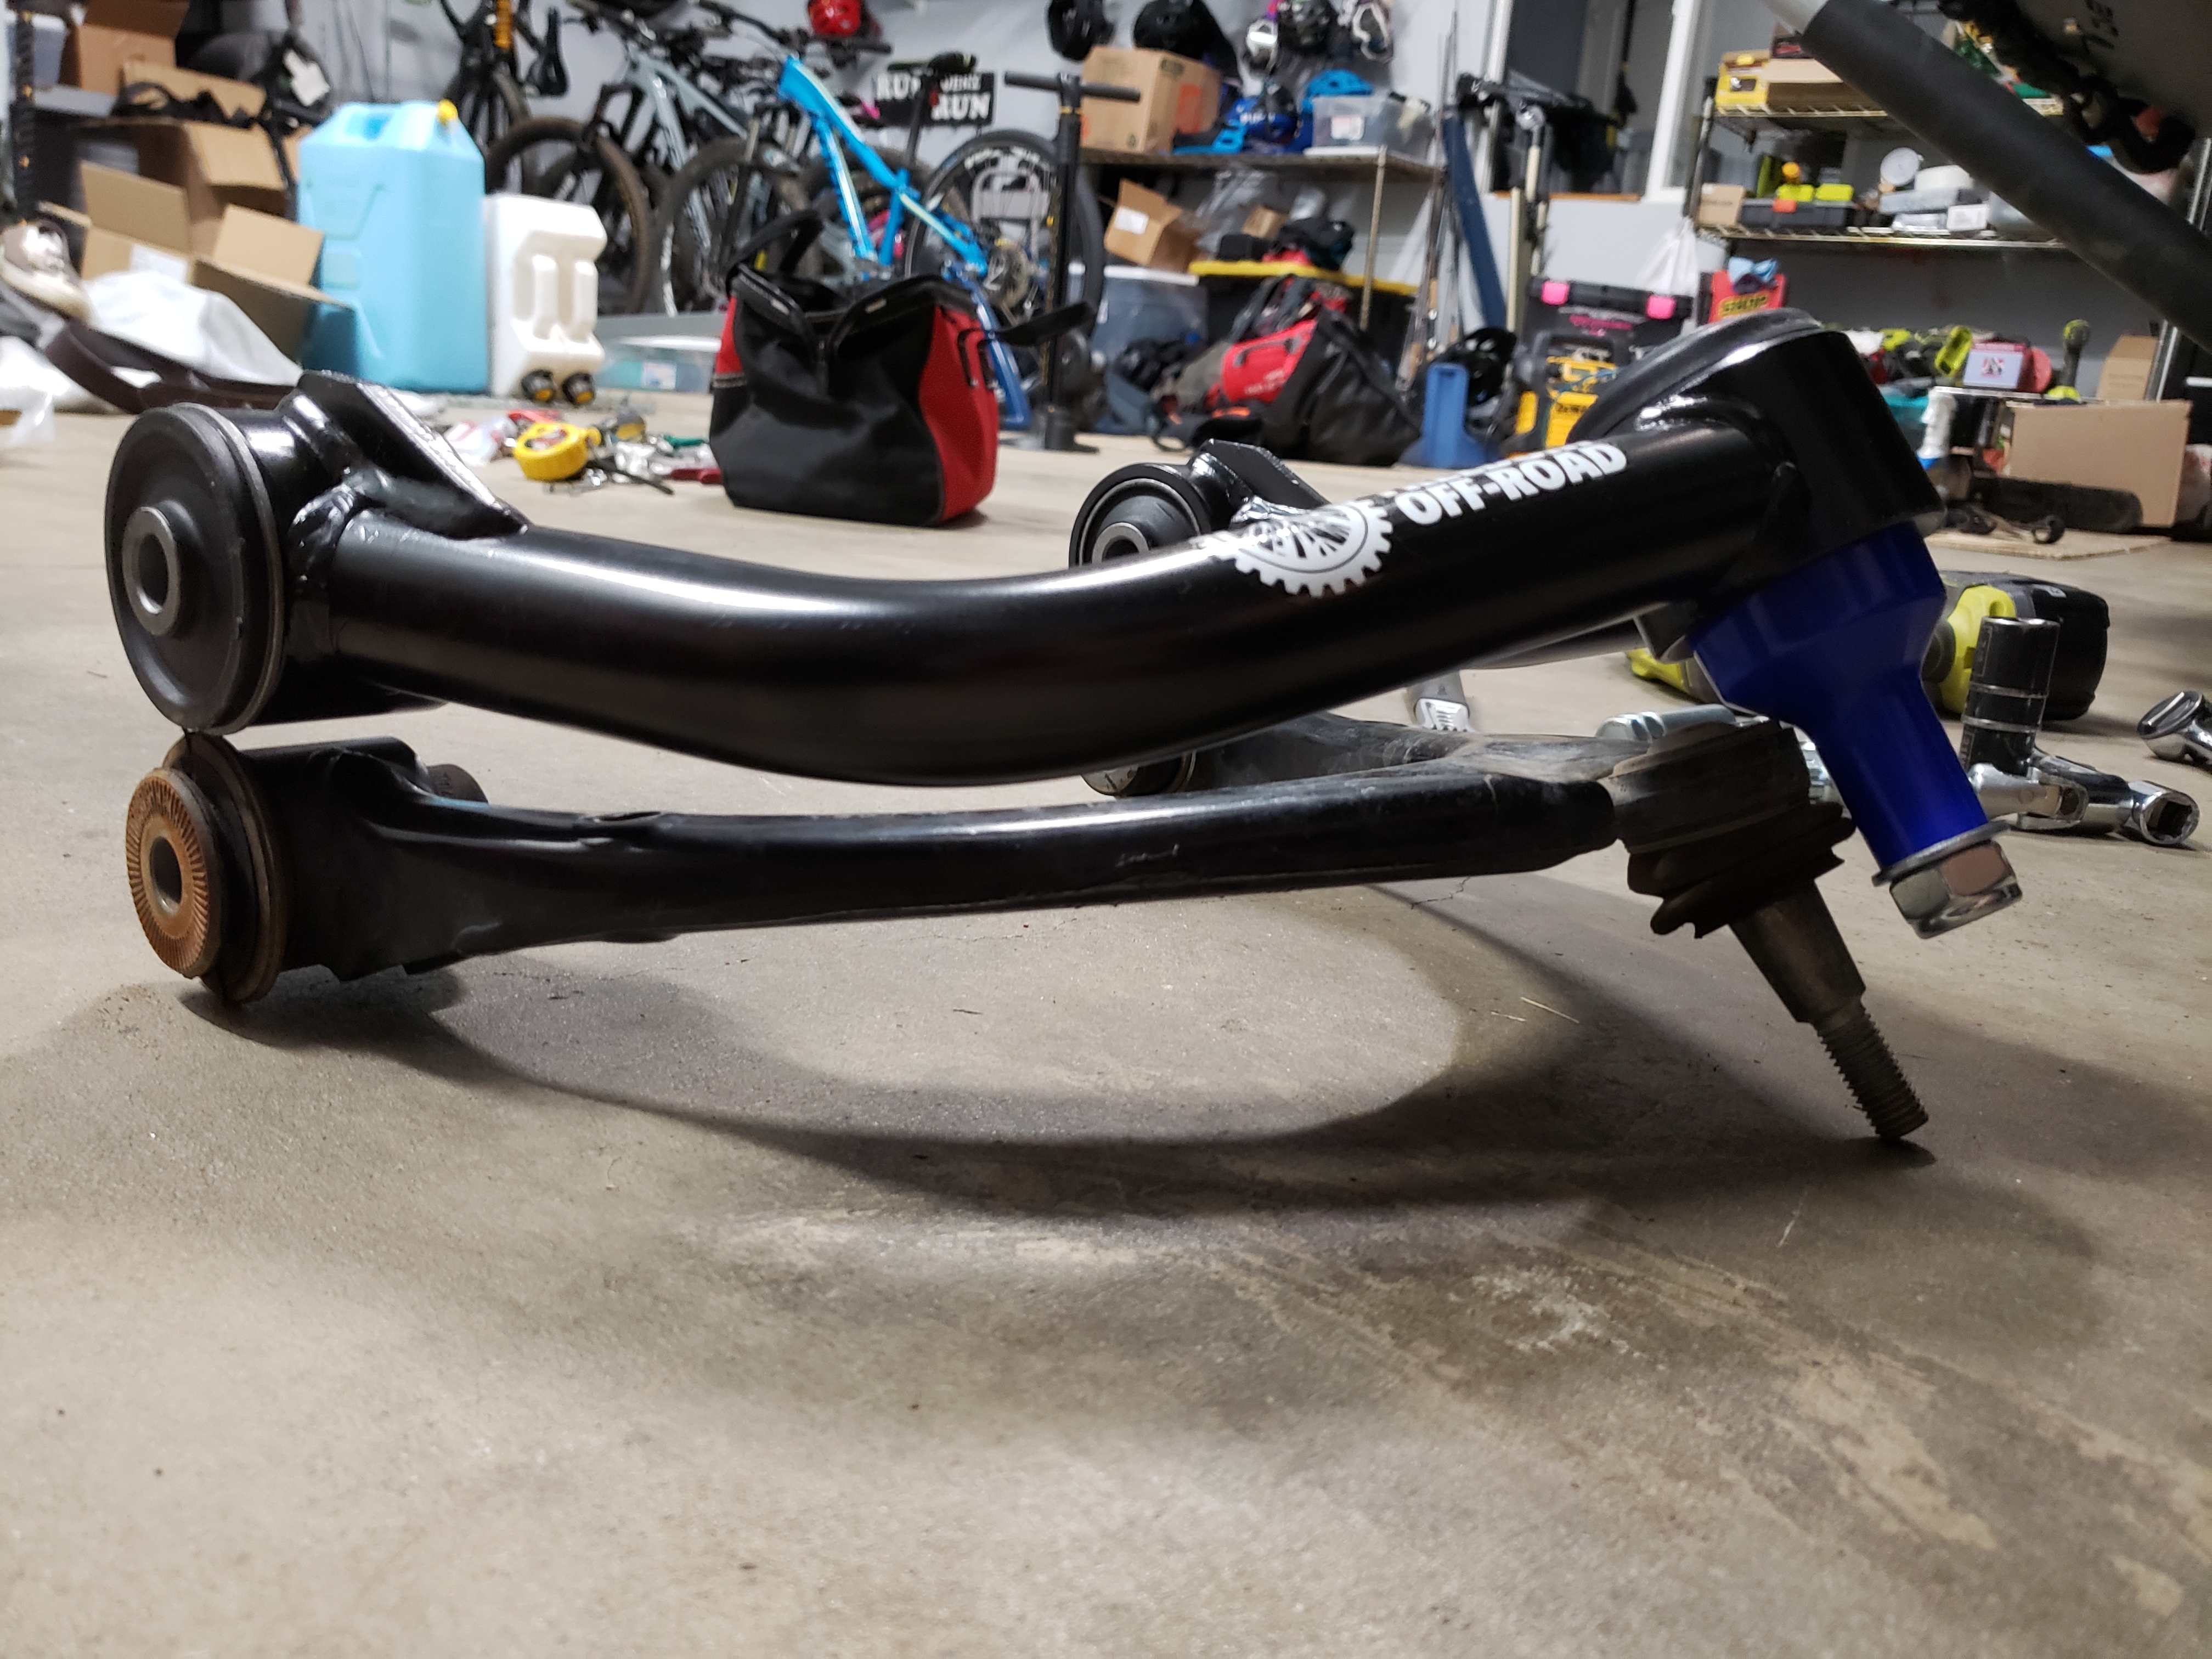
Installed at full droop. Tire is rubbing the front of the UCA due to increased caster I think.
2018 GMC Canyon MTB/Overland/Adventure Rig
- Thread starter JCWages
- Start date
You are using an out of date browser. It may not display this or other websites correctly.
You should upgrade or use an alternative browser.
You should upgrade or use an alternative browser.

Pathfinder I
Nah. None of the usual UCAs do unless you get the GMPP or Baja long travel kits which are crazy expensive.Nice. Do they add much width, if any?
I'm just looking for a cheap low maintanence UCA that fixes the ball joint angle and won't make a bunch of noise. :)

Contributor III
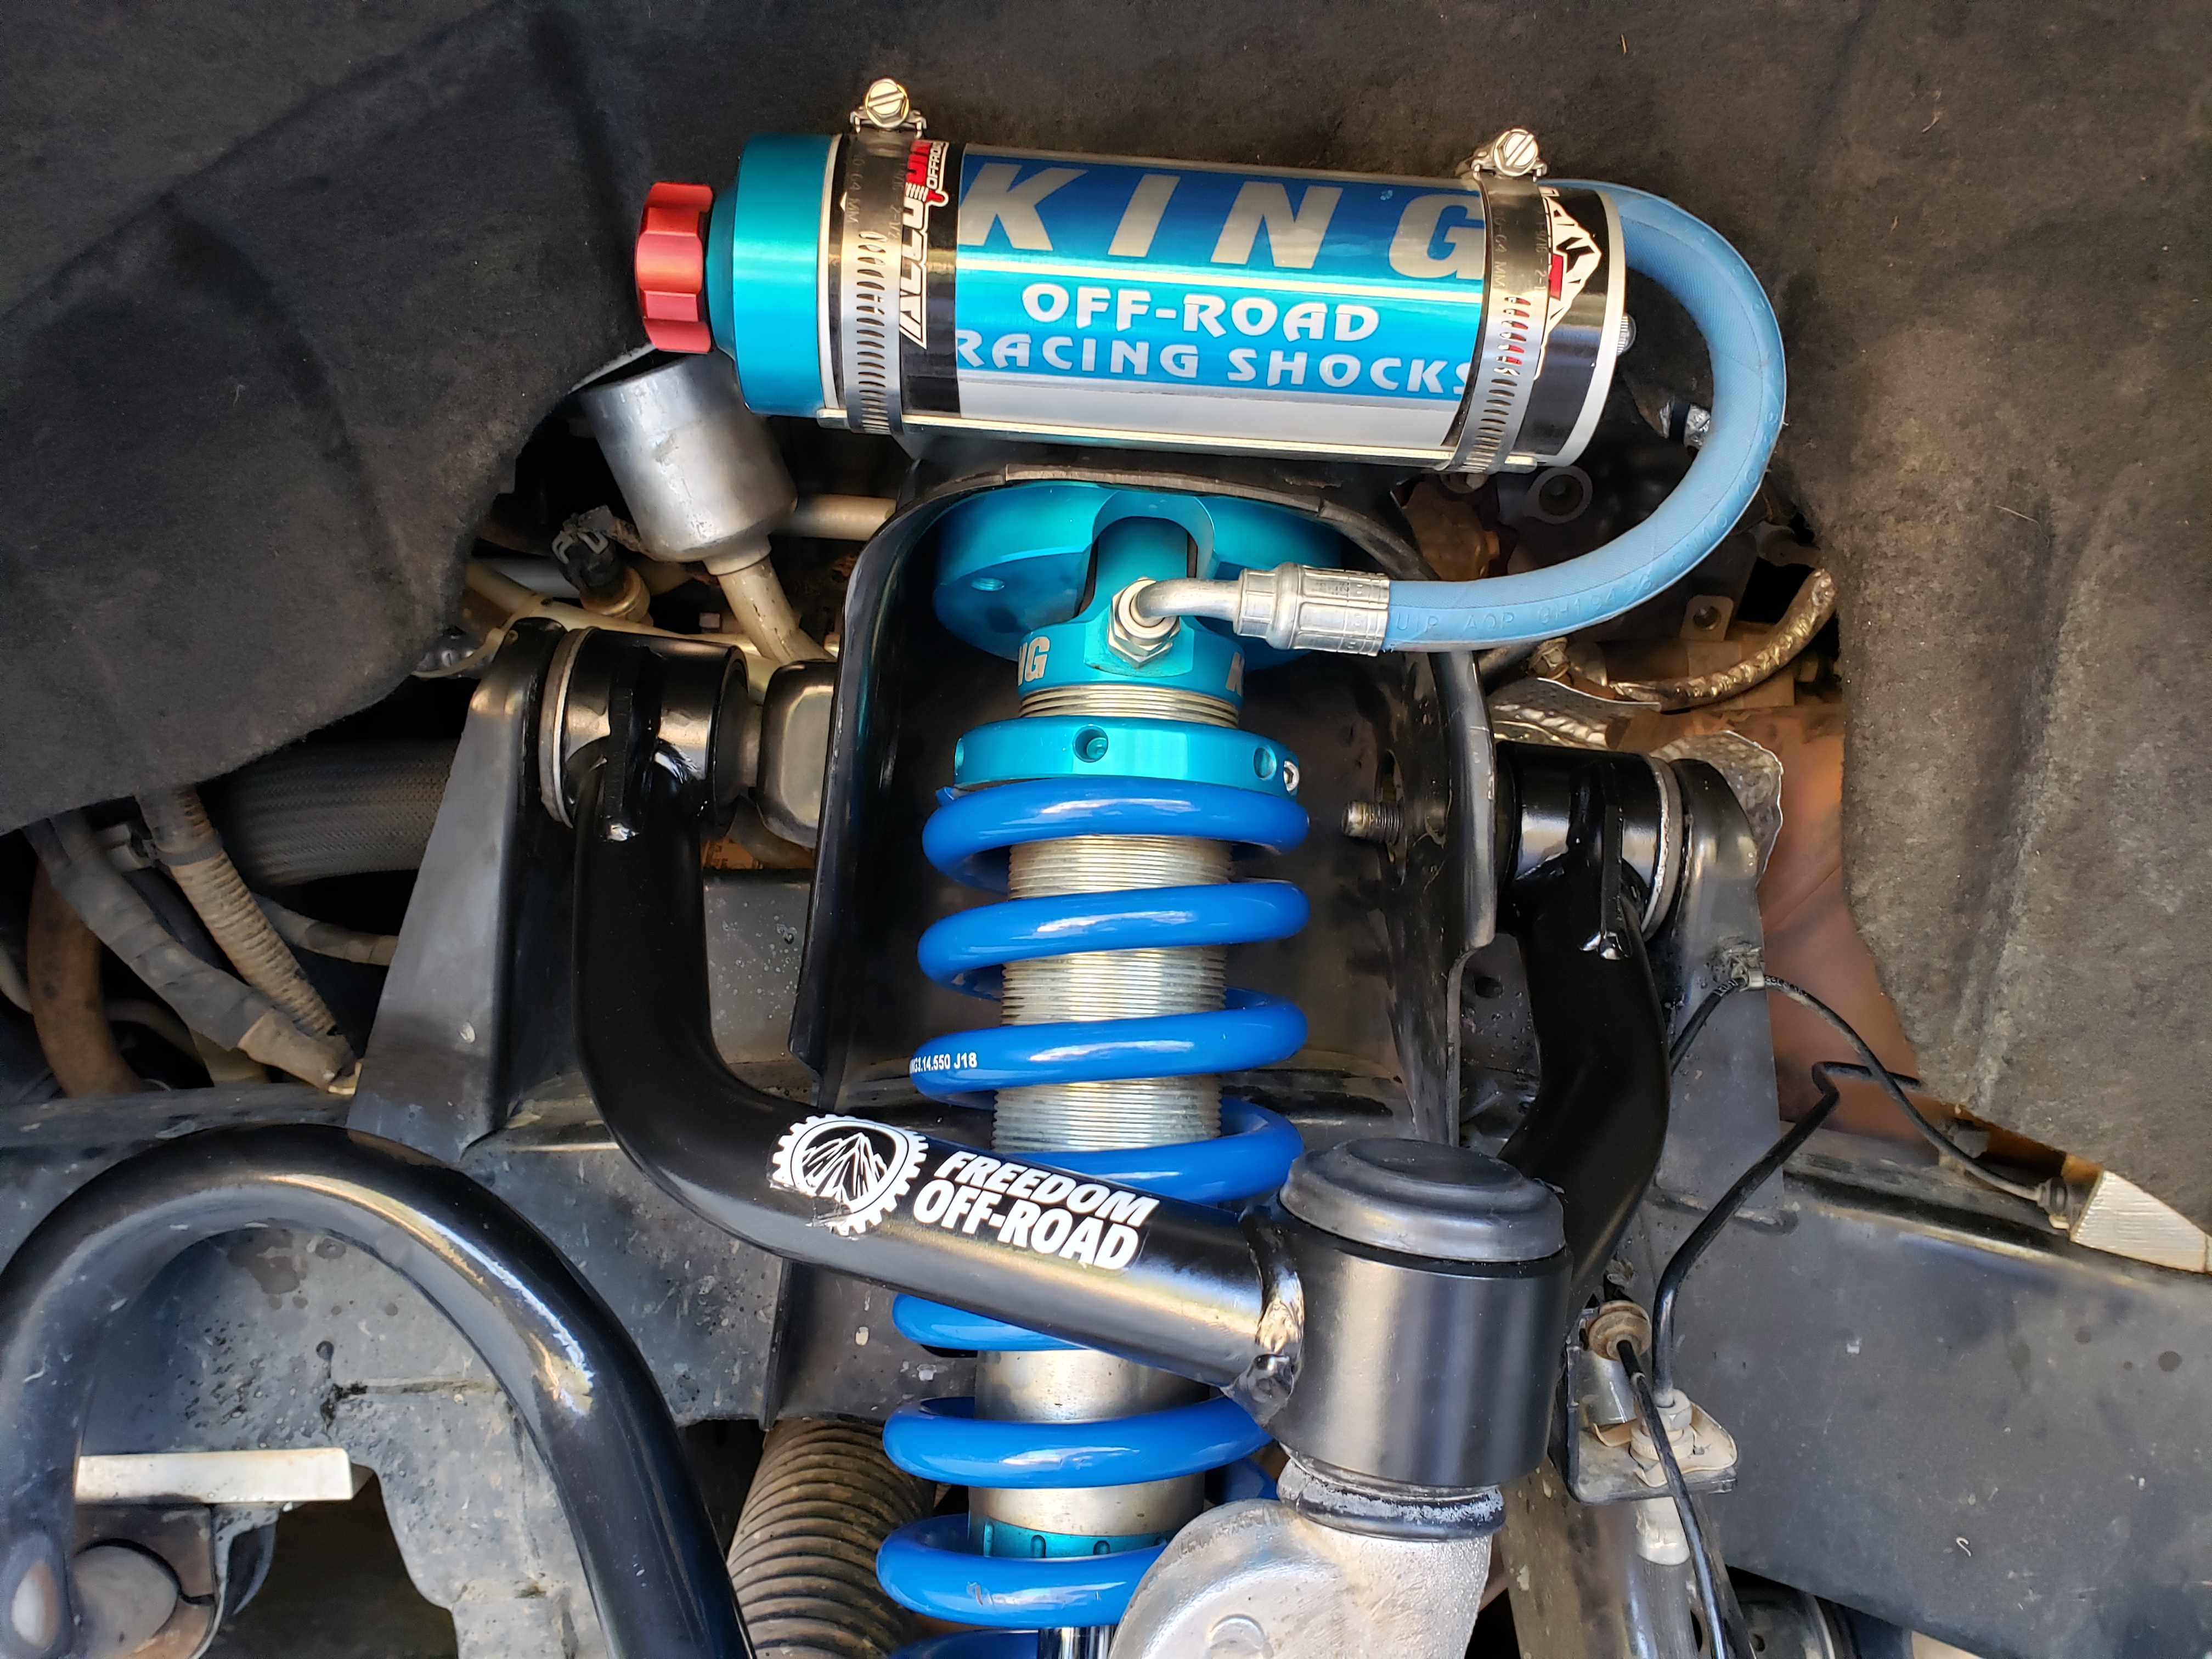
If you need sandbags let me know! Ill be out that way in a month and bringing a whole bunch with me hahahaI talked with Accutune regarding my lack of droop (coilover extension) and after a bunch of measurements it looks like I need to reduce spring rate from 550lbs to 450lbs. Even with "no preload" I am only getting about 1" of droop instead of the 2"-3" I should be getting. The truck is simply lifted too high and I can't lower it any further with these springs. That would also explain my clunk and harsh shock extension.
I'm going to play around with weight up front by adding 50lb sand bags and see what that does for shock extension numbers before I order new springs. I like the idea of the softest spring I can get away with while still achieving 2" of lift. Still, 450lb springs sounds crazy compared to what Tacomas use when they have a bumper, winch, sliders etc. Those guys need 650lb+ springs.
So I might be doing my Death Valley OverlandBound trip with a bunch of sandbags stuffed in various places up front. LOL
Pathfinder I
Lmao! I have 2 more but can't fit them anywhere else up front. I even though about sticking one above the 1st skid plate but I need the bag to be something that won't melt against the radiator base. lIf you need sandbags let me know! Ill be out that way in a month and bringing a whole bunch with me hahaha
Ryan Rupcich showed us how durable the factory skids, rock sliders and driveshaft are NOT! lol
@589FAB has some solutions for this guy's damage. :)
interesting to see a truck on the rubicon sporting BFG Baja TAs.. not the tire at all I'd expect to see there.

Member III
I'm curious to hear how those UCA's hold up Justin... I've got a lot of music projects going but I'm going to try to dive into some of our truck projects here again in a bit. I started cutting steel for the coilover mounts for our sierra and UCA's are on the list to get as well.
Pathfinder I
So far so good on the UCAs. I ran them pretty hard in Death Valley last weekend. Lots of bouncing around at higher speeds on rutted and rocky trails through Goler Wash, Mengel etc.I'm curious to hear how those UCA's hold up Justin... I've got a lot of music projects going but I'm going to try to dive into some of our truck projects here again in a bit. I started cutting steel for the coilover mounts for our sierra and UCA's are on the list to get as well.
Pathfinder I
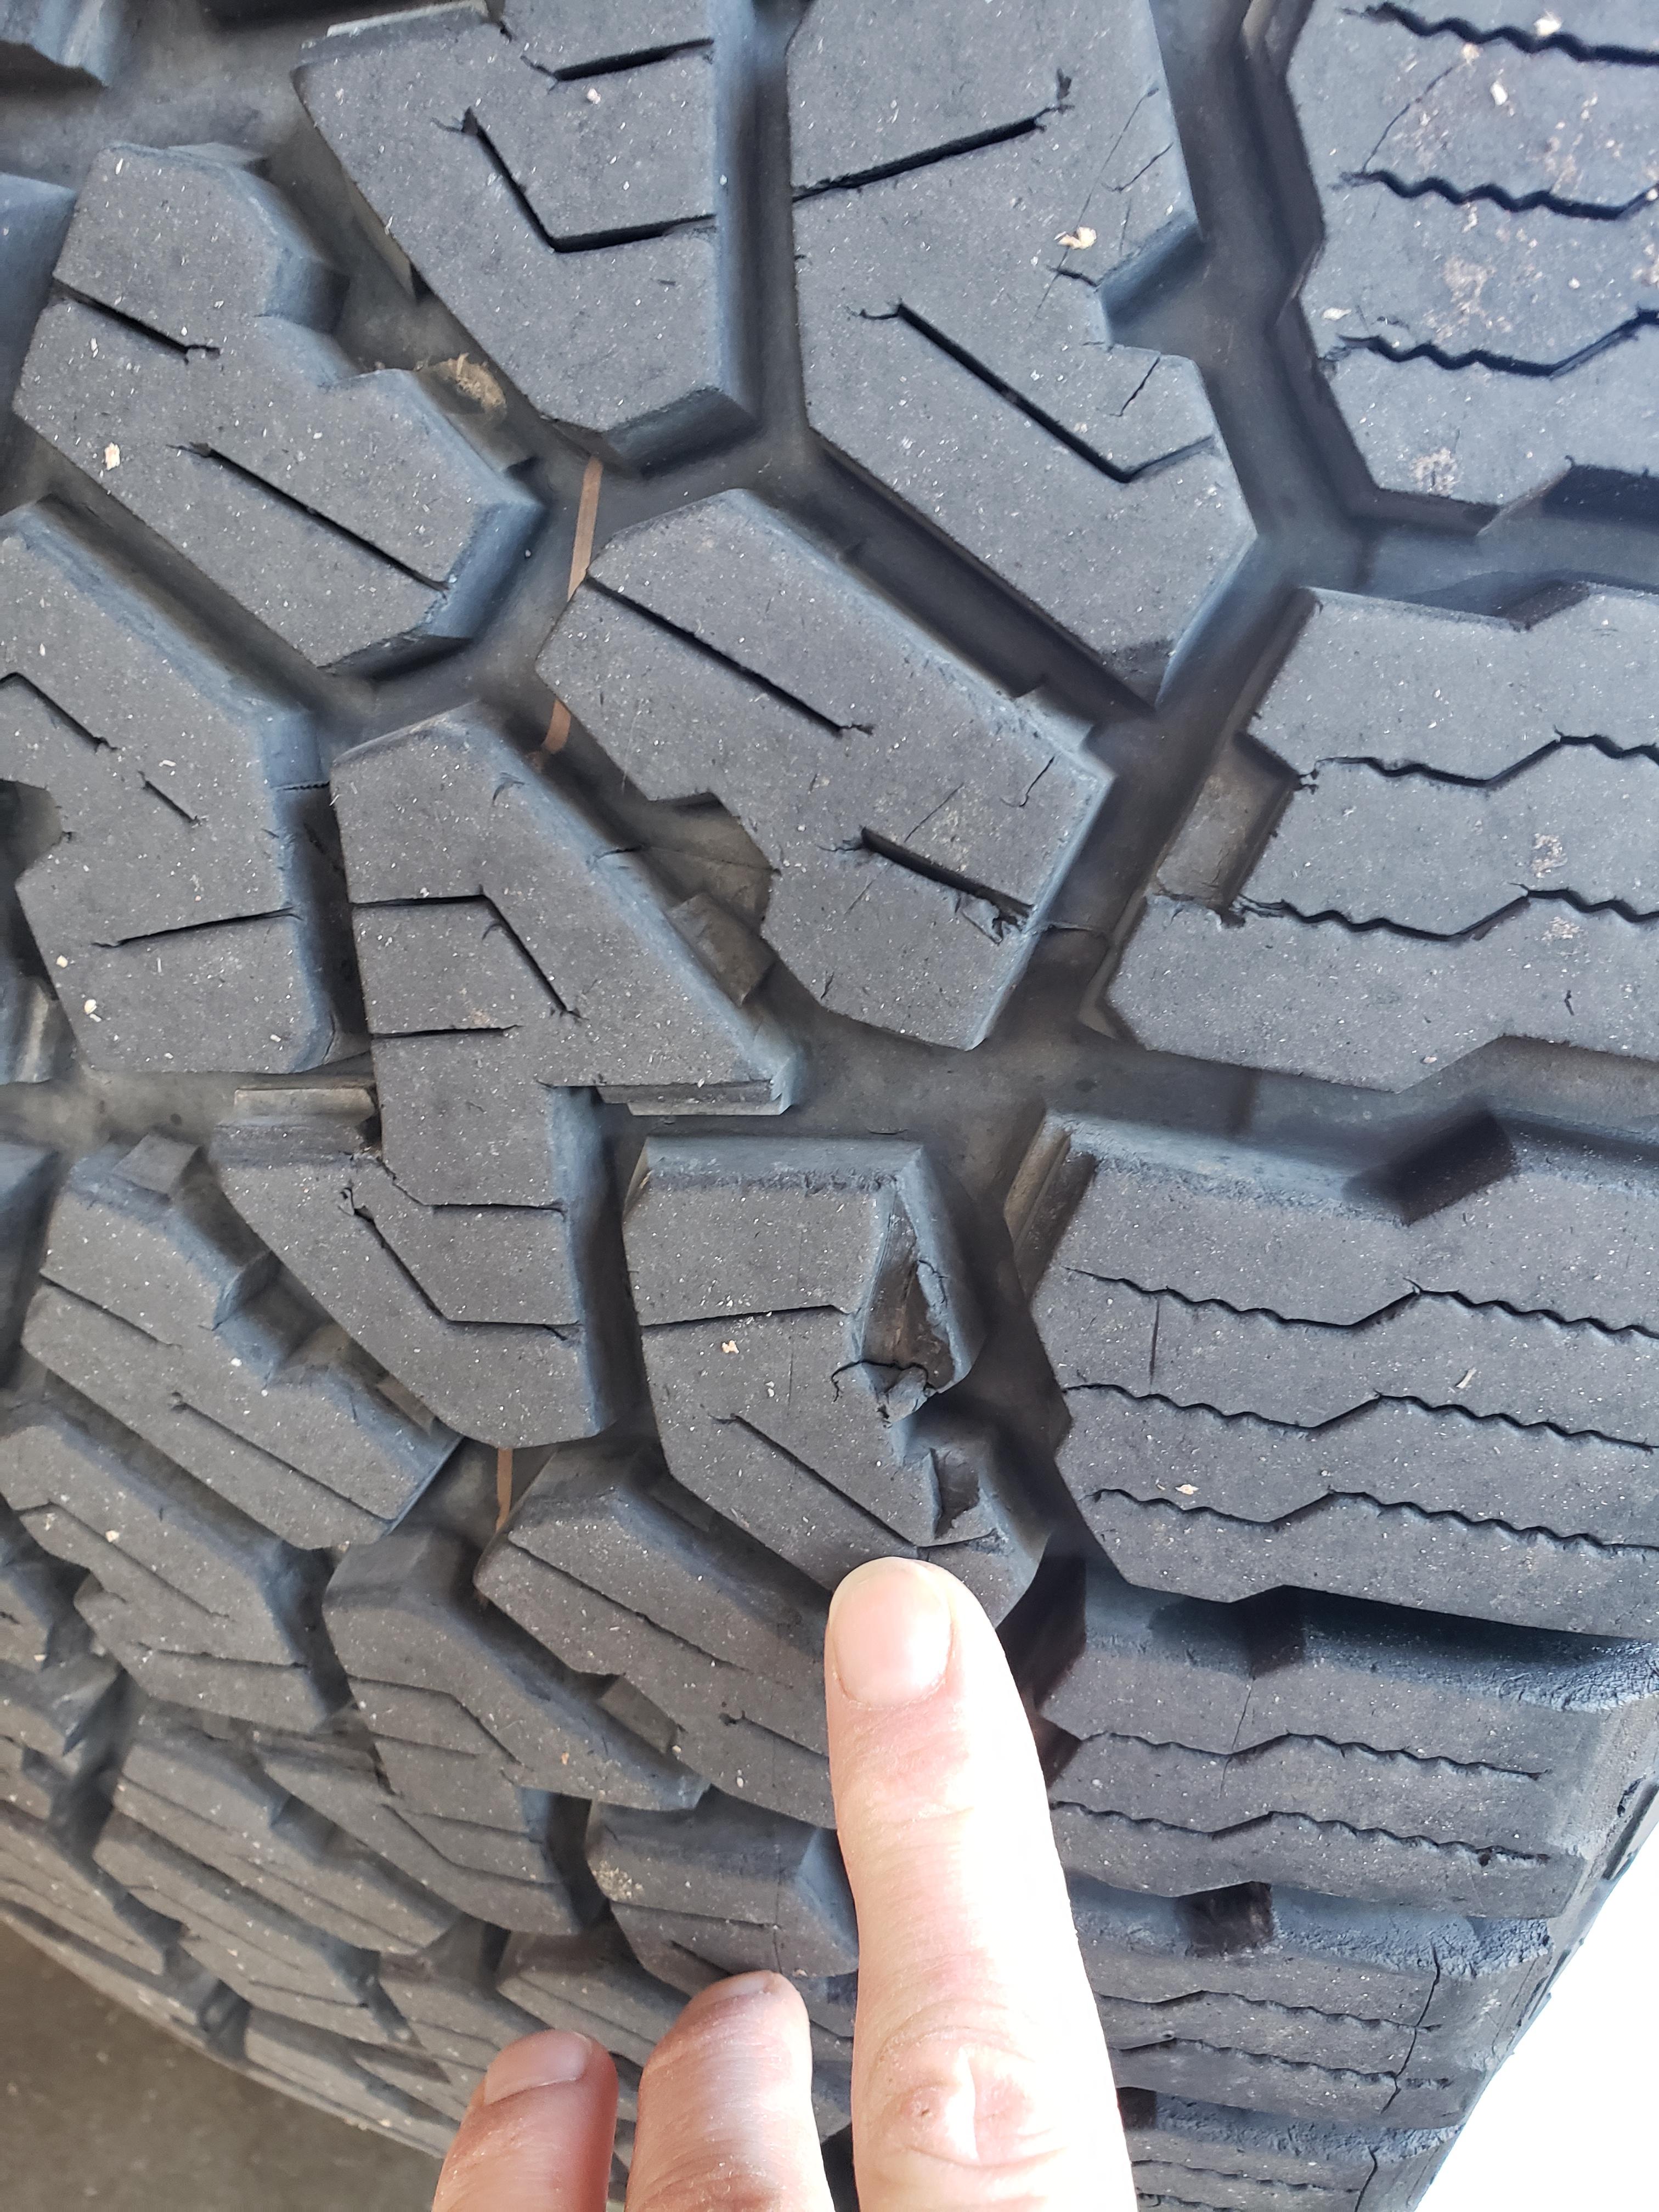
Starting to see a little chunking and lots of thin slices in the tread of my Wildpeaks. I'm not sure how many miles I have on them but likely under 10k and they see a lot of trail abuse. These small slices will most likely lead to chunking. That makes me suspect I'll have to swap them out long before the tread wears down normally.
Pathfinder I
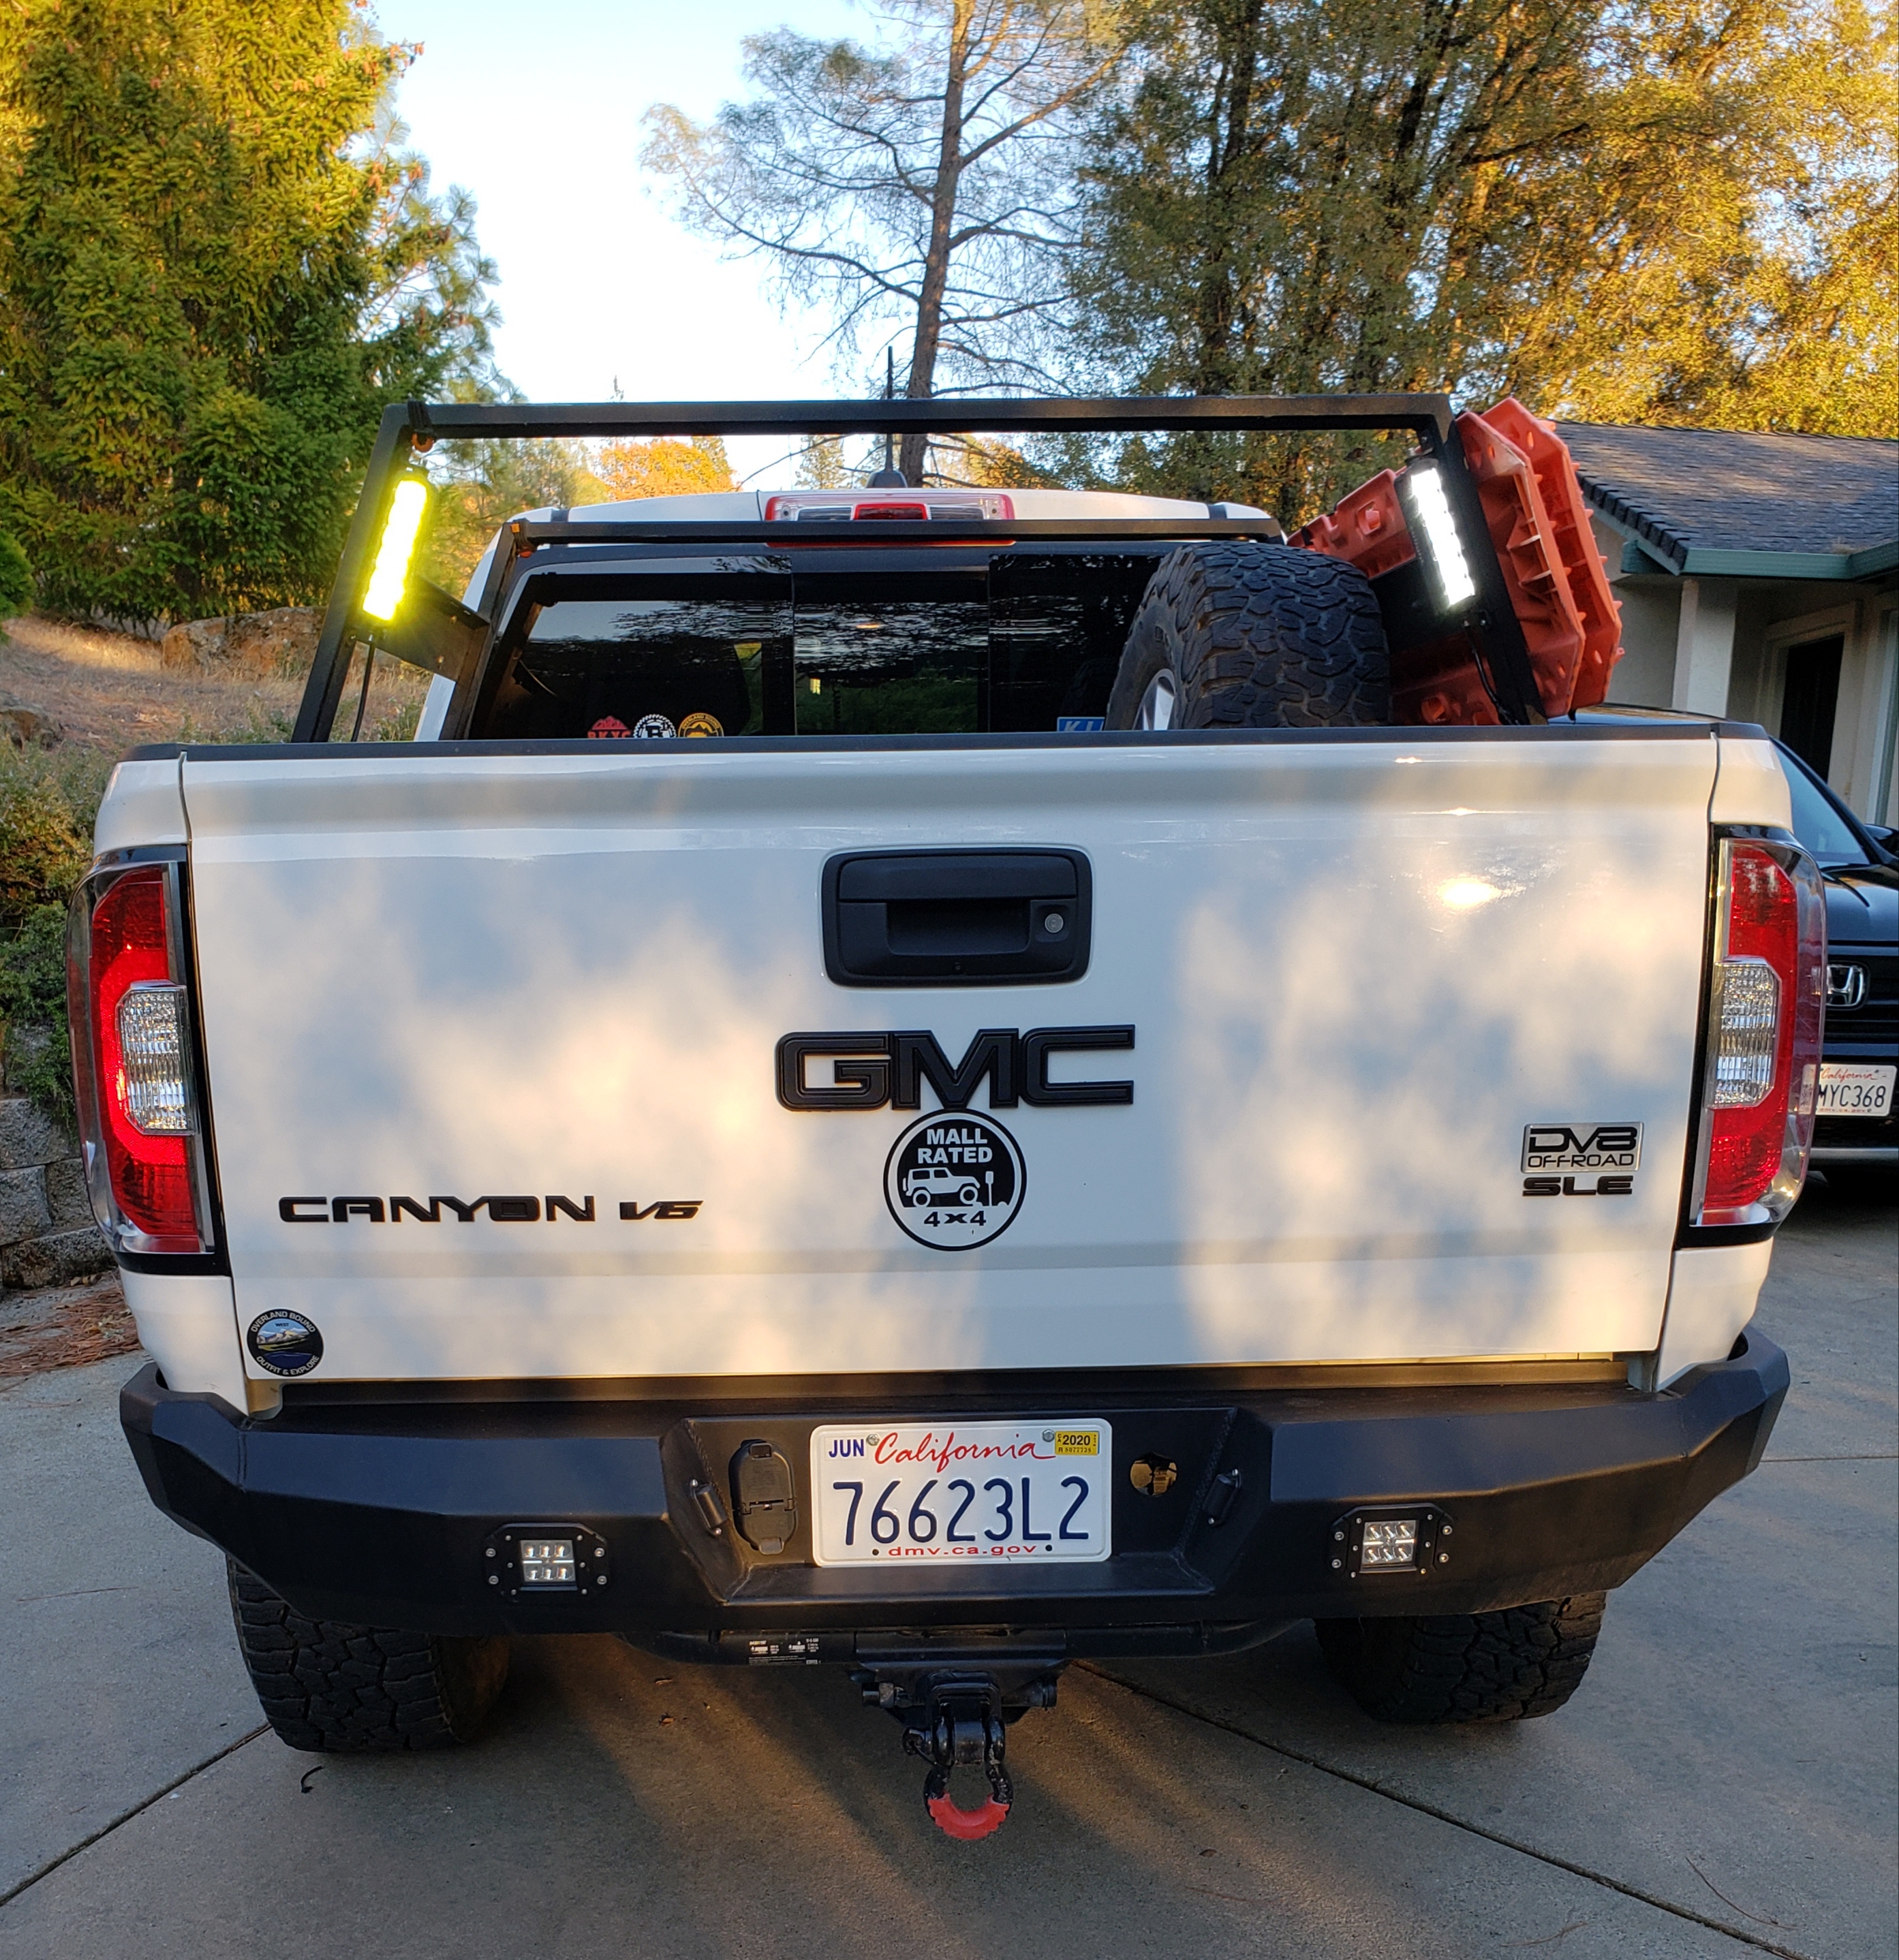
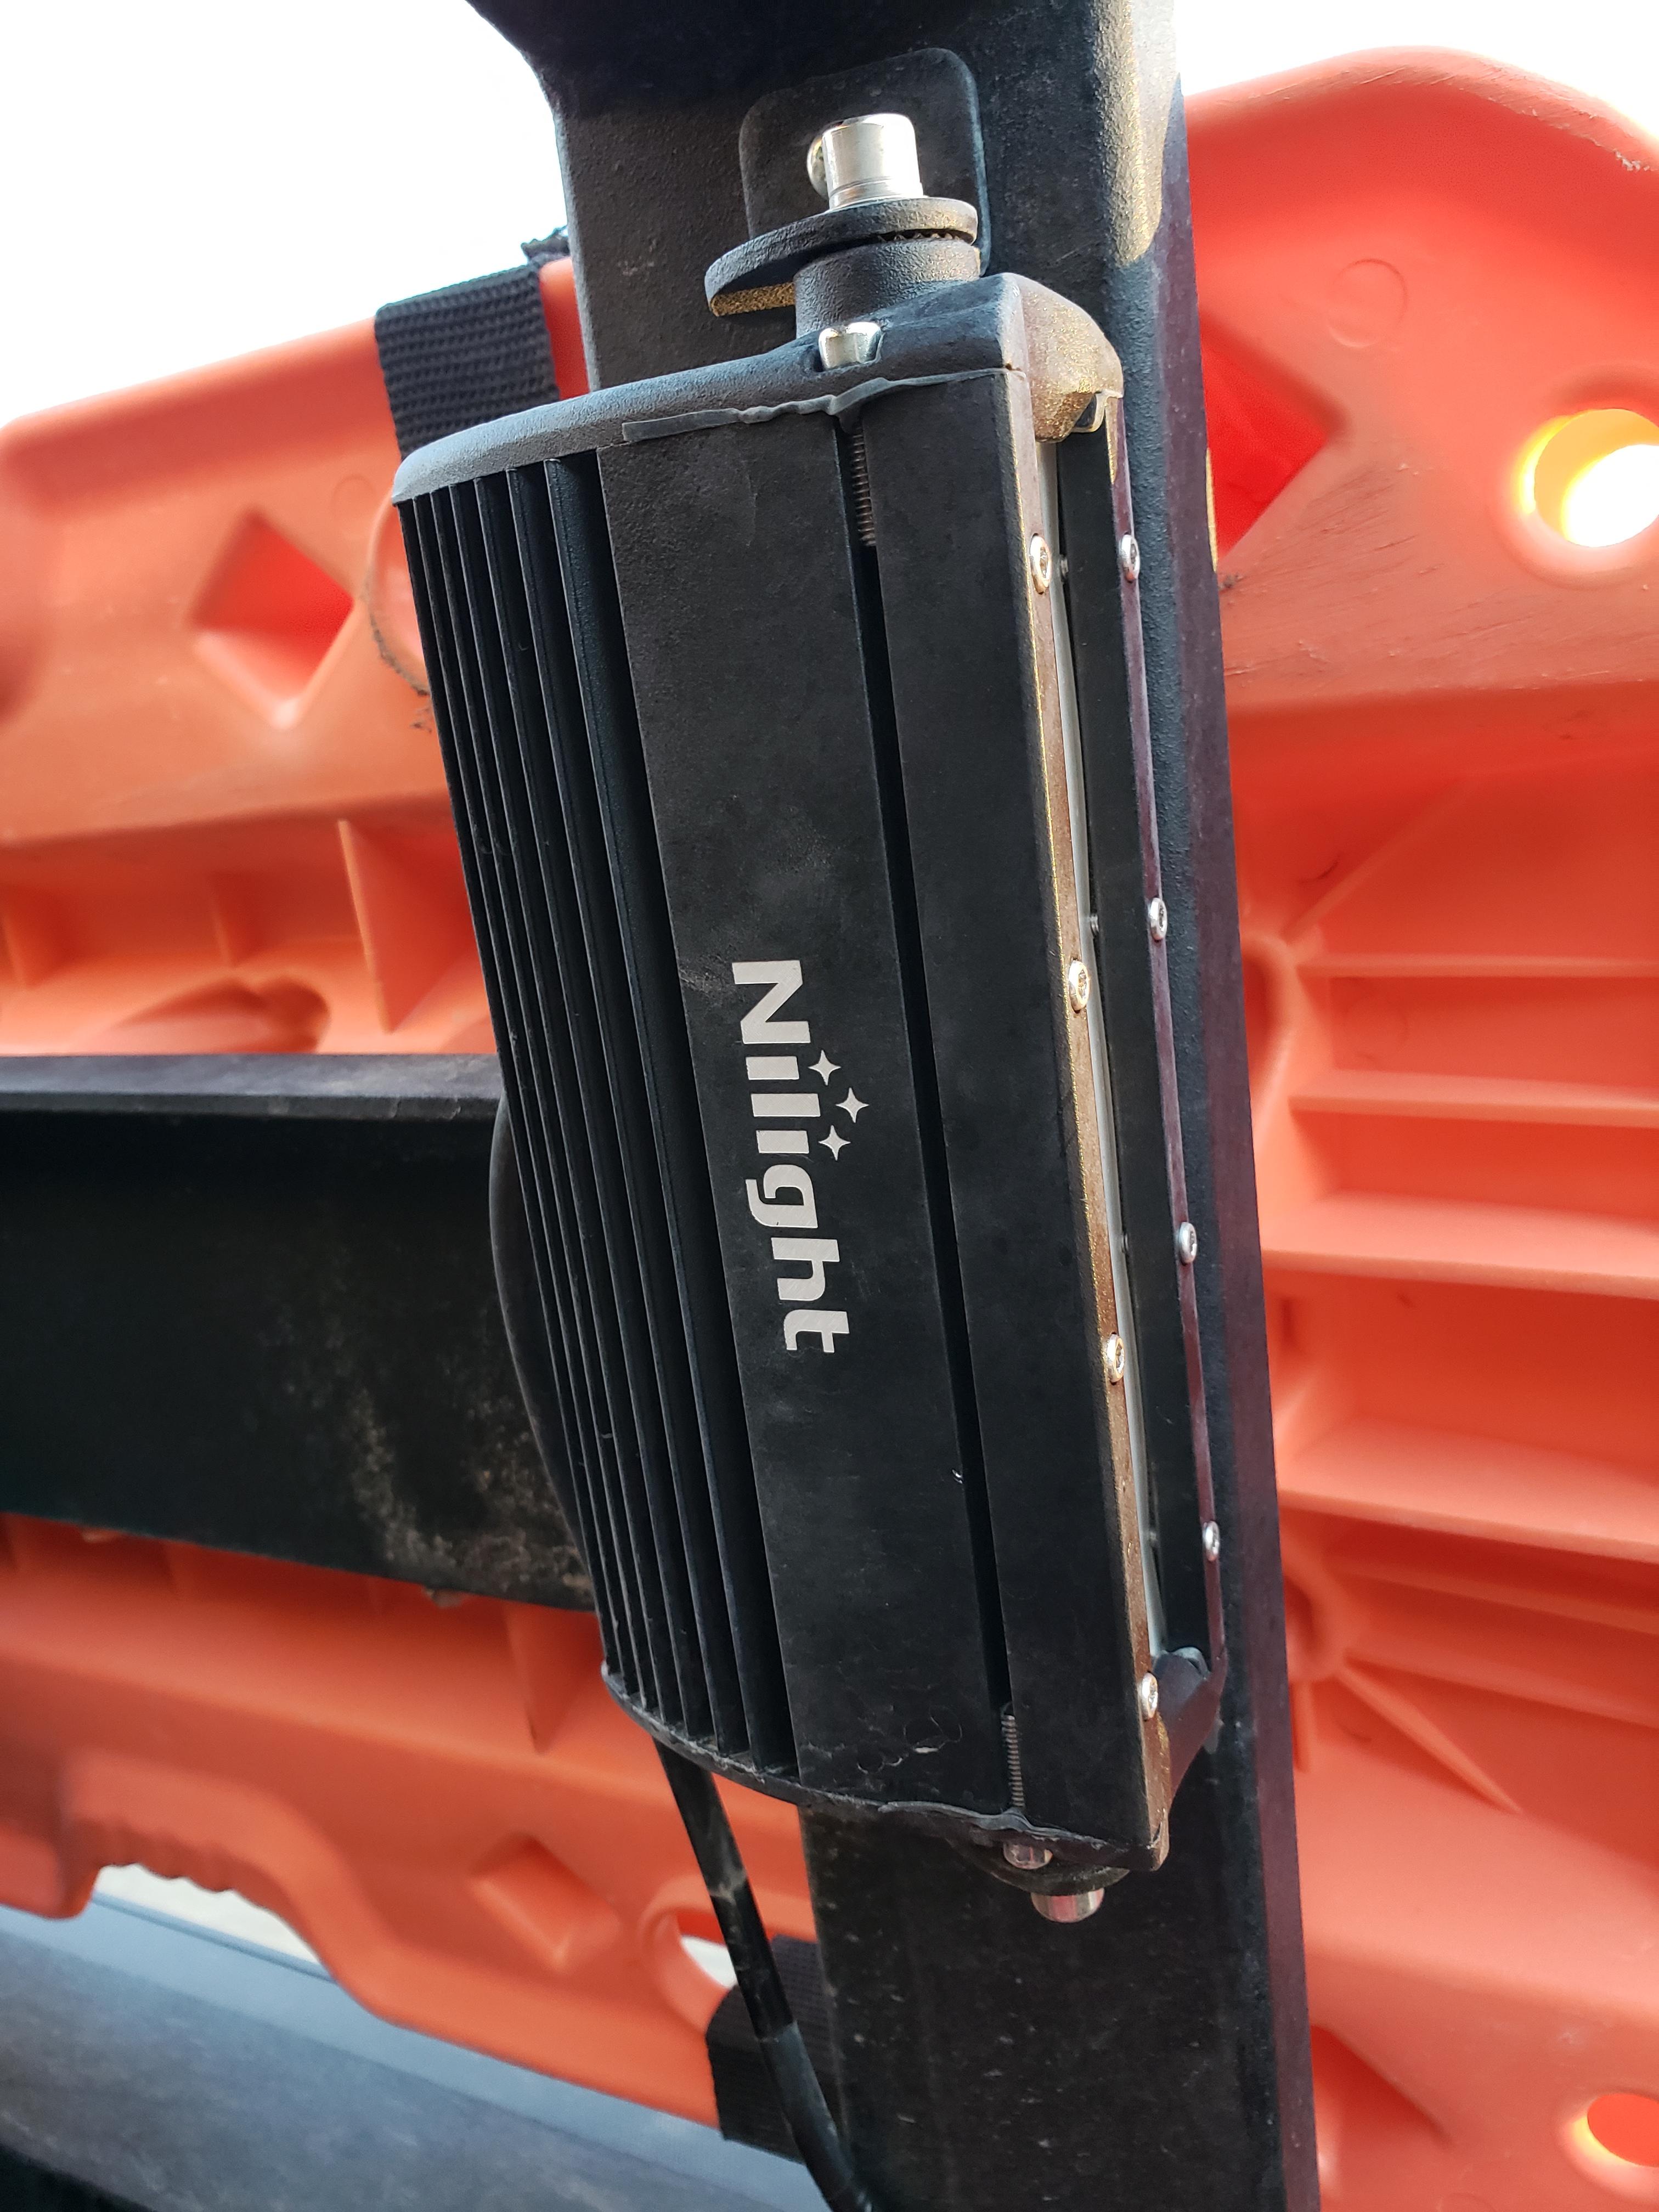
I finished wiring up my chase lights. I originally intended to only use 1 light as a chase light and one as a camp light but after 5 days in the middle of a caravan in dusty Death Valley I decided I need both lights set up for chase. I used two 7" Nilight bars and placed amber tint over the lens of one bar before the DV trip. I took the light apart to put the film on and I confirmed these lights are trash. The rubber gaskets are squished out of place and the main plate screws just screw onto the top of the plastic lens, not into or through. The waterproofing is very questionable. Granted, I already suspected junk and they will work fine for my needs and at $16/pair I won't be upset when they fail. :)
I need to add film to the passenger side light until I can replace the units with something nicer that already has an amber lens. The film looks hokey when lit up in comparison. But for a broke bloke this will work for now. I placed them on the sides of the rack instead of under the top bar because I need that space for mountain bikes. Placed on the side bars they don't take up usable space.
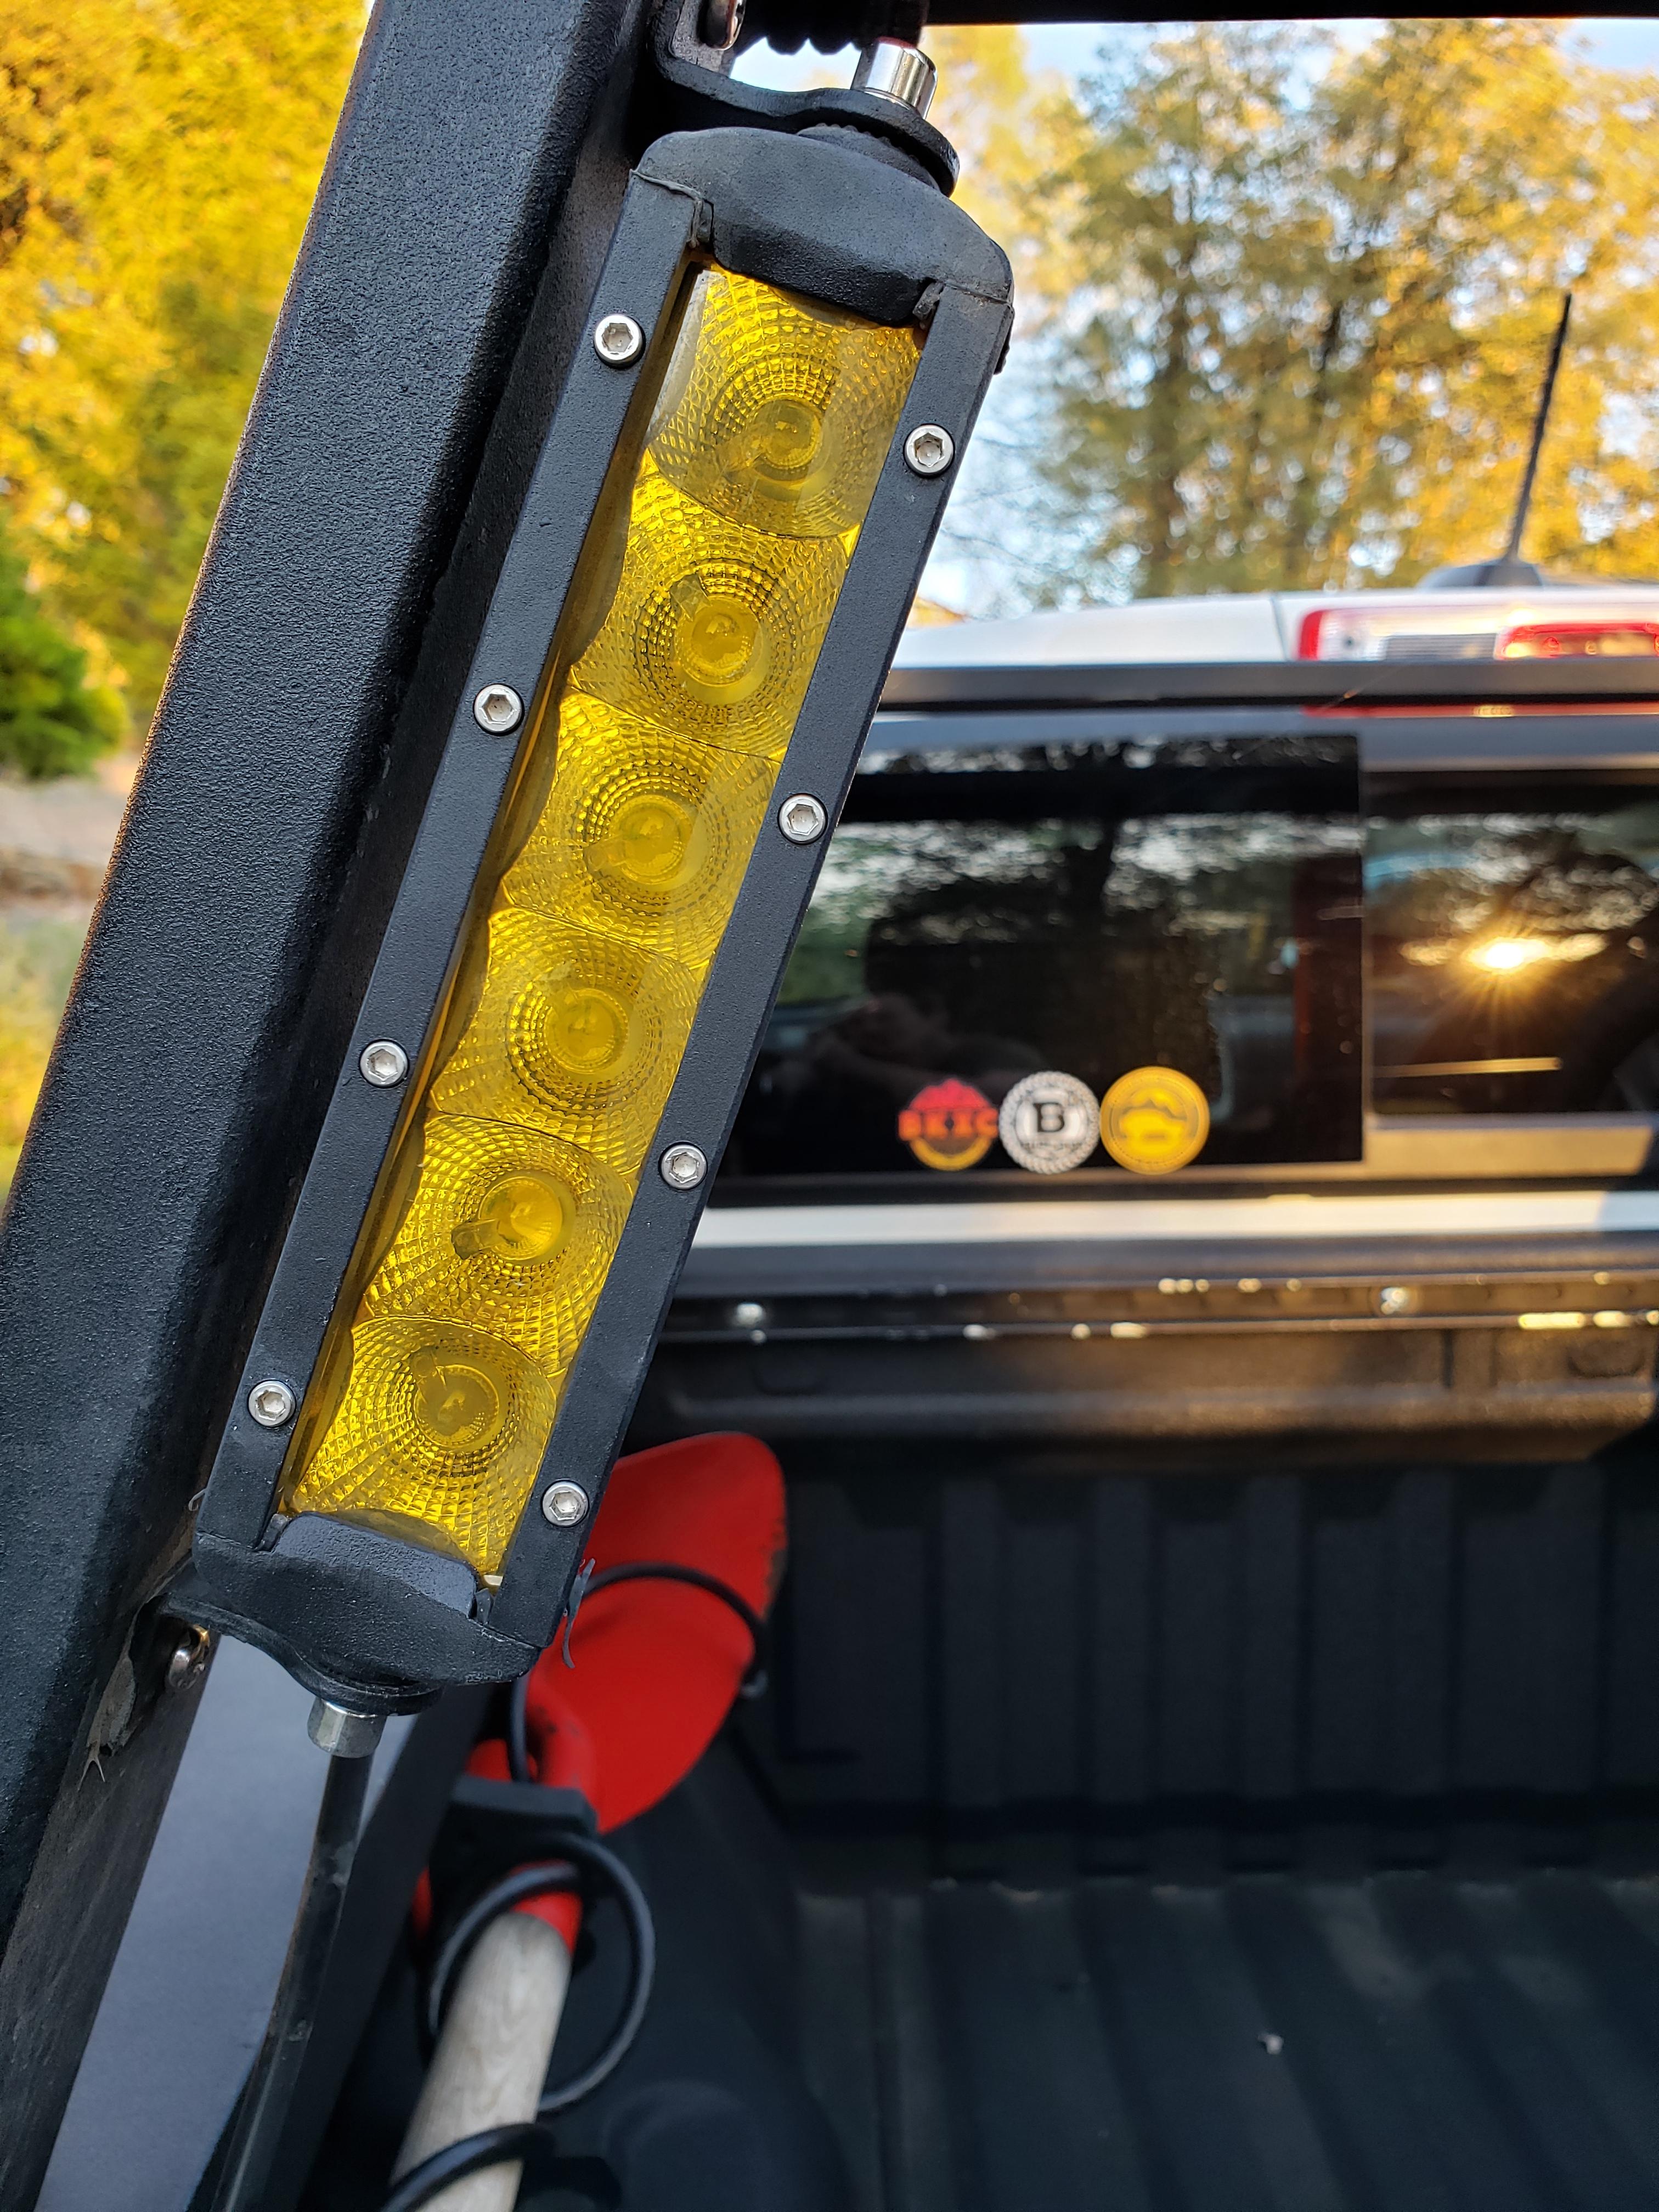
I need to add film to the passenger side light until I can replace the units with something nicer that already has an amber lens. The film looks hokey when lit up in comparison. But for a broke bloke this will work for now. I placed them on the sides of the rack instead of under the top bar because I need that space for mountain bikes. Placed on the side bars they don't take up usable space.
Pathfinder I
I finally "fabbed" up a fix for the lower mount on my DV8 steel bumper. The body lift caused the bolt holes to not line up with the frame. It's a pretty simple fix but I've been waiting on a friend to do some welding for me. I broke down and bought a piece of 13/16"x3"x25" flat steel to bridge the gap between the bumper mount and the frame. I drilled 6 holes and bolted it up. I'm pretty stoked the bumper held up to some series winching despite not being fully bolted in up until now. :)
The holes don't line up. :)

With the plate bolted in place.

With the skid back in place.
The holes don't line up. :)
With the plate bolted in place.
With the skid back in place.
Pathfinder I
I changed the rear diff fluid today. I assumed it would look terrible after reading some of the reports from others who have done it with even less miles. At 37k it didn't look too bad. The first second worth of fluid pouring out looked darkish but it quickly turned a dull yellowish color. The drain plug had a thin film of metallic sludge.
I had to use a Dremel to clear some metal from around the drain plug so I could remove it.

Drain plug. You can see the darkest fluid still in the plug for the oil container.

Most of the fluid looked decent.

I had to use a Dremel to clear some metal from around the drain plug so I could remove it.
Drain plug. You can see the darkest fluid still in the plug for the oil container.
Most of the fluid looked decent.
Pathfinder I
I've been brainstorming new lighting upgrades and all of the name brand stuff is just out of my budget range. I thought I had settled on the KC Apollo 6 halogen spots but even at $140 those come with plastic housings and mixed reviews. So I figured I'd give the Harbor Freight Long-Range Off-Road 100w halogens a shot. Worst case I'd be out $25.
The are oblong in shape but similar to most 6" rounds. They feature a plastic housing with rock shield but the lens sounds like glass when I tap on it. They run a 100w H3 halogen bulb which can be swapped out for a 130w if you need more light. They mounted up easily after I drilled a couple of 3/8ths holes in the top of my DV8 steel bumper. The only issue I'm having is aiming them. I think my bumper has a very slight tilt to it or something because the adjustments on the lights fall into a slot either too high or too low. The mounting base is made of plastic so I can always shave some down to get the angle right if I can't get it adjusted normally.
The beams are definitely spots and they reach quite far. The intensity at long distance is better than my high beams although not quite as spread. For the price I'm very happy with the output. My plan is to supplement the overall light spread with a 22" single row slim LED bar mounted in the DV8 bumper. Even the $30 Amazon units will provide enough light after a little added silicone for extra water protection.

I wanted more of a yellow light for long distance and long drives so halogen made sense. It's less fatiguing and puts out enough heat to melt ice on the lens.

Just the Harbor Freight lights

The are oblong in shape but similar to most 6" rounds. They feature a plastic housing with rock shield but the lens sounds like glass when I tap on it. They run a 100w H3 halogen bulb which can be swapped out for a 130w if you need more light. They mounted up easily after I drilled a couple of 3/8ths holes in the top of my DV8 steel bumper. The only issue I'm having is aiming them. I think my bumper has a very slight tilt to it or something because the adjustments on the lights fall into a slot either too high or too low. The mounting base is made of plastic so I can always shave some down to get the angle right if I can't get it adjusted normally.
The beams are definitely spots and they reach quite far. The intensity at long distance is better than my high beams although not quite as spread. For the price I'm very happy with the output. My plan is to supplement the overall light spread with a 22" single row slim LED bar mounted in the DV8 bumper. Even the $30 Amazon units will provide enough light after a little added silicone for extra water protection.
I wanted more of a yellow light for long distance and long drives so halogen made sense. It's less fatiguing and puts out enough heat to melt ice on the lens.
Just the Harbor Freight lights
Member III
So far so good on the UCAs. I ran them pretty hard in Death Valley last weekend. Lots of bouncing around at higher speeds on rutted and rocky trails through Goler Wash, Mengel etc.
Awesome, good to hear. I'll bug you offline to see how they're doing as well...
Pathfinder I
I jacked up the rear end today to check on my rear shocks. They have around 30k on them and they aren't exactly treated kindly..... I also wanted to measure the travel distance to determine if the Icon 2.0s were still what I need in terms of extended and collapsed length given my approx. 3" lift. The shocks are still firm with good extension time and hard to compress by hand.
Here's what I came up with with the wheels removed. The bottom of the shock disconnected and the axle at full droop.
Shock mounts eye to eye
Driver: 24.75"
Passenger: 24"
Bumpstop to frame
Driver: 8"
Passenger: 8"
Top of leaf pack to frame (ignoring the factory bumpstop)
Driver: 11"
Passenger: 11"
Based on this the optimum lengths for my truck would be around 25.5" to 26" extended and 16" collapsed assuming I kept the factory bumpstops.
I forget what the measurements for the Icons are but at full drop I had between 1/2" and 1" of shock hanging below the lower mount at full droop. So I'm very close to maxing out but at least on the passenger side I have some breathing room. :)
Passenger side

Driver side


Here's what I came up with with the wheels removed. The bottom of the shock disconnected and the axle at full droop.
Shock mounts eye to eye
Driver: 24.75"
Passenger: 24"
Bumpstop to frame
Driver: 8"
Passenger: 8"
Top of leaf pack to frame (ignoring the factory bumpstop)
Driver: 11"
Passenger: 11"
Based on this the optimum lengths for my truck would be around 25.5" to 26" extended and 16" collapsed assuming I kept the factory bumpstops.
I forget what the measurements for the Icons are but at full drop I had between 1/2" and 1" of shock hanging below the lower mount at full droop. So I'm very close to maxing out but at least on the passenger side I have some breathing room. :)
Passenger side
Driver side
Last edited:
Member III
Pathfinder I
I bent the brake line bracket down when I first did the lift. You can see the brake lines and the bracket in the left side of the last photo. The wheel speed sensor lines were also adjusted to provide more slack. So far so good!Thats not looking too bad at all, . Our sierra got some rear blocks to take the negative rake out, and well, We need another 4" of droop on the shocks, so this is doing really good! How's the brakeline and all that stuff looking as well?
Have you decided what shocks you're going with yet?
madcratebuilder
Rank V
Pathfinder I
You may want to look into Timbren Off Road bump stops. They have made a noticeable improvement on the handling of my ZR2. I was able to remove the front sway bar with no change in street driving, bumps are much smoother both on and off road and I'm getting a bit more travel out of the front end.
I'm about to order OME rear springs and install the 589 shock relocation kit.
Timbren Bump Stops - Active Off-Road Progressive Bumpstops
Timbren Active Off-Road Bumpstops are designed to allow for proper deflection of the suspension. Provides a damping response when the suspension bottoms out. Shop now.
timbren.com
I'm about to order OME rear springs and install the 589 shock relocation kit.
Pathfinder I
Everyone seems to love the Timbrens. I can't justify the cost until I get the rear finished which would be exactly what you are doing. With my front end being a little too tall the compression side of things feels amazing even with the stiffer springs. Once I drop the front a little and trade some compression for droop I'll likely need to look a little harder at the Timbrens. :)You may want to look into Timbren Off Road bump stops. They have made a noticeable improvement on the handling of my ZR2. I was able to remove the front sway bar with no change in street driving, bumps are much smoother both on and off road and I'm getting a bit more travel out of the front end.
Timbren Bump Stops - Active Off-Road Progressive Bumpstops
Timbren Active Off-Road Bumpstops are designed to allow for proper deflection of the suspension. Provides a damping response when the suspension bottoms out. Shop now.timbren.com
I'm about to order OME rear springs and install the 589 shock relocation kit.
madcratebuilder
Rank V
Pathfinder I
I couldn't justify the cost of hyd bumps so after reading 1 review from a ZR2 owner I went for it. They are quiet, smooth and at $420 for both ends very affordable. I have the 589fab rear shock relocation kit ordered and about ready to order rear springs. It would be nice if the gmpp long travel parts didn't have such a crazy price. If I hit the lotto I'm buying a taco box, 250-1 ratio!Everyone seems to love the Timbrens. I can't justify the cost until I get the rear finished which would be exactly what you are doing. With my front end being a little too tall the compression side of things feels amazing even with the stiffer springs. Once I drop the front a little and trade some compression for droop I'll likely need to look a little harder at the Timbrens. :)
Pathfinder I
You'd be my hero.I couldn't justify the cost of hyd bumps so after reading 1 review from a ZR2 owner I went for it. They are quiet, smooth and at $420 for both ends very affordable. I have the 589fab rear shock relocation kit ordered and about ready to order rear springs. It would be nice if the gmpp long travel parts didn't have such a crazy price. If I hit the lotto I'm buying a taco box, 250-1 ratio!

