Advocate I
Eastern Oregon trip part 2- Vehicle performance under max load-
The internet of things likes to say get the v8 WJ for the power. Especially if you load up or tow. I agree, but not for the standard logic that the motor is more powerful. It is all in the transmission.
I was near max weight, and at highway speeds the 5-6 speed transmission with the double overdrive and half gear?? programing worked wonders. Only rarely did I have to kick back down to 1:1 drive, the slight downshifting of the overdrives usually was enough to keep 60-70 MPH on the freeway grades. The 6 cylinder gets a 3+OD trans, and if OD doesn't hold it you are in 1:1, or worse yet 2nd gear (my Tahoe suffers the same, my old 5 speed Silverado with the little 4.8 would walk the 5.3 Liter Tahoe all day under load or in elevation). I was following a 2 door Jeep with that set up and he was miserable trying to not drop off to 50 at the top of each grade. The only time I hit full throttle was on I-80 trying to keep 70 MPH+ on the steepest. And we also hit near 10,000 feet elevation in Oregon, and I never felt I lacked the grunt to do whatever speed I wanted to do. The 4.7 also has a 4 cylinder power curve to me, but it likes to rev. Get the rev's up and she goes like hell.
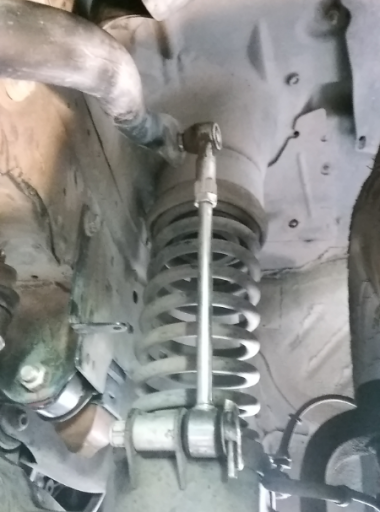
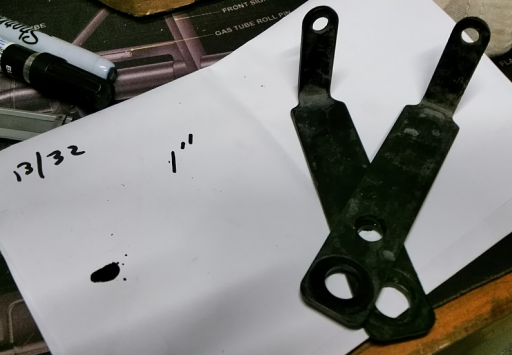
Now trailering- The little 1/4 ton trailer is a perfect fit for the WJ. With the 1" sway bar on the rear of the WJ it tracked beautifully. No pushing or pulling the rear end around. I had the weight just forward of the trailer wheels, favoring tongue weight and the pintle hitch rarely made a sound. This trailer pulled incredibly well, other than sometimes feeling like you left the e-brake on I would forget it is there. I could have not asked for a better handling setup. Yet, I learned I HATE pulling a trailer, no matter how perfect, off road on trails. Turning around, maneuvering around obstacles, constantly having to pay attention to it was not a joy to me. But on the highway, no problem since it was so easy to tow and handled so perfectly.

Did I mention it pulled so well I would almost forget it is there? On a tight switch back we came to a halt as a buddy was shifting his transfer case. He was having issues and backed up trying to get it to release. I had to suddenly back up to not get hit, and with the trailer already on a tight turn I instantly jack knifed it. Sacrificed the quarter panel. Well, it now is officially a trail rig. At least the window and tail light were undamaged. And yes, I hated pulling the trailer before this happened.

The internet of things likes to say get the v8 WJ for the power. Especially if you load up or tow. I agree, but not for the standard logic that the motor is more powerful. It is all in the transmission.
I was near max weight, and at highway speeds the 5-6 speed transmission with the double overdrive and half gear?? programing worked wonders. Only rarely did I have to kick back down to 1:1 drive, the slight downshifting of the overdrives usually was enough to keep 60-70 MPH on the freeway grades. The 6 cylinder gets a 3+OD trans, and if OD doesn't hold it you are in 1:1, or worse yet 2nd gear (my Tahoe suffers the same, my old 5 speed Silverado with the little 4.8 would walk the 5.3 Liter Tahoe all day under load or in elevation). I was following a 2 door Jeep with that set up and he was miserable trying to not drop off to 50 at the top of each grade. The only time I hit full throttle was on I-80 trying to keep 70 MPH+ on the steepest. And we also hit near 10,000 feet elevation in Oregon, and I never felt I lacked the grunt to do whatever speed I wanted to do. The 4.7 also has a 4 cylinder power curve to me, but it likes to rev. Get the rev's up and she goes like hell.
Now trailering- The little 1/4 ton trailer is a perfect fit for the WJ. With the 1" sway bar on the rear of the WJ it tracked beautifully. No pushing or pulling the rear end around. I had the weight just forward of the trailer wheels, favoring tongue weight and the pintle hitch rarely made a sound. This trailer pulled incredibly well, other than sometimes feeling like you left the e-brake on I would forget it is there. I could have not asked for a better handling setup. Yet, I learned I HATE pulling a trailer, no matter how perfect, off road on trails. Turning around, maneuvering around obstacles, constantly having to pay attention to it was not a joy to me. But on the highway, no problem since it was so easy to tow and handled so perfectly.
Did I mention it pulled so well I would almost forget it is there? On a tight switch back we came to a halt as a buddy was shifting his transfer case. He was having issues and backed up trying to get it to release. I had to suddenly back up to not get hit, and with the trailer already on a tight turn I instantly jack knifed it. Sacrificed the quarter panel. Well, it now is officially a trail rig. At least the window and tail light were undamaged. And yes, I hated pulling the trailer before this happened.