Enthusiast III
More updates on the '01. Since purchase I've had a HECK of a high frequency vibration and loud noise at highway speed. It would mainly surface at a specific speed versus consistently, initially I chalked it up to tire noise. After more investigation and noticing the noise completely disappeared when turning at highway speeds, I figured front hubs would be a good place to start!
After the suspension work, now came some more front end refresh. Here's the process of tearing down left and right front. New hubs, rotors, pads and CV axles were installed.


Video of the old LF hub, horrible shape! New video by K S
LF torn completely down. CV axle out. These had a couple spots of torn boots and I figured as worn out as other suspension/driveline components were, how good of shape could these be in. RockAuto had these cheap enough I was surprised and figured some new ones would make for some good prevention and peace of mind. I learned the hard way on these axle seals the correct tools are WELL worth their investment, even at $15 the seal puller made quick work of a job I was trying to do with needle-nose and a screwdriver. The press kit was a Harbor Freight special for about $40, and after trying to install the new seal made that job super quick.


LF hub completed with some upgraded brakes, first test drive to see if this resolved my noise. I can't explain how improved the ride is, it was a 'wow, I didn't realize this thing could ride this nice' moment.


Some shots of the RF process, same items were replaced. Wouldn't ya know, this side was done in a couple hours! The LF was my learning process and by the time I was interrupted waiting on parts/tools, took a few weeks.


Next issue cropped up on a drive home. My center diff light started flashing and I couldn't for the life of me figure out why. It hadn't been, then started during the drive. I finally realized anytime I hit the brakes, it came on. It started flashing which I finally figured out was when my turn signals were on. I stopped at a post office, tried to get back into gear and my park safety solenoid wouldn't release for me to shift, I had to manually move it. Pushed it back with my finger and was able to get home. With more investigation, I realized my brake lights weren't working at home - so that was neat, to realize I drove about 15 minutes with no brake lights. Ultimately I found the brake fuse to be popped, still not entirely sure why... but so far a new fuse as been alright. I'll be going over the trailer harness and other areas of concern that could be causing shorts. It was a pain to track down though. Video I sent to some buddies for some ideas when the issue initially came up: New video by K S

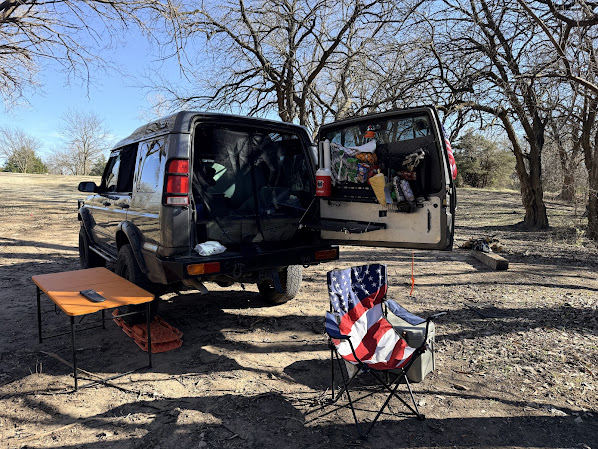
Now for the fun wild stuff... I had purchased an old '01 Blazer from my dad as a DD, while spending time going through the '01 Rover. It ended up having more issues than I wanted to deal with but another '02 Rover came up for a reasonable price. I figured if I'm going to drive 20+ year old vehicles, I may as well drive two of the same that I know how to work on and don't need to research every issue. So, the Rover addiction multiplied. This is an '02 Rover SE (they're dang near twins), which was a single owner California until 2019. It's incredibly clean and will take over as something to keep in good shape, take to shows, etc. So for the Rover fans out there, this one will be maintained as a good example of what these were in their prime. I still very much enjoy the ride quality and comfort 21 years later.

After the suspension work, now came some more front end refresh. Here's the process of tearing down left and right front. New hubs, rotors, pads and CV axles were installed.
Video of the old LF hub, horrible shape! New video by K S
LF torn completely down. CV axle out. These had a couple spots of torn boots and I figured as worn out as other suspension/driveline components were, how good of shape could these be in. RockAuto had these cheap enough I was surprised and figured some new ones would make for some good prevention and peace of mind. I learned the hard way on these axle seals the correct tools are WELL worth their investment, even at $15 the seal puller made quick work of a job I was trying to do with needle-nose and a screwdriver. The press kit was a Harbor Freight special for about $40, and after trying to install the new seal made that job super quick.
LF hub completed with some upgraded brakes, first test drive to see if this resolved my noise. I can't explain how improved the ride is, it was a 'wow, I didn't realize this thing could ride this nice' moment.
Some shots of the RF process, same items were replaced. Wouldn't ya know, this side was done in a couple hours! The LF was my learning process and by the time I was interrupted waiting on parts/tools, took a few weeks.
Next issue cropped up on a drive home. My center diff light started flashing and I couldn't for the life of me figure out why. It hadn't been, then started during the drive. I finally realized anytime I hit the brakes, it came on. It started flashing which I finally figured out was when my turn signals were on. I stopped at a post office, tried to get back into gear and my park safety solenoid wouldn't release for me to shift, I had to manually move it. Pushed it back with my finger and was able to get home. With more investigation, I realized my brake lights weren't working at home - so that was neat, to realize I drove about 15 minutes with no brake lights. Ultimately I found the brake fuse to be popped, still not entirely sure why... but so far a new fuse as been alright. I'll be going over the trailer harness and other areas of concern that could be causing shorts. It was a pain to track down though. Video I sent to some buddies for some ideas when the issue initially came up: New video by K S
Now for the fun wild stuff... I had purchased an old '01 Blazer from my dad as a DD, while spending time going through the '01 Rover. It ended up having more issues than I wanted to deal with but another '02 Rover came up for a reasonable price. I figured if I'm going to drive 20+ year old vehicles, I may as well drive two of the same that I know how to work on and don't need to research every issue. So, the Rover addiction multiplied. This is an '02 Rover SE (they're dang near twins), which was a single owner California until 2019. It's incredibly clean and will take over as something to keep in good shape, take to shows, etc. So for the Rover fans out there, this one will be maintained as a good example of what these were in their prime. I still very much enjoy the ride quality and comfort 21 years later.