[OB1375] 2015 Jeep Wrangler Unlimited Rubicon Hard Rock - The Rube Goldberg Machine

  • HTML tutorial

ovrlndr

Rank VI
Launch Member

Influencer II

4,353
Denver, CO, USA
First Name
Jason
Last Name
Broom
Member #

1375

One other minor modification I made was the Factor 55 HitchLink 2.0 (in red, to match the yellow with red and black highlights theme). I secured it through the hitch receiver with the Bolt receiver lock that could be keyed to the ignition.

This adds a convenient, and safer recovery point (since it allows for a closed system) to the rear of the Jeep

Great looking and functional!


Sent from my iPhone using OB Talk
 
  • Like
Reactions: toxicity_27

ovrlndr

Rank VI
Launch Member

Influencer II

4,353
Denver, CO, USA
First Name
Jason
Last Name
Broom
Member #

1375

So, the major modifications I've made this far have all been focused on preparing for a lift and larger tires. By this point I had selected my lift and tires, after months of research, and much deliberation.

After considering options from Mopar, TeraFlex, AEV, MetalCloak, and a few others, I narrowed the lifts down to AEV's 3.5" DualSport RS and the MetalCloak 3.5" Game-Changer RockSport Edition.

I liked that AEV and MetalCloak used dual rate coil springs, and had former Jeep engineers on staff that took into consideration the necessary geometry corrections needed when lifting the vehicle to maintain a quality ride. I was sure that either way I went, I would be happy with the product and the result, and the two options were within spitting distance of one another from a price perspective.

Ultimately, you get more in the MetalCloak kit for about the same amount of money, and what I mean by that is, it replaces the factory control arms and track bars with the fully adjustable control arms and track bars, provides extended brake lines and Adjustable bump stops as well, whereas the AEV lift addresses the geometry corrections through bolt on brackets and a custom bent OE rear track bar. They also include the AEV high steer kit as well, but I wasn't sure I wanted to go with a high steer kit yet, or whether I'd even necessarily need it; also there were other options for high steer kits entering the market that looked interesting.

Since the purchase and install, I've gotten the Jeep out with a few folks that have the Game-Changer suspension, and they all love it; so do I. Since moving to Colorado, I mainly get the Jeep out with folks running various AEV lifts (mostly the 3.5" DualSport SC, but some with the RS as well), and they all love their suspensions as well.

The tires were also a long, arduous research process. I considered Goodyears, Nittos, Generals, BFGs, and Toyos. Ultimately I wanted a heavy duty all terrain tire, that had great road manners and wouldn't let me down on the trail. Tire discussions are full of fan boys (hell, I've become one) and a lot of "the only type of tire worth running is <insert mud terrain / all terrain / etc> here" type discussions.

For me, mud terrains look cool (sometimes), but in all practicality they do not match my priorities like an all terrain does. Oh, and I HATE MUD. Won't go near the stuff unless I have absolutely no choice. And, if that is the case, I have a winch, Maxtrax and a whole lot of recovery gear. In the majority of places I plan on taking the Jeep, an all terrain just makes more sense.

Ultimately I decided on the KO2 because I liked the beefy sidewalls, the triple snowflake rating since I was planning a move to Denver, and the road manners. Quiet on the road, meet my needs off of it. Win, win.

Over a year later through 12,000+ miles, multiple trips between Atlanta and Denver, and quite a bit of time off the pavement, I've been happy with the lift and tire combo.


Sent from my iPhone using OB Talk
 
  • Like
Reactions: ngurney

ovrlndr

Rank VI
Launch Member

Influencer II

4,353
Denver, CO, USA
First Name
Jason
Last Name
Broom
Member #

1375

Alright, I babbled on about lift and tires and bored all of you with a picture-less post.

Keeping with the theme of preparing for lift and tires, these next mods addressed a few things...

First, the MetalCloak lifts are engineered with a fully loaded Jeep in mind... bumpers, armor, winch, larger spare tire, cargo area filled with gear, hard top, roof rack, etc.

So, in order to ensure I got an accurate lift height, I was aiming to try to get as much weight on the Jeep as possible before the lift went on.

One thing that would serve a dual purpose to add weight and provide security for long trips was a hardtop, and I found a heck of a deal on one when I was still in Atlanta for sale from a guy in Alabama. He had a basically brand new hardtop on his recently purchased 2015 JKU and wanted to trade for a particular soft top for his Jeep and so I bought the top new, and drove to him in Huntsville where we installed the soft top on his Jeep and put the hardtop on mine. EZPZ lemon squeezy. Good deal, too.


Sent from my iPhone using OB Talk
 

ovrlndr

Rank VI
Launch Member

Influencer II

4,353
Denver, CO, USA
First Name
Jason
Last Name
Broom
Member #

1375

The next mod to get ready for lift and tires was something to assist with climbing in the Jeep once it was at its soon-to-be lifted ride height. I'm 6'2" so no vertical challenge for me, BUT I will say, the next mod made the task of getting in more fluid, and less awkward. It also helped my 5'4" fiancée.

So. What's the mod? GraBars! 3 of 4 of them installed very easily. The other one holds the Guinness world record for biggest pain in the ass install ever. But, these things are great! Well made, simple design, sturdy as hell!


Sent from my iPhone using OB Talk
 

ovrlndr

Rank VI
Launch Member

Influencer II

4,353
Denver, CO, USA
First Name
Jason
Last Name
Broom
Member #

1375

Alright, now we're at the last mod before the lift and tires!

Like I said before, I wanted to get weight on the Jeep prior to the lift, so I got an accurate amount of lift, and I had heard from folks that had installed the lift I bought that did not have weight on their Jeeps that they were getting 4.5" or more of lift!

So, what better way to get weight on than to add a 50 lb winch kit and a 66 lb winch?!

Since I have the Hard Rock edition, I already had steel bumpers from the factory, and the front bumper was modular (converts between full width and stubby), and was winch "ready" or "capable" or whatever the market material said... it should have said "ready for you to spend a bunch more money" or "capable of costing you what an aftermarket bumper would."

For the winch, I chose the Warn 9.5CTI-S, as it was compatible with the winch kit and sat a bit higher up so I would be able to see the winch line during operation. It was also tried and true.

At any rate, AEV had a heavy hand in the design of the Hard Rock hood and bumpers. As such, the Mopar winch kit just so happened to have the same beautiful powder coat that the AEV bumper winch kit does; oh, and it had a part number stamped on the box starting with "AEV," so, yeah.

And so, I began the install of the winch. One thing that was done for me at the time I had the C gussets and control arm skids installed was I had the shop cut the factory vacuum pump bracket off the frame, as it would need to be relocated to accommodate the winch.

Let's lose that bumper!


Time to lose that grille!


Let's get that winch mounting kit on (BEEF).


Let's get that winch in place, and get the grille and bumper back on!


The rest of the install (fairlead, winch line) would have to wait, as I had a custom trim piece that would fit behind the fairlead to clean up some of the unused holes in the front of the bumper hat came pre-drilled. That's a mod for another post :-)

Next up, lift and tires!


Sent from my iPhone using OB Talk
 

toxicity_27

US MidWest Region Member Rep
Launch Member

Member II

3,278
Minnesota
Member #

0656

Ah, gotcha. Bummer on the bumper. Which front bumper do you have? I have a feeling you'll be interested in a future post on this thread :-)


Sent from my iPhone using OB Talk
I've got the stock Hard Rock front and rear bumpers. I figured it was part of the price I paid, so I'll keep them. AEV has some touch up paint they sell so I'll probably get some of that to fix it.
 
  • Like
Reactions: ovrlndr

ovrlndr

Rank VI
Launch Member

Influencer II

4,353
Denver, CO, USA
First Name
Jason
Last Name
Broom
Member #

1375

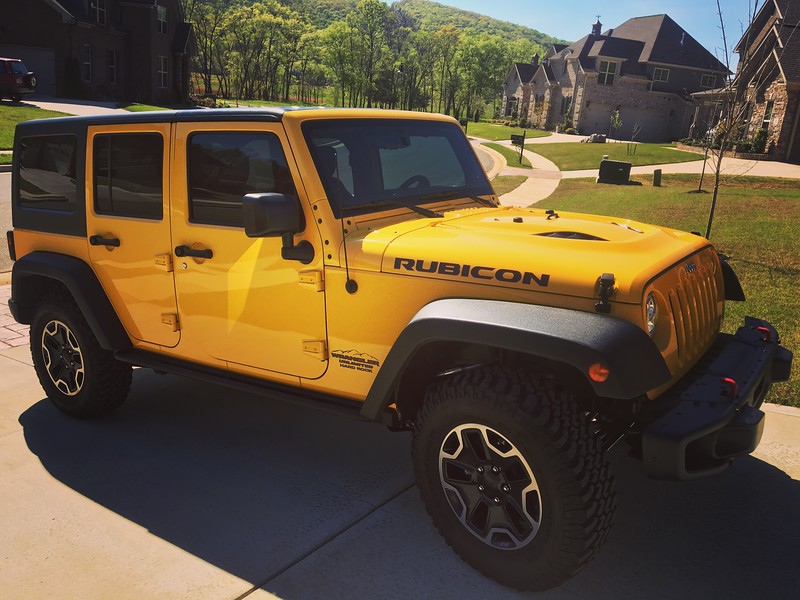
Alright. Time to get this lift and tires post out of the way. Trying to catch this thread up to present, as I have mods I'm making this weekend and I can't wait to show those to you guys.

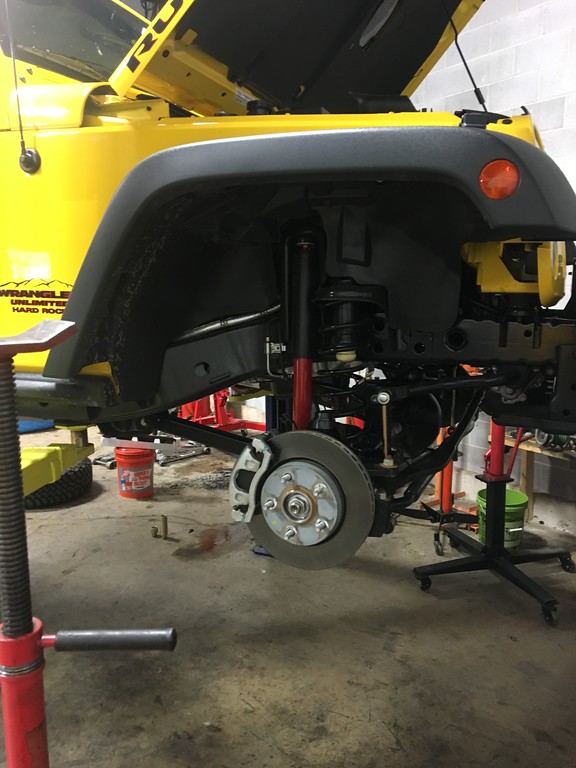
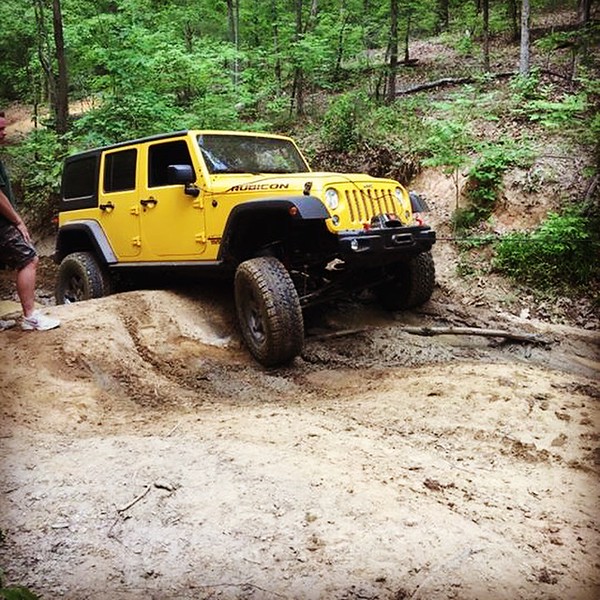
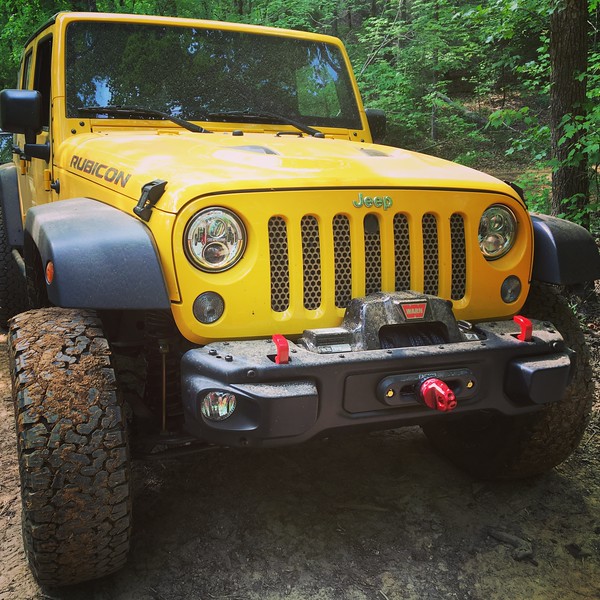
As stated, I decided to go with the 3.5" MetalCloak Game-Changer RockSport edition lift. It replaces the factory control arms and track bars with beefier adjustable control arms and track bars with that have been engineered for the Jeep's specific geometry. In terms of springs, it includes dual rate coil springs with shocks built by MetalCloak that have been tuned to their specific springs. Everything works in harmony. I like that. One of the other reasons I went this route was because the MetalCloak DuroFlex joint is low-maintenance, self-centering, and rebuildable. It allows for high degrees of misalignment when flexing and has a high level of vibration dampening as well. This all translates to a smooth ride. I was concerned about NVH (noise, vibration and harshness). I wanted to raise the vehicle to increase clearance, but at the same time I wanted to maintain a stock or better than stock ride quality, and that is what has been achieved.

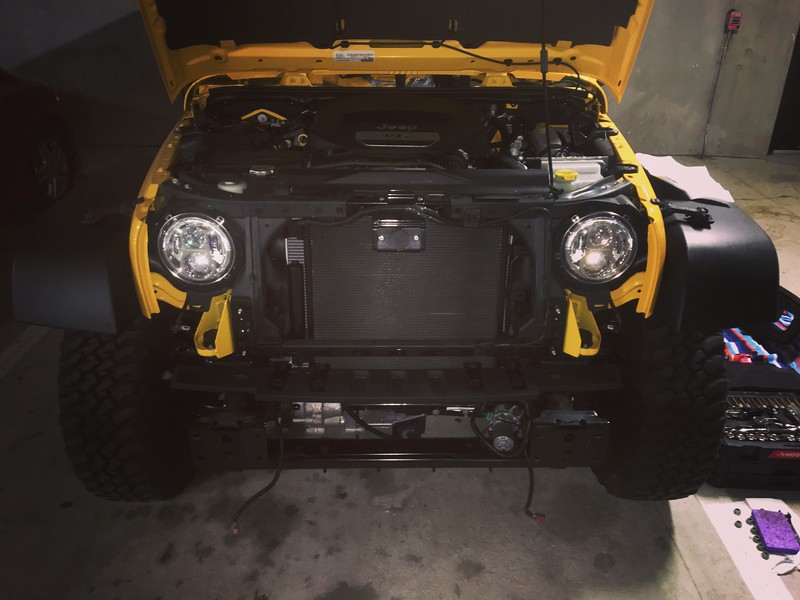
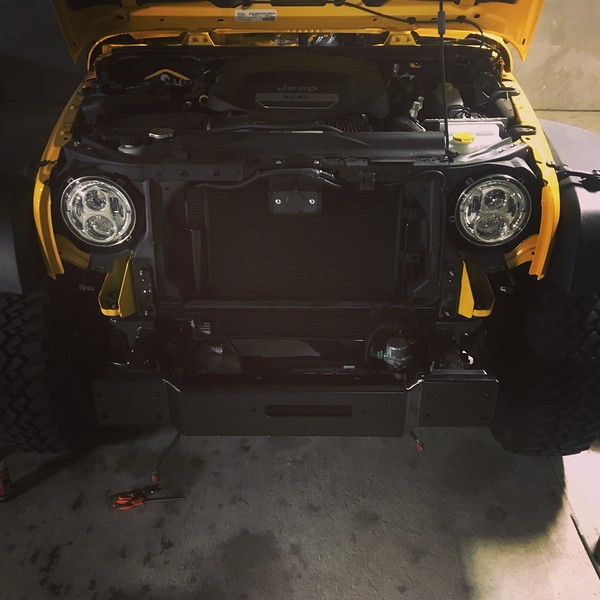
I actually did the front end of the lift installation myself. It was quite the experience, as I had never done anything like that before in my life, and I don't exactly have the biggest tool collection in the world, especially for automotive work.

I found a place in Atlanta (Oloba Rennsport) that is a car club with a "clubhouse" - essentially you can pay a membership fee (monthly or yearly) and have access to their warehouse with two automotive lifts.

I started work around noon, taking my time doing the work. First, I swapped the stock sway bar links, then I got the stock springs and shocks out, and then moved on to installing the new shocks, springs, and bumpstops. Then I installed the extended brakelines, bled the brakes and, finally, swapped out the control arms and the track bar. Doing all of this with hand tools made the process slow going (and required some makeshift breaker bars).

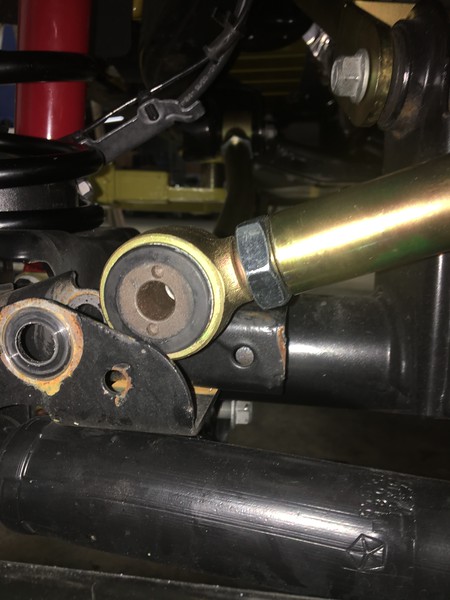
New sway bar links installed


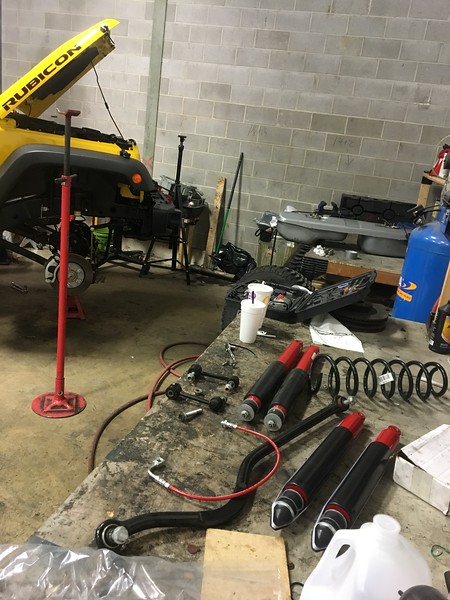
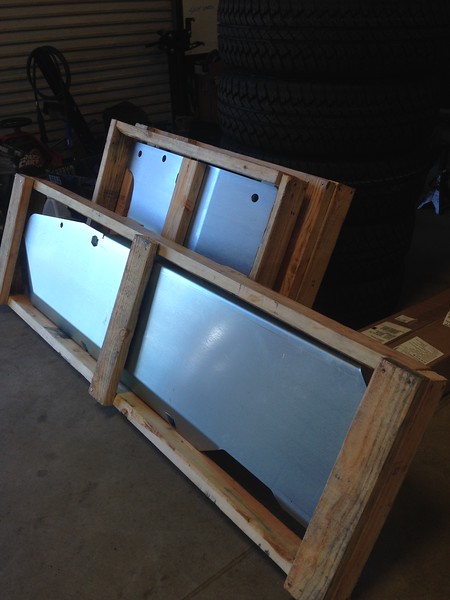
Bench full of parts!


Getting the beefier track bar in the axle side bracket and getting the axle centered was the biggest pain in the arse ever.


Front end is almost there!


About the time I was going to start the read, I got a phone call from a concerned girlfriend (now fiancée... still concerned about me, FWIW).

"Hey, what's up babe?" I said. "Where are you?" replied the concerned voice on the other end of the phone. "At that place, installing my lift, remember?" I said. "Jason, it is 6am," she said. "Huh?," I said, confused. "You didn't come home last night," she said. I couldn't believe it. Was it really 6am? No way. One look at my iPhone's clock verified what I heard on the phone.

And that's the story of how I spent 18 hours installing the front end of my suspension.

It was time to call in the professionals. I had taken the previous day off work, but I did not plan for a second day.

I packed everything up and gave the guys at the shop that did the welding work on the C gussets a call. They would be able to squeeze me in if I could get up to the shop ASAP! I drove the Jeep over to the shop, rocking the "Tennessee Tilt" (if you don't know what that is, try Google).

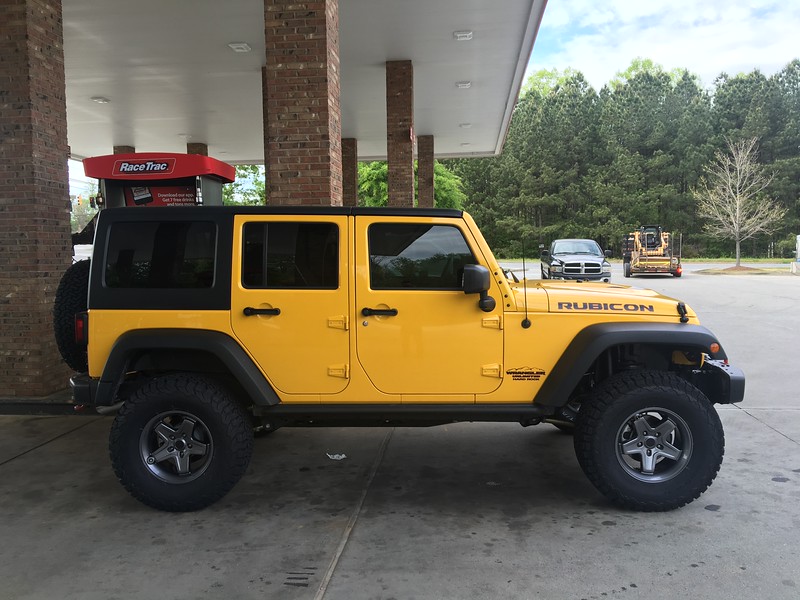
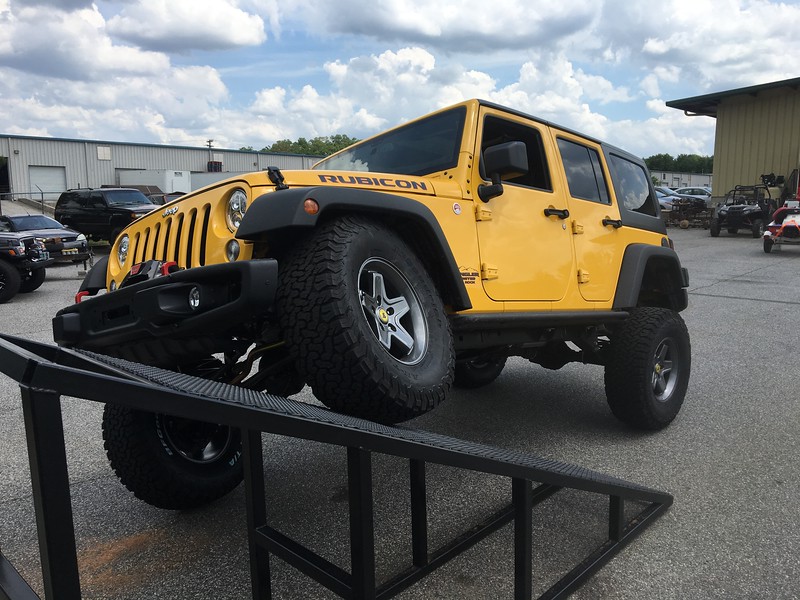
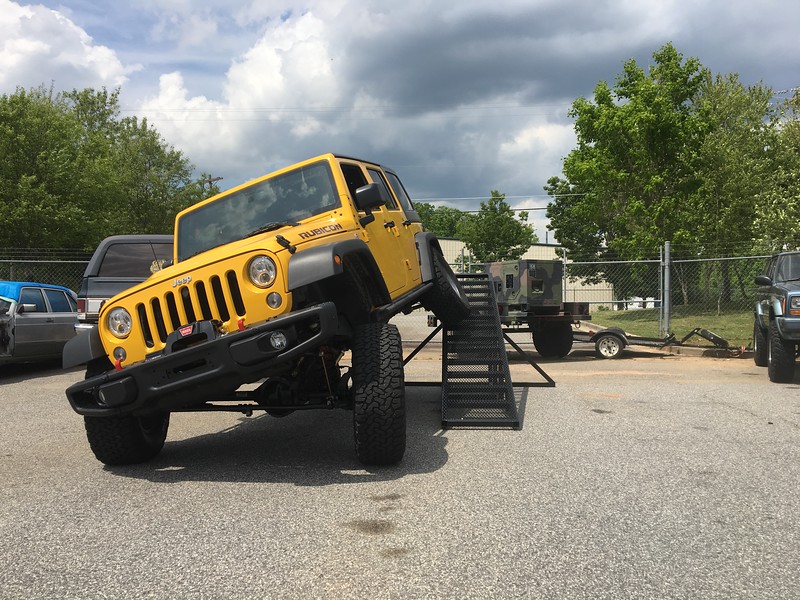
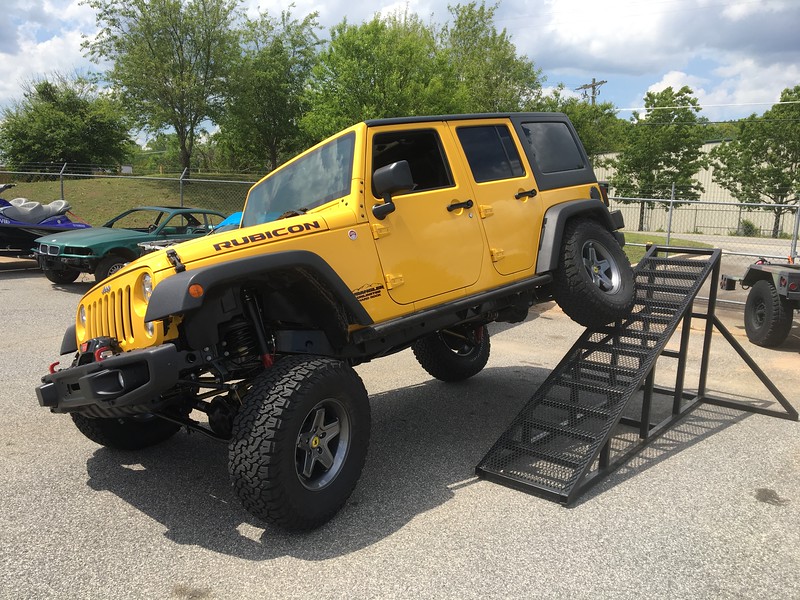
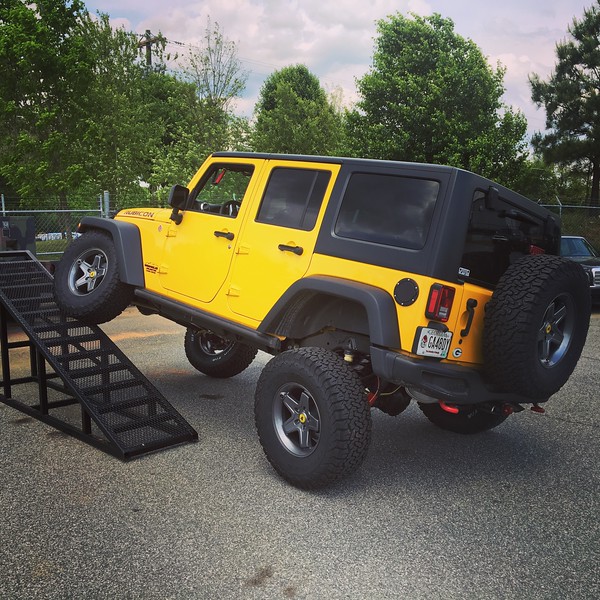
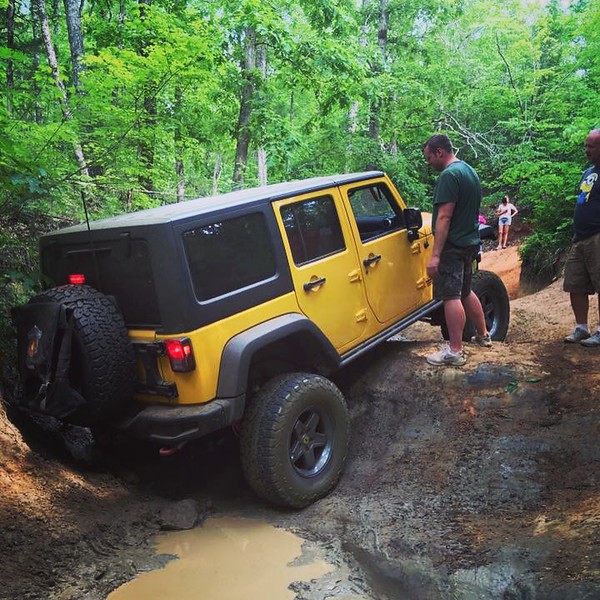
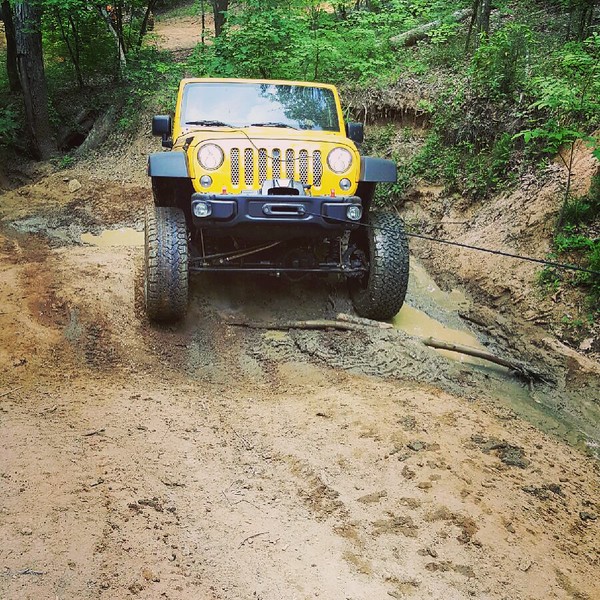
The guys at the shop, with their fancy air tools and full kitted toolboxes, made quick work of the rear suspension, and I was off to Discount Tire for the KO2s. Discount Tire got the 35" KO2s mounted to the new 17" AEV Pintler wheels, and I headed back to the shop for an alignment.


Guess what? The guys at the shop told me not only was the front end properly installed, it was perfectly aligned and caster / pinion angles looked great. Also the axle was perfectly centered up front! My hard work paid off!


Sent from my iPhone using OB Talk
 
  • Like
Reactions: dj_mccomas

ovrlndr

Rank VI
Launch Member

Influencer II

4,353
Denver, CO, USA
First Name
Jason
Last Name
Broom
Member #

1375

After the lift was on, it was time to check clearances. The suspension has a great deal of articulation, but I did not want my tires all up in my fenders causing problems, so I used the full 4" of bumpstop available from the kit (the bumpstops are adjustable). I also had my eye on the front end and potential contact between the inner sidewalls of the tires and the lower control arms and the top of the sway bar links, as the tire can contact those areas without the appropriate backspacing.

The AEV Pintlers I picked out worked nicely with the yellow, but they had a 5.25" backspacing, which is fine for AEV lifts, but MetalCloak recommends a backspacing between 4" and 4.5" for their suspensions.

We did a few tests on the RTI ramp to check for clearances. Even with full bumpstop, pretty impressive!


Sure enough, the tires were making contact with the top of the sway bar link when we backed up the RTI ramp to simulate "coming down" off an obstacle, particularly when the wheel was turned just slightly.

Well. I came prepared for this. Spidertrax hub-centric wheel spacers to the rescue. I didn't want to use spacers if I didn't need to, but if I had to, the only ones I was going to use were Spidertrax spacers. I went with their 1.25" spacers for the WJ, as it actually has the same Bolt pattern as the JK. The only issue is that, in the rear, the lugs stick through the spacer just a few millimeters (1-2mm), and depending on your wheel, this could cause issues as it would not allow the mounting surface of the wheel to mount flush. However, the Pintlers have a pocketed design, so the little bit of the lugs that stick through recess into pockets in the mounting surface, thus a flush mount and no issues! It also made the stance a little more aggressive and the track ever so slightly wider, without causing clearance issues with the fenders. The turning arc changed slightly and in some cases, the tires made contact with the bumper end caps, so off they came!


Now we were all set. Clearances checked out, no rubbing.


Sent from my iPhone using OB Talk
 
  • Like
Reactions: dj_mccomas

r2fasani

Rank IV
Launch Member

Advocate III

1,396
Ripon, CA
First Name
Rob
Last Name
Fasani
Member #

19928

Ham/GMRS Callsign
KM6ZZQ
That's some pretty good flex! How have your duroflex joints held up? Did you have to take the front end caps or the back? I'm assuming front, but I like the stubby look better anyway. First thing I did with my 2015 JKUHR was take them off. Keep the updates coming! It's great to see the evolution.


Sent from my iPhone using OB Talk
 
  • Like
Reactions: ovrlndr

ovrlndr

Rank VI
Launch Member

Influencer II

4,353
Denver, CO, USA
First Name
Jason
Last Name
Broom
Member #

1375

That's some pretty good flex! How have your duroflex joints held up? Did you have to take the front end caps or the back? I'm assuming front, but I like the stubby look better anyway. First thing I did with my 2015 JKUHR was take them off. Keep the updates coming! It's great to see the evolution.


Sent from my iPhone using OB Talk
Thanks! Lift has held up well, including the joints, and I've got 13,000 miles on the suspension. The front end caps are the ones I had to remove. We're closing in on some of the more current mods!


Sent from my iPhone using OB Talk
 

ovrlndr

Rank VI
Launch Member

Influencer II

4,353
Denver, CO, USA
First Name
Jason
Last Name
Broom
Member #

1375

Full disclosure... I'm skipping a mod (CB radio), and I will come back to it. Reason it's being skipped? Well, for one, I don't like CBs. For two, it has been decommissioned in favor of better technology.

So...

The next thing on the the list was to get the winch install buttoned up. The custom trim piece had arrived that I had ordered to cover up some of the holes that I wasn't using but that are drilled in the bumper around the fairlead.

Most of the work had already been done during the install of the winch itself, but I needed to unbolt the winch and move it to allow for room to turn a wrench.

I secured the Factor 55 fairlead and trim piece in place using grade 8 yellow zinc hardware for durability and corrosion resistance (ties into the yellow zinc MetalCloak control arms as well), then spooled the synthetic line onto the drum and capped it off with the Factor 55 ProLink winch safety thimble (hooks bad, closed system good).

At the same time, I also installed the JWM grille insert. This piece is just incredible. Beautiful powder coat, well-built and easy to install.


Little did I know, the very next day on a trip to Gulches OHV Park in South Carolina, I'd find myself high centered, and hung up on the factory skids. Good thing I buttoned up the winch install the night before!


You can faintly make out the shape of the factory transmission / t-case skid...


Here's a picture post-winching where you can see the grille insert well. Note: its actual finish is gloss black powder coat, not dirt :)


One more mod - this one was unexpected... a little trail damage! Whoops! It (mostly) buffed out.


Sent from my iPhone using OB Talk
 
Last edited:

ovrlndr

Rank VI
Launch Member

Influencer II

4,353
Denver, CO, USA
First Name
Jason
Last Name
Broom
Member #

1375

Next up was (real) armor.

I decided on the MetalCloak UnderCloak full skid system.

For those unfamiliar, the UnderCloak is a fully boat-sided skid system that includes a motor / oil pan skid, a transmission / transfer case skid and a gas tank skid. It also includes a heavy duty cross member as well. It's pure beef.

Here's a rendering from MetalCloak's product page that shows the system and how all of the skids tie together.


In addition to the UnderCloak system, I ordered Riddler differential covers and lune lockers. These things are bomb proof I'm pretty sure. There's a video on YouTube where they run over these things with every piece of construction equipment imaginable, and it's absurd the size of the rig that it takes to finally crush these things.


It's an old video, but it's entertaining:

Anyway, let's get to some install pics!

The skids as they were delivered


The motor / oil pan skid from front looking back


All in place


Another view


One last shot of the skids (don't mind our greasy paw prints)


Here's a look at one of the Riddler diff covers installed


That pretty much takes care of the armor. Honestly, it's a little overkill for most of what my rig will see, but there are a few nasty trails on my bucket list that I'm sure will make me glad I invested in this level of protection.


Sent from my iPhone using OB Talk
 

ovrlndr

Rank VI
Launch Member

Influencer II

4,353
Denver, CO, USA
First Name
Jason
Last Name
Broom
Member #

1375

So, the next mod I made was to make the name I bestowed upon Rube officially official (yeah, we're still skipping the CB).


Then after that, I got my OB member's emblem!


Sent from my iPhone using OB Talk
 

r2fasani

Rank IV
Launch Member

Advocate III

1,396
Ripon, CA
First Name
Rob
Last Name
Fasani
Member #

19928

Ham/GMRS Callsign
KM6ZZQ
Did you do your custom decal at pixeldecals.com? Solid match to the HR Rubicon hood decals.

Still playing with the first name that came to my head for my Jeep. Not sure if it's a keeper or if it's already stuck. Haha.


Sent from my iPhone using OB Talk
 
  • Like
Reactions: ovrlndr