"Nanuuq" my Land Rover Discovery 2 diesel swap, ...forever a project!

  • HTML tutorial

JDavid

Rank IV
Launch Member

Advocate II

1,165
Porto, Portugal
First Name
JDavid
Last Name
Silva
Member #

13432

So now the only things in the way of the first test drive are: Reconnecting the steering system's plumbing with the new reservoir, & then making a few throttle-cable brackets.... figures I'd reach this point right smack in the middle of winter, but I can hardly wait!
GO TINKER!!! :grinning:
The finish line is just around the bend!
Them minor tinkerings and Spring will be here before one can say Ready? Steady... (Disco)VERY!!!
 

Tinker

Rank V
Launch Member

Off-Road Ranger I

2,357
West Michigan
First Name
Mike
Last Name
Klemish
Member #

5606

You need a port-a-band!
Agreed! I have a line on a standing bandsaw, but if it falls thru then I'm definitely looking for another... need a band saw in my life! So much more precise cuts, may take slightly longer at first, but then I won't have to waste so much time touching up after grinder cuts :neutral:
 

Tinker

Rank V
Launch Member

Off-Road Ranger I

2,357
West Michigan
First Name
Mike
Last Name
Klemish
Member #

5606

Lot of work there, excellent results. Wish I had your shop space and tools.
My tools are mostly all used things, but I can manage plenty with them, even if they require a kick here 'n there to keep them working. I am so thankful for the use of that old tractor shed! It could use a little love next spring (to seal it better from rain & condensation) , but not battling with the elements is such a cool & novel thing for me haha!
 

Lanlubber In Remembrance

Rank V
Launch Member

Member III

2,827
Mimbres, NM, USA
First Name
Jim
Last Name
covey sr
Member #

16986

Ham/GMRS Callsign
none - BREAKER BREAKER HAND HELD CB AND WALKIE TALKIE
My tools are mostly all used things, but I can manage plenty with them, even if they require a kick here 'n there to keep them working. I am so thankful for the use of that old tractor shed! It could use a little love next spring (to seal it better from rain & condensation) , but not battling with the elements is such a cool & novel thing for me haha!
My Lincoln stick welder was new in 1968 and so was my acetylene welding equipment. I haven't refilled my welding bottles since 1996. My drill press was 30-40 years old when I got it in 1968 from my welder who bought himself a new one.. I just bought a cheepo flux welder to play with and hopefully tack together a front bumper I designed for my LRD2 rig.. My 7000w duel fuel Onen generator I bought in 1998 and it was 10 years old with only 20 hours running time and I have never used it yet. All of my tools were bought in the 60's but everything works.
 
  • Like
Reactions: Hafaday and Tinker

Tinker

Rank V
Launch Member

Off-Road Ranger I

2,357
West Michigan
First Name
Mike
Last Name
Klemish
Member #

5606

My Lincoln stick welder was new in 1968 and so was my acetylene welding equipment. I haven't refilled my welding bottles since 1996. My drill press was 30-40 years old when I got it in 1968 from my welder who bought himself a new one.. I just bought a cheepo flux welder to play with and hopefully tack together a front bumper I designed for my LRD2 rig.. My 7000w duel fuel Onen generator I bought in 1998 and it was 10 years old with only 20 hours running time and I have never used it yet. All of my tools were bought in the 60's but everything works.
I know it can get a bit cliche to say... but they don't make 'em like that anymore! Cool thing about the flux core welders is you can upgrade them with shielding gas if you find yourself using it more often.
 

Aktrucker

Rank 0
Launch Member

Contributor I

60
Tooele, UT, USA
First Name
Timothy
Last Name
Gardner
Member #

20654

hi there tinker.
I saw your video on how you eliminated the abs pump on your disco and I want to do the same on my 99 but what did you do to eliminate the 3 amegos and how much braided steel line did it take?
aktrucker
 

bendts

Rank IV
Launch Member

Enthusiast III

1,338
A Pasture in Wisconsin
First Name
Bendt
Last Name
S
Member #

13509

Ham/GMRS Callsign
N0WTR
hi there tinker.
I saw your video on how you eliminated the abs pump on your disco and I want to do the same on my 99 but what did you do to eliminate the 3 amegos and how much braided steel line did it take?
aktrucker
Ill look for this vid, but do you have a ready link?

Found it.
 
Last edited:

Tinker

Rank V
Launch Member

Off-Road Ranger I

2,357
West Michigan
First Name
Mike
Last Name
Klemish
Member #

5606

hi there tinker.
I saw your video on how you eliminated the abs pump on your disco and I want to do the same on my 99 but what did you do to eliminate the 3 amegos and how much braided steel line did it take?
aktrucker
Well... it's probably not the answer you're hoping for, but I gutted all (& I mean ALL) the original electrics since I'm rewiring the whole rig the way I want with no computers or fuses & all breakers + upgraded materials from front to back.

Apologies for the radio silence & updates to come soon. Time to get some miles on the new clock :sunglasses:
 

Tinker

Rank V
Launch Member

Off-Road Ranger I

2,357
West Michigan
First Name
Mike
Last Name
Klemish
Member #

5606

Time has come to complete the power steering system updates after the modifications/repairs I made to the pump's old beat-up reservoir didn't pan out...

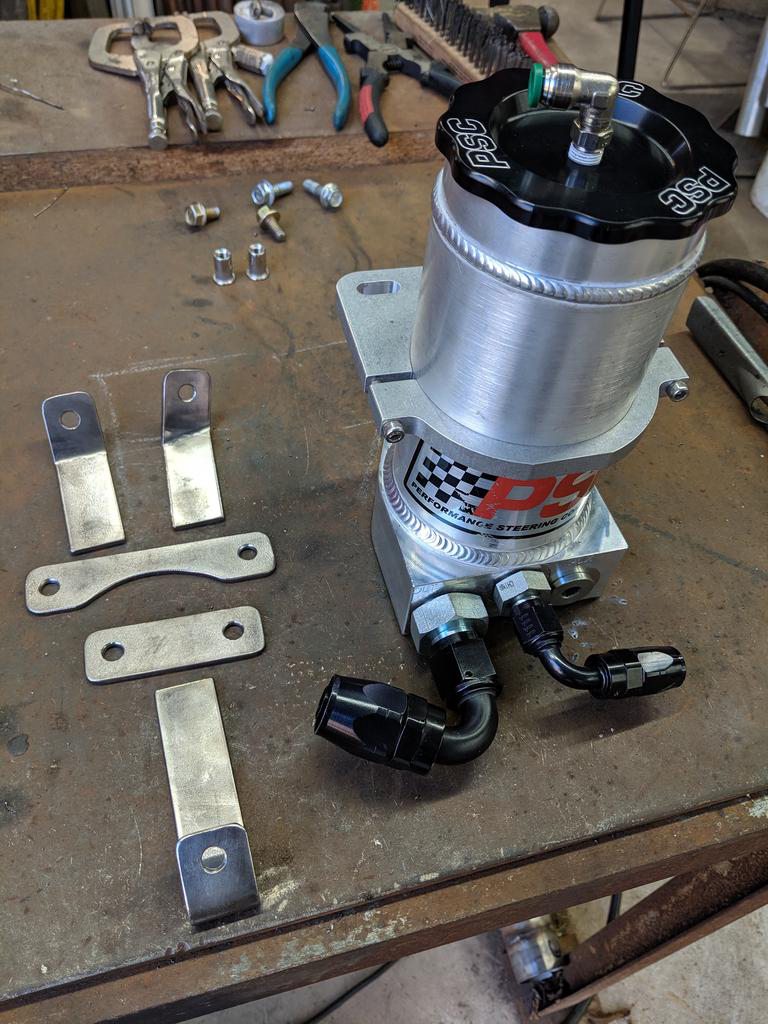
So enter here the new "remote fill can" that I've mounted over the pump 
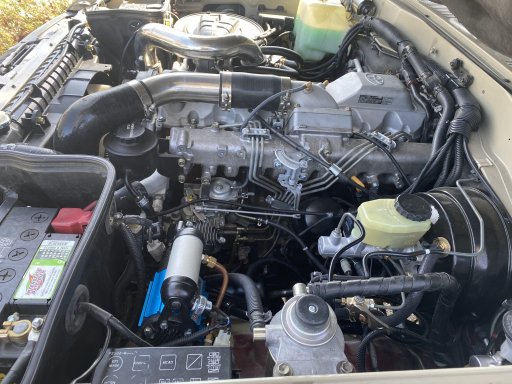
(the part that has the 20-25 note written on), now replacing the old integral fluid reservoir for a single AN fitting input port (wrapped in blue tape). The high pressure line stays the same, albeit in tight quarters with the engine mount as seen by the "scallop" cut I had a friends help in machining out of the lower-half (seen here in light gray primer) to make way for a small socket or thin box wrench:


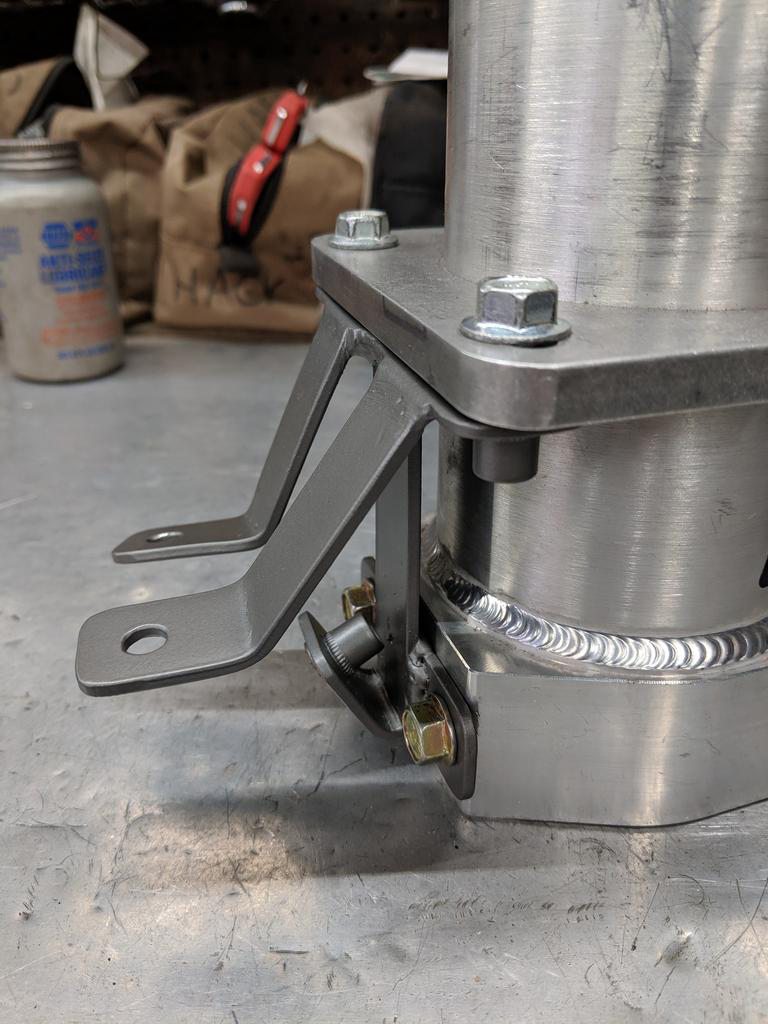
I wanted to mount the new steering fluid reservoir in a fairly specific spot, since it's size (in part due to the internal filter & the built in hydroboost ports) limited the placement options in the remaining space available under the hood. Thankfully there are a plethora of AN fittings in -6 and -10 to suit the fluid routing I wanted, but the bracket to mount it to the complex shape of the fender's wheel-well was up to me to fabricate. So after some chopping, grinding, & drilling... out came the 1" x .120" pieces of mild steel to stick together to make the "tripod" shape bracket I had in mind:


Figured I should start using more of the rivet-nuts I have, in place of welding "captive nuts" to things, should theoretically be easier to replace in the event of damage to the threads. Here they're on both the bracket & the sheet metal of the wheel-well where the bracket lies. Fresh coat of paint applied (at home where it's warm enough to cure) & don't mind the funny looking angles on these upper pair of legs... that's required just to match the curve of the wheel-well fender area it's mounting onto:


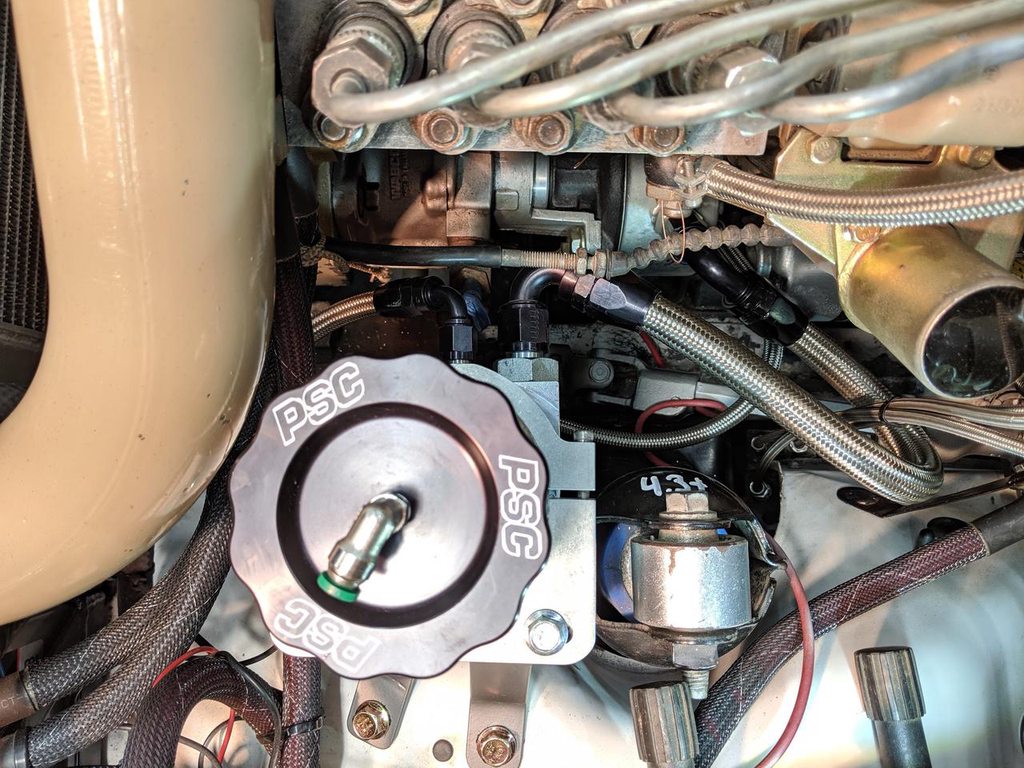
All the new power steering hoses (connecting the new reservoir between the cooler and the pump) that I put together turned out great, just as I hoped, away from friction dangers & thankfully still keeping enough room around the injection pump to make servicing things in the driver's side engine-bay area easy enough. The -6AN parts went together simply, but man did the -10 drain from the reservoir to the new pump can put up a fight! Even using proper tools + lubrication with aluminum fittings can be hair-raising:


Still a bit messy on this side until I can get ahead on the electrics part of the build (most of the larger electrical components will reside in that blank area atop the wheel-well pictured here in the foreground), after which I can do a little more tidying up when I know for sure where components will be mounted / cables routed. And now with all the new steering components in place I topped up with fresh hydraulic fluid & did a leak check. All good aside from a copper sealing washer that I think I had removed & installed a few too many times which caused it to work-harden on me... but no worries, if you don't have another handy there's an easy trick to make it soft enough to work again: Remove it & file/sand flat, then blast with a torch until it glows briefly, let it cool on it's own, which anneals it back to sealing capable if necessary:


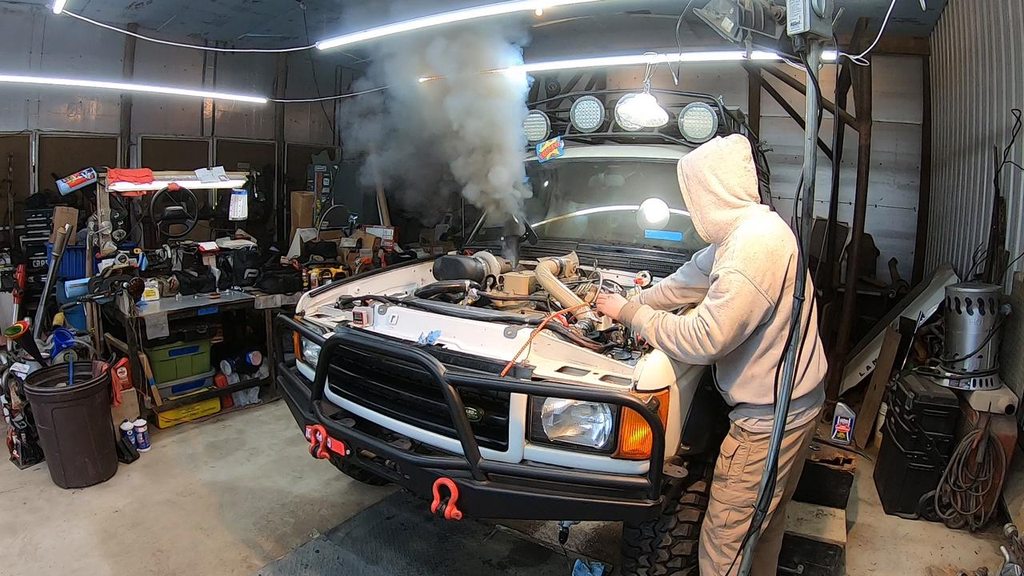
Finally with the steering system reconnected I'm able to start it again! Now for the final touches to prepare for the first voyage out of the shop with diesel power:


Pre Flight Checklist looks something like: Make a couple throttle cable brackets, bleed the brakes, connect vacuum pump to brake booster, wire starter switch + shutdown, add air filter just in case, mount a few more gauges, cut down the super long shifter handle...

GO!
 

Tinker

Rank V
Launch Member

Off-Road Ranger I

2,357
West Michigan
First Name
Mike
Last Name
Klemish
Member #

5606

The brake fluid bleeding process went so much smoother than I expected! I thought for sure I would have problems with trapped air from the system being dry after building all the new stainless/teflon front lines & deleting all the ABS system:


I think the big decrease in the system's complexity helps, and also purposefully building in a "high point" fitting to release the air (aside from the master cylinder itself) seems to have helped loads:


Almost forgot about that vacuum pump siting there between the power steering pump & the timing cover, so I made sure to get that connected to the brake booster... would've been an unpleasant surprise when I tried to drive it out & had to push manual brakes thru the floor to stop all that low end torque.


Now let's see if I can build a series of brackets to put the throttle cable right where I want it without any binding / sticking / runaways.
 

Ob1

Rank VI
Launch Member

Influencer I

3,057
Palo Alto, CA, USA
First Name
Ofer
Last Name
Bruhis
Member #

17919

Ham/GMRS Callsign
KD6UKE
The brake fluid bleeding process went so much smoother than I expected! I thought for sure I would have problems with trapped air from the system being dry after building all the new stainless/teflon front lines & deleting all the ABS system:


I think the big decrease in the system's complexity helps, and also purposefully building in a "high point" fitting to release the air (aside from the master cylinder itself) seems to have helped loads:


Almost forgot about that vacuum pump siting there between the power steering pump & the timing cover, so I made sure to get that connected to the brake booster... would've been an unpleasant surprise when I tried to drive it out & had to push manual brakes thru the floor to stop all that low end torque.


Now let's see if I can build a series of brackets to put the throttle cable right where I want it without any binding / sticking / runaways.
Hey Tinker
I deleted the ABS and the load sensing valve on the rear axle on my 80 series. The vehicle stops so much nicer. Removed 15 lb of stuff and there is room in the engine bay to put a side by side fridge. You will love it. I moved the fuel filter closer to the fender EB454793-D429-462F-9817-D7D3E2B912B2.jpeg