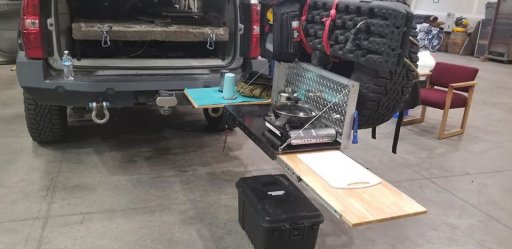
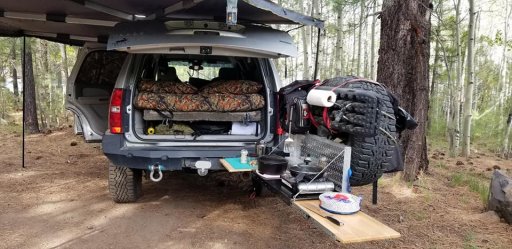
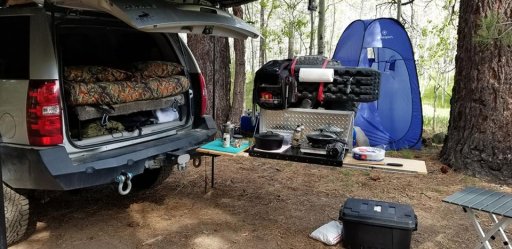
My 2011 Tahoe LT. build, a work in progress.

  • HTML tutorial

Charles M

Rank V
Launch Member

Member III

2,771
Wickenburg, AZ, USA
First Name
Charles
Last Name
M
Member #

17640

Ham/GMRS Callsign
K1CJM
Ya I was thinking of some ideas for that area as well. I may install a 30lb propane tank there with a skid plate protector and bring hose to the side of vehicle with a door for easy refill and hose connector. I measured and the tank would fit perfect. That is my 3rd project on my list. Right now I’m doing storage unit in back with my new dometic. Then solar install and then it will be propane location.
Be sure to use a LP tank that is made to be horizontal it should work out nice right there.
 
  • Like
Reactions: Danny Boy

Charles M

Rank V
Launch Member

Member III

2,771
Wickenburg, AZ, USA
First Name
Charles
Last Name
M
Member #

17640

Ham/GMRS Callsign
K1CJM
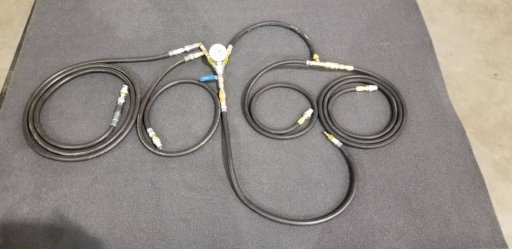
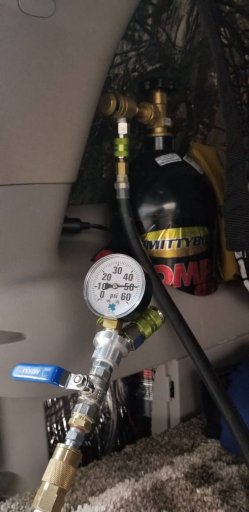
Here are some updated photos of my Air up/down system. It does all 4 tires at once. This is the complete system minus the air lines mounted into the rig.
The air gauge normally hooks to the air source and the right and left lines hook to the truck hoses. But if I needed to air up another rig I could hook the
hose coming from the air gauge directly to my tank .
20200117_144929.jpeg


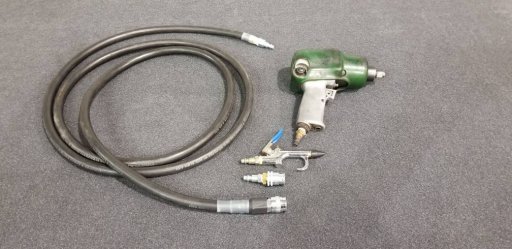
There are a few hoses with standard quick connects so I can run blowers or other air tools

20200117_145212.jpeg


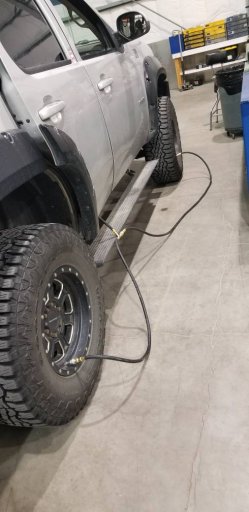
These lines connect to the hose connections right inside the doors.


20200117_143725.jpeg

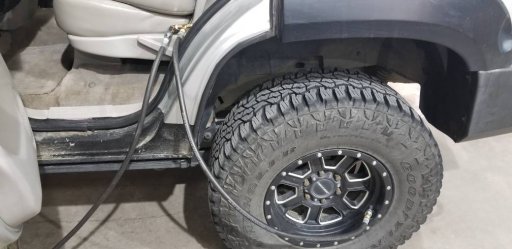
This shows where they hook up inside the doors. From there they hook up to the tank in the back when filling them.

20200117_143649.jpeg


When airing down I just disconnect from the tank and put the hose outside of the truck. Most people may not know the Co2 gas can kill you so never let it drain out inside your rig vent it out in the open.
When filling it up I connect the hose to the tank and turn it on, checking the gauge until it is close to the pressure I want. After filling I leave it connected for a minute to be sure all the tires have equalized.
This gauge is calibrated to my TPS sensors on my tires. So if in doubt I can scroll through on my dash and double check tire pressures.

20200117_143706.jpeg
 
Last edited:

Danny Boy

Rank IV
Launch Member

Enthusiast III

1,213
Huntington Beach, California, United States
First Name
Danny
Last Name
Romeyn
Member #

19576

Ham/GMRS Callsign
KI5HKQ

Charles M

Rank V
Launch Member

Member III

2,771
Wickenburg, AZ, USA
First Name
Charles
Last Name
M
Member #

17640

Ham/GMRS Callsign
K1CJM
Very Nice. Does it air up equally? how do you know what psi is in each tire?
Sorry I forgot to follow up on filling in my post above.
Airing up or down is pretty equal because the air hoses will move a lot more air than a tire valve can and if they are off a little they will equalize each other much the same as water will flow to a common level.
If you think about it by connecting all of them at once they become one big tank and the pressure will become equal in all of them very quickly.
I also give it a minute to equalize but, so far it seems to always be equal. I dropped all four down to 20PSI then back up it was pretty quick and easy.
 

Danny Boy

Rank IV
Launch Member

Enthusiast III

1,213
Huntington Beach, California, United States
First Name
Danny
Last Name
Romeyn
Member #

19576

Ham/GMRS Callsign
KI5HKQ
Sorry I forgot to follow up on filling in my post above.
Airing up or down is pretty equal because the air hoses will move a lot more air than a tire valve can and if they are off a little they will equalize each other much the same as water will flow to a common level.
If you think about it by connecting all of them at once they become one big tank and the pressure will become equal in all of them very quickly.
I also give it a minute to equalize but, so far it seems to always be equal. I dropped all four down to 20PSI then back up it was pretty quick and easy.
Very nice, that is pretty sweet
 

Charles M

Rank V
Launch Member

Member III

2,771
Wickenburg, AZ, USA
First Name
Charles
Last Name
M
Member #

17640

Ham/GMRS Callsign
K1CJM
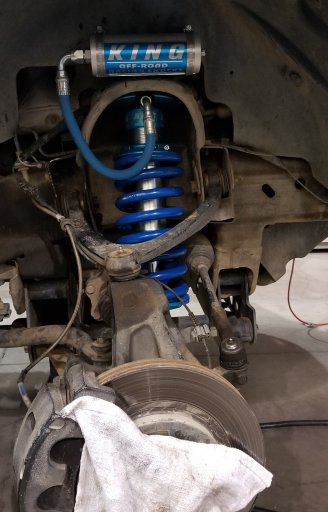
Latest upgrade... Custom 2.5 King Shocks for my 4 inch lift... Replacing the Rancho RS 7000 coil over struts that came with the lift kit.

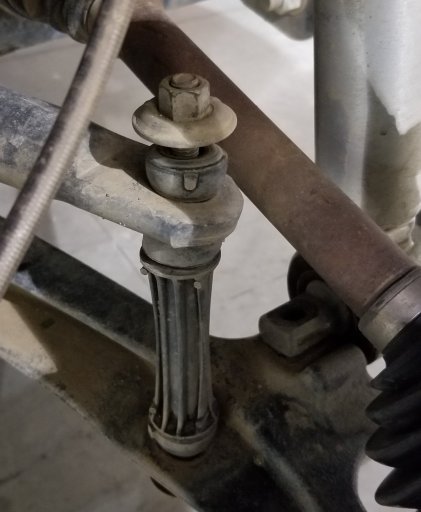
First step in installing front struts lift both sides and put it up on jack stands. Remove wheels, loosen the sway bar bolts (but leave them connected)

20200128_131659.jpg

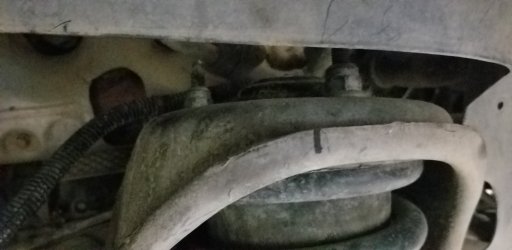
Remove upper and lower shock mounts and slide shock out the bottom.

20200128_131703.jpg

Slide the new shock in and tighten upper bolts to 37 Ft lbs and lower bolts to 40 ft lbs.
Remember to tighten the sway bar bolts when done with both sides. It will be easier to get the shock reservoir bracket on if you install the other two top bolts first. If needed you can use a heat gun to soften the plastic in the wheel well to make things easier too.

Note the rag over the lug nuts... The reason for this is to keep your shirt clean because you are one of those people who regularly puts never seize on your studs so it is much easier when you have to change a tire on a trail... Be sure to torque those lug nuts to 140 Ft lbs.

20200128_144638.jpg

I set ride height to allow for 3 inches of droop this leaves at least 6 inches for compression until bottoming out. Yes I have over 9 inches of travel now.:grinning:

How does it feel..... Well amazingly better... It feels just as smooth if not better on the highway and I had to drive across the field with little boulders in it next door and also hit several speed bumps as well... Hit them a lot faster than normal people would too... lol The suspension kind of shrugged it off and felt very smooth. It was much smoother and softer than it was with the Rancho RS7000's and it didn't make any noise... I give these shocks 3 thumbs up...

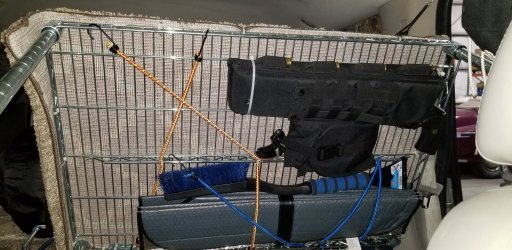
I also added a 12 gauge shotgun scabbard and small ammo pouch under my front platform today. The molle mounting perfectly attaches to the rack.

20200128_165342.jpg

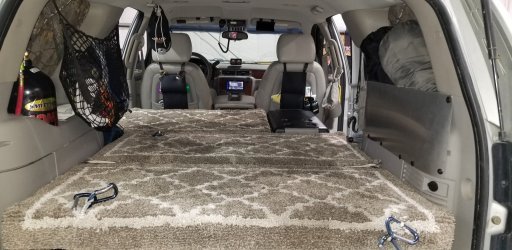
The section above is the front right section to the left of the refrigerator in the below photo. Both front and rear sections are on hinges so I can lift them to access the storage area underneath.

20200127_171746.jpg
 
Last edited:

dpf88101

Rank 0

Contributor I

60
New Mexico, USA
First Name
Derek
Last Name
Franz
We started out with a bone stock 2011 Tahoe with a single speed transfer case.

View attachment 110727

First step was pretty big adding some lift with a Rancho 4 in lift kit. To improve the suspension and smooth out the bumps I installed a RS 7000 suspension front and rear. Then installing a FabFour bumpers up front with Warn 9500 winch. To keep the rear end from looking odd I also installed a rear FabFour bumper.

Note:(For more serious off road adventures I would suggest checking out a 11.5 inch travel kit by Baja kits and installing a set of king shocks and going with a 6 inch lift)

With the lift kit installed we were able to install a set of Pro Comp 9x17 rims and 315/70x17 Cooper AT-3 tires. I did get over 40,000 miles out of them. (But, I just installed a set of 35/12.5/17 Goodyear Ultra Terrain AT tires and I like them much better)

To help light up the night a Ridged Hybrid Spot / Flood light bar was added to the front bumper along with a set of 4 in. spot lights.

So this first step took about 5 days and it looked like this...

View attachment 110728


After a few months I was getting pretty tired of the poor MPG that had dropped from 18-21 MPG stock to around 12. So an idiot at a local 4X4 shop in Reno recommended and installed a set of 4.88 gears for me. Well that was a terrible idea because the gearing was way to deep and acceleration really suffered. The mileage dropped to a high of 10 MPG plus the gears were installed wrong and started making a lot of noise... So I decided to do my own calculations and had another shop install a set of 411 gears this made a big difference improving the MPG to 16 to 19 miles and it also improved acceleration considerably. Total cost on gearing changes over $5200.. Note: I could have added a blower for about the same price.

Next step was to give it a more aggressive look and to get the tires covered up so it would reduce the amount of dirt and mud spraying on the side of it...
View attachment 110729

Since we do toss a canoe on top and the stock roof rack has plastic end pieces I offen worried they might break sending our fiberglass canoe down the road without a paddle.
I found some cro moly steel shaped like a wing laying around my shop and was later told they might have had a previous life as a wing spar on a bi-plane... These are much stronger and lower and lighter than the stock set on the right.

View attachment 110730

Installing them was easy a 1/4 drill and bolt through the stock rack system then added a set of canoe bunks for the boat. This modification also improved the MPG when hauling the boat on top because of a reduction in frontal area and improved airflow and was quieter too. I love a win win.

View attachment 110731

Since the 315x70x17 tires were to big to fit in the spare tire storage my first solution was to put it in the back with a board on top so I could put things on top of it. Very crude idea but it worked and it gave me an idea for a future modifications.

View attachment 110737


Next I installed a new swing out spare tire rack it was much better and it allowed me to install a shelf back there... View attachment 110738
Which FabFour Bumpers are those? Are these the ones for suburbans? Great job on the tahoe build
 

Charles M

Rank V
Launch Member

Member III

2,771
Wickenburg, AZ, USA
First Name
Charles
Last Name
M
Member #

17640

Ham/GMRS Callsign
K1CJM
Which FabFour Bumpers are those? Are these the ones for suburbans? Great job on the tahoe build
When I got them they were listed for a Tahoe but, they no longer list them that way it would be worth it to call them and request a set.. A few things on my Tahoe are no longer listed as available like both bumpers and the lift kit..

Carid has bumpers listed too
 
Last edited:

rho

Rank V
Launch Member

Member III

2,031
SF bae area
First Name
Juliette
Last Name
Penning
Member #

18700

Ham/GMRS Callsign
AG6YB
Nice! Cool build thread, there is a lot that we have to improvise or go fully custom for the GM trucks sadly... especially with the suspension.
 

AxiS99

Rank III
Launch Member

Influencer II

770
Santa Barbara, CA, USA
First Name
Steven
Last Name
Jones
Member #

17587

Here are some updated photos of my Air up/down system. It does all 4 tires at once. This is the complete system minus the air lines mounted into the rig.
The air gauge normally hooks to the air source and the right and left lines hook to the truck hoses. But if I needed to air up another rig I could hook the
hose coming from the air gauge directly to my tank .
View attachment 135945


There are a few hoses with standard quick connects so I can run blowers or other air tools

View attachment 135946


These lines connect to the hose connections right inside the doors.


View attachment 135947

This shows where they hook up inside the doors. From there they hook up to the tank in the back when filling them.

View attachment 135948


When airing down I just disconnect from the tank and put the hose outside of the truck. Most people may not know the Co2 gas can kill you so never let it drain out inside your rig vent it out in the open.
When filling it up I connect the hose to the tank and turn it on, checking the gauge until it is close to the pressure I want. After filling I leave it connected for a minute to be sure all the tires have equalized.
This gauge is calibrated to my TPS sensors on my tires. So if in doubt I can scroll through on my dash and double check tire pressures.

View attachment 135949
Is there a difference between regular ain and CO2? Benefits?
 

Charles M

Rank V
Launch Member

Member III

2,771
Wickenburg, AZ, USA
First Name
Charles
Last Name
M
Member #

17640

Ham/GMRS Callsign
K1CJM
Is there a difference between regular ain and CO2? Benefits?
I am guessing ain is a typo for air... There are some differences I have noticed.

CO2
Is a liquid that expends to a gas when taken out of the bottle so it has more gas volume contained in a CO2 bottle compared to a pressurized air tank. My regulated pressure coming from the tank is 150 psi it will fill tires very quickly it can also be used for high volume air tools. With my system all four tires can be filled in less than 5 minutes. I have 35x12.5x17 tires and air down to 15 to 20 psi and fill up to 50 psi...

Compressed air will generally have some moisture in it and this will affect cold vs hot pressure but, CO2 I think expands more from cold to hot than air does so this may equal itself out...

The main benefits I see are in how the two are supplied.

With air the tank is much smaller or you need a pump and most quality pumps cost more $ initially and depend on being in or close to the vehicle. They tend to be little slower than CO2 also. The air supply is unlimited.

CO2 Tanks if you source the components yourself are around $150 or even less. They can be transported any way you want but, should be standing up when in use so, you wont pump liquid CO2 into your airlines or tires. (They can freeze, crack and blow out) I get about 4 to 5 tire fills per 10 pound tank. Tank refills are around $20. The tank is portable you can take it anywhere to fill a tire.

Personally I have a real cheap air pump and CO2. I like redundancy. My air pump stopped working once and had to drive out with three tires pumped up to 50 psi and one with 25 psi in it... It was not fun... lol
 
  • Like
Reactions: AxiS99

Charles M

Rank V
Launch Member

Member III

2,771
Wickenburg, AZ, USA
First Name
Charles
Last Name
M
Member #

17640

Ham/GMRS Callsign
K1CJM
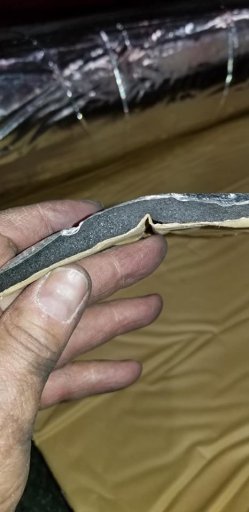
Thought I would add a few more things to the rig... Since we sleep inside this rig and also spend a fair amount of time in the desert at very high temperatures and hunting in the colder seasons too. I decided to add some insulation to reduce heating and cooling needs. I used 10mm Uxcell it has fabric reinforced foil on one side and an adhesive on the other. is pretty easy to use and sticks well to a metal surface. It will insulate the hot and cold and also deadens the sound too.

96579754_10158501357491738_5168039649406353408_o.jpg

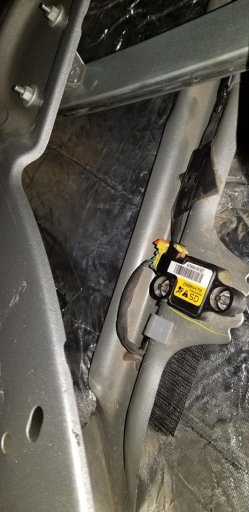
I lined the door panels and also sealed off the factory foam barrier so the door is completely sealed from outside.

96525657_10158501357586738_1427267703189536768_o.jpg
 
  • Like
Reactions: GoWithTheFlow

Charles M

Rank V
Launch Member

Member III

2,771
Wickenburg, AZ, USA
First Name
Charles
Last Name
M
Member #

17640

Ham/GMRS Callsign
K1CJM
I took it out last weekend and it was pretty cold at night and it was warmer inside with the new insulation. While out I did feel around to find other cold spots so I can work on more insulation in those spots before the next trip. We did find a really nice place to get away..

97473040_10158523831636738_5101263692616433664_o.jpg

Found a use for one of my old motorcycle tank bags... I added two white wire racks inside it and use it to hold kitchen supplies. When traveling it is inside the truck my paper towel rack is just a simple bungee cord going through and hooked on both sides I put just enough tension on it to keep the paper from flying off when the wind blows...

99101196_10158523831481738_3585184745874522112_o.jpg
 

trail_runn4r

US Rocky Mtn. Local Expert. Colorado: Denver Area
Member

Pathfinder III

4,815
Denver, CO, USA
First Name
Carlo
Last Name
Donzelli
Member #

16845

Here are some updated photos of my Air up/down system. It does all 4 tires at once. This is the complete system minus the air lines mounted into the rig.
The air gauge normally hooks to the air source and the right and left lines hook to the truck hoses. But if I needed to air up another rig I could hook the
hose coming from the air gauge directly to my tank .
View attachment 135945


There are a few hoses with standard quick connects so I can run blowers or other air tools

View attachment 135946


These lines connect to the hose connections right inside the doors.


View attachment 135947

This shows where they hook up inside the doors. From there they hook up to the tank in the back when filling them.

View attachment 135948


When airing down I just disconnect from the tank and put the hose outside of the truck. Most people may not know the Co2 gas can kill you so never let it drain out inside your rig vent it out in the open.
When filling it up I connect the hose to the tank and turn it on, checking the gauge until it is close to the pressure I want. After filling I leave it connected for a minute to be sure all the tires have equalized.
This gauge is calibrated to my TPS sensors on my tires. So if in doubt I can scroll through on my dash and double check tire pressures.

View attachment 135949
Charles, thank you for putting this thread together! Lots of ideas and great information.

I have been willing to build an air up/down system similar to yours for some time now. Could you share more details about it, and maybe parts needed? Was it difficult to assemble?

Thank you!