M715 Adventure Rig

  • HTML tutorial

joe.schigel

Rank IV

Enthusiast III

1,212
Detroit, MI
So today, the big milestone happened! The engine was turned on!!!


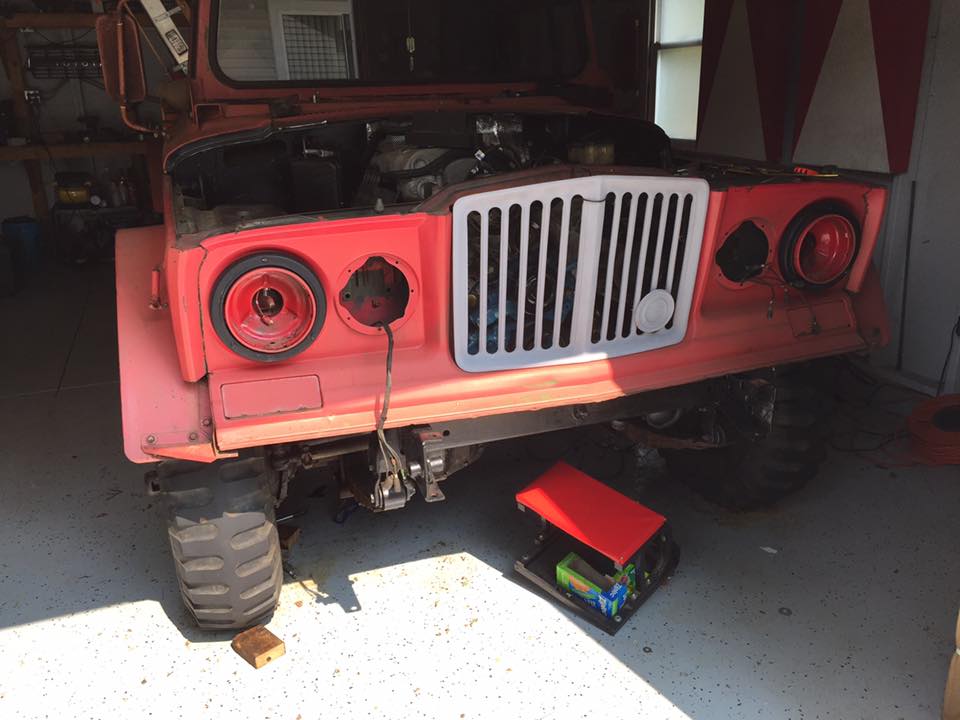
After a minor problem with fuel pressure, we got it to run!!! It worked 95% of the way it's supposed to. Cylinder 4 doesn't appear to be igniting. We did a compression test and spark test and it all looks ok. I think the injector is dumping fuel into the cylinder. I'll order a new one and hopefully that will fix it. Other than that, the engine works!!!!!!

__________________
 

joe.schigel

Rank IV

Enthusiast III

1,212
Detroit, MI
I made a lot of progress today. I spent all of this morning going through the 2500's wiring harness. I removed the ABS, cruiser control, HVAC, lights, radio, and other circuits that I won't be using. The harness is a lot less menacing now that it's a bit smaller. It was still an intimidating job. Took me about 4 hours but it's done, and the engine still runs with it! I've routed it in a little bit but I expect to modify it some as time goes on.

All the engine harness stacked on the engine.


The gauges, ignition system, and OBD2 port. I'll change out the cluster for individual gauges later.


the lovely rat's nest I removed


I also couldn't wait any longer so I put the front end back on!


Having the engine run plus the front end back together is a huge morale boost! It feels like I'm working on an actual truck again! The engine fits nicely but the front is still tight.


I'll probably need to remove the threads on the water pump pulley to make room for a radiator.


I also need to fix the radiator mounts as I go. A prior owner had done quite the hack-job before me. I really think I may be able to get it driving by the end of summer or early fall!

Also, my driveshafts came in!
 

joe.schigel

Rank IV

Enthusiast III

1,212
Detroit, MI
Yesterday I was able to work on the fuel tank a bit. I cleaned it all up and painted it with the chassis saver paint that I used on the frame. When I was installing the module, if I use the o-ring, I have trouble getting the retaining ring to thread correctly. It jumps off the thread. If I don't use it, it's fine. I may use sealant instead of the rubber o-ring when I install it for good. Next on the list of projects is basically everything. I want to focus on the power steering, power brakes, cooling system, and A/C system. Once I get all that sorted out, I can focus on the rear end and maybe test drive it!

before


after
 

joe.schigel

Rank IV

Enthusiast III

1,212
Detroit, MI
It's been a busy week this week at work and home but I've still managed to make a little progress on the truck. This week my reproduction rhino grille came in from a gentleman over on the ifsja forum. It looks pretty good! I can't wait to get it mounted and painted.


I also ordered a bunch of steering parts, cooling parts, and brake parts from summit and most of it came in yesterday. I was able to finally test fit the thing that I've been dreading, the radiator. Luckily, it fits like a glove!


There's enough room between it and the engine (I'm going to use a pusher fan) and it shouldn't take much fabricating to make it work.


I got an aluminum 3-pass radiator to hopefully keep the V10 cool enough. I need to weld in the driver's side radiator brace then a friend of mine will TIG on some tabs to the radiator so I can mount it where the 715's radiator originally mounted.


After that, I want to piece together the brake system and steering system so I can have all of the engine accessories and engine bay sorted out. I still am on the fence about putting A/C in it. It would be nice, but I'm not sure I have the room for a condenser in front of the radiator.
 

joe.schigel

Rank IV

Enthusiast III

1,212
Detroit, MI
Last night I was able to fabri-cobble together the driver's side radiator support. I used a sheet of 1/8" steel and a section of angle iron. It's simple but should be effective. Now I just need to TIG some aluminum brackets onto the radiator to mount up.

the brace itself


holding it in place


Welded in and ground down for smoothness


It seems to fit really well.


I was also able to swap out the fuel injector on cylinder 4 and it's running normally now! I may be able to get the truck driving in a month!
 

joe.schigel

Rank IV

Enthusiast III

1,212
Detroit, MI
I've been slowly chipping away at the 715 as time allows. Last weekend has some extremely nasty weather most of the time and it knocked out my power. Plus, who wants to be in a garage in a sever thunderstorm with 80mph winds? haha. When the weather finally broke, I took my radiator over to my buddy's place so he could TIG on some mounting tabs.


After that, I painted the face of the radiator with paint from Eastwood to try to hide the fact that I have a large engine in the truck.


After doing that, I also painted the engine bay with the same rust-inhibitor that I coated the frame and firewall with.


On top of all this, I even managed to get the brake pedal installed and the pushrod fabricated. It looks like it will all work.


Once I get my proportioning valve in, I can finish the brakes. next will be the steering and the clutch. I need to figure out how to sneak a master cylinder onto the clutch pedal where there was never supposed to be one. After that, I'll tidy up the wiring a bit more, rebuild the axles, install the driveshafts, then maybe, just maybe, be able to give it a test drive!
 

joe.schigel

Rank IV

Enthusiast III

1,212
Detroit, MI
Today I got my exhaust manifolds back from the ceramic coater's. They look pretty good! I went with silver since the two options they had on hand were black or silver and I wanted to try to dissipate heat a bit.


I also decided to go ahead and get the truck box I wanted. After I get it bolted down, I'll relocate the batteries to the box. This way they'll be out of the weather and out of my way. I think I'll turn the center console into a boom box of sorts. Head units on the top and speakers on the sides.


I tried to fiddle with the clutch pedal mounting but with the time I had today, it wasn't going to happen. So I decided to turn my attention to the steering. I had ordered hoses for a J10 and lucky me! They fit the box and the Ram's pump! I need to route the return hose in a bit of a funky direction to avoid the radiator but otherwise, it's looking good! I'm also putting a small cooler on the frame crossmember to cool the steering system. I've at least got one system mostly figured out!


joe.schigel

Rank IV

Enthusiast III

1,212
Detroit, MI
After fiddling with the radiator and power steering for a while, I realized that those hoses I was trying to use didn't have the right end (they are flared where they should be o-ring style). So while I'm waiting on my new hoses, I figured I'd start work on the clutch.

First thing was to figure out how to sneak in a master cylinder in a place there was never supposed to be one. Since I have a vacuum brake booster, it firewall space more of a premium.


I found a suitable location utilizing a hole that is unused in the clutch pedal mount. I needed to drill out all three holes and grind down the lip in the above picture. The idea is to put the master cylinder to the left of the pedal and relocate the bracket (or make a new one) to work with the new push-rod location.


Drilling the holes wasn't too bad and the master cylinder fits! Although, I got it a tad close to the fender liner. Oh well.


Now all that's left to do is shorten the push-rod and make some form of bracket on the pedal for the push-rod to mount to.
 

itsrikka

Rank I
Launch Member

Member I

271
Vincennes, IN
First Name
Rikka
Last Name
Lee
Member #

19291

Just went through your whole build. Damn does this thing look good. I always wanted a 5-quarter but couldn't justify the $3-5k people want for them around here (in junk condition.)

I love that you put the V10 in. Don't see a lot of that where I'm from. I also love the wilwood driveline brake. I've never seen that before. Is it just to help slow the truck by slowing the driveshaft?
 

joe.schigel

Rank IV

Enthusiast III

1,212
Detroit, MI
Just went through your whole build. Damn does this thing look good. I always wanted a 5-quarter but couldn't justify the $3-5k people want for them around here (in junk condition.)

I love that you put the V10 in. Don't see a lot of that where I'm from. I also love the wilwood driveline brake. I've never seen that before. Is it just to help slow the truck by slowing the driveshaft?
Thanks! The drive-line brake is my parking brake. The truck had similar originally but it was a strap around a drum. Kind of like a tractor.

Here's the old tcase with the old drive-line brake
 

joe.schigel

Rank IV

Enthusiast III

1,212
Detroit, MI
ok, so long time no post. My primary driver (the 80 series land cruiser) blew it's head gasket and that combined with work took away from 715 wrenching time. I was finally able to dig back into it again tonight for a bit. I messed with the fuel tank mounting some more but I need some material before I can make any more progress... I notched the cross members where the new sending unit / pump sticks up but it's so tall that I still need to space the tank down 2". I'm definitely going to need to make one heck of a skid plate for it.
In the meantime, I was able to bolt down my storage box and fiddle with the wiring some more. I couldn't get my code reader to work the other day and determined that it wasn't getting power. So I rerouted some 12v power and now the computer can talk with my scanner!


It's throwing an evap purge solenoid code but that's not a big deal since it's no longer there. Now I just need to figure out what to do with the rest of the mess of wires... I'd love to get rid of that distribution block but I'm not sure I can. I might tuck it all up into the dash and strap it down out of the way.


While I was contemplating where to run the wires, I had my head in the footwell and pushed the pedals out of frustration. To my chagrin, it looks like when the clutch gets depressed, the firewall deflects... I should probably brace that soon. This project feels like the definition of "so close, but so far" right now...
 

joe.schigel

Rank IV

Enthusiast III

1,212
Detroit, MI
Ok, so I was finally able to get the fuel tank mounted in the truck! I had to clearance some of the cross members as well as weld in some spacers so I could sneak the fuel module in and tuck the tank up as high as possible. The downside is the bed is now a touch weaker. But the upside is that the tank doesn't drop below the frame much and the fuel module is ~1/8" away from the bottom of the bed!

just snuck it in there


After getting that sorted, I changed gears to install my new 12V gauges. I decided to do that before rebuilding the rear axle because I clearly have my priorities straight... plus they're shiny!

Original


I used Stewart Warner gauges for the ancillaries and an Autometer GPS speedometer. I had to paint the chrome bezel on the speedo but other than that, it was all plug and play.


One of the Stewart Warner gauges did have a mounting post pull out after I accidentally over-torqued it...


I tried to solder it back on but I think I need to use epoxy.


Next, I guess I do the rear axle while I avoid the rest of the wiring... Or I'll muscle up and do the wires. The axle sounds good. haha
 

joe.schigel

Rank IV

Enthusiast III

1,212
Detroit, MI
Ok, after a long hiatus, I was able to resume work on the 715! I started with getting the fuel tank hooked up. The new filler neck with nice, fuel rated hose was a touch short so I had to extend the fuel tank inlet.


I used a piece of 3" exhaust extension, some sealant, and tapped it on.


The fuel system is now 98% done! I just need to rebend the fuel line a bit.


Next I added in a reinforcement plate to the firewall for the clutch pedal. I noticed the firewall flex when I pushed the pedal so something had to be done. I used a plate of 1/8" metal and welded it in. It doesn't seem to be bending anymore now!


After that, I attached the pedals and the steering column and wheel finally! It's so nice to have the steering wheel in and wiggle the tires!


Next I'm going to start on the rear end and suspension. I want to remove leaf #2 from each of the spring packs. I just need to figure out how to reattach the spring retainers to #3 or something.
 
  • Like
Reactions: MazeVX

renodemona

Rank V
Launch Member

Enthusiast III

2,365
Sparks, NV, USA
First Name
Glenn
Last Name
Smith
Member #

4913

Ham/GMRS Callsign
KJ7TCT
That's looking awesome! Always good when you can sit in it and it feels kinda sorta like a truck again
 
  • Like
Reactions: joe.schigel

joe.schigel

Rank IV

Enthusiast III

1,212
Detroit, MI
I made some pretty good progress today. I was able to get one of the rear leaf packs off and it was much easier than expected.


From there, I undid the leaf pack to knock the rust off and paint them.


After the paint dries, I'll keep spring #2 out to see how much that softens up the ride. I've got new spring clips and some leaf spring insert material to hopefully reduce friction between the leafs and allow the suspension to flex a bit more. While I waited on the leafs to dry, I cleaned and painted the rear end.


We'll see how far I get tomorrow but I hope to have the rear basically done by the end of the day.
 
  • Like
Reactions: MazeVX