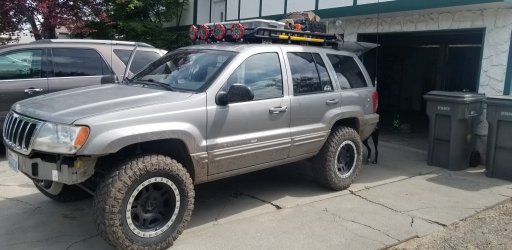
Just another WJ

  • HTML tutorial

MrWilsonWJ

Rank V
Launch Member

Member III

1,691
Kennewick, WA
First Name
Dustin
Last Name
Wilson
Member #

23384

20200426_163238.jpg
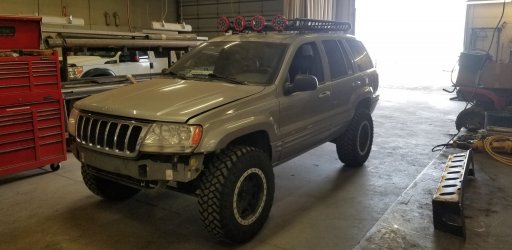
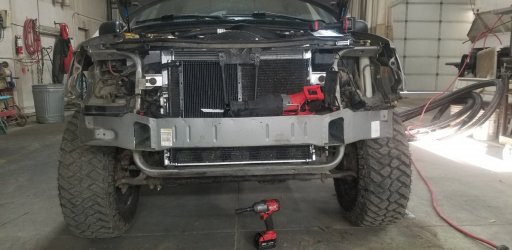
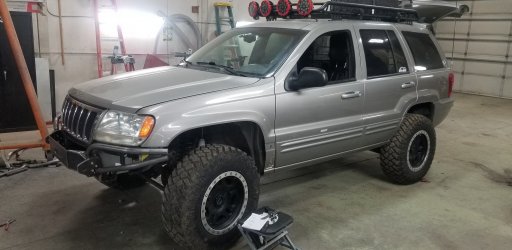
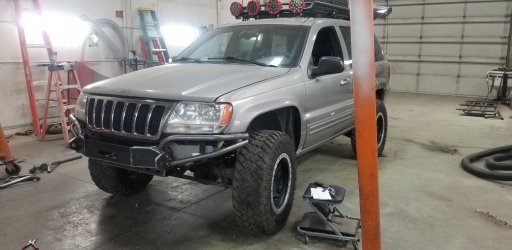
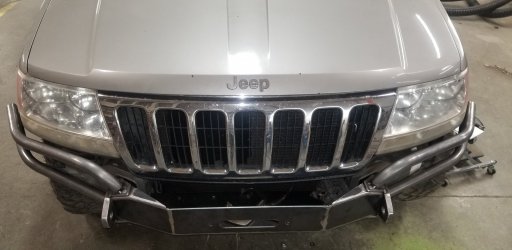
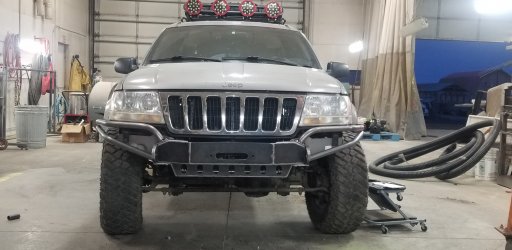
It's alive!!! Finally got it back together, once all the plumbing was done I got the fluids in it, it fired up and ran smooth. Only thing I ran into was fitment of the hood latch. The radiator has a trans cooler built in (stock did too) but mine also had an auxiliary cooler plumbed in series. So not being able to leave well enough alone a thought if an auxiliary cooler is good, a bigger auxiliary cooler is better. Well that's all good until I went to install the grill support and hood latch and the latch came in contact with the cooler. After a little bending and spacing of the latch all was good.
20200426_163307.jpg
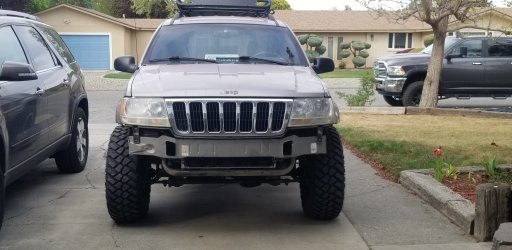
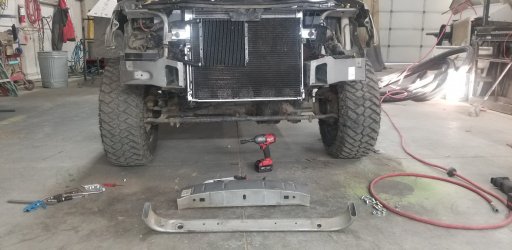
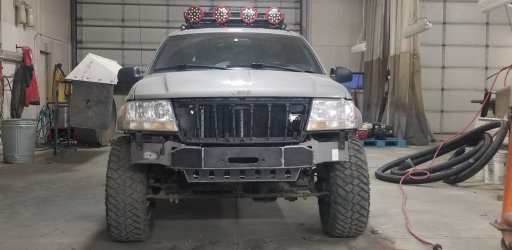
I didn't put the original bumper back on since I have the trail forged stubby to go on. I'm not a big fan of the chrome, but when I was at the wrecking yard that was the only '04 grill they had. I guess we'll see how I like it after the bumper is done, if I'm still not happy I'll cut my old grill off the bumper and put it back on. (For those of you reading that don't know, early WJ bumper/grills were one piece and I believe only the '04 had a two piece bumper/grill set up)
Now that it's up and driving it's time to get it to the shop for a bumper!
 

MrWilsonWJ

Rank V
Launch Member

Member III

1,691
Kennewick, WA
First Name
Dustin
Last Name
Wilson
Member #

23384

Cb install time! I'm currently reading the material to get my ham license, but I probably won't have it and a radio for a while so in the meantime I thought I would install the ch I had on the shelf. Also once I get my Ham i would then be cover with 2 types of trail comms since i know people running both. So here's a quick rundown of the radio install.

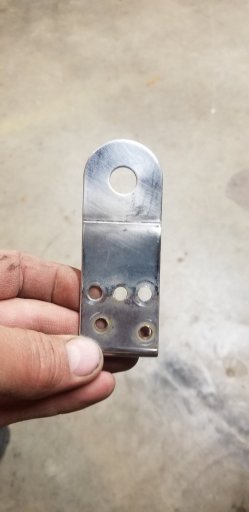
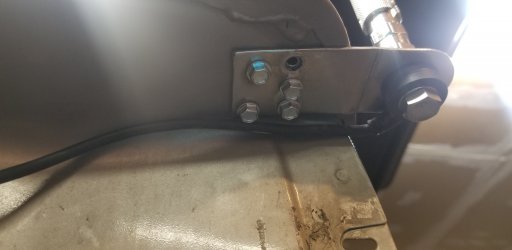
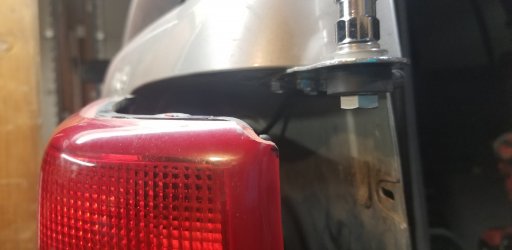
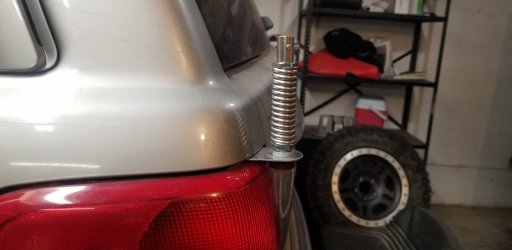
I had an old 90 degree antenna bracket that I straightened out for my mount, then I pulled off the driver side taillight and mounted it to the body. I had to trim the corn of the taillight just a little for the cable to fit between the light housing and the body. For a cable I used a fire stick low clearance.
20200427_175319.jpg20200427_182838.jpg
20200427_182857.jpg
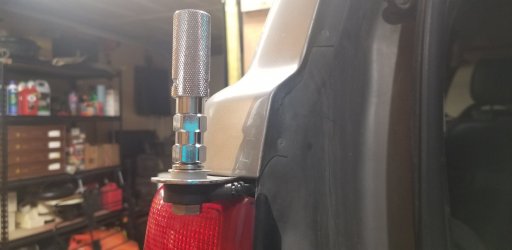
And this is what the mount looks like all buttoned up! Sorry no pics of the antenna itself installed cuz my garage ceiling is too low. I have both a spring mount and quick disconnect for the antenna, not sure what the final setup will be.
20200427_183025.jpg
20200428_195505.jpg
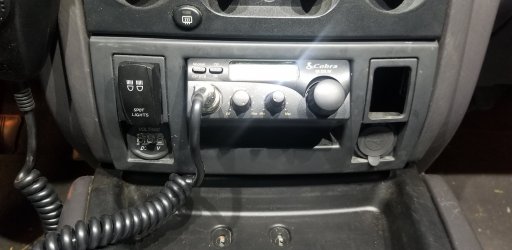
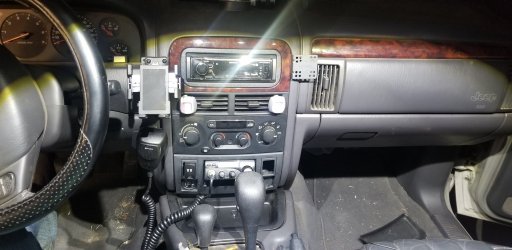
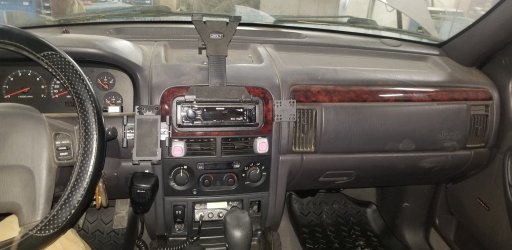
For the antenna cable I ran it in where the wiring for the taillight goes and inside the body panels up to the dash and once in the dash cut it to length to install the end. I had already decided to change out the original cigarette lighter and 12v power port. In their place is now a digital volt meter that will eventually monitor the 2nd battery and on the other side is a dual USB charger plug in. Since those were both removed I took the power from the lighter to power the radio. To mount the radio I cut the back out of the cubbie hole and drilled holes in the side for screws.
20200428_195321.jpg
20200428_195248.jpg
That center panel is from a '04 I believe. Mine originally had the ashtray. Radio fit perfectly in the cubbie and looks pretty clean. In the bottom corners you can see where the lighter/12v plug used to be. Now lower left is voltmeter lower right is the USB plugs. The rectangle holes on either side of the ch is where the switches for the heated seats would be, but since my WJ doesn't have them it's a great place to stuff a couple rocker switches. And that's all I got for now... we'll see what other little projects I can find to knock out before moving it to the farm for bumper work.
 

MrWilsonWJ

Rank V
Launch Member

Member III

1,691
Kennewick, WA
First Name
Dustin
Last Name
Wilson
Member #

23384

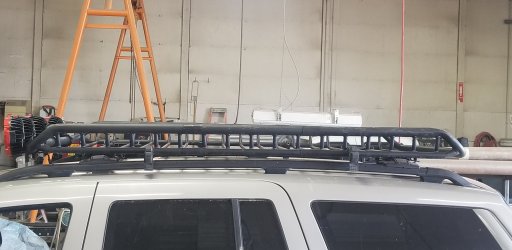
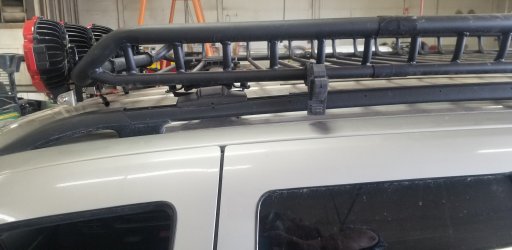
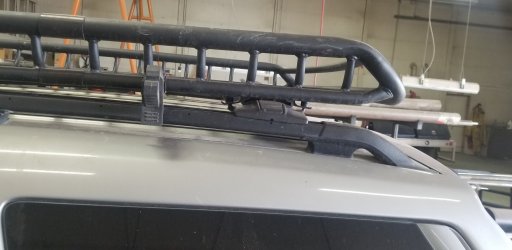
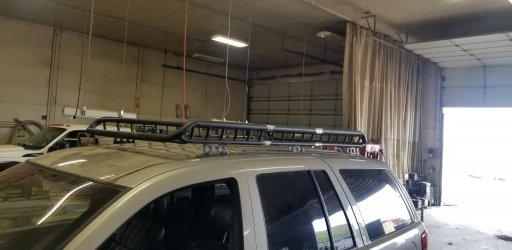
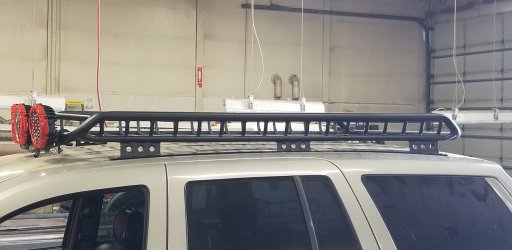
Finally got the WJ out to the farm for some metal work list includes remount roof rack, trim fenders, front bumper w/ high clearance rad. Support, rear bumper w/ tire swing out and some rocker protection. Decided to start with the roof basket, goal for this was to get it lower to the roof and make it a more solid mount. It was just sitting on the factory roof rack which was pretty flimsy and had the basket sitting about 2" off the roof at its closest spot.
1588513890412_20200502_091932.jpg
20200502_091900.jpg
20200502_091908.jpg
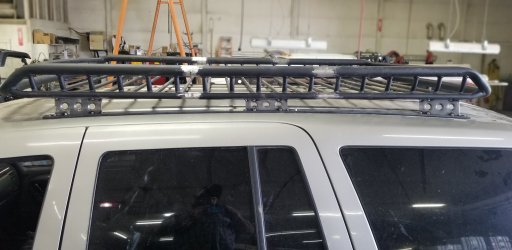
I didn't take any progress pictures while I was doing the work, but really I didn't do anything crazy to mount it. Several other people have done write ups on mounting these and I didn't deviate much from what they've done. After removing the factory rails I cut a couple pieces of 1"x 1/4" flat bar 5' long and attached it to the roof using 3 of the factory holes. Since I wanted to get it down low I put some 1/2" square stock on the peak of the curved roof for my clearance, at either end where the roof curves down it's still about 2 1/2" off the roof. Once I had the basket all centered up where I wanted it to sit, just cut some 1/8" plate to go between the basket and 1/4" flat bar that is bolted to the roof. I went with 3 plates per side and each one is 6" long. Since I picked up a dimple dye set a while back and hadn't had a chance to play with it I put some dimpled holes in my support plates. Here it is all tacked in place before I pulled it down for final welding.
20200502_163320.jpg
20200502_163341.jpg
After that I got it off and finished welding it all up, just need to paint it and get some kind of thin rubber or foam strip to put between the rack and body when it goes back on. I haven't settled on a final light configuration or what all will be mounted to the basket so for now lights will be on bolt on clamps and shovel/ axe will use the same clamps with quick fists. Once I figure out the setup I like I'll weld on some permanent mounts and bed line it for a durable coating. Another thing I did that I forgot to mention was weld up the seems on the basket since it was previously held together with screws. The basket is a Rola with an extension in it, they slide together and have a single screw at each connection then a piece of thin rubber sleeve covering the screw and seem. The purpose for welding the seem was not only to make it stronger but also try to keep moisture out. I'll post up some pictures once I get it painted and things hung back on it. Next up fender trim and bumper!
 
  • Like
Reactions: SkunkedGorilla

MrWilsonWJ

Rank V
Launch Member

Member III

1,691
Kennewick, WA
First Name
Dustin
Last Name
Wilson
Member #

23384

Been a busy week so far, but I've got a bit more done. I got the rack all cleaned up, primed and paint. Before I installed it put some hard 1/4" thick foam weather strip on the bottom of the flat bar rails so there will be a little protection between the rack and body. Still need to scrounge up some metric stainless steel bolts for attaching it but for now regular bolts will work. Once it was mounted I threw some lights on it, they're nothing special just cheap-o 6" LEDs but I like how they look.
20200505_174911.jpg
20200505_174929.jpg
Originally I had planned on knocking out the bumper first, but my wife decided she wanted to do some social distance camping this weekend for her birthday so my project list changed order a little bit. Mostly what I've got done was little things just to make it more usable for the weekend. A/C is back up and working. After having it apart to do the timing set and replacing the lines it needed vacuumed and recharged. Got that all done and it's back to blowing cold.
Next on the list was a tablet mount and more aux power for charging. The mount is a screw down ball mount that I attached to the middle of the dash. For more charging power I installed a cigarette lighter plug behind the dash and put one of those plugs in it that has 2 USB ports for your charging cord to plug into. Then I ran one cord behind the dash, coming out from the trim on the bottom left corner by the stereo and the other was ran up by the windshield vents and up to the tablet mount. I'd like to find a better solution to my cigarette lighter plug for power, but it's what I had laying around so I used it.
20200506_202623.jpg
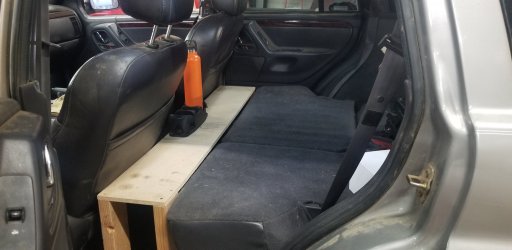
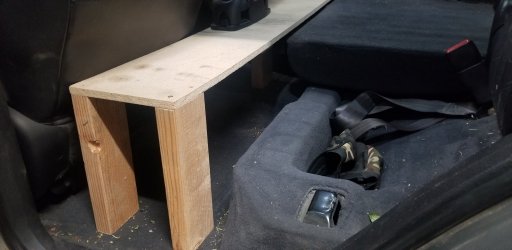
Next small project was removing the rear seat bottoms and replace them with a small platform. Now don't laugh too hard at my wood working skills, I threw the platform together in about 15 mins and plan to do something totally different in the future. The plan for this one was something fast that would get the puppy (100 lbs great dane/mastiff mix) a little more room and add some storage space. It's nothing special but it will serve its temporary purpose, and I added extra cupholders!!
20200506_202431.jpg
20200506_202500.jpg
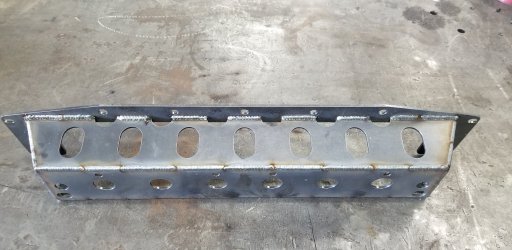
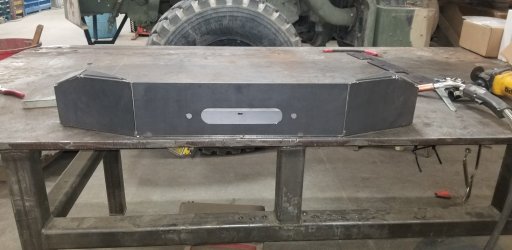
Before I changed direction on this week's projects I did get a start on some of the bumper stuff. This is the Trail Forged high clearance radiator support I ordered from Xerofab. Went together really easy, just bend the pieces into place, set the top flange on and burn it in! Hopefully the rest of the kit is that easy. I didn't install it yet because it involves cutting the factory rad support off and I wanted to wait until I started the rest of the bumper.
20200505_174727.jpg
 

MrWilsonWJ

Rank V
Launch Member

Member III

1,691
Kennewick, WA
First Name
Dustin
Last Name
Wilson
Member #

23384

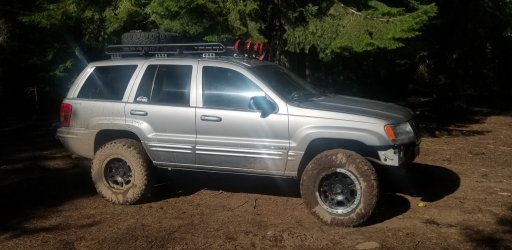
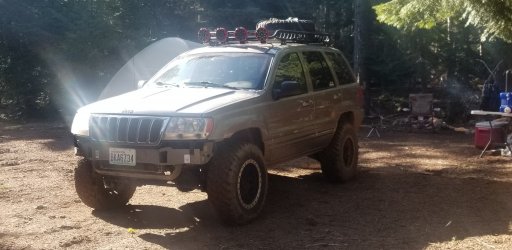
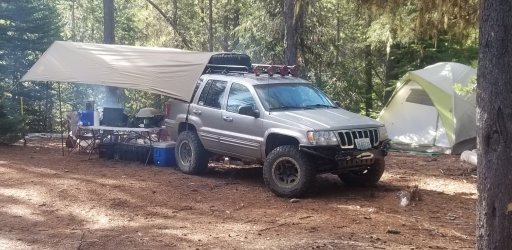
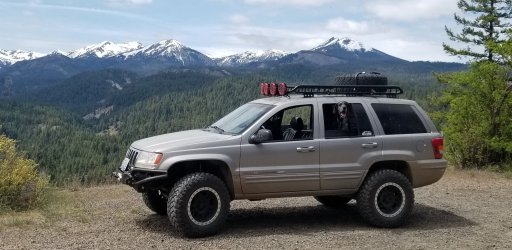
Took the WJ out on a little shake down trip this weekend and everything worked great. Ran good, my lights worked (had to rewire one cuz I pulled the wires out when I was unloading the roof rack) and the rack was plenty stout when loaded. Took it out on some trails and played in the snow a bit, but didn't get too crazy since I was alone and don't have a winch yet.
20200509_083645.jpg
20200509_083746.jpg
And one with the rack loaded with gear
20200510_143443.jpg
I've only made a little progress with the bumper install so once I get more done I'll throw up some pics.
 

MrWilsonWJ

Rank V
Launch Member

Member III

1,691
Kennewick, WA
First Name
Dustin
Last Name
Wilson
Member #

23384

Bumper Update... not done but getting there.
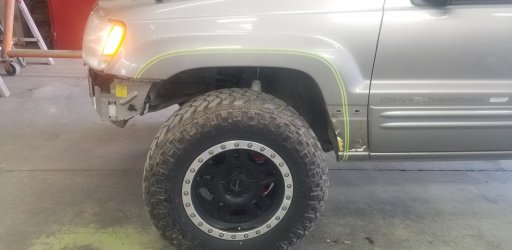
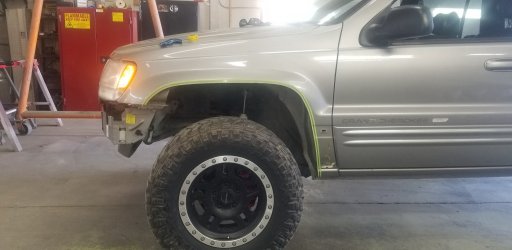
I first started off trimming the front fenders to where I think I will need them when I eventually move up in lift and tire size. As it was I had a little bit of rubbing when flexed but that shouldn't be an issue anymore, might even be able to go up in size. The other reason for trimming now is for when I build the outer wings of the bumper I know how far to run the tube to match the fender.
Trim Pics 20200511_171423.jpg20200511_173553.jpg
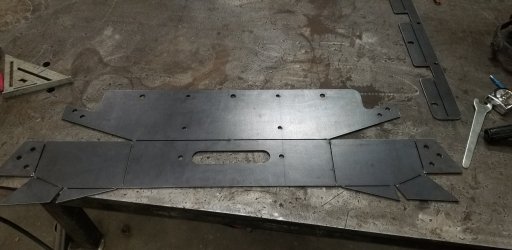
Next up was to weld up all the pieces for the brackets and the bumper itself. Rather than the kit showing up with a bunch of laser cut pieces that you have to line up and tack together they are cut out of one piece of plate with 1/4" tabs left holding them together. All you have to do is take a cutoff wheel, cut the tabs half way through and bend them into place. Mounting seems plenty stout, it has a plate the goes on the bottom of the "frame rail" and an L bracket that goes inside so it sandwiches the frame. So far I like the Trail Forged kit, It went together rather easy and had decent instructions.
20200512_183944.jpg20200512_184834.jpg
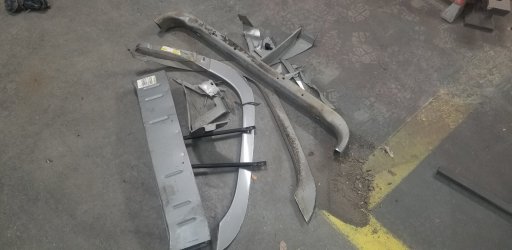
Next up was more cutting. The front cross member has to come out if you plan to run a winch (mine should be here tomorrow!!) You can mount the bumper without cutting this out, I had it bolted in place while tacking things together before cutting and it fit fine. With the bumper I had ordered the high clearance radiator support so the factory one had to be cut out as well.
20200513_191322.jpg20200513_192454.jpg

Annnnd the new center section all mounted up!20200513_203424.jpg
Now it's time to break out the tube bender and start work on the out wings. I have an idea of how I want it to look but we'll see what I end up with. Once the wings are done I'll have more sheet metal to cut away and I will have to do something different for a washer tank. I found a washer bottle kit from Napa that has a small tank with it for only $35, I'll see what I can come up with for that. My plan is to have the bumper built and rhino lined in the next few days so more pics to come soon, then on to the rear.
 

MrWilsonWJ

Rank V
Launch Member

Member III

1,691
Kennewick, WA
First Name
Dustin
Last Name
Wilson
Member #

23384

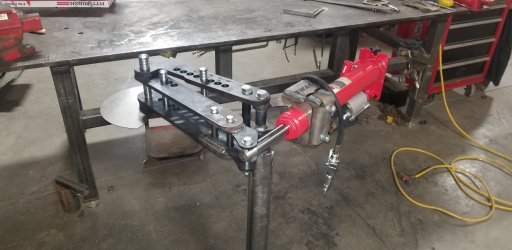
Bumper is done! for now anyway... It was a little bit of a slow process between coming up with something I liked and getting a new bender figured out so I could get uniform bends side to side. The bender I used was a woodward Fab manual with a swag off road cylinder clamp and harbor freight air over hyd. cylinder.
20200514_202154.jpg
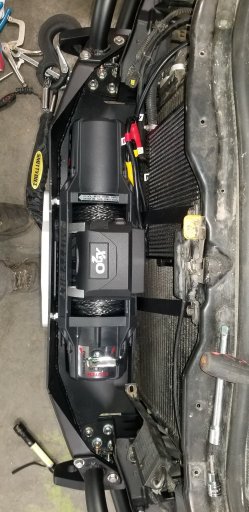
I started with the passenger side and after 3 attempts came up with a top tube I liked then moved over to the driver side and knocked it out of the park the first try using the measurements from the other side. Only problem is I was slightly of on my measurements and the driver side looked better, time to measure that one to find out where I was off to duplicate it for the passenger side. 3 more tries later for the passenger side and I had it right! So that makes 6 tubes bent up for the passenger side to the 1 it took to get the driver side. The bottom is pretty simple with just one bend in it and rotated up towards the top tube, I'm not totally sold on the look of the bottom tube and might change it up. For now I'll run it like this but will probably put in a filler plate between the tubes with some dimple dyed holes, just need to decide if I want to put lights in it or not. I made the shackle hangers and wings to bolt on that way I can easily remove them to make changes or replace one if it gets folded up on the trail. Another new addition to go along with the bumper is a Smittybilt X20 10k winch with synthetic line. The bumper is really compact which I like but it sure makes it tight for getting the winch installed. Also to pull it off how I wanted I removed a fare amount of sheet metal.
20200517_204729.jpg20200517_204729.jpg20200517_204642.jpg20200517_204622.jpg20200517_204610.jpg20200520_173819.jpg20200519_161200.jpg

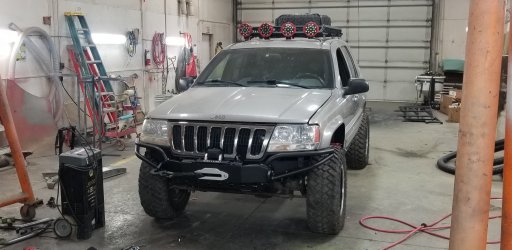
And here is the finished product! Until I decide on the filler plates and lights I just Rattle canned it but once I'm happy I will sand blast and rhino line it. While I had the spray paint out I painted the exposed sheet metal behind the bumper and gave the inside of the wheel wells a coat of black to cover up the silver which I think really helped the looks after trimming. I'll get some more pictures up after I get it outside. Also you can see I got a little carried away trimming the grill for the clutch lever on the winch. Luckily I have another grill at home so I'll give it another go to see if I can do a cleaner job, maybe not take out so much material.
20200520_183757.jpg
 

MrWilsonWJ

Rank V
Launch Member

Member III

1,691
Kennewick, WA
First Name
Dustin
Last Name
Wilson
Member #

23384

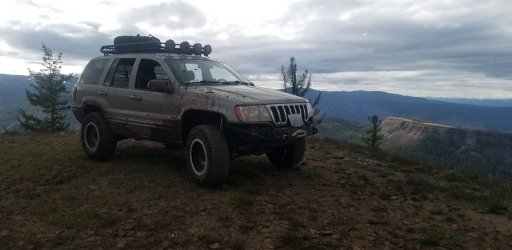
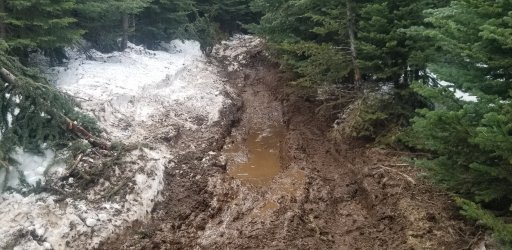
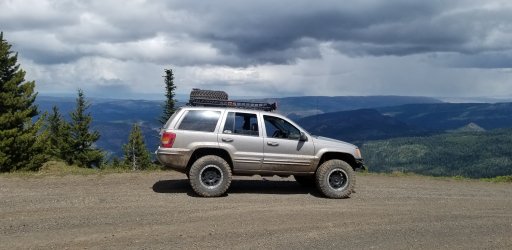
I got the WJ out on some trails this weekend and it did great. It could definitely use some more ground clearance but I can deal with it for now. The trails I ran would normally be an easy drive but this early in the year there was still a decent amount of snow and mud but I got through it all with the addition of some fresh pin striping and a flat tire from a log that ripped a valve stem off.
20200523_081831.jpg
20200524_130330.jpg
20200524_171252.jpg
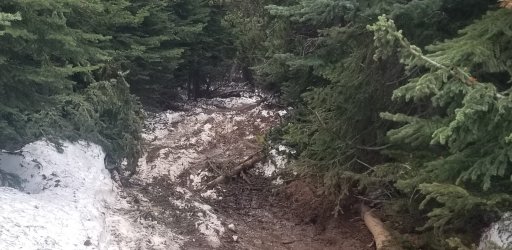
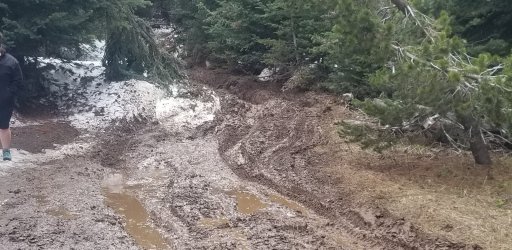
And here's a little bit of what the trails looked like, don't look like much from the picture but I probably wouldn't have tried them without the winch. A lot of the ruts were pretty deep and there were some good size holes you had to watch out for. This was the first patch like this and probably one of the easier ones to get through.
20200524_155143.jpg
20200524_155158.jpg
20200524_155116.jpg
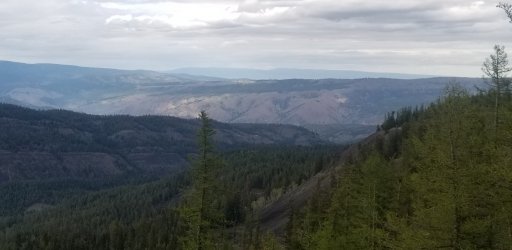
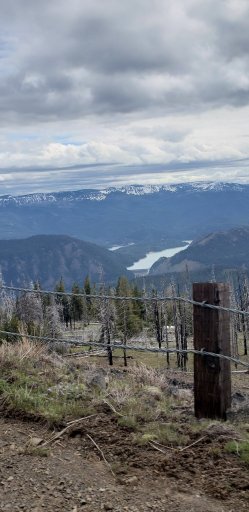
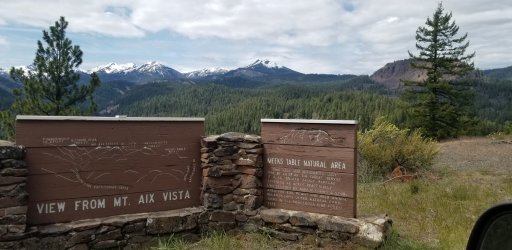
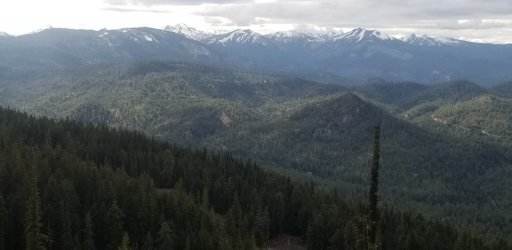
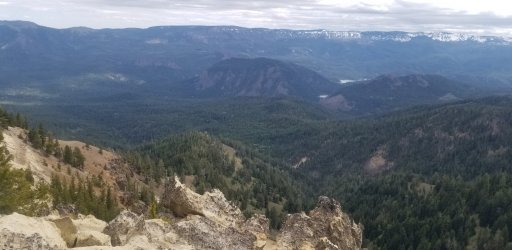
But there was some awesome views along the way.
20200524_171443.jpg
53654.jpeg
20200524_130740.jpg
20200524_171436.jpg
20200524_145123.jpg
 

ThundahBeagle

Rank V

Advocate I

1,548
Massachusetts
First Name
Andrew
Last Name
Beagle
Member #

0

It really was! We had rain, cold nights and a flat but it was totally worth it.
I also went with IRO (2 inches in my case) and Pro Comp 9000 series. I am guessing you have spoken with Nick "Kolak" Ianuzzi out of Arizona? He is extremely knowledgeable about Jeeps in general and WJ's specifically. He suggested IRO coils and either Bilstein or Pro Comps to me. I went with the Pro Comps and am perfectly happy. I slapped some Moog sway bar links all around, put in new end-to-end drag links and entire new tie rod, some JK wheels and that thing was rockin out nicely.

Still got a lot of work to go, though, so I'm watching.
 

MrWilsonWJ

Rank V
Launch Member

Member III

1,691
Kennewick, WA
First Name
Dustin
Last Name
Wilson
Member #

23384

Sounds like you got yourself a good set up going. All of my IRO stuff came from Kolak, the kit I used was the 3" Foundation. It came with the lift springs, New track bar and sway bar links then he got me the pro comp shocks. While I was at it I installed a new HD steering stabilizer, new spring isolators, new rear a arm and some bushings. On this last trip I noticed my front control arm bushings making noise (really it was my wife that pointed it out) so I'm currently shopping for some adjustable LCA's...if I'm gonna be in there changing things I might as well go bigger and better. Looking to make a couple other suspension changes, already have an Addco HD rear sway bar on it's way but also eyeing some of the JKS quick disconnects.
 
  • Like
Reactions: SkunkedGorilla

Sarab Loh

Rank II
Launch Member

Enthusiast I

442
Hartsdale, Ny
First Name
Deep
Last Name
Singh
Member #

11676

Remember to disco the rear when wheeling with addcos. They limit flex and can damage the end link mounts. Awesome build!

Alsobthe rear seat bolts can be replaced with Clovis pins so you can add seat bottoms and remove them easily
 

MrWilsonWJ

Rank V
Launch Member

Member III

1,691
Kennewick, WA
First Name
Dustin
Last Name
Wilson
Member #

23384

Remember to disco the rear when wheeling with addcos. They limit flex and can damage the end link mounts. Awesome build!

Alsobthe rear seat bolts can be replaced with Clovis pins so you can add seat bottoms and remove them easily
Good to know on the Addco sway bar, I was wonder how much the heavier bar was going to limit the flex. As for the rear seats I plan to remove them completely and build boxes that go in their place, my thought for that is if you don't have the bottoms with you the backs are kind of useless and having them there is a waste of space. Since it is a 60/40 split I want to build 2 boxes, one the size of the 60 one for the 40, have it go down into the foot well and where the seat back is when folded down then the top be level with the cargo area. If I ever plan on having a passenger on a trip I can just pull one side out and throw the seat back in.
 

MrWilsonWJ

Rank V
Launch Member

Member III

1,691
Kennewick, WA
First Name
Dustin
Last Name
Wilson
Member #

23384

Here is a little tease of the latest project, cut the rear fenders and a full stuffed 33" tire, 285/70R17 to be exact(Maxxis says they are 33x11.8) . The rear clears surprisingly well with only 3" of lift, but the front is going to take a little work to make fit well. As it sits right now the front only rubs at full lock. Testing was done with factory rear sway bar and the front connected since I don't have disconnects yet. In this configuration I can flex like in the picture with the front tires only starting to rub when I get close to full lock. I think with a combination of a BFH and adjustable control arms I can make this work. I also have a set of 3/4" leveling spacers I could throw on the front if need be, I'm going to try to do this using as little bumpstop extension as possible since I still want it to flex. Some bump stop extension is going to be needed in the rear, it currently tucks inside the fender opening with 3/4" to spare but the tire will come in contact with the top of the wheel well if I go more than the picture. Shouldn't be too much though, I will have to get it lifted up with the forklift and take some measurements to see just what I need. I took a lot of pictures of the fender trim process so when I get some time I'll do a write up for those interested.
20200602_193530[25891].jpg
 

MrWilsonWJ

Rank V
Launch Member

Member III

1,691
Kennewick, WA
First Name
Dustin
Last Name
Wilson
Member #

23384

Really nice build. I like everything about it... even the chrome grille ;) Looks great and is a very practical and sensible build. Well done.
Thank you! This will be one of those ever evolving builds. Once I get the suspension dialed in to clear these tires I'll get back to fab work and get a bumper/tire carrier built. After that it's on to electrical and accessories, 2nd battery with isolator, on board air, some lights in the rear hatch to use at camp. Then fully remove the rear seats and build boxes. Once I have things where I like it I would like to go with a 6" lift and 35's so I can get more ground clearance. The major down fall to these rigs is how much lift you have to run if you want bigger tires...
 

GCWJ

Rank 0

Traveler I

60
Coon Rapids, MN
First Name
Glen
Last Name
Canaday
Nice WJ.
Pay attention to the accessories belt tensioner, they tend to fail around 170-190k km (at least as I saw on few WJ in our group).
Mine failed at a little over 150k on the freeway. Thankfully they are easy to change out on the side of the road.
 

MrWilsonWJ

Rank V
Launch Member

Member III

1,691
Kennewick, WA
First Name
Dustin
Last Name
Wilson
Member #

23384

Rear fender trim update-
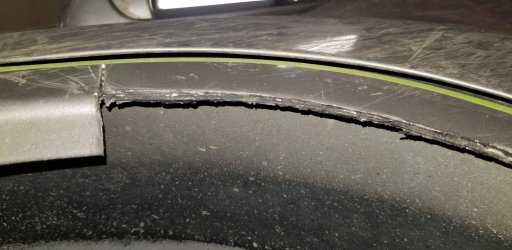
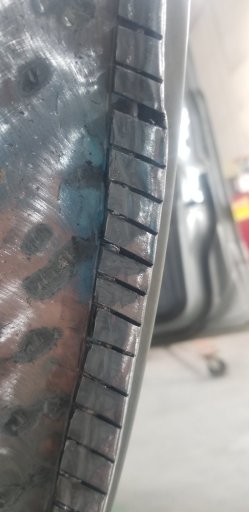
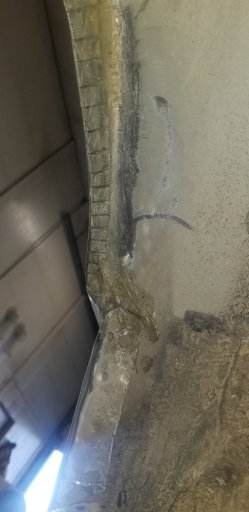
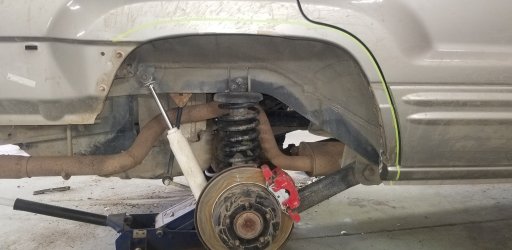
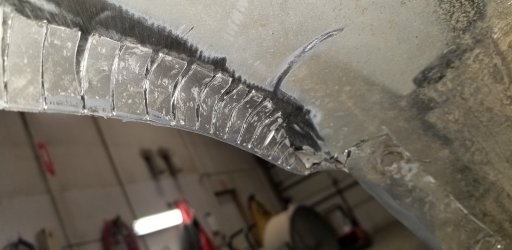
There is tons of write ups and how to videos out there on how to trim the rear fenders on a WJ and I think I watched all of them. They range from cutting with a sawzall and hammering the metal over to full on fender relocating with adding in new sheet metal, mine falls somewhere in the middle, but so far I'm happy with the result. For those of you that don't know the rear fender opening on the WJ consists of an inner and outer piece of sheet metal and the distance between the two varies depending on what part of the opening you're working on. So when you start to tackle this job in needs to be approached differently depending on the section you are working on. After watching and reading for a couple weeks on how to do this job I decided on the method of cutting, folding over, reattaching with body panel adhesive and covering with seam sealer.

Here is what I lined out to cut, the tape is 1/4" wide, I put it right on the edge of the door opening and then followed the shape of the original fender opening.
1.jpg
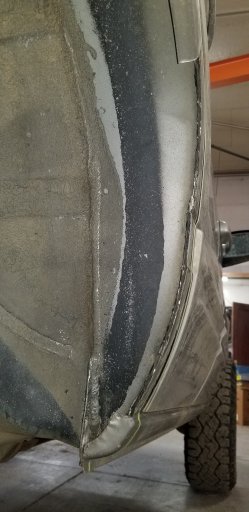
Next up was to start the cutting! My tool of choice was a die grinder with a 3" cut off wheel. First step was to separate the inner and outer pieces of sheet metal, to do this cut on the edge of the fender opening where it turns in 90 degrees to make the factory lip.
2.jpg
3.jpg
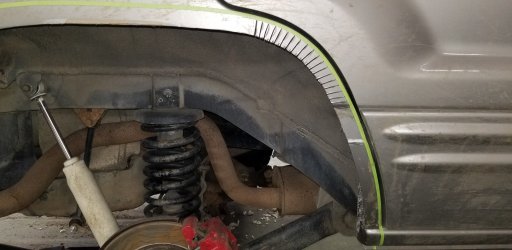
At this point you should be able to get a screwdriver in between the two pieces and open them up. I don't have any pics of it, but there is a bunch of foam insulation/ sound deadening in there that you want to scrape out as you go so you don't start a fire. When you're separating the sheet metal only take off enough of the lip to get them apart, you will need the extra length of the outer skin for folding over later. Now that they are apart you can move on to make the 100's of bend cuts, the closer together you make them the smoother the radius of the fender opening will be. In the areas where the opening had a tighter curve I tried for 1/4"-3/8". Cut just up to the tape and try to keep them as even as possible because if you are short of the tape on one and cut into the tape on the next it will show. At this point I'll cover how to do the front section, then the middle and rear as each area of the opening requires a little different approach.
4.jpg
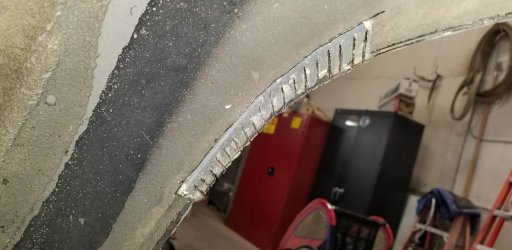
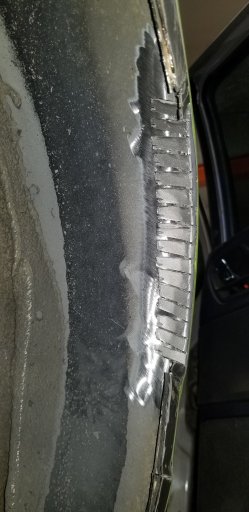
Once those are made you will remove a portion of the inner sheet metal using your bend cuts as a guide as to how much to cut out. Doing this make for less metal to bend but also creates a gap in some places.
5.jpg
I wish I had taken more pictures at this point, but I fail you... But in the pic above you can see I went about 1/4" past my bend cuts, this was because at this part of the fender the inner piece of sheet metal had the start of a bend and cutting it out would allow for a better bend of the outer skin. Before I bent anything over I took a 3" 80 grit flap wheel on a 90 degree die grinder and cleaned things up to bare metal to help the panel adhesive stick. Once were cleaned up I took a flat nose punch and hammered in the inner sheet metal to close some of the gaps up, then began to bend over all the little tabs of the outer skin. You can use a pair of needle nose vise grips or just do it by hand. After they were all bent over for that section I worked it with a hammer, hitting right on the corner of the bend to get the bends to roll in tighter. Next just lightly tap the tabs down into place until they looked seated up to the inner piece of sheet metal. Once I was happy with how they were laying I came back with the die grinder and cut off any excess material, leaving about a 1/4" past the gap between pieces.
6.jpg
20.jpg
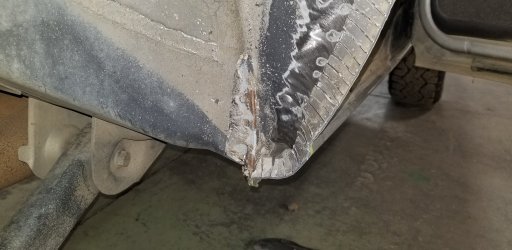
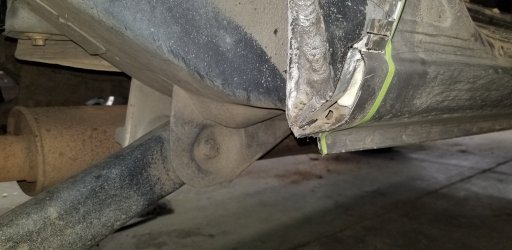
Now that the front radius of the opening was done I moved onto the rocker. Start with cutting off the end cap of the rocker and removing all the foam. After that it's pretty much the same process, but instead of removing the inner piece of sheet metal I bent it out towards the outer skin to close some of the gap and made the same type of bend cuts in the outer skin to fold it over the inner skin. Also just inside the rocker is a pinch weld that I just hammered over.
15.jpg
16.jpg
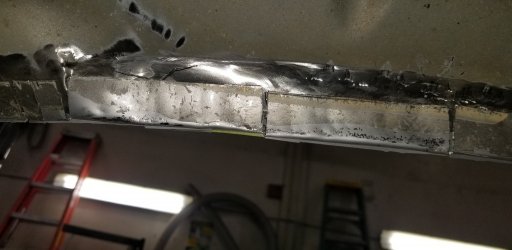
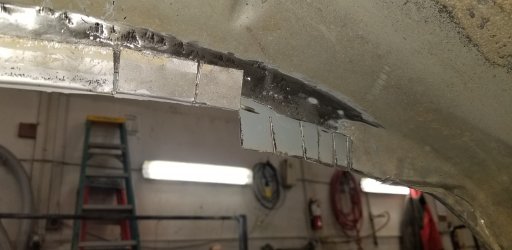
After that I mover on to the upper portion of the wheel open which is really the easiest part and can be bent up in three sections. Same process as before but at this section the 2 pieces of body panel are really close so you can just trim back the inner skin and fold the outer over 180. Once it was folded over I took a hammer and dolly to it to tighten up the bend. In the next 2 pictures you can see chipped paint hanging down, I tried to score it with a razor blade before bending it but I don't think it helped much.
7.jpg
8.jpg
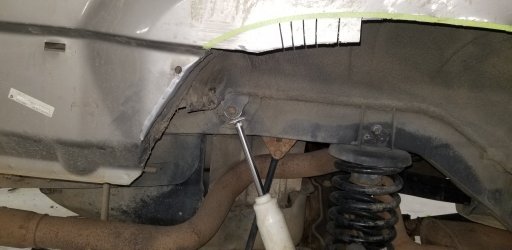
The rear of the opening is a mix of the first 2 sections, it transitions from bending over 180 to having some gap. I first started with cutting the pinch weld loose at the top so I could get it bent over and out of the way. Then made some more bend cut so I could get them bent over at the start of the transition.
9.jpg
Once those were bent over it was the same process as doing the rocker: separate, bend inner skin out, outer skin in.
14.jpg
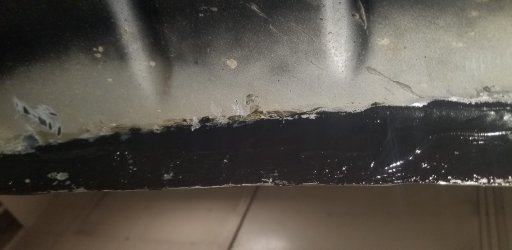
Once all the cutting, hammering and trimming was done I cleaned up the chipped paint a bit with the flap wheel and started in with the body panel adhesive. I've checked out a couple how to's on this job and seen where people used this instead of tacking things back together with results so I thought I would give it a go. I put it on pretty thick, got smoothed out and let it cure over night.
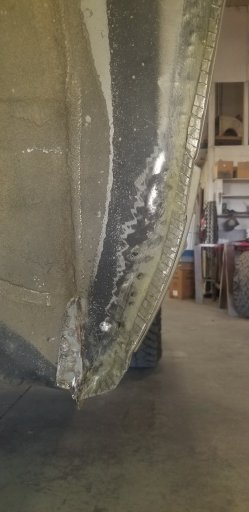
21.jpg
22.jpg
I followed the adhesive up with a coat of seam sealer to fill any pin holes and help smooth out any sharp edges I might have missed.
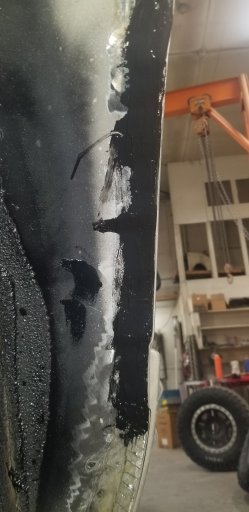
23.jpg
24.jpg
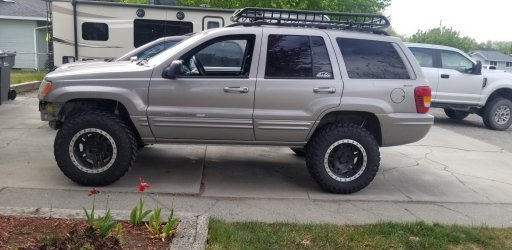
Once that dried I taped off the wheel opening and hit it with a coat of flat black paint. For the bumper trim I just used the cut off wheel and followed the line I made when I lined out the fender opening. I didn't add any new attachment points (I cut out a few with the trim) But I have a few hundred miles on it since I trimmed with no issues. Here is a pic with the trim job complete and the 33's. Next project will be adjustable upper and lower control arms in the front to be able to push the axle forward a bit, a set of 3/4" leveling spacers and quick disconnects. Parts should be here in the next week!