Member III
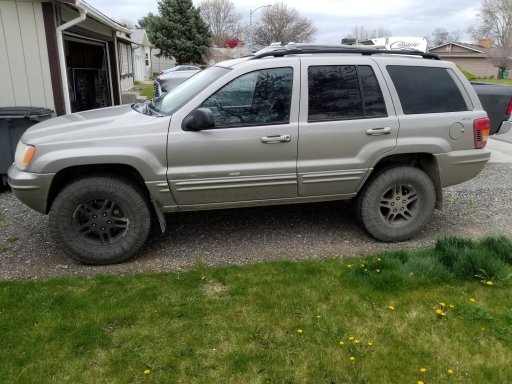
I didn't plan on doing a build thread for my WJ so there isn't much for pictures of work done so far. Now that I've joined OB I thought I might as well, hopefully I will get some good insight and tips from other members that might be helpful along the way and at the same time if there is anything I post of interest to you all feel free to ask questions. I started with a mostly stock 2000 Grand Cherokee Limited, 4.7L V8 Quadra-trac II, 2" budget bump spacer lift and a bad transfer case (didn't know that at the time of purchase). It seemed to run good and strong with leather interior that was clean and a straight body so at $2k i think i got a decent deal on it. My goals for this build is to make a capable trail rig that can take on any trail i feel ballsy enough to try but also be reliable enough to take on multi day trips and maybe some of the back country discovery routes around the PNW. I've had the Jeep for about two years now and most of that time I have been doing basic maintenance and stocking up on parts to start the build. Being that I farm, winter is about the only time I get to tackle projects on it that and having a house that we are currently remodeling will be my excuse for why the build moves slow ( I was told I have to split my time 50/50 between the house and Jeep)... The build my not end up as what some consider a true overlander and lean more towards a trail rig but I do want to make it as self contained as possible for multi day camping/trail runs. So here she is in all her stock glory!
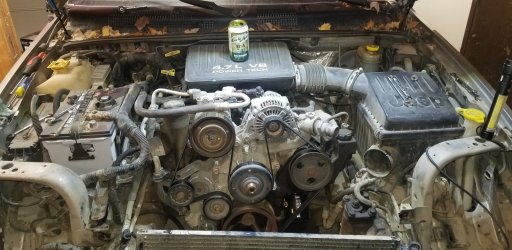
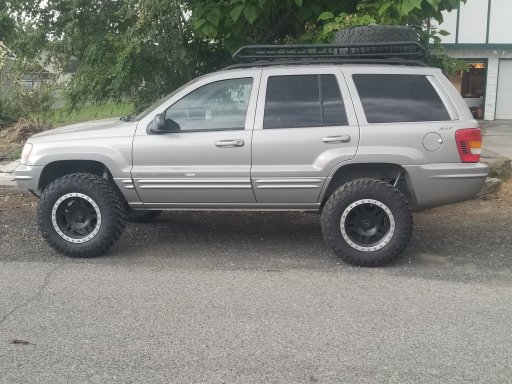
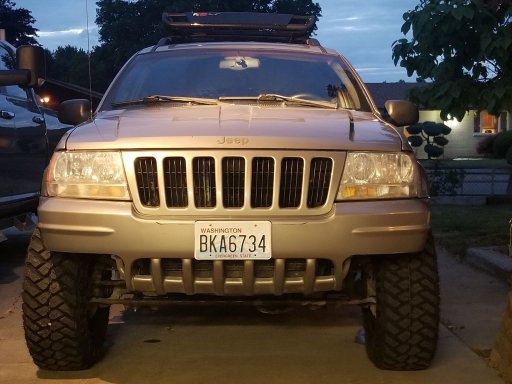
And here is how it sits today.
I'll give a quick run through of things I've done so far, again if there is anything you want more info on feel free to ask.
-Basic maintenance- Oil and filter change, air filter, Coils and plugs, serp. belt, fluid in both diffs and attempted fluid change in the T case... we'll get to that one.
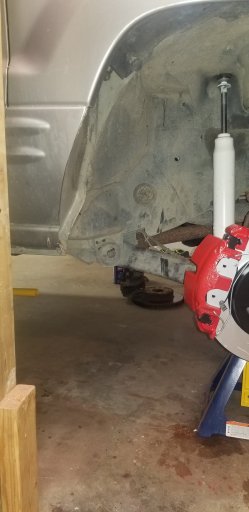
-3" IRO lift consisting of their 3" coil springs, adjustable track bar, extended sway bar links and Pro Comp ES9000 shocks. When I did the lift I replaced all of the coil spring isolators, rear A arm ball joint, rear A arm, installed a new HD steering stabilizer and some other bushings. I had already purchased the tires and wheels so I ordered up this lift and with a week and a half before a planned memorial day trip thought i had plenty of time to get it installed and finish my fluid changes. Well that ended up being a week and a half thrash session of late nights after work that involved installing the lift, new drivelines and a 247 to 242 T case swap... we'll get to that.
- Tires are Maxxis Razr M/T 265/70R17 on Pro Comp wheels that are 17"x 8.5" with 4.5" backspacing
-With the lift i had to trim the bumper and the fender to clear, need to do a little more trimming.
Bumper trim
Slight trim to the back of the fender
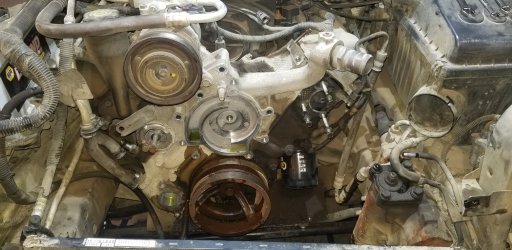
-T case Swap!! I told you we'd get to it... 247 to 242HD Now I had already planned to do this so I had all the parts rounded up, I just didn't plan on doing it when I did. While installing the lift I went to change the fluid in the T case and it came out looking like rubbing compound and smelled like a turd covered in burnt hair... The coupler was shot, probably why it didn't want to lock in 4 Low and maybe why I got the rig for cheap. So now my nice easy 10 days to have it ready for memorial day turned into a bigger project. In reality the swap is pretty easy and straight forward I just was thrown a curve ball and had to get it done in short order or not take the WJ. I won't go into too much detail on the swap since there is a ton of write ups out there on the inter webs that are better than what i could do, but i will say if someone sells you a 242HD out of an XJ or a I6 WJ it's NOT an HD. Those only came in the V8 WJ, Durango, Dakota, 1500 rams and i heard there was a version in the H1. I sourced mine from the local pull-n-save wrecking yard ($150!) out of a '98 Durango (if you're doing this you want a '98- '99 some time in '00 they took away the 2wd option). Using the case out of a Durango and not a WJ i had to swap the input shaft from my junk 247 into the 242, while i was there I rebuilt it with new bearings and seals. While at the wrecking yard I had grabbed the rear drive shaft from the durango, a front double cardan driveshaft and U joint pinion yoke from a newer WJ. I had a couple of inches taken out of the durango rear shaft and then used a 1310/1330 u-joint to bolt up to the rear end. Mine came stock with the Rzeppa front driveline so I put the wrecking yard pinion yoke on the front diff with a new seal, threw some new u-joints in the double cardane front shaft and it bolted right in. Throw some fresh fluid in it and swap was complete. Sorry no pics of what it did on this.
-Rolla roof basket with extension on half busted factory crossbars. Plan to pull the crossbars and rails off to build my own mounts that are a little more stout.
-New Kenwood head unit that is Bluetooth capable, 20 year stock deck wasn't gonna cut it. New tweeters in the dash, old ones were blown, might upgrade the rest but not a priority.
-New rear wiper motor, old one filled the cab with the wonderful aroma of burning electrical when I tried to use it.
So that's it up to the point of deciding to start my thread. Done a little more work and have a lot more planned for this winter and going forward after that.
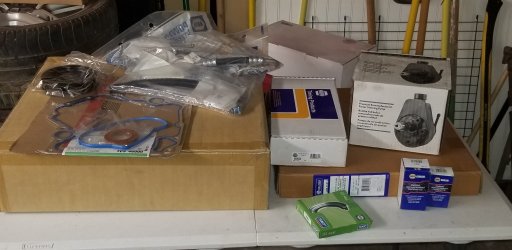
This winters project list I have parts for.
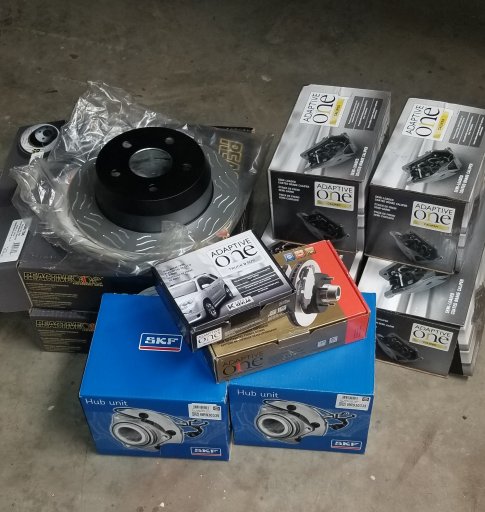
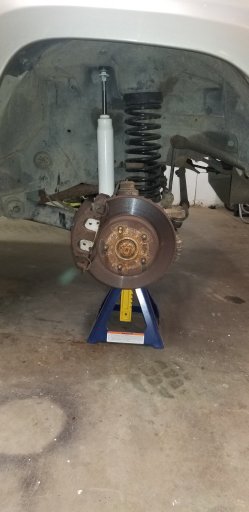
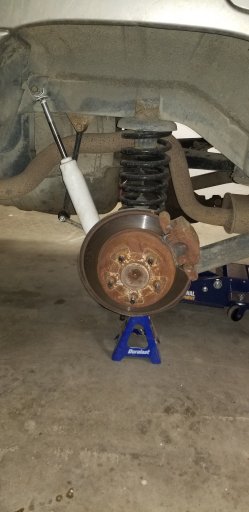
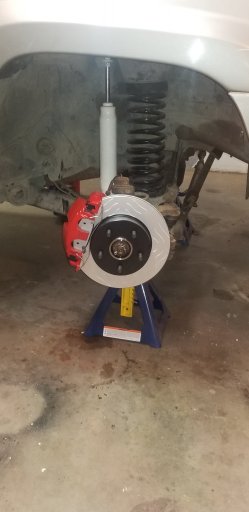
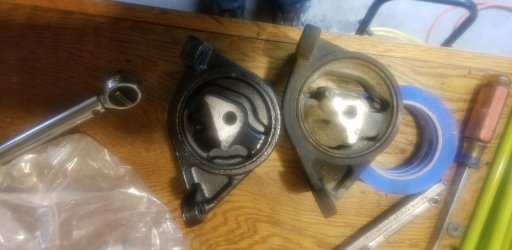
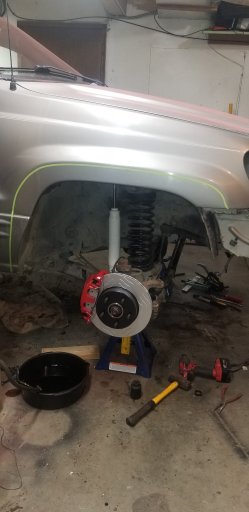
-Brakes (done)
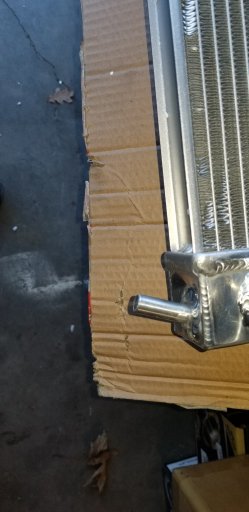
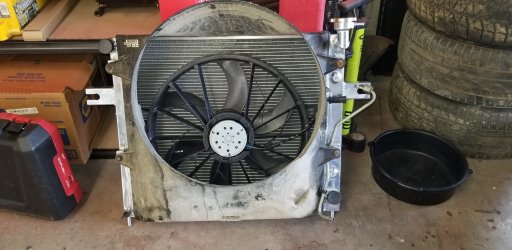
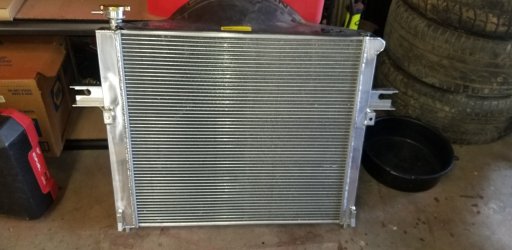
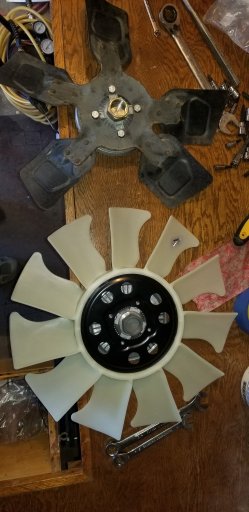
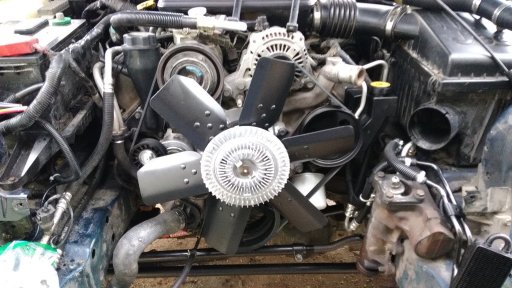
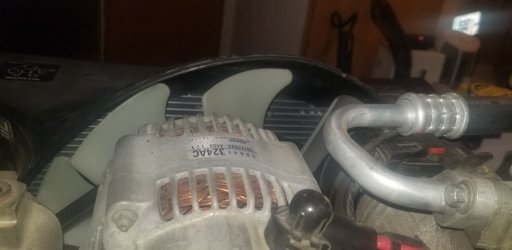
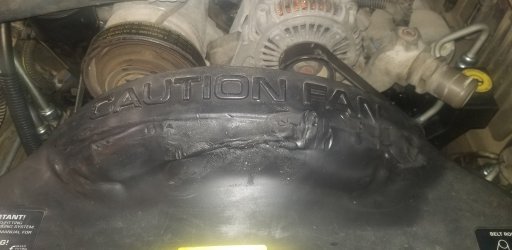
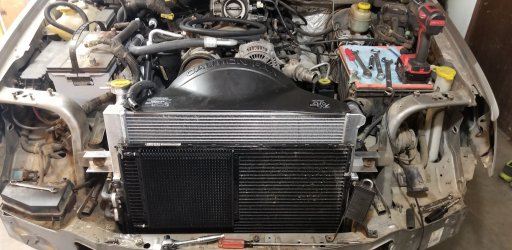
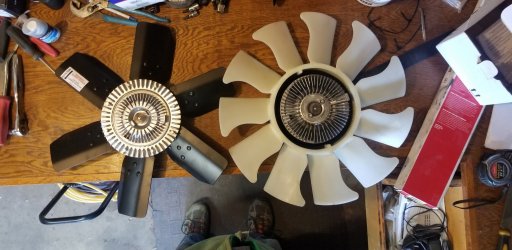
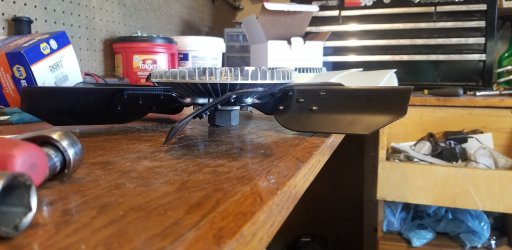
-Cooling system upgrade. Aluminum rad., 9 blade fan, new clutch
-Lights remount what I have when I do the roof rack
-Dual Battery setup
-12v-120 system
-Rear seat quick release
-Switch panel mount
-CB install, might try to build something in the center console that incorporates CB mount and panel for rocker switches
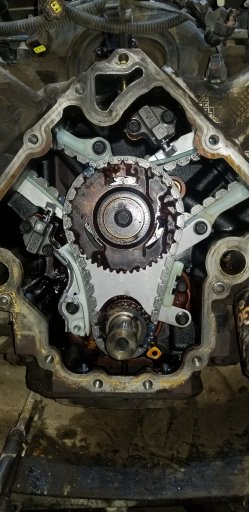
-More boring maintenance to increase reliability (timing set, sensors, things like that)
Wish list for this winter $$$ and time allowing
-Storage boxes to go in place of rear seat bottoms when removed
-Platform in rear cargo area that I can slide totes under and pack on top of. I don't want a drawer setup because i want something i can easily take out since plan to use the tire well for mounting onboard air system and dual battery setup.
-Trailforged DIY front bumper
-Build my own rear bump with tire swingout.... just picked up a tubing bender now to convert it from manual to hyd.
-Rock sliders
-Rear lunchbox lock with new shafts and a truss
-Onboard air setup
Long term wish list (realistically everything on the winter wish list should be here)
-6.5" long arm lift and 35's
-ARB's front and rear
-Axle beef- chromo shafts, gusseting, truss, tubes, u-joints at the front knuckles.... I know, I know, it's stupid to waste money building a D30 but i'm going to
-Bed line the exterior
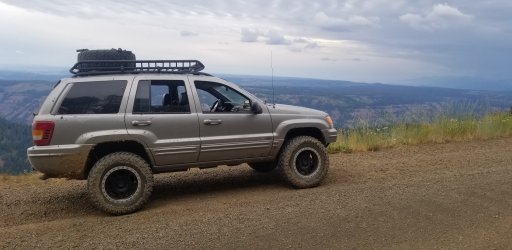
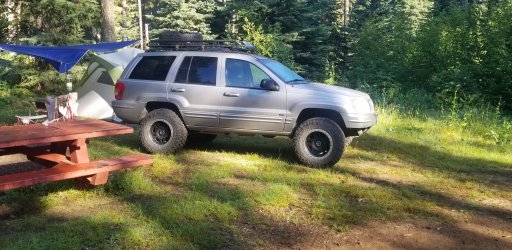
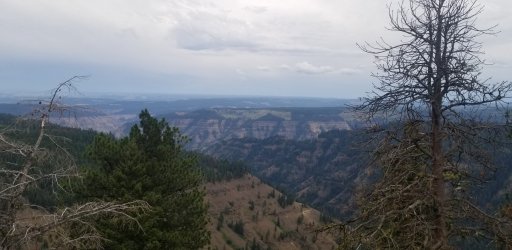
Here is a few pictures of it now on a trip this past summer in NE Oregon.
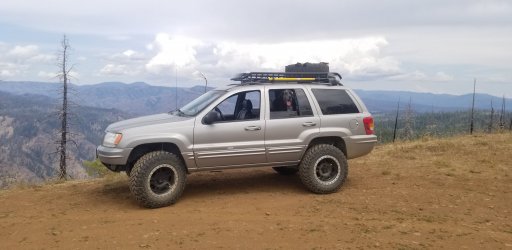
And here is how it sits today.
I'll give a quick run through of things I've done so far, again if there is anything you want more info on feel free to ask.
-Basic maintenance- Oil and filter change, air filter, Coils and plugs, serp. belt, fluid in both diffs and attempted fluid change in the T case... we'll get to that one.
-3" IRO lift consisting of their 3" coil springs, adjustable track bar, extended sway bar links and Pro Comp ES9000 shocks. When I did the lift I replaced all of the coil spring isolators, rear A arm ball joint, rear A arm, installed a new HD steering stabilizer and some other bushings. I had already purchased the tires and wheels so I ordered up this lift and with a week and a half before a planned memorial day trip thought i had plenty of time to get it installed and finish my fluid changes. Well that ended up being a week and a half thrash session of late nights after work that involved installing the lift, new drivelines and a 247 to 242 T case swap... we'll get to that.
- Tires are Maxxis Razr M/T 265/70R17 on Pro Comp wheels that are 17"x 8.5" with 4.5" backspacing
-With the lift i had to trim the bumper and the fender to clear, need to do a little more trimming.
Bumper trim
Slight trim to the back of the fender
-T case Swap!! I told you we'd get to it... 247 to 242HD Now I had already planned to do this so I had all the parts rounded up, I just didn't plan on doing it when I did. While installing the lift I went to change the fluid in the T case and it came out looking like rubbing compound and smelled like a turd covered in burnt hair... The coupler was shot, probably why it didn't want to lock in 4 Low and maybe why I got the rig for cheap. So now my nice easy 10 days to have it ready for memorial day turned into a bigger project. In reality the swap is pretty easy and straight forward I just was thrown a curve ball and had to get it done in short order or not take the WJ. I won't go into too much detail on the swap since there is a ton of write ups out there on the inter webs that are better than what i could do, but i will say if someone sells you a 242HD out of an XJ or a I6 WJ it's NOT an HD. Those only came in the V8 WJ, Durango, Dakota, 1500 rams and i heard there was a version in the H1. I sourced mine from the local pull-n-save wrecking yard ($150!) out of a '98 Durango (if you're doing this you want a '98- '99 some time in '00 they took away the 2wd option). Using the case out of a Durango and not a WJ i had to swap the input shaft from my junk 247 into the 242, while i was there I rebuilt it with new bearings and seals. While at the wrecking yard I had grabbed the rear drive shaft from the durango, a front double cardan driveshaft and U joint pinion yoke from a newer WJ. I had a couple of inches taken out of the durango rear shaft and then used a 1310/1330 u-joint to bolt up to the rear end. Mine came stock with the Rzeppa front driveline so I put the wrecking yard pinion yoke on the front diff with a new seal, threw some new u-joints in the double cardane front shaft and it bolted right in. Throw some fresh fluid in it and swap was complete. Sorry no pics of what it did on this.
-Rolla roof basket with extension on half busted factory crossbars. Plan to pull the crossbars and rails off to build my own mounts that are a little more stout.
-New Kenwood head unit that is Bluetooth capable, 20 year stock deck wasn't gonna cut it. New tweeters in the dash, old ones were blown, might upgrade the rest but not a priority.
-New rear wiper motor, old one filled the cab with the wonderful aroma of burning electrical when I tried to use it.
So that's it up to the point of deciding to start my thread. Done a little more work and have a lot more planned for this winter and going forward after that.
This winters project list I have parts for.
-Brakes (done)
-Cooling system upgrade. Aluminum rad., 9 blade fan, new clutch
-Lights remount what I have when I do the roof rack
-Dual Battery setup
-12v-120 system
-Rear seat quick release
-Switch panel mount
-CB install, might try to build something in the center console that incorporates CB mount and panel for rocker switches
-More boring maintenance to increase reliability (timing set, sensors, things like that)
Wish list for this winter $$$ and time allowing
-Storage boxes to go in place of rear seat bottoms when removed
-Platform in rear cargo area that I can slide totes under and pack on top of. I don't want a drawer setup because i want something i can easily take out since plan to use the tire well for mounting onboard air system and dual battery setup.
-Trailforged DIY front bumper
-Build my own rear bump with tire swingout.... just picked up a tubing bender now to convert it from manual to hyd.
-Rock sliders
-Rear lunchbox lock with new shafts and a truss
-Onboard air setup
Long term wish list (realistically everything on the winter wish list should be here)
-6.5" long arm lift and 35's
-ARB's front and rear
-Axle beef- chromo shafts, gusseting, truss, tubes, u-joints at the front knuckles.... I know, I know, it's stupid to waste money building a D30 but i'm going to
-Bed line the exterior
Here is a few pictures of it now on a trip this past summer in NE Oregon.