
Enthusiast III
Saw this on the tubes, thought it would be a fun project!
Enthusiast III
Enthusiast III
Awesome! I'll make one in the spring.I just made one for myself based off of this guys video! It's awesome.....just have to figure out my permanent mounting method.
Enthusiast III
Perhaps a few pics of your build would be cool!I just made one for myself based off of this guys video! It's awesome.....just have to figure out my permanent mounting method.
Perhaps a few pics of your build would be cool!


 I am still working on a permanent mounting solution. It holds pressure at 50psi with no issues and works great. You definitely need a pipe wrench handy to open and close the fill cap as that seemed to be the only place it would leak if it wasn't tightened enough. My ABS glue technique was a bit messy but I am otherwise very happy with the 60 bucks I spent on the project! I hope this helps!
Enthusiast III

Member III

Creator III
8182

Influencer I

Traveler III
Traveler III

Traveler III

Got some foam blocks from a neighbor, and cut them to fit my stock roof rack.
Where do I find a 4” flat end cap for the valve and hose spigot? Anyone?
View attachment 64655
Check out pvc40.com, can’t seem to copy and paste their pics, what I would do is buy a reducing tee that is 4”slip x 3/4”FPT X 4” slip, and use a normal end cap, avoid trying to tap (thread) the end cap that you may pressurize, looks like a weak spot to me. You want a valve stem with a nut on the inside (aluminum wheel type I believe). I’m assuming the conduit fitting you have there is just to back up the threaded part, could be tough to glue conduit and pvc.Got some foam blocks from a neighbor, and cut them to fit my stock roof rack.
Where do I find a 4” flat end cap for the valve and hose spigot? Anyone?
View attachment 64655
Traveler III

Member III
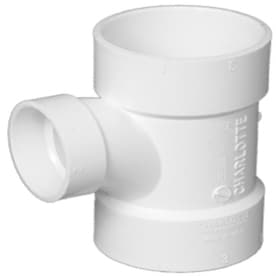
ABS 4” end cap. Abs is used as a drain not pressurized but it is rated for 80 psi & im only going 30 to 40 psi so figured I’d be good. The cap you have in the picture is the correct one & it is rated up to 160 psi I believe.I bought the 4" PVC Schedule 40 pipe and T-Connector with threaded cap. However, I need a flat end cap for the back so I can add the Valve and Hose Spigot. I also need to order the Metal Valve Stem, to replace the rubber seal one I got from a tire store - not sure the one I have will correctly seal.
@Jku Ben - what did you use for the end cap - what brand, any issues?
View attachment 64612


