

Pathfinder I
I've had more than a few members PM me about my DIY budget Awning. So, I thought I'd share some photos and a description...
I started with an 8' section of 4" black PVC pipe. I have 6' Thule load bars which I bolted the PVC pipe to, I accomplished this by duct taping a socket wrench to a broom stick, as my arms aren't 6+ feet long. I couldn't put in a self tapping bolt as the tarp rolls up and fits into the PVC pipe, the pointed in would snag the tarp. I used a end cap on the front and on the rear, a screw on end cap. I then took a 8' long 1x2 and painted it with Duplicote rubber coating (4 coats after cutting it in sections to fit between the load bars) I attached these pieces along the top with industrial strength Liquid Nails and epoxy. The reason for this is...the screw in snaps, if I screwed them directly into the PVC, they would snag the tarp when it was slid into the PVC for transport. Next step...1 6'x8' Blue (in my case brown) camping tarp and boat canvas snaps. Precise measuring here is key! Attach snaps to tarp...super easy...again measuring is key. Next...two Coleman brand adjustable aluminum poles...why adjustable? In bad weather, you make one pole slightly shorter so the rain runs off one end. THIS IS IMPORTANT... Bright neon colored paracord! I originally used black and got tripped so many times I lost count! Because I couldn't see it. Okay, next.... the top of the poles have nipples which fit through the riveted holes in the tarp. To keep the wind from coming up under the tarp and lifting it off the poles, I bought 2 ...locking collars? Essentially, thick washers that have a allen nut to lock it on the nipple. when packing the "awning" up...poles first, pushed all the way to the other end but with the paracord sticking out...then the rolled up tarp. Paracord still hanging out...once tarp is in, bunch paracord up and stuff in. screw on end cap. The reason for this is...when unpacking, you just pull the paracord and everything just slides out!
7 minutes setup time, 10 minutes break down.... Feel free to ask questions
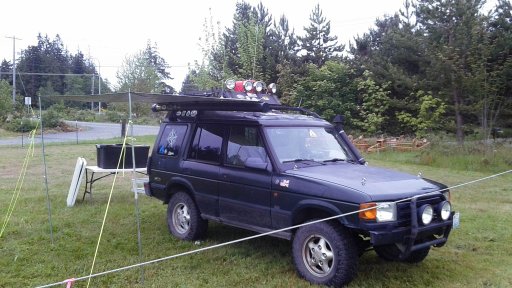
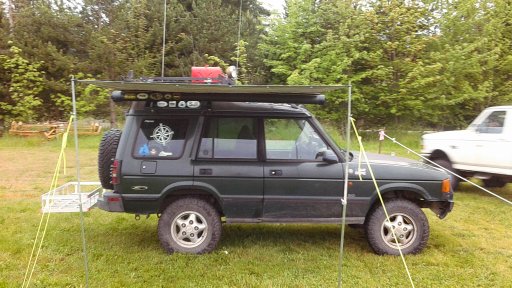
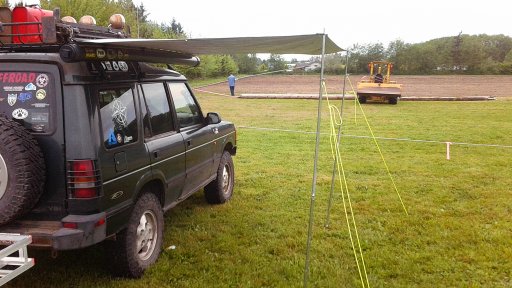
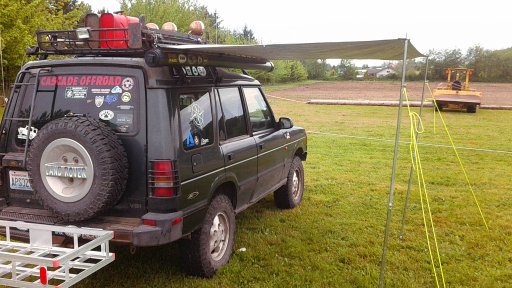


