Building a 2014 Nissan Frontier Pro-4x in CA

  • HTML tutorial

Vadim

Rank IV
Launch Member

Contributor III

1,402
Sacramento, CA
Member #

8234

My off road needs have changed in the last few years and my 95 Isuzu Trooper, all though very off road capable, will not be able to tow the size of trailer that my family will be purchasing this year. So after much research I bought a 2014 Nissan Frontier Pro-4x.

As for the lift, I contacted Greg at PRG and turns out he was very local to me. We talked for a while and I decided to go with OME 2607 springs (and bilstein 5100 in the near future). For the time being the truck will get a 2" spacer for the front and 1.5" AAL for the rear. I also picked up some used SPC upper control arms a few weeks back from a clubfrontier forum member to prevent and future coil bucket contact.

I also installed 1" wheel spacers to get a more aggressive look. Definitely digging the look of the truck right now. Cant wait to get the new fan pulley bracket to see how it rides and how much the suspension settles

I decided to install my CB radio between the dash and center console. I wanted to be pretty discreet but look like a clean install. That didn’t leave much options other then the storage tray under the arm rest. What I ended up doing is hacking up the bottom side of the hvac panel and creating a slot for it. It turned out exactly the way I wanted. It was a lot of disassembly just to get the panel off. I also made my own antenna mount on the utilitrack rail.
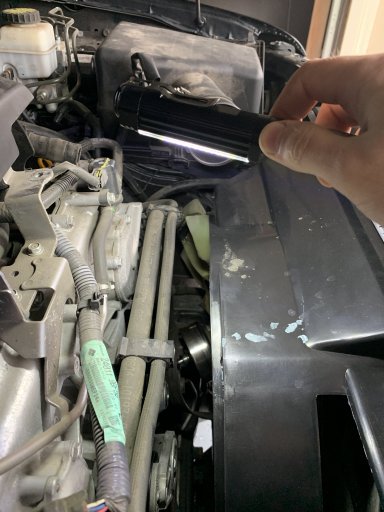


D7EAB1EA-D5F2-48E9-A20E-DBA9F0D0C25B.jpeg

358C8316-4000-4F3C-8B34-5EB704F58DC4.jpeg
D481206C-81B0-47F1-911F-378356E73567.jpeg
 

Attachments

Last edited:

James Deaton

Rank V

Pathfinder I

Hey nice job! There is really no replacement for OEM parts. Your Gates bracket issue reminds me why I buy all OEM Mitsubishi parts for my vehicles. The lack of power steering could have turned out real bad...

Amazing how it could look so crumpled, then with a new hood and bumper it looks fine again LOL...

James
 

Vadim

Rank IV
Launch Member

Contributor III

1,402
Sacramento, CA
Member #

8234

Thanks for the support guys. I actually dont mind aftermarket parts depending on the brand. Needless to say, I got the gates bracket again.

Since the truck is still a budget build for me, I dont have the luxury of oem parts. From OEM, the fan blade, clutch and bracket was close to $600 but aftermarket it was $140.
 
Last edited:

Vadim

Rank IV
Launch Member

Contributor III

1,402
Sacramento, CA
Member #

8234

Man I didnt realize I was so far behind on updating this. Ive been doing alot of work on the truck in preparation for a trip next weekend. The simplest upgrades include relocating the trailer plug to the bumper and cutting off the stock bracket. Then I did the differential breather relocation to behind the tail light. I ended up using an inline filter and the toyota breather on the end. Installed my flashlight holder using a quick fist clamp, and then moved onto installing a light bar and wiring it up.

Now the time consuming upgrade was the my lift. Originally I did a 2"spacer on the front and 1.5" AAL in the rear and that was great for a few months but I already knew that in the future I would go higher. Recently I purchased the Bilstein 5100 front shocks, Bilstein 5125 4" extended shocks, OME 2607 medium duty springs and a 1" rear block spacer. The rear block spacer and rear shocks took me about an hour to install. However the front bilstein 5100 and OME assembly was a challenge. Primarily because on the first one I put the coil bucket on the wrong way. After that was corrected, things went smoother. Took me about 4 hours total for the fronts which included doing a quick alignment. Rears were about an hour total for both sides.

Definitely love the way the truck sits now. Front is a bit higher but with some slight suspension settling and the addition of a winch in the bumper, that should go down a smidge. Overall with the larger 33" tires and the suspension lift, I gained a total of 3" in the rear and 4 1/4" in the front. I also ordered some aftermarket camber/caster alignment bolts and it took me about 6 hour total to install these. The main delay was due to the oem bolts being seized up in the bushing so I had to cut them out and order new control arms. They are all finally installed and the truck alignment looks much better then after the initial install without the bolts. Going to get alignment done tomorrow.

I also cut up some 1/4" plate, drilled and painted and then used my own set of bolt, washer and wing nuts to mount to the utilitrack in the bed. Then I mounted up my quick fist clamps so that I can carry my axe and shovel out of the way of the rest of the cargo. I also picked up a Rough Country Pro9500 S synthetic winch which needed slight modification. Since my bumper is enclosed and pretty tucked up, the factory solenoid location and the free spool clutch arm were in the way. Took me about 20 min with no instructions to remove the controller and clock the gear on the winch so that the clutch arm is facing the front. Winch is going in tomorrow as well.

Also found a great deal on some used moto metal 16x8 rims with a +10 offset. Paired it up with some 285/75/16 Milestar Patagonia MT tires. Final pictures of the truck will be posted after alignment is done.

B3AE74C8-0500-48E2-B42A-22B9BAA8738E.jpeg
A9A2B393-6E00-4BA2-A50F-076B62E45254.jpeg
03835FF6-4D04-4572-A0E6-3B21CB993474.jpeg
7EE0B102-C9ED-41FE-8CD0-39D133838827.jpeg
41D107F8-3AA9-48F0-BBD8-1CA7571C269E.jpeg
 
Last edited:

Vadim

Rank IV
Launch Member

Contributor III

1,402
Sacramento, CA
Member #

8234

Thanks a lot guys. Got more future plans but for the time being I’ll be helping others. Got a ‘18 Tacoma to lift this weekend, bumper weld up for a 90s Cherokee and a 2004 gx470.
 
  • Like
Reactions: JCWages

James Deaton

Rank V

Pathfinder I

I had no idea that was your truck I’ve been staring at on Coastal Offroad’s webpage!!! How do you like their bumper? What kind of winch do you have in it and how easy was it to mount?

I’m thinking pretty hard about this bumper because I just had a fender bender, so I need to make some decisions...

James
 

Vadim

Rank IV
Launch Member

Contributor III

1,402
Sacramento, CA
Member #

8234

I had no idea that was your truck I’ve been staring at on Coastal Offroad’s webpage!!! How do you like their bumper? What kind of winch do you have in it and how easy was it to mount?

I’m thinking pretty hard about this bumper because I just had a fender bender, so I need to make some decisions...

James
Yep that’s the one. They contacted me for pictures after I got it done. I honestly love the bumper. It was very discreet, simple and affordable. I welded it together myself and they ha great instructions. I weld as a hobby too and it’s held up with pulling at least 10 vehicles out by now. I have a rough country 9500s synthetic cable winch. The main thing with these bumpers is to make sure you can click the gears on the winch. The free spook handle normally sits on top on all winches but this bumper has a concealed design so you have to “clock” or rotate the handle to sit facing forwards. I would hands down get this bumper for all my future builds.
 
  • Like
Reactions: JCWages and reaver

reaver

Rank VI
Member

Explorer I

3,680
Caldwell, ID, USA
First Name
Brian
Last Name
McGahuey
Member #

23711

Ham/GMRS Callsign
GMRS WRMV941
Yep that’s the one. They contacted me for pictures after I got it done. I honestly love the bumper. It was very discreet, simple and affordable. I welded it together myself and they ha great instructions. I weld as a hobby too and it’s held up with pulling at least 10 vehicles out by now. I have a rough country 9500s synthetic cable winch. The main thing with these bumpers is to make sure you can click the gears on the winch. The free spook handle normally sits on top on all winches but this bumper has a concealed design so you have to “clock” or rotate the handle to sit facing forwards. I would hands down get this bumper for all my future builds.
Good to know! I'm contemplating picking the diy kit for my 03 Xterra, as I really like the look and low profile fit of this bumper.