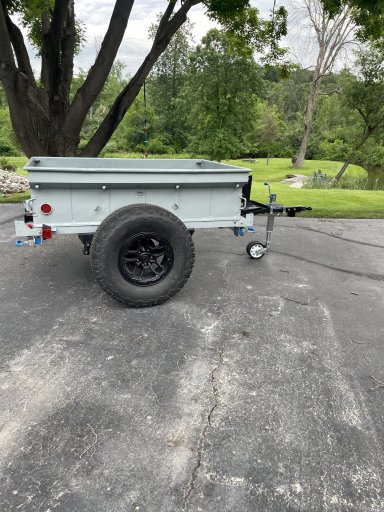
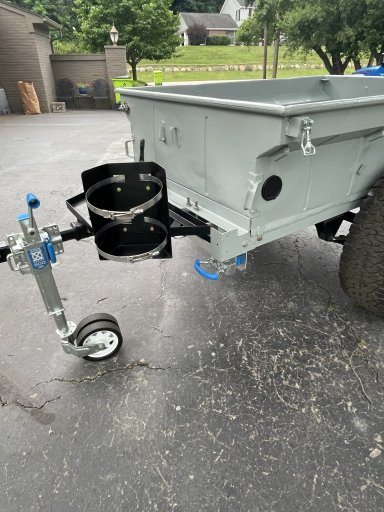
Backyard's M416 Overland Trailer Build!

  • HTML tutorial

Enthusiast III

443
Rochester, MI, USA
First Name
Wayne
Last Name
Adventurer
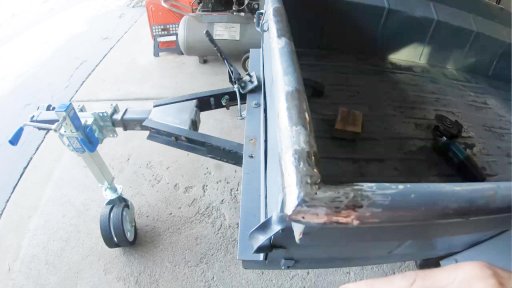
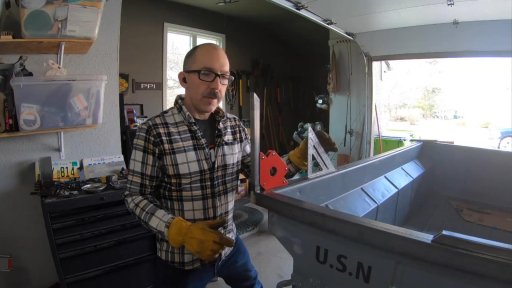
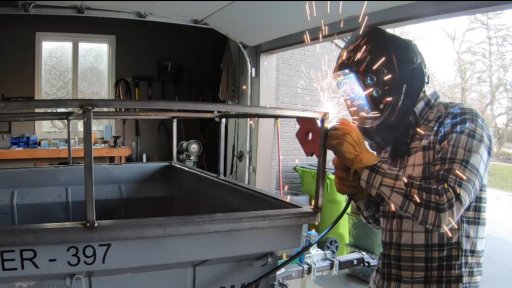
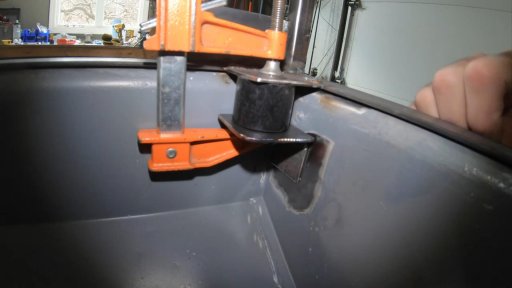
This weeks project was to straighten out the tube rails. As I am going to build a lid for the trailer I wanted a good sealing surface and these were pretty rough. Seems to be only 2 good options...Option 1: replace the rail with new metal such as welding in angle iron to recreate the rail. Con's to that is buying 60 ft of material and lot of welding. Option 2: weld up and grind the damaged areas. Con's to that is lots of grinding. Positive is no money spent...just time. I didn't want to just throw a bunch of body filler on the rail as that would be easiest but I'm sure that would get damaged easily over time after constantly lifting items into and out of the trailer.

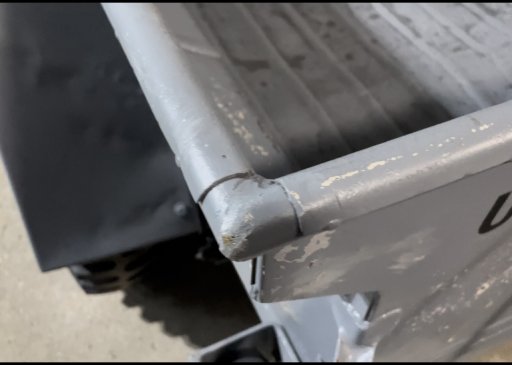
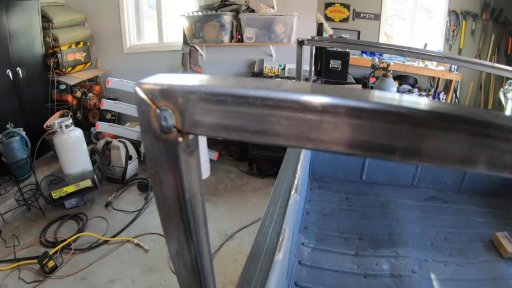
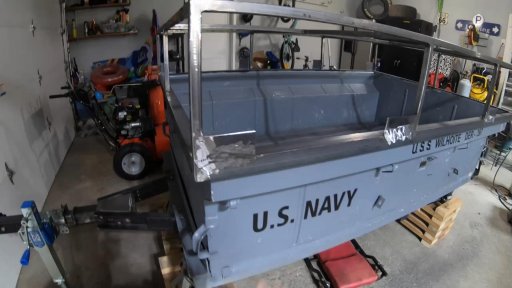
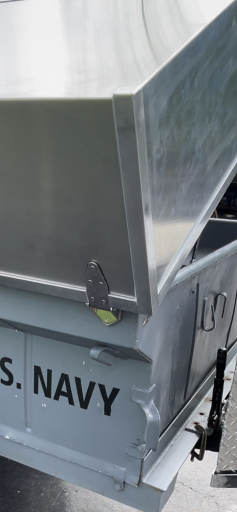
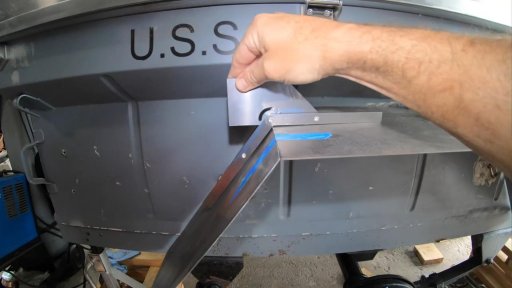
I also wanted to get rid of the step in the corners as that wouldn't seat very well. So i put down a few beads of weld there and grinded them down for a smooth transition.

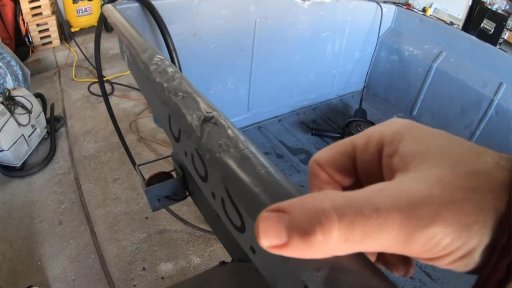
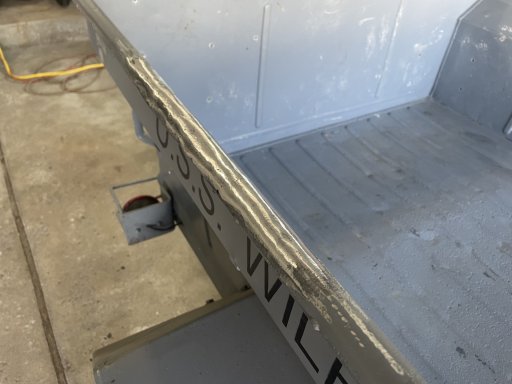
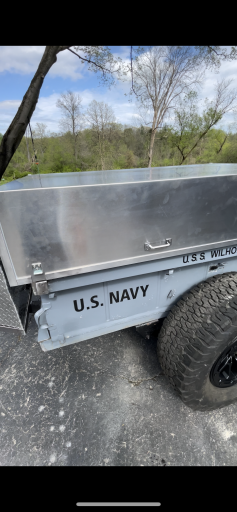
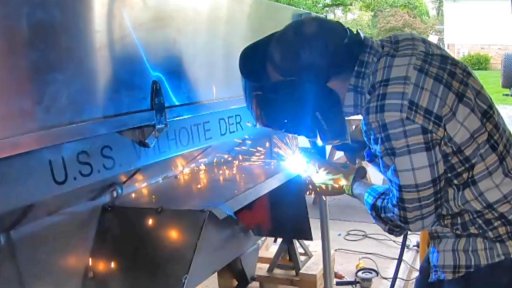
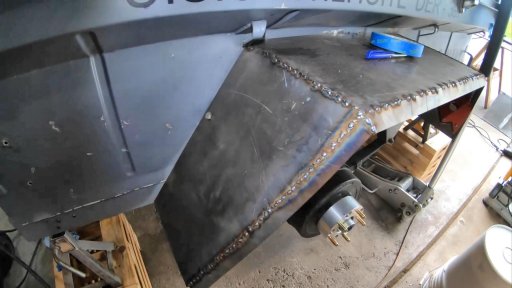
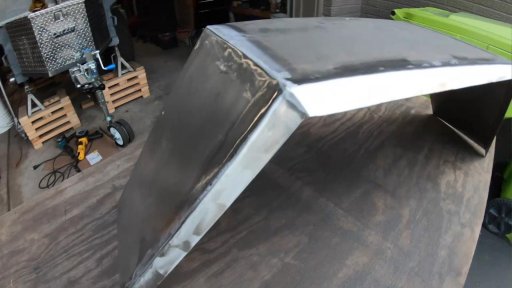
So I decided I would weld and grind the dents on the tub rail. That was a lot of work but in the end I am glad I did it. It looks so much better and will give me a good surface now. A light coat of all metal filler in a few areas that will mostly get sanded away and it will be good.

I am glad thats over! :smiley:


Attachments

  • Like
Reactions: reaver

smritte

Rank V
Launch Member

Member III

2,827
Ontario California
First Name
Scott
Last Name
SMR
Member #

8846

Ham/GMRS Callsign
KO6BI
This was also an issue when I got my trailer. I ended up having to cut off the rounded metal and replacing it with square. The reason was two fold. First was what it was going to take to repair and second, I wanted a sealed lid.
 
  • Like
Reactions: Backyard Hotrods

Enthusiast III

443
Rochester, MI, USA
First Name
Wayne
Last Name
Adventurer
This was also an issue when I got my trailer. I ended up having to cut off the rounded metal and replacing it with square. The reason was two fold. First was what it was going to take to repair and second, I wanted a sealed lid.

It seems to be pretty common with these trailers. How does your lid seal up?
 

smritte

Rank V
Launch Member

Member III

2,827
Ontario California
First Name
Scott
Last Name
SMR
Member #

8846

Ham/GMRS Callsign
KO6BI
perfect. I made the frame out of 1" thin square. 2" angle around the sides to give it a lip, diamond plate for the top and gas struts to help open and close. My only area that had sealing issues was my tailgate. This spring when I rebuild it, The entire box is getting replaced with a sealing tailgate.
 
  • Like
Reactions: Backyard Hotrods

Enthusiast III

443
Rochester, MI, USA
First Name
Wayne
Last Name
Adventurer
perfect. I made the frame out of 1" thin square. 2" angle around the sides to give it a lip, diamond plate for the top and gas struts to help open and close. My only area that had sealing issues was my tailgate. This spring when I rebuild it, The entire box is getting replaced with a sealing tailgate.

NIce to hear it works well. Any pictures of it on the forum?

Thanks!
 

smritte

Rank V
Launch Member

Member III

2,827
Ontario California
First Name
Scott
Last Name
SMR
Member #

8846

Ham/GMRS Callsign
KO6BI
The lid itself, no. Early in this post I have some pictures but they have the rtt mounted on it. I had it set up to open from the side to allow access when the RTT was deployed. The RTT would fold on the ladder side.
 

Enthusiast III

443
Rochester, MI, USA
First Name
Wayne
Last Name
Adventurer
Spent this past week removing the suspension and taillights. The man I bought the trailer from was interested in any parts that I didn't use so he came up on Saturday and bought the wheels, fenders, axle and the modified drop tongue that was on the trailer. That worked out great, gave me a few bucks and cleared out some garage space.

I also spent some time measuring for a new axle. I ended up ordering one but being a custom size it will be a few weeks. I also spent some time finishing up my design for the lid and picked up the materials for the structure as that will most likely be my next project as I can do the suspension till the axle gets here. Will post more details on those when its time to install them.

Will have to figure out if I want to get new springs the same length as the originals....it seems most trailer springs they offer now are much shorter. My spring hardware is pretty much shot too so will be looking into upgrades for those.


Attachments

Enthusiast III

443
Rochester, MI, USA
First Name
Wayne
Last Name
Adventurer
I have been busy the last few weeks on the lid. This is going to be a big / involved project and I'm not a fast worker so I know it will probably take a month realistically. I have made good progress and I wanted to share the first phase of the project rather than waiting till the lid is done. Still probably 2 weeks out for that.

I have the main frame all done and it fits up nice. I used 1.5" Angle iron. I designed it to have a 3/8" gap around the trailer. It is nice and square...and flat for building and welding it on the garage floor lol. I welded it on the inside and outside after putting a nice chamfer on the edges. Then ground the welds down smooth.

I will have a video of the project when the lid is done.

LId 2.jpgLId 3.jpgLId 4.jpgLId 5.jpgLId 6.jpg
 
  • Like
Reactions: KonzaLander

Enthusiast III

443
Rochester, MI, USA
First Name
Wayne
Last Name
Adventurer
Thought I would share the CAD model of the lid I did. Doing this helped me adjust the design and bring the weight down. 1st iteration was made with 1" square thick wall tubing and the lid was 110 lbs lol. Was able to make adjustments and bring the weight down to 55 lbs without any sheet metal on it yet So I am happy with that and think that's the best I can do with steel. Again, I can only MIG so aluminum structure is not an option. I modeled more of the trailer and have the rim of the tub in my lid file to check clearance and fitment. I also did a quick model of a large 65 qt electric fridge and 24 G water tank to see how that would look.

Almost done with the lid frame itself. Should have that done in the next few days and will follow up shortly.
Lid ONly.JPGLid ONly 2.JPGLid ONly3.JPG
 
Last edited:

Enthusiast III

443
Rochester, MI, USA
First Name
Wayne
Last Name
Adventurer
I took a break on the lid as I was waiting for the sheetmetal to finish it off. The tongue box just showed up. I ordered it a while ago but they were out and had to build it and I was fine waiting for it. I spec'd this one out as I thought it was the ideal size and gave me enough room for the electronics I want to add to it. Plus I really wanted to go with aluminum so it wouldn't rust.

Since there was a bit of overhang on the tongue I decided to build a frame for it out of 1.5" angle iron. I added a couple strips down the middle with a couple tabs that ran down and bolted to the inside of the c channel on the trailer tongue. Then I just used 4 bolts to bolt the box to the bracket I made. Its rock solid and now. I do have it spaced out to hopefully use the original parking brake with the new axle.


tb 1.jpgtb 3.jpgtb 4.jpgtb 5.jpgtb 6.jpg
 
Last edited:

Enthusiast III

443
Rochester, MI, USA
First Name
Wayne
Last Name
Adventurer
The sheet material for the lid didn't show up last weekend so I was able to get the suspension installed and mocked up. I was curious to see how the new 3500HD axle would fit. I did order it with electric brakes as I figured now would be the time to do so. I ordered the axle at 53.5" as I will be using 2" wheel spacers for the desired 57.5" axle width I measured. It fit great. I have 1.5" to the trailer frame and a little less at the top of the tire to the tub. I ordered the axle the same bolt pattern and thread size as the Jeep. I also added wheels and tires to my CAD model which allowed me to double check my axle width size.
I ordered the axle from trailer parts outlet: The Trailer Parts Outlet - Find Axles, Tires, And Everything You Need

I ordered new 10 leaf springs, hd shackles and new u bolts from vintage jeep parts. They were great to deal with. 1949-1953 CJ3A - Suspension & Lift Kits - VintageJeepParts.com

For the 2" spacers bought them from adapt it usa. You have to run spacers to clear the trailer hub if you want to run a automotive wheel. I had the spacers spec'd with the same lug size as the jeep to keep everything common.

We recently sold our JK sahara and picked up a lightly used JL Rubicon extreme recon. the only problem there was trying to find used take offs to match was impossible. I did find Defiant wheels make a wheel that is very close in design and is the same size and offset as the XR wheel. I picked up 2 of those and so far I am pleased with them. I found a guy selling two take off bfg's in the same 315 size that came off a Raptor so i scored those for cheap.

Overall I am really happy with how everything fit and is looking.


Attachments

Enthusiast III

443
Rochester, MI, USA
First Name
Wayne
Last Name
Adventurer
After looking at how my axle and suspension is sitting...it doesn't seem quite right. I think someone replaced one or two of the frame rails (that run side to side) and the spacing is off. My leaf spring shackle angles don't look correct which was my first sign.

Can someone please tell me distance the two center frame rails are suppose to be apart from each other? This should be the same as and tell me the distance of the leaf spring shackle mount distance from eye to eye .


Here are pictures of the finished lid structure. The square tubes I am using are .75" and .065" wall. This will help keep the weight down but be plenty stiff enough for the structure.

I also added .125" reinforcing plates for the hinges on the passenger side and the latches & handles on the driver side. After all the welding I ground the welds down flush so the sheet metal has a smooth surface to lay on.

I also welded in "pads" on the corner of the lid and brackets in the tub corners...I wanted to build a hard stop for the lid so the weight of the lid won't crush the gasket I am going to use. I have designed a .25" air gap between the tub and lid. For the spacers I used 1.5" delrin. Its easy to cut and drill and will be strong enough to support the lid.
 

Attachments

bcmedicxj

Rank IV
Launch Member

Off-Road Ranger I

1,146
Vonore, TN, USA
First Name
Bruce
Last Name
Collins
Member #

19170

Ham/GMRS Callsign
GMRS WRKP 397 Groundhog
Service Branch
EMS
After looking at how my axle and suspension is sitting...it doesn't seem quite right. I think someone replaced one or two of the frame rails (that run side to side) and the spacing is off. My leaf spring shackle angles don't look correct which was my first sign.

Can someone please tell me distance the two center frame rails are suppose to be apart from each other? This should be the same as and tell me the distance of the leaf spring shackle mount distance from eye to eye .


Here are pictures of the finished lid structure. The square tubes I am using are .75" and .065" wall. This will help keep the weight down but be plenty stiff enough for the structure.

I also added .125" reinforcing plates for the hinges on the passenger side and the latches & handles on the driver side. After all the welding I ground the welds down flush so the sheet metal has a smooth surface to lay on.

I also welded in "pads" on the corner of the lid and brackets in the tub corners...I wanted to build a hard stop for the lid so the weight of the lid won't crush the gasket I am going to use. I have designed a .25" air gap between the tub and lid. For the spacers I used 1.5" delrin. Its easy to cut and drill and will be strong enough to support the lid.
I'll try to get those measurements off my trailer tomorrow. Do you suppose there would be any difference depending on the manufacturer of the trailer? I doubt it but you never know.
 
  • Like
Reactions: Backyard Hotrods

Enthusiast III

443
Rochester, MI, USA
First Name
Wayne
Last Name
Adventurer
I'll try to get those measurements off my trailer tomorrow. Do you suppose there would be any difference depending on the manufacturer of the trailer? I doubt it but you never know.
that would be very helpful, thank you. I wouldn't think so. They were all built to the same plans...or supposed to lol

I have found two trailer websites that suggest hangers should be 3/8" and another sayd .5" shorter than the spring eye to eye distance. Would like to confirm the m416 frame spacing
 
Last edited: