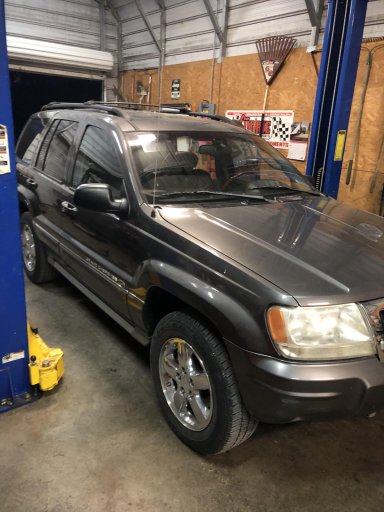
2004 WJ Laredo

  • HTML tutorial

adventure_is_necessary

Rocky Mountain Region Local Expert Kansas
Member

Traveler III

4,007
Bonner Springs, Kansas, United States
First Name
Lucas
Last Name
Antes
Member #

7082

Ham/GMRS Callsign
KE0ZXA
The old magnet mount worked well, however I knew the adhesive would be a weak point. After the constant heating and cooling, it gave up. While this isn't the first time this has happened, it will be the last. Unfortunately, no adhesive I've been able to find will outlast a more solid mounting option. Enter the RAM Mounts X-Grip with a longer arm. It seems everyone runs something from this company and I can see why. Solid mount and very functional. Zero issues with it.IMG-6300.JPG I have been a user of BROG stuff for some time and am rather impressed with their quality. I've had my eye on their visor organizers for some time and decided to snag one to have more stuff readily available and to free up room in the console and glove box. While I can't use the visor mirror ( I never really used it to begin with), I'm happy with the purchase. My co-pilot might not like having to remove the visor organizer when she gets one on her size, but that's how it'll have to be to have easy access to gear.IMG-6301.JPG Hauling around kiddos is messy business. Seat covers and full coverage floor mats have done wonders for keeping the rig clean, however the constant slew of trash left in the rig had me looking for a solid option for keeping it contained. BROG stepped up with a roll-up dump pouch. Super solid construction and the material will allow me to rinse it out should that need arise.IMG-6302.JPG So with the failure of the phone mount came the slow failure of the CB magnetic mount. I have been considering the RAM Mounts CB mic clip for a bit, but I wasn't super fond of the 90* bracket as it would take some drilling to make it work. I found on a fellow OB members thread that he snagged a Panavise in-dash mount for his WJ. I liked the fact that it utilizes the mounting holes for the head unit. It's solid and looks great. I have the mic rigged up for now, but I plan on snagging that RAM Mounts CB clip before too long.unnamed (1).jpg unnamed (2).jpg And after nearly a year of listening to a clunking noise from the rear end, I am happy to say it is GONE! It was always present from the beginning of the lift install. I thought it was just the ball joint on the A-arm going out. Well after a bit of off-road travel the weekend before last, I had noticed that it was a little bit noisier than usual. I checked everything I could think of but it was still noisy. With a little bit of research, I found out the WJ has an oddball sized rear shock bolt over the norm and that this is a common issue on most lifted WJ's. Thanks to KOR, they corrected this issue with new sleeves and bolts. A quick swap of the sleeves and torqued the new bolts down, and it's quiet! Not quiet like stock, but that's due to the stiffer springs. No more clunk. Whew!
wj-shock-mount-sleeves-with-new-bolts.png
 

adventure_is_necessary

Rocky Mountain Region Local Expert Kansas
Member

Traveler III

4,007
Bonner Springs, Kansas, United States
First Name
Lucas
Last Name
Antes
Member #

7082

Ham/GMRS Callsign
KE0ZXA
Finally got around to adding a few bits here and there. Weather somewhat impeded my ability to do a few of these improvements, but we hit a slight break over the weekend so I got to it!

First off, I finally did a proper fix on the driver side door harness after my quick fix splice job failed after nearly a year. This is a know failure on the WJ's as Chrysler skimped on the proper wiring, thus creating a future weak point with all of the use the doors see. Lost all controls on the driver side door so no power anything and since the child lock on the windows were enabled, no window usage for anyone either. Got a replacement Mopar harness from eBay and soldered it in. What should have taken 1 hour took nearly three as the shop temps kept the wires and solder from staying at a workable temp.
IMG-6603.JPGIMG-6594.JPG
Once this was done, life got a whole lot more enjoyable. It's amazing how much we take for granted, especially with our rigs. Makes me miss my first car. Manual locks, windows, and mirrors.

Second, I upgraded the rear sway bar end links to some Iron Rock Offroad one that are height corrected for the lift. Would have gone on smoothly if it wasn't for the top bolts on both sides being seized up in the weld nuts. Managed to free them up with a bit of penetrating oil, a torch, and a bit of elbow grease. New bolts went in on the top and the bottom bolts came with the kit. I can somewhat tell a different in the rear ends behavior on the road. I'm excited to see how they perform off-road!
IMG-6595.JPG IMG-6596.JPG

Next up were a couple interior pieces. Added in a rechargeable 120 lumen pen light from Anker to the visor. $15 and the think will also run off AAA's if needed.
IMG-6601.JPG

And finally, another Panavise in-dash mount. They're usually about $25 on Amazon, but it was down to $15 so I jumped on it. I had a couple ideas for it but haven't settled on it's exact use just yet. Either I will move my iPhone RAM Mount to it or I will utilize it for holding my Baofeng handheld for easy access when in use.
IMG-6597.JPG IMG-6599.JPG

Next up is tackling the front sway bar end links when the weather cooperates. I suppose I could pull it into my garage to do it sooner, but it'd have to be during the day as there is no lighting out there just yet.
 

offroadinclined

Rank IV
Launch Member
Member

Traveler III

997
Moncks Corner, SC, USA
First Name
Joe
Last Name
Neacosia
Member #

6164

Service Branch
Navy Veteran
I had the same issue with the doors and the wiring harness. Is the one off amazon better construction or just replacement?
 

adventure_is_necessary

Rocky Mountain Region Local Expert Kansas
Member

Traveler III

4,007
Bonner Springs, Kansas, United States
First Name
Lucas
Last Name
Antes
Member #

7082

Ham/GMRS Callsign
KE0ZXA
I had the same issue with the doors and the wiring harness. Is the one off amazon better construction or just replacement?
Amazon or eBay one's I've found are just a Mopar replacement. Same P/N and has Mopar on packaging. I paid about $60 for it off Amazon. Sometimes eBay is better on pricing and sometimes they're about the same. I wouldn't even mess with a temp fix again. so much easier to just do it the right way once.
 

adventure_is_necessary

Rocky Mountain Region Local Expert Kansas
Member

Traveler III

4,007
Bonner Springs, Kansas, United States
First Name
Lucas
Last Name
Antes
Member #

7082

Ham/GMRS Callsign
KE0ZXA
Well, I finally sold my M715. Sad it's gone as it was a fun truck, but glad since it allowed me to make a little purchase. A while back I snagged a set of 5 JK Moab wheels for $100. They were in good shape and the guy just wanted them out of his hair. They've sat in the garage for a while as I wasn't sure when or even if I'd use them. Well with the truck gone and a little coin in my pocket, I jumped on ordering tires for the wheels. I researched ever since getting the wheels for the right tire size. I could have had some used tires but would have ran the risk of not having the right size to work with the rig and lift. I knew a LT245/75R16 would work with some possible rubbing, and they measure out to about 30.5"-31". Since I knew I could clear that on the stock wheels, I figured that since the wheels have less offset, 1 inch to be exact, I could get away with a 31" size tire without issue. I settled on a LT245/70R17 to have virtually the same size. I scooped up a set of 5 Falken Wildpeak AT3W's from my usual tire shop, and they were discounted due to a sale. Boy was I right on the money with the fit. The spare barely fits in the spare wheel bay (but it's brand new so after I get it into rotation with the other tires, it'll fit better). No rubbing lock to lock or in reverse. I'm very impressed! After a little road use and a retune of the ECU to accommodate the larger tire, we're ready to roll!

wj.jpg
 

DanW

Rank V
Launch Member

Member III

2,268
Danville, Indiana
Member #

13615

Great looking WJ! My son has one that we are slowly fixing and building. We just completed a waterpump change and will button that up today. Spark plugs are next. It idles just a little roughly, so I'm hoping the new (OEM style, as you did) plugs smooth it out a little. We will then move to changing the transmission fluid and putting on a new pan with a drain plug. After that, we've got to find the source of an oil leak, which is either going to be the oil pan gasket or a rear main seal. Probably in the fall, we'll put a 2" lift on it and move to 245 Wildpeak AT3's. That tire looks like one of the best deals out there.

How do you like the Wildpeaks so far? How did you flash it to correct the speedometer? How many miles are on it now?
 

adventure_is_necessary

Rocky Mountain Region Local Expert Kansas
Member

Traveler III

4,007
Bonner Springs, Kansas, United States
First Name
Lucas
Last Name
Antes
Member #

7082

Ham/GMRS Callsign
KE0ZXA
They look great!! What size lift are you running?
Running the OME HD Springs front and rear. Front needed new spring perches and the IRO ones I got managed to level things out. Yields about 2" over stock ride height when new. I think I picked up nearly 3" by the time it was all said and done. The factory springs were tired and worn out.
 
Last edited:

adventure_is_necessary

Rocky Mountain Region Local Expert Kansas
Member

Traveler III

4,007
Bonner Springs, Kansas, United States
First Name
Lucas
Last Name
Antes
Member #

7082

Ham/GMRS Callsign
KE0ZXA
Great looking WJ! My son has one that we are slowly fixing and building. We just completed a waterpump change and will button that up today. Spark plugs are next. It idles just a little roughly, so I'm hoping the new (OEM style, as you did) plugs smooth it out a little. We will then move to changing the transmission fluid and putting on a new pan with a drain plug. After that, we've got to find the source of an oil leak, which is either going to be the oil pan gasket or a rear main seal. Probably in the fall, we'll put a 2" lift on it and move to 245 Wildpeak AT3's. That tire looks like one of the best deals out there.

How do you like the Wildpeaks so far? How did you flash it to correct the speedometer? How many miles are on it now?
You might look into running some intake/fuel system cleaner through it before the new plugs (to save the new ones). I've used Sea Foam (both the intake spray and fuel treatment) religiously and it seams to help. Plugs will also help. I'm looking at some hotter coil packs. Supposed to yield a little hotter spark and better burn, which should help the power and MPG's. Pricey though! Sounds like you're covering a lot of the maintenance and have a good plan. If you stick with stock wheels, be mindful that the LT245/75R16 might rub. I went with the JK Moabs to avoid that issue, which yielded 1" extra (or less in the case of offset) of room. 255 would still fit I believe, but not a lot of 10ply choices in a size that fits. I really like my AT3W's so far. I've only driven them city with maybe a smidge of highway. Maybe 100 miles or so on them. I'll get about 200 on them this weekend on some highway and gravel, so I can report back about their mannerisms. I have a buddy out in Durango, CO with these tires on his XJ and loves them. He's driven back and forth from there to here a few times and I have only heard good things. I have a few other friends that rave about them. I like how they're more of an aggressive AT but they're not noisy (so far) and they're more affordable. I also like how they're 3 Peak certified. I did recalibrate the speedo and ECU with a Superchips Flashpaq. Would you believe me that the rig feels like it was meant to run these size tires? I'm actually getting decent MPG's city compared to the stock size. The true test will come this weekend with the highway driving.
 
  • Like
Reactions: DanW

adventure_is_necessary

Rocky Mountain Region Local Expert Kansas
Member

Traveler III

4,007
Bonner Springs, Kansas, United States
First Name
Lucas
Last Name
Antes
Member #

7082

Ham/GMRS Callsign
KE0ZXA
Also, I am planning out a cargo/trunk platform build here. Let me know if you have any input! It's slow going right now but hopefully will kick it off this Sunday with part of the build. Hope to have this and maybe a DIY hitch cargo carrier just in time for the first real trip of the year, OXW!
 

adventure_is_necessary

Rocky Mountain Region Local Expert Kansas
Member

Traveler III

4,007
Bonner Springs, Kansas, United States
First Name
Lucas
Last Name
Antes
Member #

7082

Ham/GMRS Callsign
KE0ZXA
Great looking WJ! My son has one that we are slowly fixing and building. We just completed a waterpump change and will button that up today. Spark plugs are next. It idles just a little roughly, so I'm hoping the new (OEM style, as you did) plugs smooth it out a little. We will then move to changing the transmission fluid and putting on a new pan with a drain plug. After that, we've got to find the source of an oil leak, which is either going to be the oil pan gasket or a rear main seal. Probably in the fall, we'll put a 2" lift on it and move to 245 Wildpeak AT3's. That tire looks like one of the best deals out there.

How do you like the Wildpeaks so far? How did you flash it to correct the speedometer? How many miles are on it now?
Update on the tires. I put about 200 miles on them this weekend, mostly highway. I did take it down the gravel, through a little mud, and drove through some crazy rain on the interstate. They handle and perform flawlessly aside from the normal rock throwing issue where they stick in the treads until you get going fast and they eject (or just stay put). No annoying whine, hum, or click (from the rocks). They're actually more quiet than the Yokohama Geolandar AT/S that were on previously, and those weren't even 10ply! I did have to retune for the tire size a few times as the measurements did not coincide with the ECU/speedo adjustments. No biggie. I just had to break out the stopwatch, calculator, and a GPS driven speedo to get a more accurate reading between adjustments. Not sure if it's an issue with the tuner or just the norm when adjusting for tire size changes. It's within the OEM spec of MPH reading. MPG's are still better that before. Might still be due to the better tune and gearing liking the bigger tires? I can't really say. Hope this helps your decision on getting these tires.
 

adventure_is_necessary

Rocky Mountain Region Local Expert Kansas
Member

Traveler III

4,007
Bonner Springs, Kansas, United States
First Name
Lucas
Last Name
Antes
Member #

7082

Ham/GMRS Callsign
KE0ZXA
I began work on my cargo/trunk space platform build! Just got the base built for it as time was limited and I didn't want to get in over my head just yet. Should sit up about 9"-10" off the floor so I can slide gear under it. Will have a door in the center the same width and length as the one for the spare wheel bay so I can have easy access if it is needed, but also access to all my gear. I haven't decided whether the top will be one solid piece, minus the center door, or is there will be wings on the sides for easier access to that relatively odd sized and somewhat unusable usable space. Once it's all together how I want it, I think I'm going to shoot in in a matte black and maybe hit the top with bed liner for added grip for gear and for the dogs.IMG_6789.jpgIMG_6788.jpgIMG_6787.jpg
 

DanW

Rank V
Launch Member

Member III

2,268
Danville, Indiana
Member #

13615

You might look into running some intake/fuel system cleaner through it before the new plugs (to save the new ones). I've used Sea Foam (both the intake spray and fuel treatment) religiously and it seams to help. Plugs will also help. I'm looking at some hotter coil packs. Supposed to yield a little hotter spark and better burn, which should help the power and MPG's. Pricey though! Sounds like you're covering a lot of the maintenance and have a good plan. If you stick with stock wheels, be mindful that the LT245/75R16 might rub. I went with the JK Moabs to avoid that issue, which yielded 1" extra (or less in the case of offset) of room. 255 would still fit I believe, but not a lot of 10ply choices in a size that fits. I really like my AT3W's so far. I've only driven them city with maybe a smidge of highway. Maybe 100 miles or so on them. I'll get about 200 on them this weekend on some highway and gravel, so I can report back about their mannerisms. I have a buddy out in Durango, CO with these tires on his XJ and loves them. He's driven back and forth from there to here a few times and I have only heard good things. I have a few other friends that rave about them. I like how they're more of an aggressive AT but they're not noisy (so far) and they're more affordable. I also like how they're 3 Peak certified. I did recalibrate the speedo and ECU with a Superchips Flashpaq. Would you believe me that the rig feels like it was meant to run these size tires? I'm actually getting decent MPG's city compared to the stock size. The true test will come this weekend with the highway driving.
I changed the water pump, belt, radiator hoses, spark plugs, and two rear most coil overs. The idle has smoothed significantly. We've got a new issue. The check gauges light comes on from time to time and the oil pressure gauge shows zero. The engine feels/sounds/runs fine, but we didn't push it. I suspect a faulty sensor or guage. Any experience with that? It doesn't do it all the time, so that's strange. The engine runs the same whether showing good oil pressure or showing the light and zero pressure.
 

adventure_is_necessary

Rocky Mountain Region Local Expert Kansas
Member

Traveler III

4,007
Bonner Springs, Kansas, United States
First Name
Lucas
Last Name
Antes
Member #

7082

Ham/GMRS Callsign
KE0ZXA
I changed the water pump, belt, radiator hoses, spark plugs, and two rear most coil overs. The idle has smoothed significantly. We've got a new issue. The check gauges light comes on from time to time and the oil pressure gauge shows zero. The engine feels/sounds/runs fine, but we didn't push it. I suspect a faulty sensor or guage. Any experience with that? It doesn't do it all the time, so that's strange. The engine runs the same whether showing good oil pressure or showing the light and zero pressure.
I haven't had any trouble with mine. You're on the right track from what I know. Did the low oil light come on before this failure? That would indicate a sensor failure or issues withe the sending unit, but the engine runs the same so the sending unit is probably ok. There are some OBD2 Scanners out there that will read oil pressure, so that's maybe something to ask about from a mechanic or auto parts store to borrow. What code was the CEL throwing? That might also indicate a place to start. I wouldn't push the rig much until that's resolved, but that's me. Sensors fail all the time and gauges do fail
 

adventure_is_necessary

Rocky Mountain Region Local Expert Kansas
Member

Traveler III

4,007
Bonner Springs, Kansas, United States
First Name
Lucas
Last Name
Antes
Member #

7082

Ham/GMRS Callsign
KE0ZXA
Made a little progress last night on the platform. Time is limited, the shop is 5min away, and the table saw is on its last leg. Not a good trio of issues. I have the hook bolts waiting and will hopefully be installed tonight once I mark and drill the holes to line up with the factory tie downs.

On the porch. Will be adding some more support to hold the weight of gear and dogs before I add the plywood and hinges. Hoping to have more progress on this project by Sunday evening.
IMG-6817.JPG

Inside the Jeep. The angles fit nicely with the seat backs. Everything sits nice and tight. There will be plenty of room between the gear under the platform and the top. Should be able to hold a good bit of gear under there. Might even look at adding to it once it's done and tested.
IMG-6818.JPGIMG-6819.JPG
 
  • Like
Reactions: stickel

adventure_is_necessary

Rocky Mountain Region Local Expert Kansas
Member

Traveler III

4,007
Bonner Springs, Kansas, United States
First Name
Lucas
Last Name
Antes
Member #

7082

Ham/GMRS Callsign
KE0ZXA
While diagnosing some clarity issues with my CB, I ended up welding on the mount for the antenna. The clamp was rusting and it caused the cheap powder coat on the bull bar to start flaking and rusting underneath. Sooooo. I cut up the clamp mount, welded it to the bull bar (I'm no welder and the welder I have access to is junk), and I attempted to make it look pretty with some bed liner paint. It'll probably need to be painted again if I feel like the paint job needs attention. It's covered and shouldn't rust, so I'm happy...for now. I'd like an ARB bull bar bumper but the $$ isn't there for that.

IMG_6823.jpgIMG_6822.jpg
 
  • Like
Reactions: stickel

jeepman

Rank III
Launch Member

Traveler III

740
Columbia, Tennessee, USA
First Name
Tracy
Last Name
Duke
Member #

18360

Nice build! I will be stealing a few of your ideas. I am building an 04 Overland that I picked up a few months ago. It is going to be an Overland build but will see a little rougher terrain down here. I worked as a master tech at a Jeep dealer for 14 years. The rough Idle on the 4.7's is usually O2 sensors. I bought this one cheap with fairly low miles because of the rough idle. Replaced all 4 O2 sensors and it idles like new and I am getting 19-21 mpg on strictly highway driving. I replaced the plugs, coils, water pump, and radiator as preventative maintenance. 4.7L's do not like to be overheated. I've put a winch mount on while I had the front bumper off and ordered a warn winch with synthetic rope. I had to loose the factory tow hooks to install the mount but the winch will make up for it.
 

Attachments