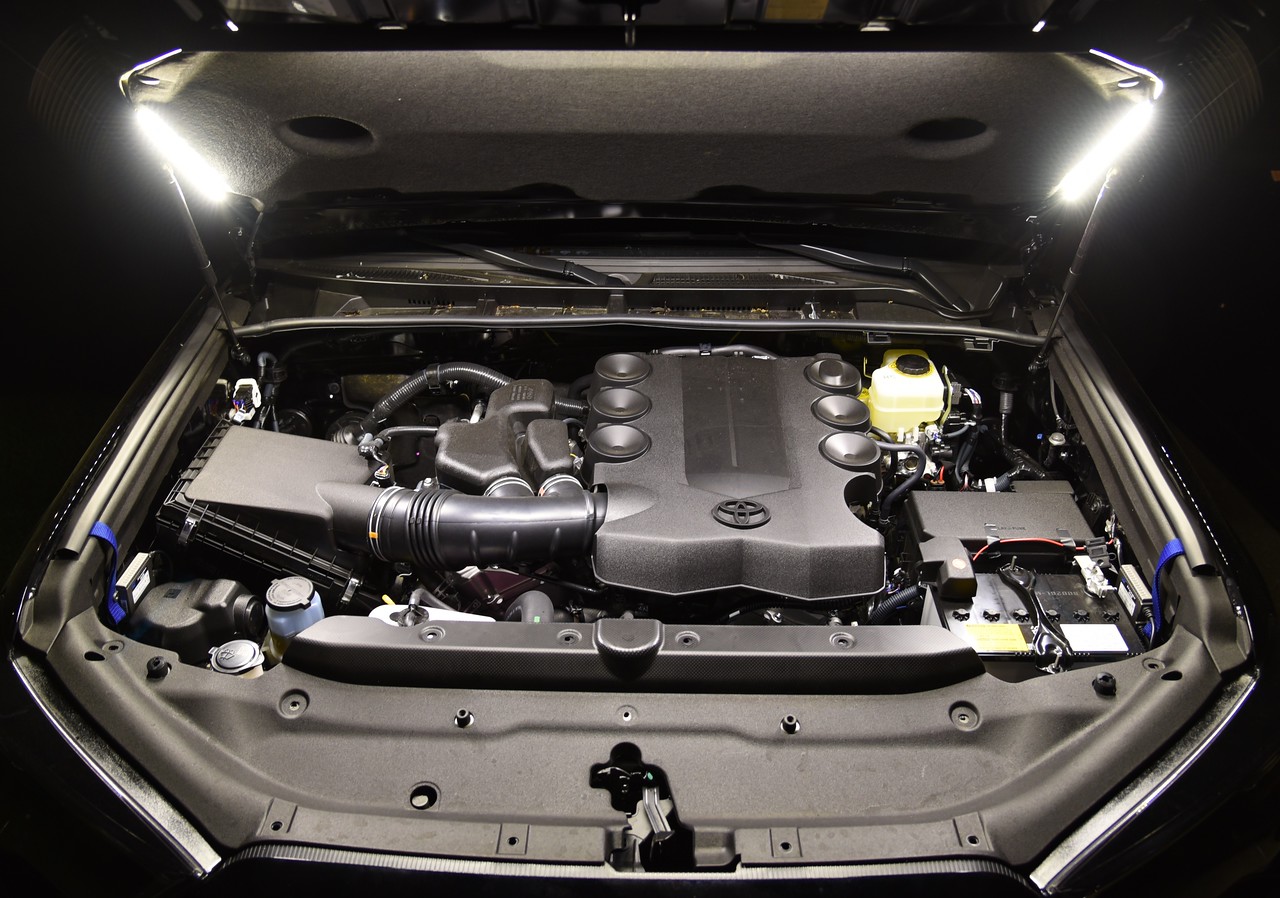
Yup these will be going on the 4runner and the taco truck. They are awesomeAnd here's what they look like

Compared to the stock fog lights:

Sent from my SM-G935V using Overland Bound Talk mobile app
Yup these will be going on the 4runner and the taco truck. They are awesomeAnd here's what they look like
Compared to the stock fog lights:


Traveler III
Thank you, Dave! That's a lot of good information for not documenting it. :) I forgot you weld everything, so I'd need to have someone help out. I've considered those aluminum tinker-toy pieces for putting something similar together sans welding, but at more cost. The design is simple, though, and might fit better with my plan than the storage areas. I just want to make it easy to slide the cooler out, and raise the cargo area floor a couple inches to make a flat surface with the rear seat backs.The fridge is currently plugged and and staying cold for a trip to grandma's this weekend (and to test the voltage safeties, etc before any trips where we will depend on it), so I don't have a finished version photo with no fridge.
Traveler III
Yup these will be going on the 4runner and the taco truck. They are awesome
Thank you, Dave! That's a lot of good information for not documenting it. :) I forgot you weld everything, so I'd need to have someone help out. I've considered those aluminum tinker-toy pieces for putting something similar together sans welding, but at more cost. The design is simple, though, and might fit better with my plan than the storage areas. I just want to make it easy to slide the cooler out, and raise the cargo area floor a couple inches to make a flat surface with the rear seat backs.
I appreciate you're posting this,
Steve
Traveler III
Yep, the PrinSu roof rack will be one I'd seriously consider if my current basket/kayak rack/bike rack/awning setup doesn't work out.The new trend in roof racks is to use extruded aluminum with stamped/water jet cut end pieces, we're going to be seeing a lot more of that stuff in the next few years.
Traveler III


Pathfinder I
Depending on the fasteners used it could be ok. I had my civil engineer wife do the load calculations to tell me what tubing to use for my roof rack, so I cheated.Yep, the PrinSu roof rack will be one I'd seriously consider if my current basket/kayak rack/bike rack/awning setup doesn't work out.
My only concern with the PrinSu is that the entire load on any ONE crossbar is in a shear/bending load on the fastener in the end. There is no other mechanical support. I'd almost want to laminate a second, smaller shelf behind the side pieces to share the load.
http://www.prinsudesignstudio.com

Influencer II
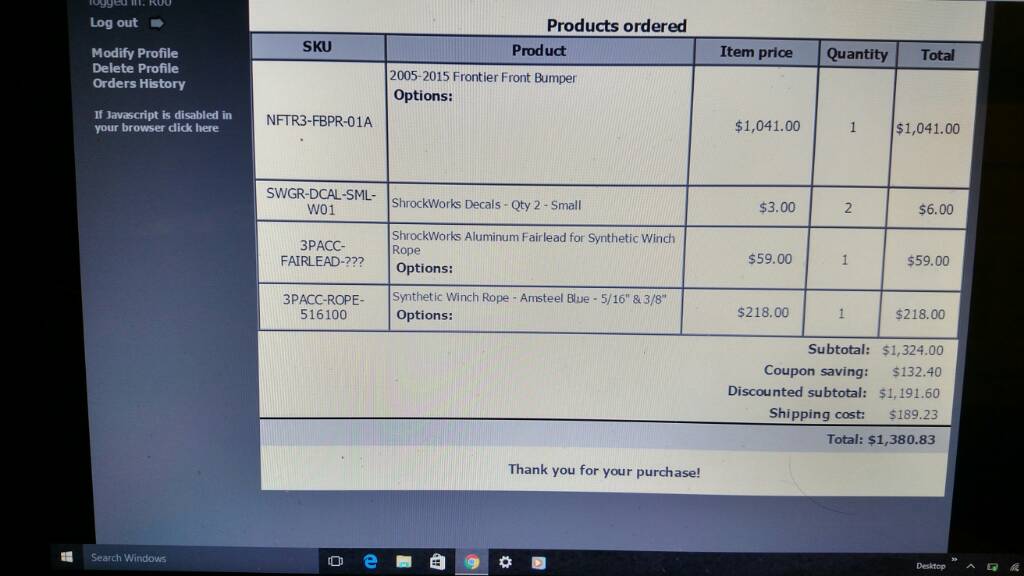
Seems like for $1k+ orders they could toss in the decals for free. Sweet gear though.
Finished my 4" Long Arm upgrade from Iron Rock Off Road today. I took lots of pictures and some time laps of it. Once I have them all compiled ill post them on my Build Page. The lift took me around 36 hours to complete. I did it in my garage with no air tools. Makes me want to spend money on an air compressor and tools now. Just need to install my Rock Sliders next.
Before with a 2"BB kit and tires from a JK Rubicon
View attachment 2102
After with the IRO 4" Long are Kit.
View attachment 2103
Traveler III


The ones I added to the order are different from the freebies they usually send out...Seems like for $1k+ orders they could toss in the decals for free. Sweet gear though.