The Beginning is the End is the Beginning (The continuing journey of the “Adventure Machine”)

  • HTML tutorial

reaver

Rank VI
Member

Explorer I

3,680
Caldwell, ID, USA
First Name
Brian
Last Name
McGahuey
Member #

23711

Ham/GMRS Callsign
GMRS WRMV941
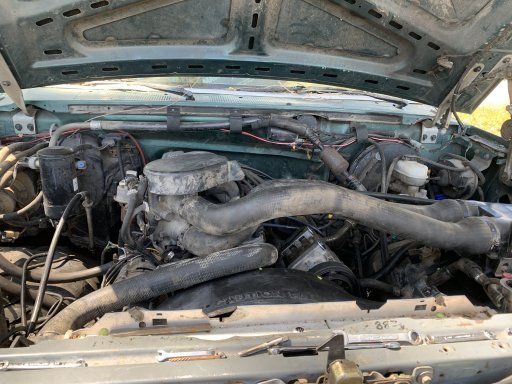
Well six months later and I finally have the engine in. I spent the day yesterday swapping over the exhaust manifolds from the old engine to the JY engine... only to discover the JY engine has a hole in the oil pan... so not sure what I’m going to do there... I don’t have a warm enough place to let the RTV set up...

Today it was just a matter of lifting the engine up and pushing the Bronco forwards.

Tomorrow is going to be getting the transmission ready to put in.

View attachment 189848
View attachment 189849
Nice to see you making some progress again on this! It's supposed to be 60 on Saturday here in the treasure valley, so maybe it'll be warm enough up there for rtv to set?
 
  • Like
Reactions: M Rose

M Rose

Local Expert
Mod Team
Member

Advocate III

5,584
Northeast Oregon, United States
First Name
Michael
Last Name
Rose
Member #

20990

Ham/GMRS Callsign
W7FSB
Service Branch
US ARMY Retired
Nice to see you making some progress again on this! It's supposed to be 60 on Saturday here in the treasure valley, so maybe it'll be warm enough up there for rtv to set?
Supposed to snow and rain Saturday through next week. , I think the patch will hold until after I get the old engine rebuilt... looking at this engine I see a lot of things that I don’t like.
 
Last edited:

M Rose

Local Expert
Mod Team
Member

Advocate III

5,584
Northeast Oregon, United States
First Name
Michael
Last Name
Rose
Member #

20990

Ham/GMRS Callsign
W7FSB
Service Branch
US ARMY Retired
The auto shop sells a two part putty for repairing gas tanks. I have used it to fix holes in my Jon boat. Im sure it can be used to fix the hole in the oil pan.
Probably... not sure where the leak is though... there is a huge fiberglass patch at the sump area... I have another oil pan... just need the temperature to cooperate with me... and I really need the weather to cooperate so I can also swap my old intake on and probably should resell the heads while I’m at it... the more I look at this engine, it’s just a running core. I will be taking my old block down to the machine shop in the next week or so and see if it’s worth rebuilding... I hate doing things twice, but some times you have to do what you have to do...

On a positive note, the transmission was rebuilt recently and looks to be good to go... so only thing left in the power train will be the NP203/205 doubler transfer case.
 
  • Like
Reactions: jcgraves3

BensonSTW

Rank III

Enthusiast III

I had an 88 with the 300 straight 6 and a 5 speed. Stock height with the original tread pattern Goodyear mt-r’s. 32x11.50s fit perfect. That thing went anywhere I ever wanted it to and some places I didn’t want. 1 of only 2 vehicles I’ve ever had that I regret not owning still. Keep plugging away. Broncos are in my mind the perfect 4x4.
 
  • Like
Reactions: M Rose

M Rose

Local Expert
Mod Team
Member

Advocate III

5,584
Northeast Oregon, United States
First Name
Michael
Last Name
Rose
Member #

20990

Ham/GMRS Callsign
W7FSB
Service Branch
US ARMY Retired
I almost sold the “Adventure Machine” today out of frustration... when I put oil in it, I found three huge oil leaks in the oil pan... I was given an ultimatum by the landlord yesterday after tweaking my back to have it back on the road by Friday... so out of time I about had the junk yard come get it... but... after talking it over I decided to drain the oil and try to patch the holes with my new welder... if that doesn’t work, I’ll drive it to a shop to replace the oil pan... I’m done doing mechanical work to the “Adventure Machine” it’s time to focus my energy on cosmetics.

It Lives

I have a new dash, leather seats, steering column, door panels, and a few other parts to start in the interior... Next month I will be getting a carpet and weather seal kit to finish up the interior.

I hope to get my coms installed soon as well... More to come tomorrow as I fix the oil pan, and get all my junk cleaned up and ready for the next stage of the build... lots more pictures and videos to fallow.
 

El-Dracho

Ambassador, Europe
Moderator
Member
Supporter
Investor

Inventor I

13,232
Lampertheim, Germany
First Name
Bjoern
Last Name
Eldracher
Member #

20111

Ham/GMRS Callsign
DO3BE
Just watched the video. Wow, this is really a gigantic project if you do it alone. So I can understand if you are frustrated from time to time and want to give up. But when the rig is finished one day, you can be proud of what you have done and be happy with every mile you drive it!
 
  • Like
Reactions: Sparksalot

Enthusiast II

1,250
Hartford, SD
I almost sold the “Adventure Machine” today out of frustration... when I put oil in it, I found three huge oil leaks in the oil pan... I was given an ultimatum by the landlord yesterday after tweaking my back to have it back on the road by Friday... so out of time I about had the junk yard come get it... but... after talking it over I decided to drain the oil and try to patch the holes with my new welder... if that doesn’t work, I’ll drive it to a shop to replace the oil pan... I’m done doing mechanical work to the “Adventure Machine” it’s time to focus my energy on cosmetics.

It Lives

I have a new dash, leather seats, steering column, door panels, and a few other parts to start in the interior... Next month I will be getting a carpet and weather seal kit to finish up the interior.

I hope to get my coms installed soon as well... More to come tomorrow as I fix the oil pan, and get all my junk cleaned up and ready for the next stage of the build... lots more pictures and videos to fallow.
Hang in there. It's a crap load of work but should be fun way to make memories and some adventures. At least that's what I keep telling myself... But it's getting closer!
 
  • Like
Reactions: M Rose

M Rose

Local Expert
Mod Team
Member

Advocate III

5,584
Northeast Oregon, United States
First Name
Michael
Last Name
Rose
Member #

20990

Ham/GMRS Callsign
W7FSB
Service Branch
US ARMY Retired
Hang in there. It's a crap load of work but should be fun way to make memories and some adventures. At least that's what I keep telling myself... But it's getting closer!
Thanks for the encouragement. @18163.175 stopped by today and helped me look over the project and gave me much needed words of encouragement. Tomorrow I’m going to swap oil pans from my old engine to the junk yard motor.

Today while out on a test drive I found the transfer case is stuck in 4-low no matter where the shifter resides, and the shifter locks up before going to the 2H position... so looks like I’m going to have to pull the T-Case to figure out what is going on there. Hopefully not a new T-Case. I really want a twin stick 205 in it... so I might just start looking for a NP205 to swap with the BW1346.
 
  • Like
Reactions: Sparksalot

M Rose

Local Expert
Mod Team
Member

Advocate III

5,584
Northeast Oregon, United States
First Name
Michael
Last Name
Rose
Member #

20990

Ham/GMRS Callsign
W7FSB
Service Branch
US ARMY Retired
Got the tick fixed... it was probably a collapsed lifter... Oil leak patch is in (JB-Weld), and now I’m searching for the parts to rebuild my transfer case... come to find out stuck in low range means one of two things... either the range selector switch is broken, or the oil pump went out... either requires pulling apart the T-Case and replacing the broken part/s. So Sunday I will split the case to see what’s up.
 
  • Wow
Reactions: Sparksalot

BensonSTW

Rank III

Enthusiast III

The good thing is that borg Warner t-case is fairly simple to remove and split. I had to do the exact same thing on my 88. Mine was just a stuck shift selector and once freed up worked great. I didn’t have to put any money into mine except the rtv to reseal the case.
 
  • Love
Reactions: M Rose

M Rose

Local Expert
Mod Team
Member

Advocate III

5,584
Northeast Oregon, United States
First Name
Michael
Last Name
Rose
Member #

20990

Ham/GMRS Callsign
W7FSB
Service Branch
US ARMY Retired
The good thing is that borg Warner t-case is fairly simple to remove and split. I had to do the exact same thing on my 88. Mine was just a stuck shift selector and once freed up worked great. I didn’t have to put any money into mine except the rtv to reseal the case.
That’s good to hear
 

M Rose

Local Expert
Mod Team
Member

Advocate III

5,584
Northeast Oregon, United States
First Name
Michael
Last Name
Rose
Member #

20990

Ham/GMRS Callsign
W7FSB
Service Branch
US ARMY Retired
On April 28th I forgot to mention another problem I was having. On a short trip to the gas station the engine overheated. I thought I had air in the system so I burped the cooling system several times without any luck. In fact I finally got the coolant level to stay consistent, but would still over heat within 15 minutes.
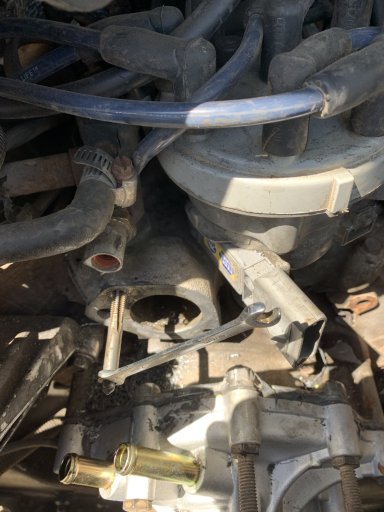
The past two weeks I have replaced the water pump, fan clutch, and the thermostat. While changing the thermostat one of the bolts broke. I tried to weld a nut onto the protruding bolt without any luck. I ended up snapping the bolt off inside the intake manifold last week.
Today I was finally able to drill and tap the intake manifold. But the thermostat housing wouldn’t fit flush. I ended up using my old housing and a heavy coat of UltraBlack RTV. I hope I have it sealed up now... if not, I’ll have to carefully pull the intake manifold (again) to swap the lower.
The good news... I got my steering column, steering wheel, and my bonus instrument cluster in last night. So as soon as I get road worthy I can go pick up the rest of my interior parts so I can put the inside back together.

Tapping the Thermostat Housing

F060E375-7E65-46C8-A879-8630DA4147D1.jpeg
All Buttoned Up and Ready To Fill
A382910B-BC03-4A0F-A182-884F9DD6377E.jpeg
I also have a new T-Case to install if I can’t get this shifting issue fixed.

more to come tomorrow.
 
  • Like
Reactions: Sparksalot

BensonSTW

Rank III

Enthusiast III

On April 28th I forgot to mention another problem I was having. On a short trip to the gas station the engine overheated. I thought I had air in the system so I burped the cooling system several times without any luck. In fact I finally got the coolant level to stay consistent, but would still over heat within 15 minutes.
The past two weeks I have replaced the water pump, fan clutch, and the thermostat. While changing the thermostat one of the bolts broke. I tried to weld a nut onto the protruding bolt without any luck. I ended up snapping the bolt off inside the intake manifold last week.
Today I was finally able to drill and tap the intake manifold. But the thermostat housing wouldn’t fit flush. I ended up using my old housing and a heavy coat of UltraBlack RTV. I hope I have it sealed up now... if not, I’ll have to carefully pull the intake manifold (again) to swap the lower.
The good news... I got my steering column, steering wheel, and my bonus instrument cluster in last night. So as soon as I get road worthy I can go pick up the rest of my interior parts so I can put the inside back together.

Tapping the Thermostat Housing

View attachment 197943
All Buttoned Up and Ready To Fill
View attachment 197944
I also have a new T-Case to install if I can’t get this shifting issue fixed.

more to come tomorrow.
Those old Broncos sure are a labor of love. I have always loved the bronco. I have mixed feelings about the new one though. Keep up the good work. I enjoy seeing these old rigs getting a new chance to roll down the trail. I’m going to look at another 78/79 tomorrow.
 

M Rose

Local Expert
Mod Team
Member

Advocate III

5,584
Northeast Oregon, United States
First Name
Michael
Last Name
Rose
Member #

20990

Ham/GMRS Callsign
W7FSB
Service Branch
US ARMY Retired
Those old Broncos sure are a labor of love. I have always loved the bronco. I have mixed feelings about the new one though. Keep up the good work. I enjoy seeing these old rigs getting a new chance to roll down the trail. I’m going to look at another 78/79 tomorrow.
Good luck on the Second Gen.

Just got back from taking my daughter to the school bus stop and had a few more minutes to waste before coming back inside the house. I decided to tighten down the t-stat housing and hook up my hoses again. Added some water, and no leaks. I’m going to try driving it up and down the road in about an hour to try to get it to overheat again, and force the transfer case into high range.

If all goes as planned, I should be able to start on the fun stuff today, if not... I’ll be rebuilding my transfer case :) :(
 

M Rose

Local Expert
Mod Team
Member

Advocate III

5,584
Northeast Oregon, United States
First Name
Michael
Last Name
Rose
Member #

20990

Ham/GMRS Callsign
W7FSB
Service Branch
US ARMY Retired
Update time... wow I’ve been busy.

I got the transfer case to shift... Not sure what I did... but it shifted when I was testing one last time before dropping the T-Case.

Over heating issue is fixed. I replaced the thermostat, water pump, and the fan clutch. (The radiator and the heater core were replaced last spring before all the engine trouble).

I was having problems with acceleration, and a top speed of 40 mph. I pulled codes and found that the Throttle Position Sensor voltage was low... replaced the TPS and now acceleration is a lot better. Reset the timing, and again again acceleration is better, but the engine still feels under powered.

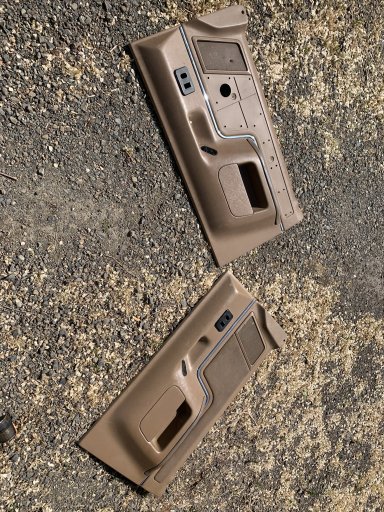
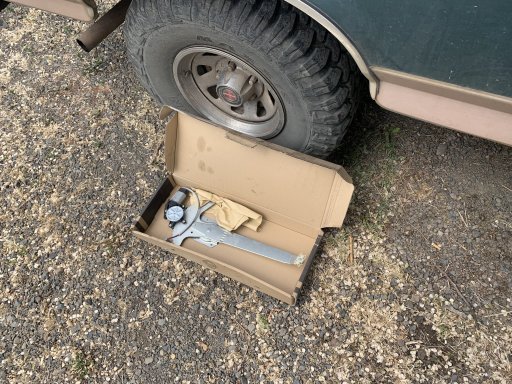
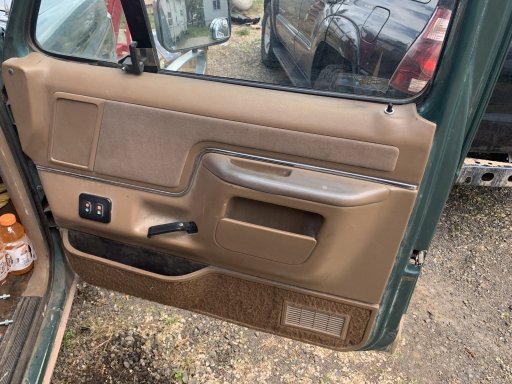
Over the past couple of days I have been focusing on the interior. Wednesday I installed both front seats. Thursday I swapped the driver side door panel and bolted down the center console. Today I installed a new window regulator and motor as well as swapped door panels. I’m hoping to move to the back tailgate soon to fix the rear window motor.

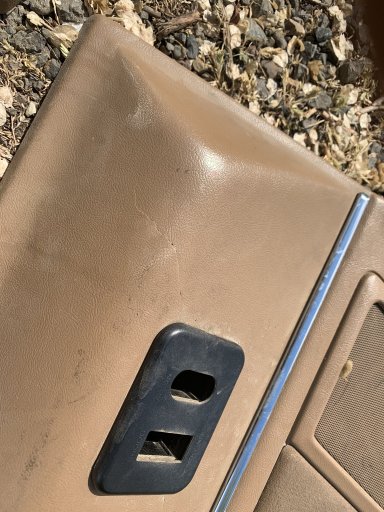
Cracked Panel... I should have taken pictures of the back side, I don’t know how it stayed on the door.
3F336E30-D182-4FE7-B505-76C0852EBB23.jpeg

pretty close match in color if you ask me. (New on top, old On bottom
5838F7A1-F9B6-4C70-8ED1-207759661CA8.jpeg

New window regulator and motor ready to go in
34719D6B-07D8-46F4-A374-BE14CA2D7A9D.jpeg

All buttoned back up
805DACF5-056D-4462-8A6C-9B7825177F62.jpeg
 
Last edited:
  • Like
Reactions: Sparksalot

M Rose

Local Expert
Mod Team
Member

Advocate III

5,584
Northeast Oregon, United States
First Name
Michael
Last Name
Rose
Member #

20990

Ham/GMRS Callsign
W7FSB
Service Branch
US ARMY Retired
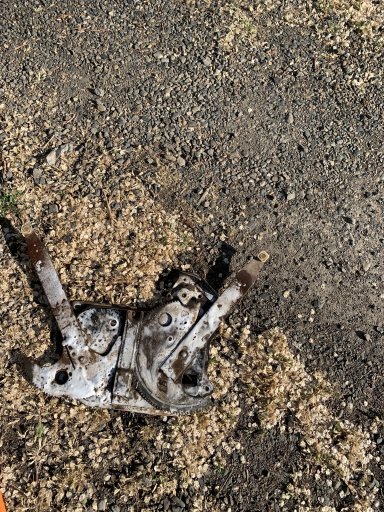
After the rain I decided to go back outside and try to tackle the rear window. Two hours later and the window now moves up and down on its own. I still need to rout the wiring better as well as rewrire the assembly as well. I have an internal brake somewhere, so it will be easiest to just make a new wire.

cleaning up the stuck window regulator
4ABC617E-58B0-471A-ADEF-D83A4B68CAE8.jpeg
 
  • Like
Reactions: reaver