Suburban turned to Zombie Response Vehicle

  • HTML tutorial

Asuarez_673

Rank III
Launch Member

Enthusiast III

859
Virginia Beach, VA
First Name
Alexis
Last Name
Suarez
Member #

4389

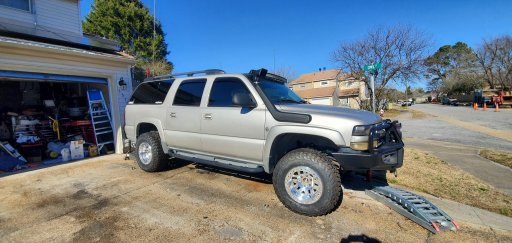
As in the previous pictures, the leveling kit has been put on. Raised the Burb 2 Inches in the front and 3 in the rear and it sits pretty close to level.

The ARB LED Fog Lights are honestly well worth the money IMHO. When I found them online, I got them for 100 bucks and the halogen kit was 75ish. The light output is fantastic and the cutoff is great. ill try and take some night pics either today or tomorrow.

For the winch, I got a Smittybilt X20 12k. Couldn't beat it for the price, came with a wireless remote which can also be plugged into the unit itself. I did have to take the clutch side of the winch apart and move it so that I could access it through a small access hole on top of the bumper. Not hard to do but you do need to be careful taking it apart.

Still working on fabricating a skid plate for the new bumper, but the Z71 skid plate still works just leaves an opening that id rather close up for the high approach angles.
 

Asuarez_673

Rank III
Launch Member

Enthusiast III

859
Virginia Beach, VA
First Name
Alexis
Last Name
Suarez
Member #

4389

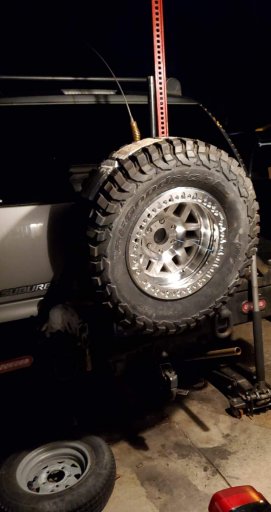
In a few posts ago, you saw the KM3s just sitting in the Garage waiting to get put on. Well after almost a year and a half of waiting my wheels finally arrived. Originally I was going to get some Raceline Beadlocks. Their customer service was subpar so I switched over to KMC. At the time the only Beadlock option I had was the KMC KM234 Grenade, but after constant calls to KMC and with local reps, the wheel blanks had been shipping for almost 7 months, and still no ETA on when they were going to arrive to then get drilled to my 6 X 6.5 bolt pattern, so luckily the had a few blanks ready to be drilled but it was the KM 229 Machete which were also pretty nice and honestly feel like they fit the Burb a little better. The cool thing with the KMCs is that the beadlock ring has drain holes so that water doesn't stay inside the wheel, as well as the bolts are recessed so that they don't get damaged.

Mounting the tire to the Beadlock was honestly fairly easy. This is my first time setting up beadlocks, but I did have my local rep show me and guide me through it before I even attempted it myself. all it takes is some soapy water and a spray bottle and the tire goes on. getting the bead to seat took a little flathead to get it flush and then between my wife and myself we installed all the bolt and I torqued them to 22 ft/lbs. I thought long and hard about retaining the TPMS system, but after having a couple chats with a couple of local people who run beadlocks, I decided against it as the placement of the valve stems in in the middle of the wheel, and if I ever do any slight rock crawling or drop my PSI down as I intend to, it could crack my sensors and I'd be back at square one. There is a pressure monitoring system called Tymate that I've been looking at, ARB has also made one, so I will be doing some research to see which one will be the best for my use.

20210225_145123.jpgreceived_1046269369196026.jpeg
 

RoarinRow

Rank V
Launch Member

Member III

2,771
Elk Grove, CA, USA
First Name
Rolando
Last Name
Nispiros
Member #

17011

Ham/GMRS Callsign
KN6JJS
So for the ARB bumper. I hate that I didn't take any pictures, I can search deep into my files if anyone needs me to, but the Chevy brackets and LandCruiser (LC) bumper don't line up. Test fitting the bumper will show you what you need to cut in order to make the bumper and the brackets line up. its roughly 2ish inches on the front side of the bracket and then about an inch on the top side. Once the cuts are made, you should be able to line up the bumper to all the holes on the bracket, and whatever isn't aligned, if its close, just take a file to it because the last thing you need to do is over cut it.

As far as fitment goes, its honestly super close. Since this bumper isn't made for the Burb, it took a lot of bolting on and taking off to get it just right. Unfortunately, the bumper wing (sides of the bumper) and the headlight hoops don't fit. I got in touch with a fab shop that has a tube bender and the plan is to cut the hoop and make our own hoop so that the headlights can clear. Its not that you can't see anything with the headlights, but the tube runs practically down the middle of the light and personally, I'm really big on good lighting so I wanted to make sure, I could see as far down the road as possible. The wings on the bumper are going to be cut and capped so that it matches the fender line. Hoping to do this here soon once I get the brake lines swapped out and put my new steering in.

View attachment 189102View attachment 189103View attachment 189104
Looks good though. You got it on!
 

Asuarez_673

Rank III
Launch Member

Enthusiast III

859
Virginia Beach, VA
First Name
Alexis
Last Name
Suarez
Member #

4389

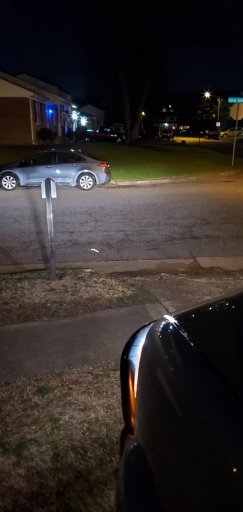
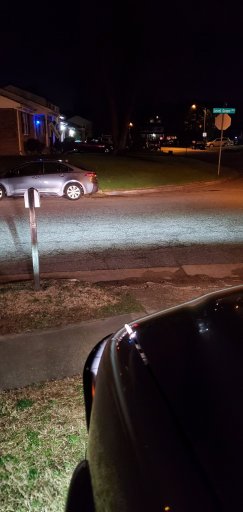
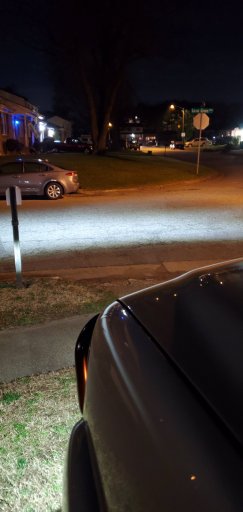
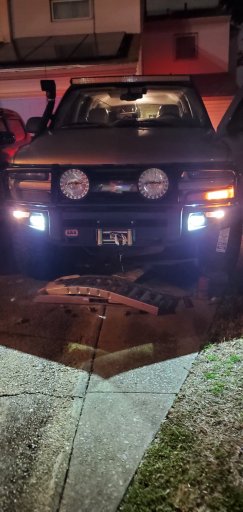
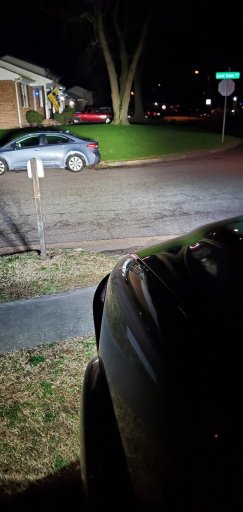
So I finally had a chance to take some night pictures. of course the city would come by the same day and fix the street light that's been out for months, but you can still depict the light brightness, and once I get the brake lines done, I will go over to some dark spots and show everything finished.

Here is just Headlights
20210227_203540.jpg

Headlights and Fog Lights
20210227_203550.jpg

Just Fogs
20210227_203604.jpg20210227_203614.jpg

Headlights, Fogs, and the HTX on just the LED Ring
20210227_203631.jpg

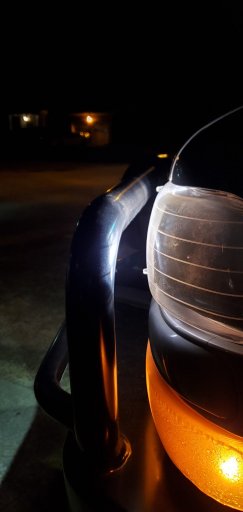
and lastly, you can see why I am going to cut the headlight bars and make my own so that I can see more.
20210227_203647.jpg

So up next, I've been building my own projector retrofit headlights. I'm going to work on them a bit today and show some updates later tonight.
 
  • Like
Reactions: RoarinRow

RoarinRow

Rank V
Launch Member

Member III

2,771
Elk Grove, CA, USA
First Name
Rolando
Last Name
Nispiros
Member #

17011

Ham/GMRS Callsign
KN6JJS
So I finally had a chance to take some night pictures. of course the city would come by the same day and fix the street light that's been out for months, but you can still depict the light brightness, and once I get the brake lines done, I will go over to some dark spots and show everything finished.

Here is just Headlights
View attachment 189270

Headlights and Fog Lights
View attachment 189271

Just Fogs
View attachment 189272View attachment 189273

Headlights, Fogs, and the HTX on just the LED Ring
View attachment 189274

and lastly, you can see why I am going to cut the headlight bars and make my own so that I can see more.
View attachment 189275

So up next, I've been building my own projector retrofit headlights. I'm going to work on them a bit today and show some updates later tonight.
Those sucker are bright for sure. Yeah from the pictures the bar did look like it was slightly blocking the headlight line of sight. That’s a big project.
 

Asuarez_673

Rank III
Launch Member

Enthusiast III

859
Virginia Beach, VA
First Name
Alexis
Last Name
Suarez
Member #

4389

So I finally had a chance to take some night pictures. of course the city would come by the same day and fix the street light that's been out for months, but you can still depict the light brightness, and once I get the brake lines done, I will go over to some dark spots and show everything finished.

Here is just Headlights
View attachment 189270

Headlights and Fog Lights
View attachment 189271

Just Fogs
View attachment 189272View attachment 189273

Headlights, Fogs, and the HTX on just the LED Ring
View attachment 189274

and lastly, you can see why I am going to cut the headlight bars and make my own so that I can see more.
View attachment 189275

So up next, I've been building my own projector retrofit headlights. I'm going to work on them a bit today and show some updates later tonight.
Those sucker are bright for sure. Yeah from the pictures the bar did look like it was slightly blocking the headlight line of sight. That’s a big project.
It's been a big project for sure. Being that the projector is very narrow I didn't want it to interfere at all, but I love the HTX they should be more than enough for off road, the light bar is great for seeing stuff up close whenever I'm doing technical stuff
 
  • Like
Reactions: RoarinRow

RoarinRow

Rank V
Launch Member

Member III

2,771
Elk Grove, CA, USA
First Name
Rolando
Last Name
Nispiros
Member #

17011

Ham/GMRS Callsign
KN6JJS
It's been a big project for sure. Being that the projector is very narrow I didn't want it to interfere at all, but I love the HTX they should be more than enough for off road, the light bar is great for seeing stuff up close whenever I'm doing technical stuff
A project of blood, sweat, and tears.
 
  • Like
Reactions: Asuarez_673

Asuarez_673

Rank III
Launch Member

Enthusiast III

859
Virginia Beach, VA
First Name
Alexis
Last Name
Suarez
Member #

4389

It's been a big project for sure. Being that the projector is very narrow I didn't want it to interfere at all, but I love the HTX they should be more than enough for off road, the light bar is great for seeing stuff up close whenever I'm doing technical stuff
A project of blood, sweat, and tears.
I just hope it's all worth it in the end. This industry changes so fast that by the time you are finishing something up, that stuff is already outdated, which makes custom builds that much more stressful
 
  • Like
Reactions: RoarinRow

RoarinRow

Rank V
Launch Member

Member III

2,771
Elk Grove, CA, USA
First Name
Rolando
Last Name
Nispiros
Member #

17011

Ham/GMRS Callsign
KN6JJS
I just hope it's all worth it in the end. This industry changes so fast that by the time you are finishing something up, that stuff is already outdated, which makes custom builds that much more stressful
Yeah future proofing our rigs is an endless process. We are never ever done modding.
 

Asuarez_673

Rank III
Launch Member

Enthusiast III

859
Virginia Beach, VA
First Name
Alexis
Last Name
Suarez
Member #

4389

I just hope it's all worth it in the end. This industry changes so fast that by the time you are finishing something up, that stuff is already outdated, which makes custom builds that much more stressful
Yeah future proofing our rigs is an endless process. We are never ever done modding.
Ain't that the truth lol
 
  • Like
Reactions: RoarinRow

Asuarez_673

Rank III
Launch Member

Enthusiast III

859
Virginia Beach, VA
First Name
Alexis
Last Name
Suarez
Member #

4389

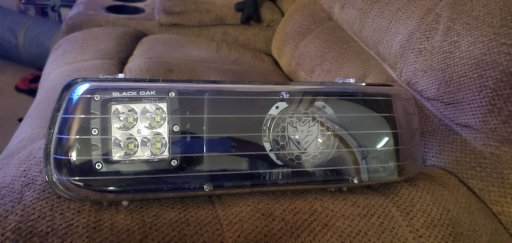
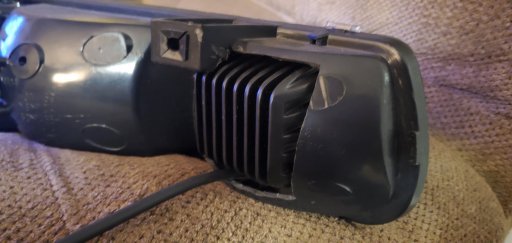
Well my day was pretty much wasted, as I had a close friend come by and he needed some help with his car so I didn't get to do as much as I had wanted, but I did get to start a bit on my headlights.

So for the headlights I got some generic housings from Amazon. They were cheap and this is my first time doing any major retrofit so I didn't want to have too much invested just in case I messed up somehow.

The plan for the low beam was a Morimoto Mini H1, I wanted the mini turbine shroud and put a switchback but after putting the lights somewhat together yesterday I realized that the only shroud I'll be able to use is the Mini Graphite. I'm still debating if I should get Halos with switchbacks in it or if it would be too much and just look tacky. As far as the high beam, I got a set of LED pods.

In order to let the LED pod fit properly, I had to cut the backside of the housing. Currently trying to figure out how I am going to seal up the rear of the housing to keep moisture out, but here's a few pics of what I got done so far.

20210228_192237.jpg
20210228_192258.jpg