Reaver's DIY adventure box!

  • HTML tutorial

lhoffm4

Rank III

Advocate I

778
Boise, Idaho
First Name
Lee
Last Name
Hoffman
Service Branch
US Navy
I am at the same crossroads, considering buying a welder. Unfortunately I have zero experience using one!
Look at a stick (tig) welder, they are less expensive to get into and are very versatile and possibly easier to learn with. Tons of Youtubes to learn from... Of course knowing a welder is always a good thing too!
 

reaver

Rank VI
Member

Explorer I

3,680
Caldwell, ID, USA
First Name
Brian
Last Name
McGahuey
Member #

23711

Ham/GMRS Callsign
GMRS WRMV941
Look at a stick (tig) welder, they are less expensive to get into and are very versatile and possibly easier to learn with. Tons of Youtubes to learn from... Of course knowing a welder is always a good thing too!
Someday, but for this iteration, it's all wood.
 
  • Like
Reactions: lhoffm4

Ubiety

Rank VI
Member

Explorer I

5,221
Sammamish, WA, USA
First Name
Greg
Last Name
Ubiety
Member #

6193

Ham/GMRS Callsign
Ribs
Can't wait to see what you get done this upcoming week @reaver! Actually would love to come over and help but the family keeps booking my weekends and that pesky work thing ;) Why don't you come over to this side to do the work and I'll show up when I can! Hahahaha
 
  • Like
  • Love
Reactions: reaver and M Rose

reaver

Rank VI
Member

Explorer I

3,680
Caldwell, ID, USA
First Name
Brian
Last Name
McGahuey
Member #

23711

Ham/GMRS Callsign
GMRS WRMV941
Can't wait to see what you get done this upcoming week @reaver! Actually would love to come over and help but the family keeps booking my weekends and that pesky work thing ;) Why don't you come over to this side to do the work and I'll show up when I can! Hahahaha
Haha. I wish. Honestly, if I had a garage to work in, I probably would already be finished. But, as it stands, I have to plan around the weather. Good news is we're looking at some scattered showers on Monday, and Friday. The rest of the week looks pretty good.
 
  • Like
Reactions: Ubiety

reaver

Rank VI
Member

Explorer I

3,680
Caldwell, ID, USA
First Name
Brian
Last Name
McGahuey
Member #

23711

Ham/GMRS Callsign
GMRS WRMV941
Both front doors are built. Door jam has been built for one of the doors.

Going to get the second door on tonight after my daughter goes to bed.

I'll be building the passenger side door jam tomorrow, and installing the latches, and rear door jam as well. Then I'll get the tongue box installed.

Got lots of small stuff to do, as well, but she's getting closer!
 
Last edited:

reaver

Rank VI
Member

Explorer I

3,680
Caldwell, ID, USA
First Name
Brian
Last Name
McGahuey
Member #

23711

Ham/GMRS Callsign
GMRS WRMV941
Also, ordered some more 12g marine wire, and a 20A HQST MPPT Solar charge controller.

Oy, this trailer is going to bankrupt me..... Good thing I can live in it if I lose the house.
 
  • Haha
Reactions: Shahn and Ubiety

reaver

Rank VI
Member

Explorer I

3,680
Caldwell, ID, USA
First Name
Brian
Last Name
McGahuey
Member #

23711

Ham/GMRS Callsign
GMRS WRMV941
OK, after three long days of work, she's now ready for paint!

Tounge box positioned:


All doors are framed, with latches installed! Kitchen box is set with the stove in place (I definitely need a smaller stove though, but that can happen later).


Power and water boxes positioned, and wiring holes drilled through the side of the trailer.


My plan is to get the first coat of durabak on tomorrow.

Then I need to wire up the electrics, plumb the faucet, and hook up the lights! I also need to bolt the superstrut rails to the roof, and cut the crossbars for the tent. At that point, it's done for right now!

Now, if you'll excuse me, I'm going to take a nap. I'm TIRED.
 

reaver

Rank VI
Member

Explorer I

3,680
Caldwell, ID, USA
First Name
Brian
Last Name
McGahuey
Member #

23711

Ham/GMRS Callsign
GMRS WRMV941
Today's task...... PAINT!

This morning, I had a few hours before my dad came over to help me install a new outdoor faucet. I took that time to get all the doors primed, since I was lazy, and skipped the FRP panels.

Each door got two coats of exterior primer. I finished about 20 minutes before dad showed up.


Dad and I installed the new faucet, which gave the primer time to dry.

Then, I layed down the first coat of durabak. Of course, they didn't send me a roller, only the foam tubes, and I should have bought a 4" roller instead, but I made it work.

I gave that a few hours to get tacky, then applied the second coat.

Tomorrow I put it back together, permanently mount the tongue box, install the trim, lights, and side boxes.

I'll be damned if this thing isn't going to be ready for our annual memorial day trip!
 

reaver

Rank VI
Member

Explorer I

3,680
Caldwell, ID, USA
First Name
Brian
Last Name
McGahuey
Member #

23711

Ham/GMRS Callsign
GMRS WRMV941
Another very productive day. I got ALOT done.

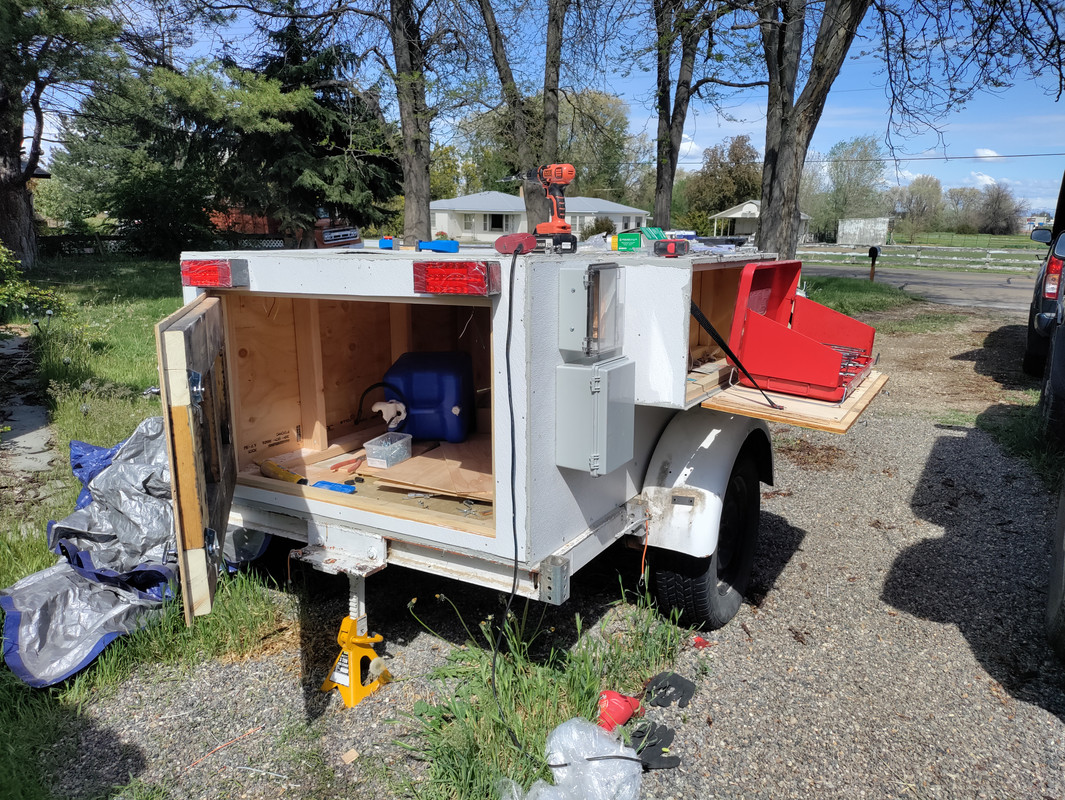
Tail lights are wired and work.


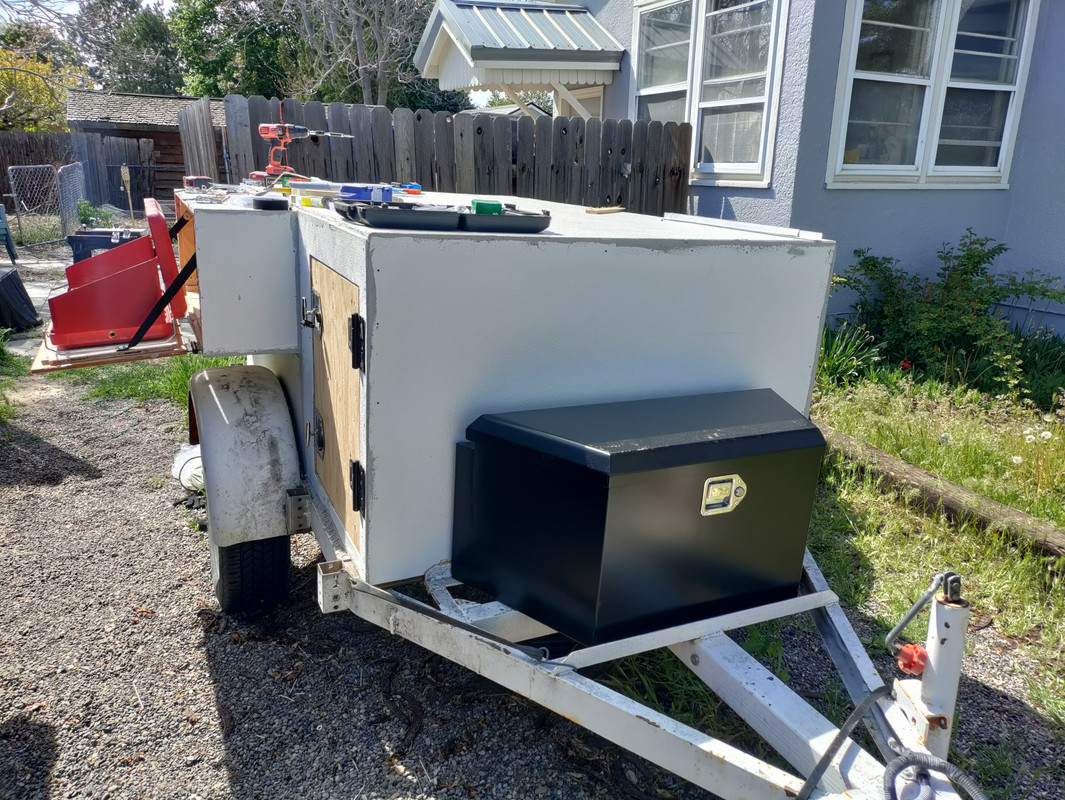
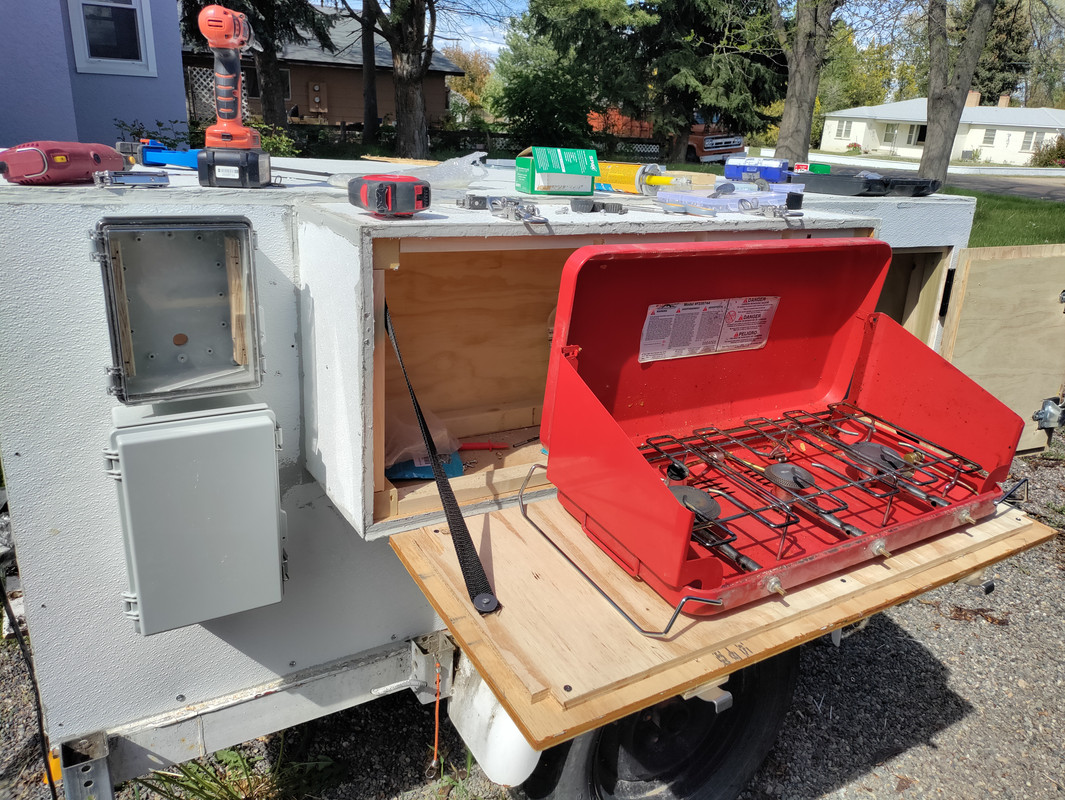
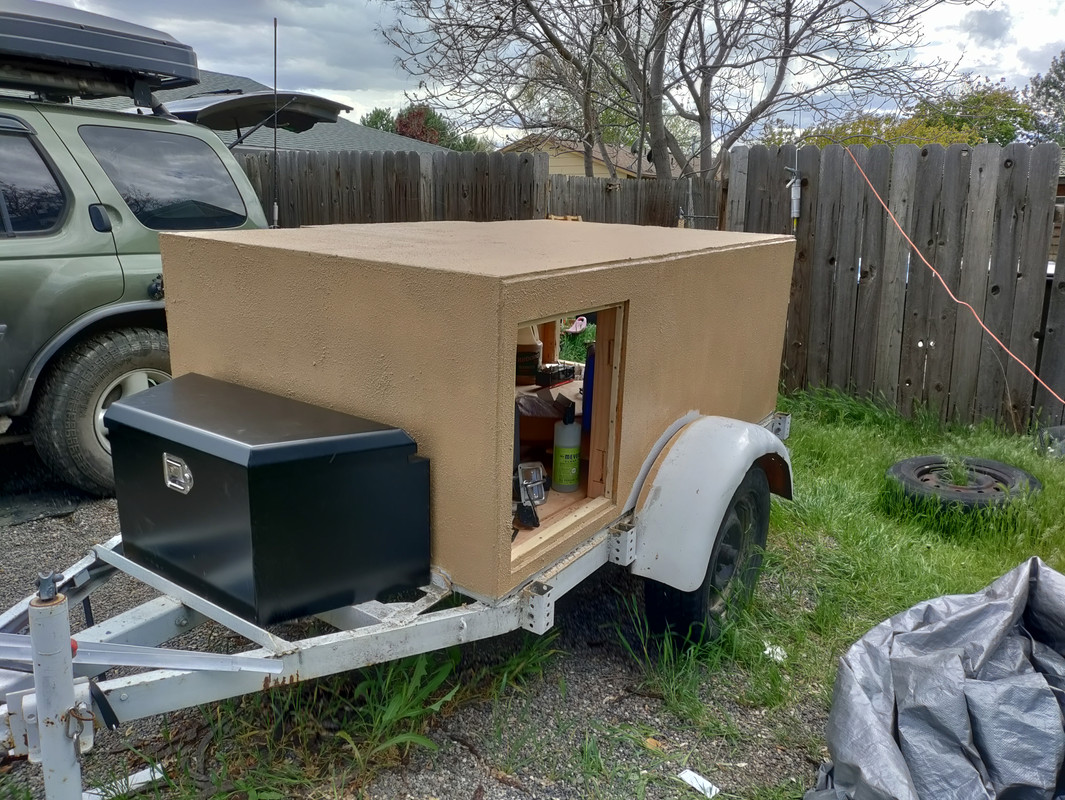
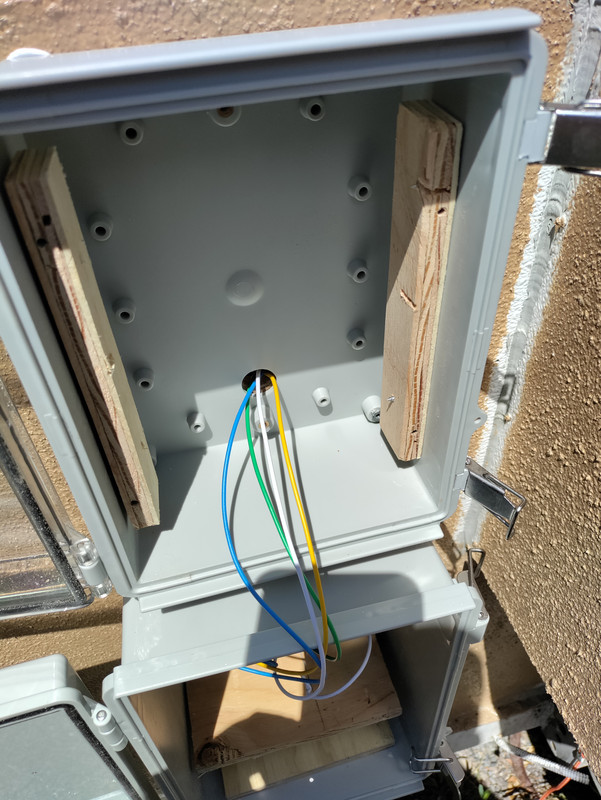
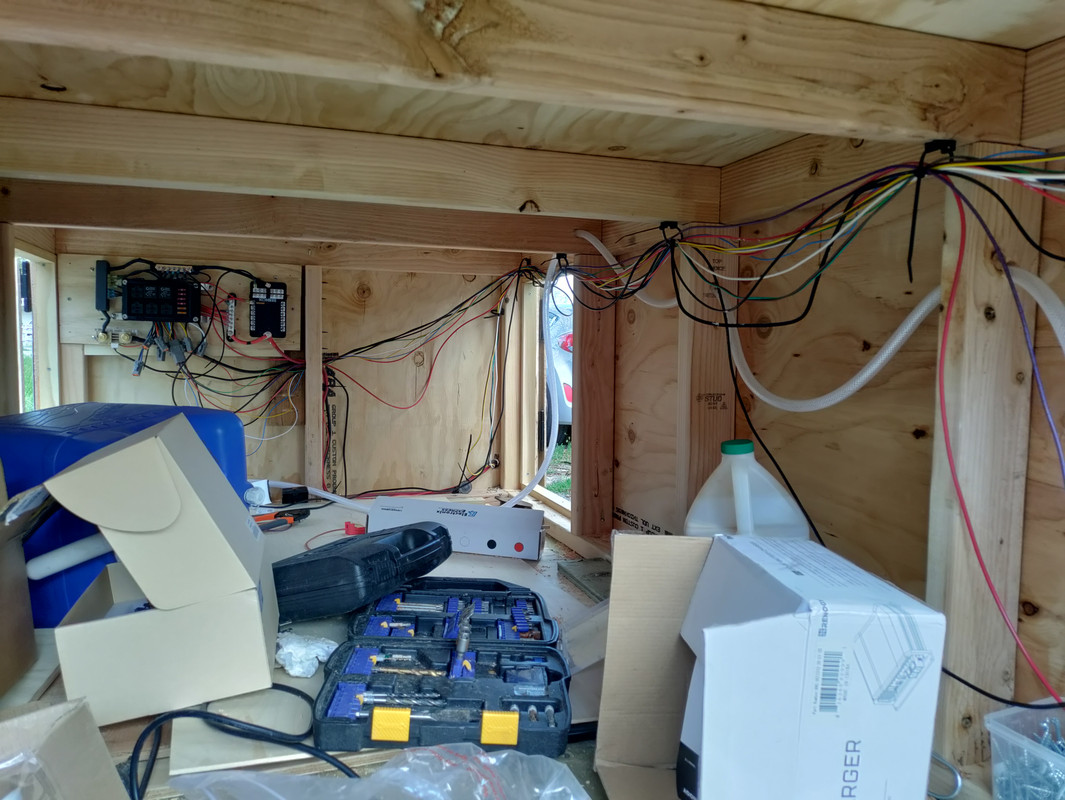
I then mounted the power and water boxes, and sealed the back with sikaflex, and started running wires through.


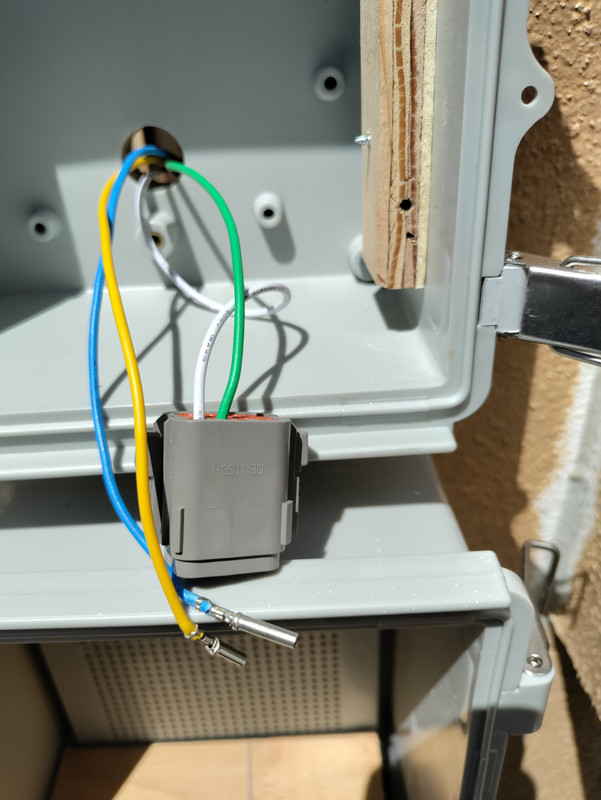
Then I started building the connector.

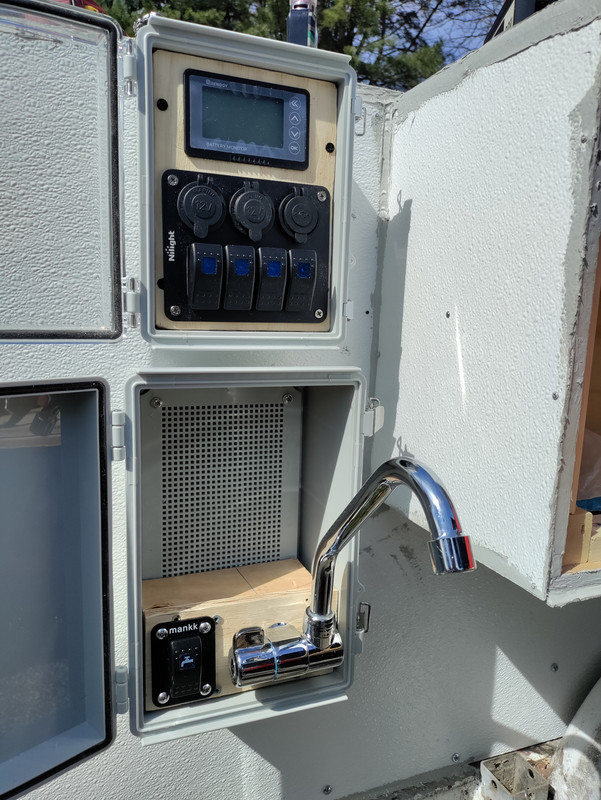
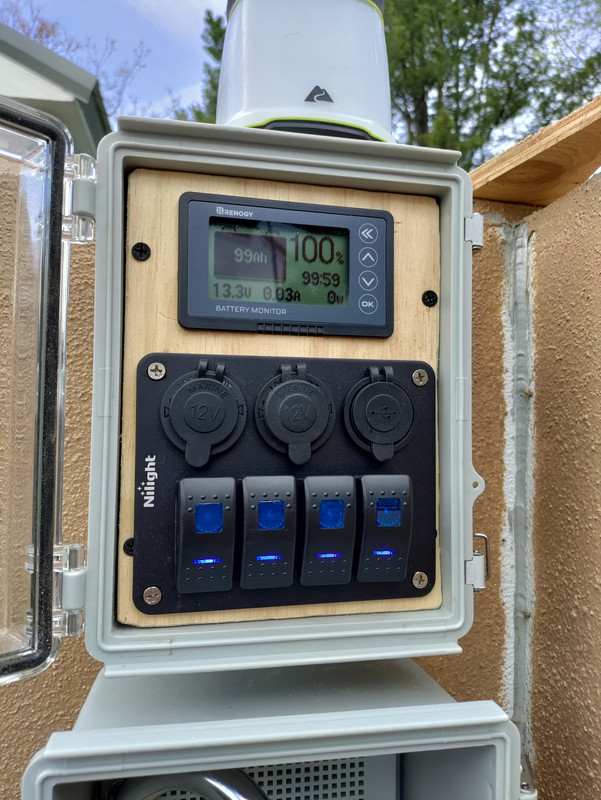
I then connected the harness to the switch panel, and mounted it up!


I then temporarily ran the primary power and ground through the front wall, since I'm waiting on one more waterproof junction box, since the walls are too thick for a cable gland. I'll seal the back of the box with two sikaflex gaskets.

I was going to mount the rack rails, but realized I need to put the roof trim on first, and I don't have enough aluminum angle at the moment. I'll be getting more tomorrow.

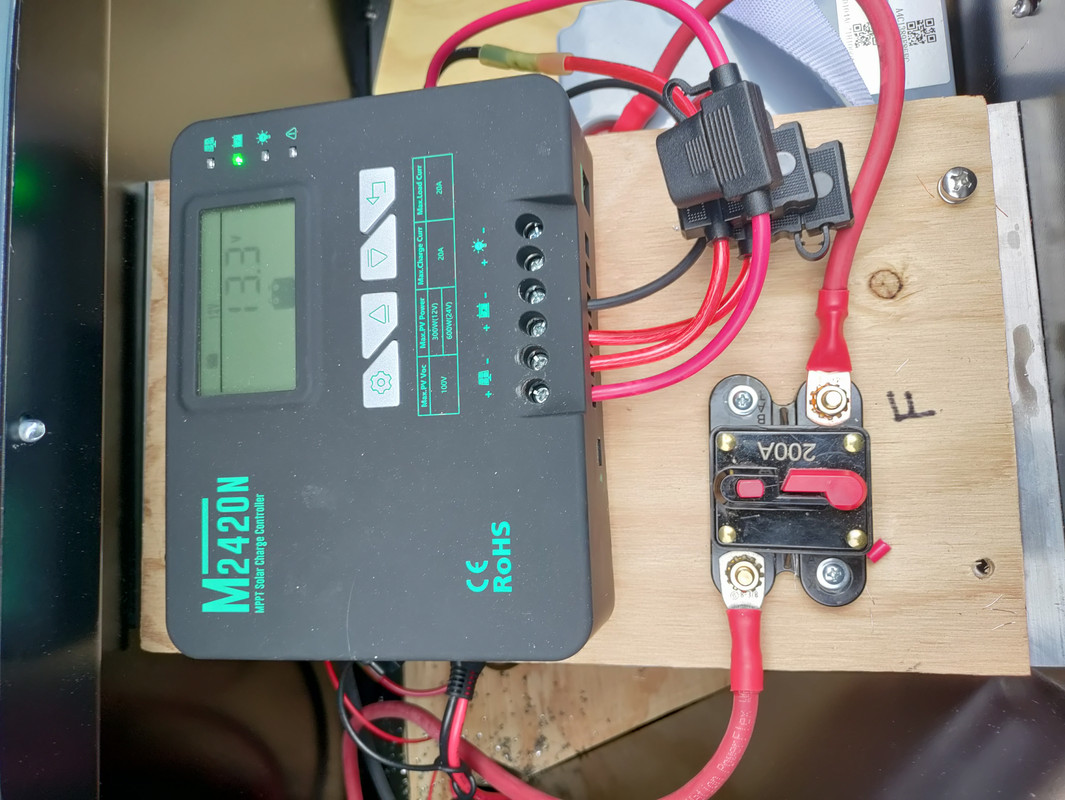
So instead, I started mocking up where the dc charger, battery, and solar charge controller would go. I initially wanted the dc and solar chargers to sit next to each other, above the battery. Unfortunately, there's not enough room. So, I think I'll move the DC charger down below the shelf, next to the battery.

I'm waiting on a few more parts, but it's getting ever so much closer!
 

lhoffm4

Rank III

Advocate I

778
Boise, Idaho
First Name
Lee
Last Name
Hoffman
Service Branch
US Navy
Will there be any gear or reason to throw a load bearing rack on top of the trailer? Was wondering about it shedding water. Looks pretty flat.
 

reaver

Rank VI
Member

Explorer I

3,680
Caldwell, ID, USA
First Name
Brian
Last Name
McGahuey
Member #

23711

Ham/GMRS Callsign
GMRS WRMV941
Will there be any gear or reason to throw a load bearing rack on top of the trailer? Was wondering about it shedding water. Looks pretty flat.
My roof top tent is going up there. It is fairly flat, yes. That being said, with the durabak bedliner paint, plus the frp panels underneath the paint, I'm not worried about water sitting on the roof at all. It rained pretty good Friday night for a bit, and there wasn't a drop of water inside.
 

reaver

Rank VI
Member

Explorer I

3,680
Caldwell, ID, USA
First Name
Brian
Last Name
McGahuey
Member #

23711

Ham/GMRS Callsign
GMRS WRMV941
Ladies and gentle-folk, groot is just about finished!

Got the solar charger tested today! It's wired up, and charges the battery perfectly! (though I need higher performing solar panels with this charger).


I worked on the relay box and fuse block until 2am this morning, and got it in today. No shorts, and everything works exactly like it should! Hooking up to the switches was easy, as everything is color coded. I have an open relay in the relay box, and I'm thinking interior lights, but those may not need a relay.


Battery monitor, switches, and power ports all working exactly like they should!

This is what the wiring looks like before tieing it all down!


All that's left to do now is install the fridge slide, cut and install trim, wire up and test the water pump, and put the tent on! Everything but the tent will happen in the evenings this week!
 

reaver

Rank VI
Member

Explorer I

3,680
Caldwell, ID, USA
First Name
Brian
Last Name
McGahuey
Member #

23711

Ham/GMRS Callsign
GMRS WRMV941
No pictures over the last couple days. Since I'm back at work during the day, I only have a few hours after my kid goes to bed to get work done on the trailer.

Fridge slide is in, and bolted down. Power cord is made, tested, and set. On the plus side, my $279 only draws about 3 amps while running in eco mode.

Water tank is also in its final position. Hoses are the correct length now, and the water pump is mounted.

Picking up my trim pieces tomorrow.

I'll get those cut and installed, and then I can put the rack on! Looks like I'll be able to start loading this up this weekend!

**EDIT**

I'm going to have to hold off on the aluminum corner trim for right now. It's going to cost me about $200 worth of aluminum to finish this thing off, and I just don't want to spend that right now.
 
Last edited:
  • Like
Reactions: Shahn and Ubiety

grubworm

Rank V
Launch Member

Member III

2,358
louisiana
First Name
grub
Last Name
worm
Member #

17464

Service Branch
USN-Submarines
awesome job, brian!

that thing is small, but i bet it feels like it has as much work put into it as house. i know that wiring wasnt as easy as it looks.
very cool! plus by you building it and you touching EVERY piece of it, there is absolutely nothing that can wrong with it that you wont know how to fix.
a LOT of work and passion went into that!
VERY impressive!
 
  • Like
Reactions: Ubiety

reaver

Rank VI
Member

Explorer I

3,680
Caldwell, ID, USA
First Name
Brian
Last Name
McGahuey
Member #

23711

Ham/GMRS Callsign
GMRS WRMV941
awesome job, brian!

that thing is small, but i bet it feels like it has as much work put into it as house. i know that wiring wasnt as easy as it looks.
very cool! plus by you building it and you touching EVERY piece of it, there is absolutely nothing that can wrong with it that you wont know how to fix.
a LOT of work and passion went into that!
VERY impressive!
Thanks man!! It's been a really fun project, and I've learned ALOT.

There's way more room inside the trailer than there appears. I can actually crawl inside even with the fridge slide and water tank in there, and still have lots of room (not that this was built to sleep in....), so fitting all of our camp gear in here will be no problem.

The wiring was actually pretty easy. I still don't have the harness for the truck in yet, in order to power the DC-DC charger, but I'll get that in this weekend. Tonight, I'll be cutting and mounting the superstrut runners for the rack, as well as cutting the crossbars that will mount to them. I still need to cut and install the weatherstipping for the doors as well. Lots of little small things to do, but we'll be ready to use it next weekend!
 
  • Like
Reactions: Ubiety and grubworm