
Pathfinder III
Pathfinder III

Member II
Hey, @MStudt how was the bumper to install? Did you have to mod it in any way or was it all lined up alright?

Off-Road Ranger I
I felt like the owner lied to me honestly. I bought what he called a 3rd Gen rack, and it wasn't. I was supposed to come out with one before Christmas, and still doesn't have one out. Instead of telling me the truth about the rack he just sent me a Tacoma rack that was intended to mount on the bed. The only difference was that he included some different mounts. Plus, knowing what I know about fabricating I can tell that he's got around a 100%+ mark-up on his racks. Don't get me wrong though it is a nice rack. But it's not worth the price tag, and I can see that after having one.
Member II
I e-mailed and asked about a 3rd Gen 4Runner rack and he flat out told me he was too busy to design and fabricate them.
Member II


Pathfinder III
Member II
@MStudt Something just crossed my mind...I was thinking of painting my (your) mount with Line X or Monsta Liner...something like that ...would that effect the "ground" connection when I hook up an antenna? I think I may need to leave a contact point or something...
Pathfinder III
Member II


Member II
Member II

You say this like, "Eh, I'm just going to do a couple little things and get going."So it looks like this thread is coming back to life. Due to recent issues with my wife's Rover, the 4runner now gets to enjoy an adventure. Im not going into details but, the Rover is out and the 4runner is in. The 4runner will be getting a much needed face lift. This is going to be a major over haul in 2-3 weeks.
Let's start from the top. I have some work to do on my Prinsu roof rack since it needs to carry some items now. The roof rack will now hold a 99" CVT awning, Port-a-Shower, TRED's, fishing pole holder, and 2 Alu-Box's full of gear.
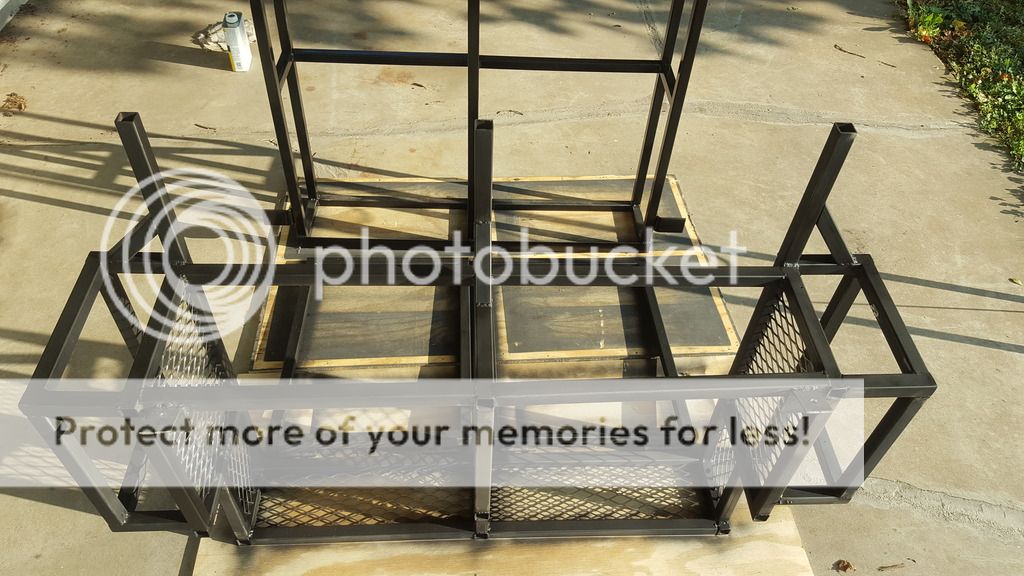
The inside is getting an entirely new platform, and will have a design similar to what I build for the Rover. It'll have dual drawers that are 34" long, 2 large compartments up front, and 2 small compacts up front. The front of the platform will hold 2 one gallon Rotopax, and maybe more.
The rear end is getting new springs, shocks, and bump stop extensions. I'm also going to rebuild the rear drums, and install new seals and bearing in the axle. Today I ordered a new 4xInnovations rear bumper with tire carrier, hilift mount, Jerry can mount, and fold down table to finish it off.
New Faulken tires are on the way, and now I'm hunting for a full size rim for a spare. I need to install our winch on my 4xInnovations from bumper, and touch up the paint a little. I'm also adding an ARB compressed under the hood with some updated electrical work. Some light pods are getting installed for ditch lights, maybe a backup light, and a new switch cluster on the dash.
Hope I'm not missing anything.
 You've got big things going on!
Member II
You say this like, "Eh, I'm just going to do a couple little things and get going."
Member II

Member II


Member II


Member II


Member II
Member II


