Marn's M416 Build
- Thread starter Marn
- Start date
You are using an out of date browser. It may not display this or other websites correctly.
You should upgrade or use an alternative browser.
You should upgrade or use an alternative browser.
 Untitled

Also, super not liking the combo pintle/ball hitch. The adjustable setup I have that I use on my Ford and Dodge to pull the trailer has a pintle that is just a dedicated pintle, no ball. I cant hear or feel the trailer at ALL when towing with either of those vehicles. The second I start driving with this combo hitch on the wagoneer, it's super friggin' bangy and clangy. I'm going to assume the regular pintle hitch is the difference here, not that i simply cant hear or feel it on either the Ford or the Dodge.
I swapped out for a dedicated pintle hitch this weekend after running a combo for 9 years. The difference is night and day.
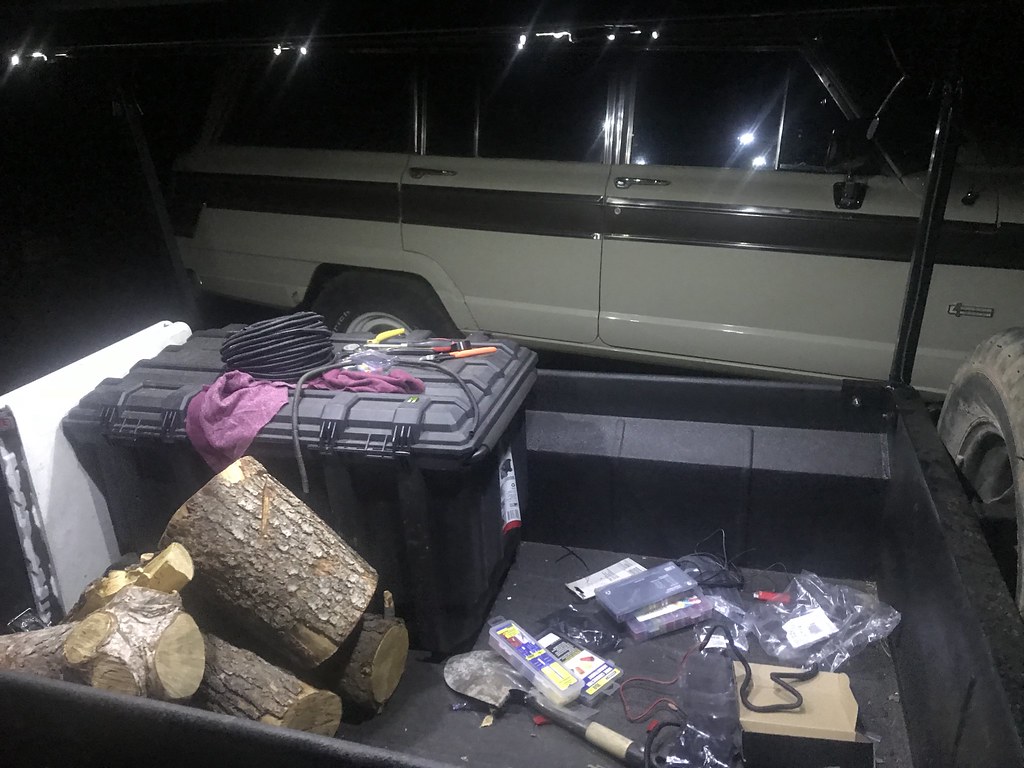
Aite, after the first successful trip there were still some remaining items that needed to be fabricated.
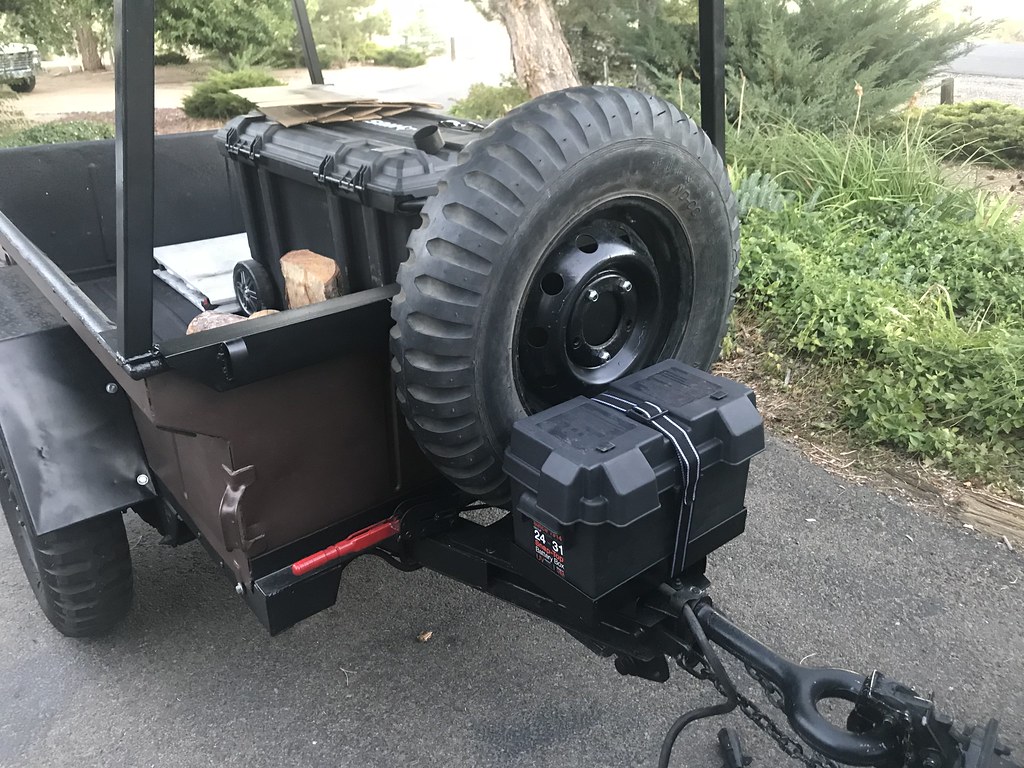
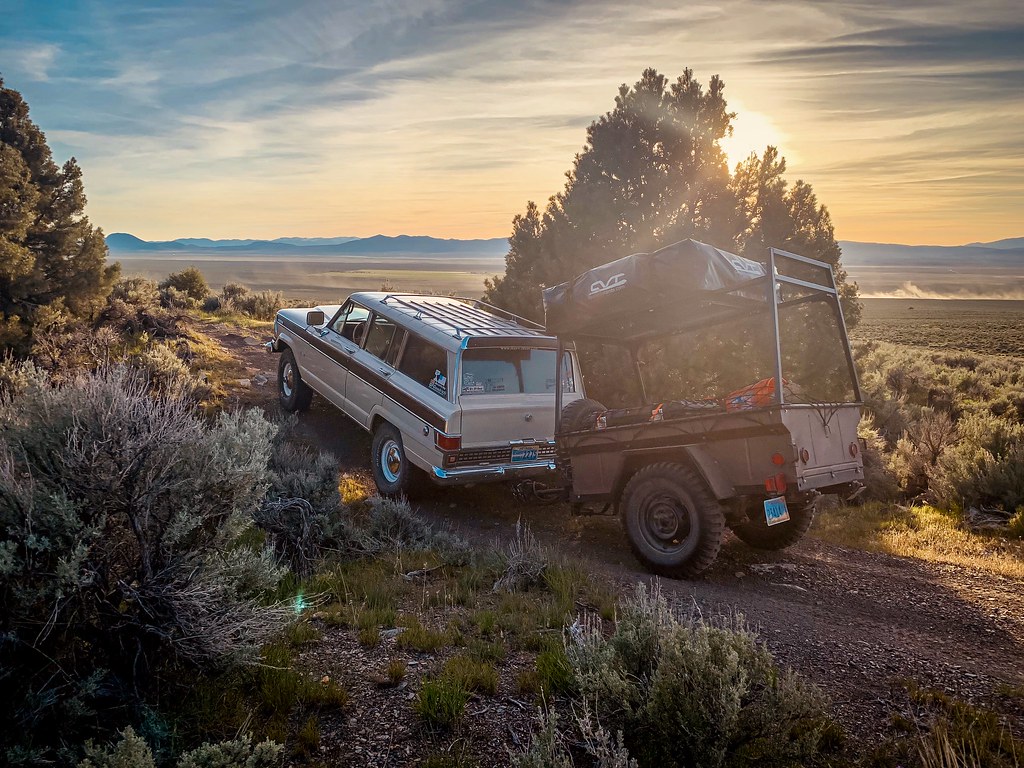
Spare tire carrier was a must, as I wanted it out of the tub, and preferably adding weight to the tongue. We created a pretty basic mounting system by welling a cross piece to the front of the frame, from there we located the tire so it would rest on the frame of the trailer, then mounted an arm and a mounting plate. Its all integral to the frame rack system and not permanently attached to the trailer itself. I may consider adding an arm that goes down and bolts to the trailer frame to stiffen it, but we'll see if thats necessary.
 Untitled by Marn, on Flickr
 Untitled by Marn, on Flickr
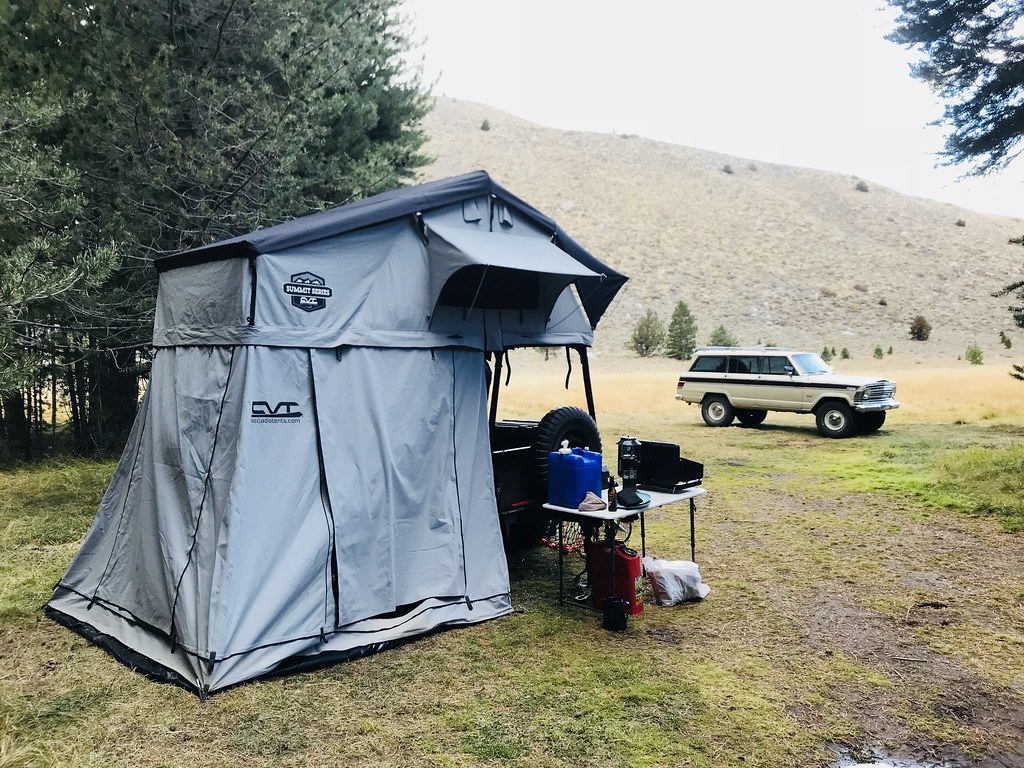
As I was pondering the design of the tire rack, a solution for a battery mount came to me. I was worried about just bolting a plastic battery box to the trailer, that it wouldnt be very sturdy. So, why not make a frame for it? We welded up a frame and put it on risers to clear the lunette, this way it could be run either in the high or low hole. I left it in the high. its scooted forward enough that it clears the spare tire.
I picked a battery box that was larger tna my 24 series RV battery. This gives me enough room on the inside for some wiring and other useful items. I'll be wiring in a 6 circuit fuse panel to run a few items that will be permanent to the trailer. Definitely going to be setting up some area lights, as well as power to the tent for the interior light and USB ports. I have also ordered a 12v accessory panel that I will be mounting to the box. It'll have a switch, a volt meter, a dual USB port, and a typical 12v outlet. What i will have created here is essentially a home built power pack or power station.
Lastly, I did not bolt the plastic battery box to the frame, but rather will use a strap or two to secure it. This means I can simply pull the battery box off of the trailer as a whole unit, so if i want to charge it or bring the box inside or use it somewhere away from the trailer, it can be conveniently lifted from the frame and carried wherever. The "permanent" item wiring (trailer lights, tent power) will be connected with plugs so they can easily be unplugged when removing the battery box.
Anyway, progress! Next week i should be able to get the majority of the electronics completed.
 Untitled by Marn, on Flickr
 Untitled by Marn, on Flickr
 Untitled by Marn, on Flickr
Spare tire carrier was a must, as I wanted it out of the tub, and preferably adding weight to the tongue. We created a pretty basic mounting system by welling a cross piece to the front of the frame, from there we located the tire so it would rest on the frame of the trailer, then mounted an arm and a mounting plate. Its all integral to the frame rack system and not permanently attached to the trailer itself. I may consider adding an arm that goes down and bolts to the trailer frame to stiffen it, but we'll see if thats necessary.
Untitled by Marn, on FlickrUntitled by Marn, on FlickrAs I was pondering the design of the tire rack, a solution for a battery mount came to me. I was worried about just bolting a plastic battery box to the trailer, that it wouldnt be very sturdy. So, why not make a frame for it? We welded up a frame and put it on risers to clear the lunette, this way it could be run either in the high or low hole. I left it in the high. its scooted forward enough that it clears the spare tire.
I picked a battery box that was larger tna my 24 series RV battery. This gives me enough room on the inside for some wiring and other useful items. I'll be wiring in a 6 circuit fuse panel to run a few items that will be permanent to the trailer. Definitely going to be setting up some area lights, as well as power to the tent for the interior light and USB ports. I have also ordered a 12v accessory panel that I will be mounting to the box. It'll have a switch, a volt meter, a dual USB port, and a typical 12v outlet. What i will have created here is essentially a home built power pack or power station.
Lastly, I did not bolt the plastic battery box to the frame, but rather will use a strap or two to secure it. This means I can simply pull the battery box off of the trailer as a whole unit, so if i want to charge it or bring the box inside or use it somewhere away from the trailer, it can be conveniently lifted from the frame and carried wherever. The "permanent" item wiring (trailer lights, tent power) will be connected with plugs so they can easily be unplugged when removing the battery box.
Anyway, progress! Next week i should be able to get the majority of the electronics completed.
Untitled by Marn, on FlickrUntitled by Marn, on FlickrUntitled by Marn, on Flickr
Last edited:

Enthusiast III
I found a 6 switch/ dual USB and 12v with a volt meter very cheap on Amazon. Works well. Nice installation plate
 Untitled by Marn, on Flickr
 Untitled by Marn, on Flickr
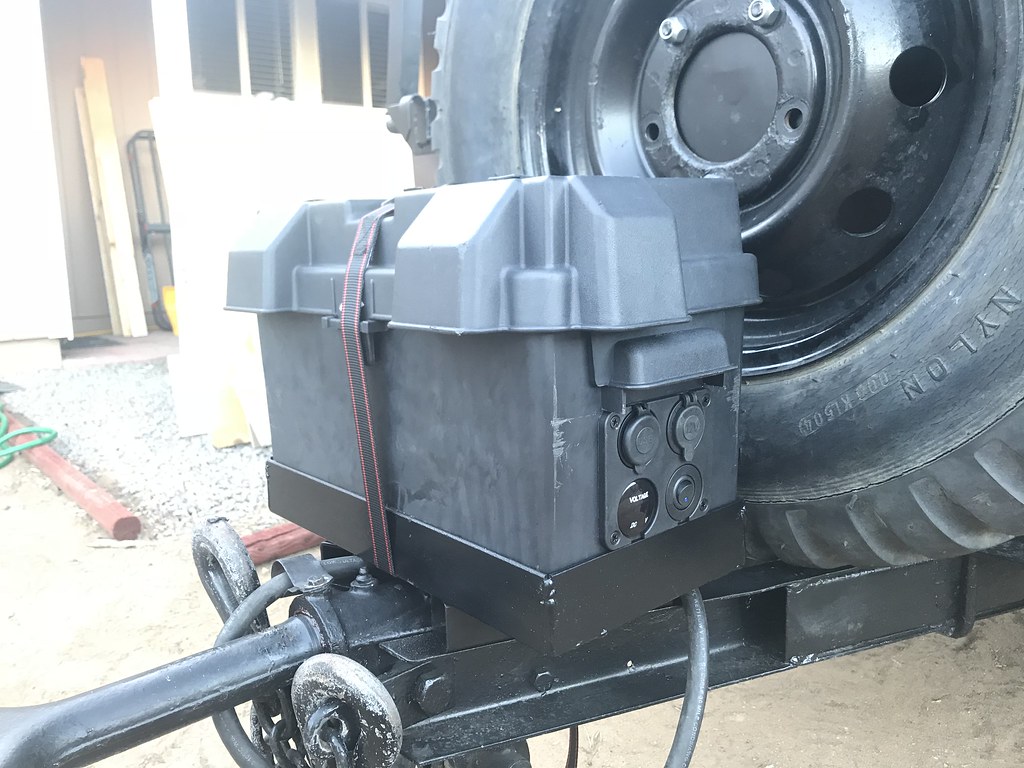 Untitled by Marn, on Flickr
somebody on facebook asked for a build and parts list, so here's the rundown:
Okay, so there are a lot more sturdy or roomy ways to do this project, but I'm poor and cheap and had limited space on the front of my trailer, and I specifically wanted the thing to be removable.
Parts list:
-(1) 24-31 series battery box. I run a 24 series battery, and knew a 31 series box would give me a bit of extra room for my controls n such. This is the one I bought: https://www.walmart.com/ip/NOCO-Sna...r-Automotive-Marine-and-RV-Batteries/16781380
-(1) of these power panel things. This one on amazon has like 48 different configurations and colors. Based on dimensions i chose the square one with 4 ports. I determined I would use the switch to power up the panel, not power an accessory. You can find larger and smaller options all on this one product page: -(1) 6 way fuse block with ground. Since this is a portable box, its not grounded to the trailer, so I wanted it all self contained. This little box comes with all the labels you'd want, and it fit nicely. The fit is tight, you could do a 10 way panel, but you'd havew to mount it sideways or something. I plan to just tape mine in place where you see it. -(a bunch of) wire and crimp connectors. I used 12 AWG wire from the battery to the panel fuse panel, for both positive and negative connections. On the accessory panel, i just used small stuff, 16 gauge I think.
-(a bunch of) fuses in various amperage's for your accessory needs.
Building it:
1. Measure your crap. I had to cut the tabs under the handle where i mounted the panel. As you can see, i scratched the hell out of it with my saw.
2. Drill some holes. lay the panel out and mark the holes you need. I think I used a 1 1/4" hole saw but dont quote me. Do your due diligence and measure.
3. Mount up! Mount the panel. I used the screws it came with.
4. Wire that bad bitch. If you have a basic knowledge of wiiring this should take you all of half an hour. I decided to make it so the switch powered up the panel and the accessory ports.
- Run a wire from positive terminal to positive terminal on fuse block. run negative battery terminal to negative terminal on fuse block.
- Run from a wire from both a ground location and a fused location on the fuse block, to the switch on the panel. This will leave you with 1 open terminal on the switch.
- Make a lil daisy chain of connectors, you'll need 3 more spade connectors. . Run this from the remaining terminal on the battery, to the positive terminal on each accessory port and the volt meter.
- Do the same thing for the negative. Unlike the positive, you'll want to start this daisy chain on the wire that comes from the negative on the fuse block, because there is only 1 negative terminal on the switch.
5. Pretty much done. Tuck it all in there and call it a day.
6. I'm going to put some screws through the box into the little plastic divider that keeps the battery off to one side, because I don't trust that it wont pop out.
7. I picked up a quality lashing strap to use to hold this thing to the trailer frame i made. The ones that come with the battery box are janky. This one has a 500lbs working load, and its just a simple cam buckle, so its easy to remove when you want to.
8. As mentioned, i'm going to wire in some weather proof connectors, as such, to plug in the lights from the trailer. these will always be hot when they are plugged in to the battery box, which is fine, it will mean i don't have to actually turn the box on in order to power them, as they should have no draw when turned off.
So, if you want to run something heavy duty like an air compressor, just pop the top and connect straight to the terminals. If you needed to jump start your truck, do the same thing. When its time to charge it, do the same thing. I may eventually run a solar trickle charger, but for my trips, this will last more than long enough. This battery has something like 56 amp hours, or a 135 minute reserve capacity, so, for running a few LED's and charging phones, I think it'll be fine. I've used this battery in my pop up camper and never had an issue running the lights and the water pump over several day trips.
NOTE: this thing is in no way dust proof, and is not water proof. It's absolutely fine as far as being weather proof, but my suggestion is to use good quality heat shrink fittings, and just keep it clean. It's gonsta get FULL of dust if you're wheelin'. Thats fine and doesnt bother me, but beware.
Anyway.
Thanks :-) I got the one i used from amazon as well.I found a 6 switch/ dual USB and 12v with a volt meter very cheap on Amazon. Works well. Nice installation plate
And, we have light! I just used some cheap water proof LED's from ebay. Wired directly to the battery fuse block, with a switch in line. I used automotive weather proof plug connectors at the battery box, so it can be unplugged at any given time without removing the lid of the box.
 Untitled by Marn, on Flickr
Untitled by Marn, on Flickr Untitled
Maybe I missed it, but are you charging the battery off the Jeep alternator when towing?
Presently I am by charging it at all. After trips I just plug it in at home. The power usage for the accessories I am running will be so minimal that I should be able to go quite a long time without needing a recharge. I have used this battery in my camper running water pumps and lights and other items for several day trips without being connected to a power source. Both the trailer and all 3 of my tow vehicles are wired for 7 pin so I can run a 12v lead to the battery or a charge regulator if I deem it necessary after more trials.
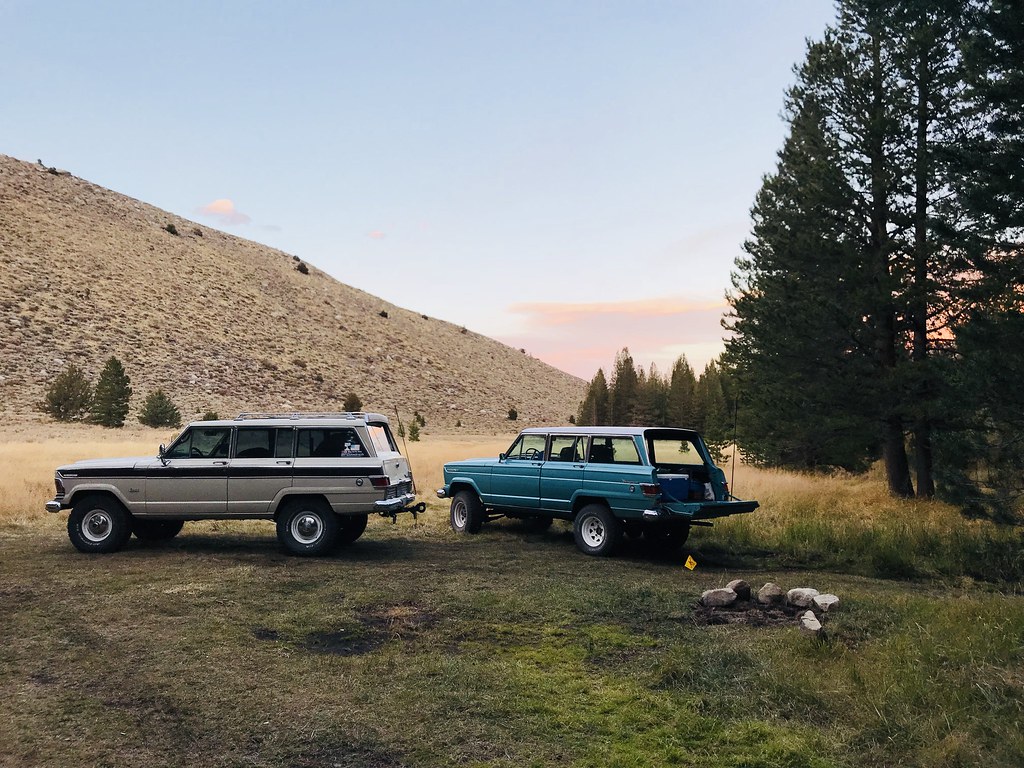
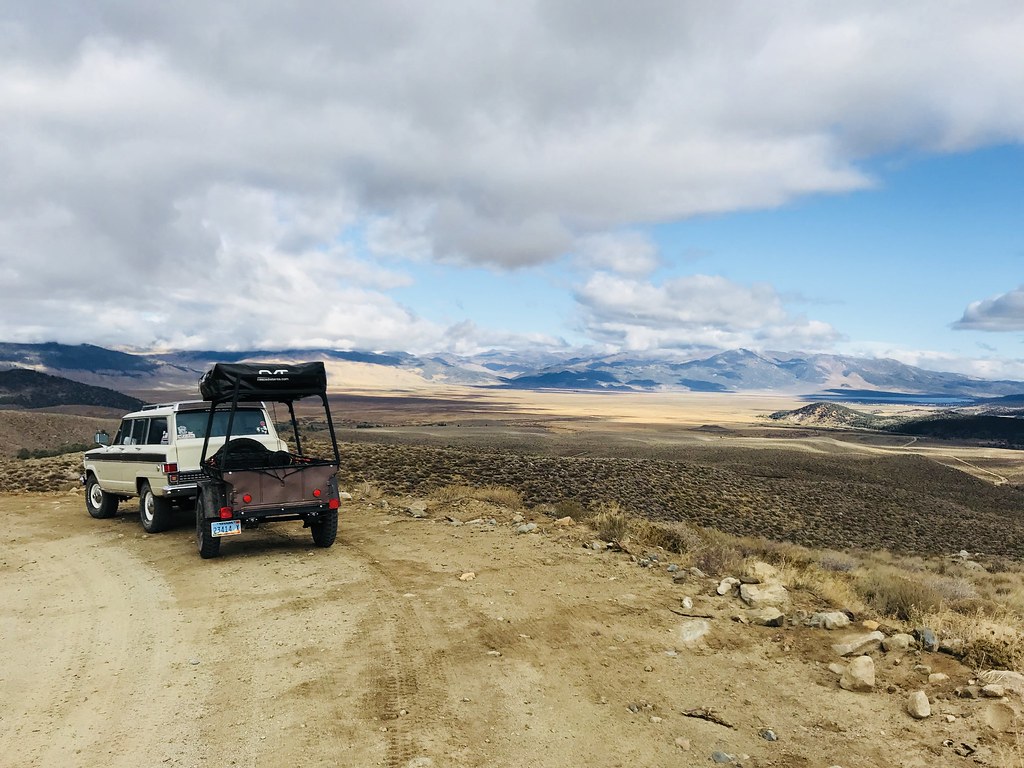
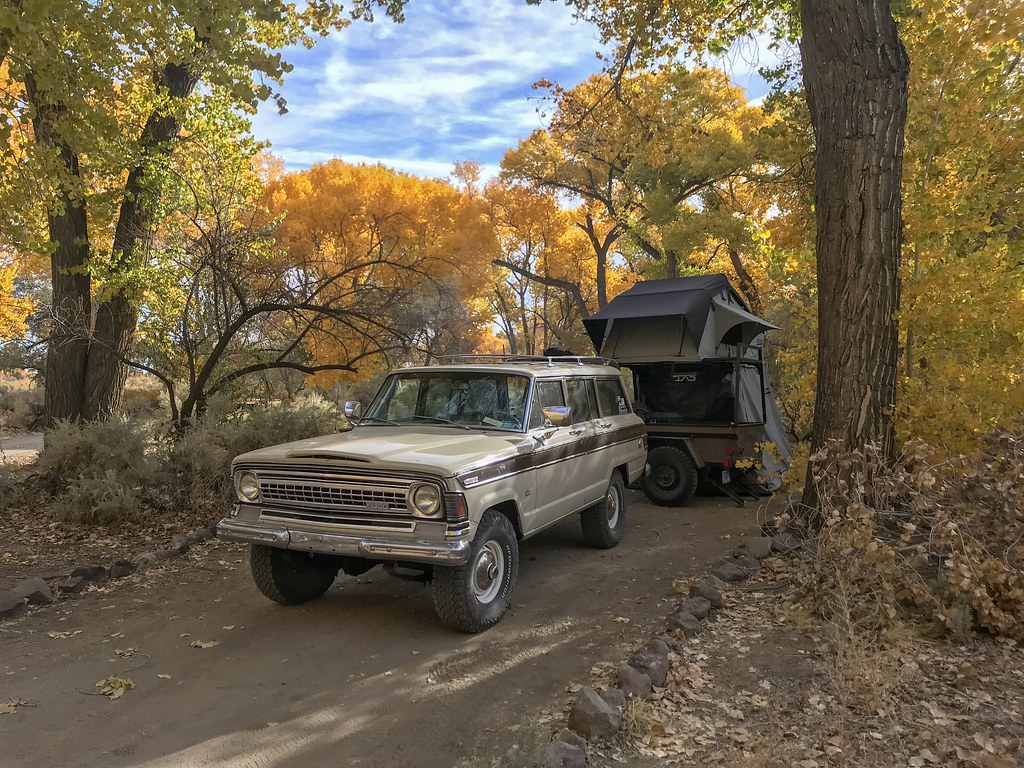
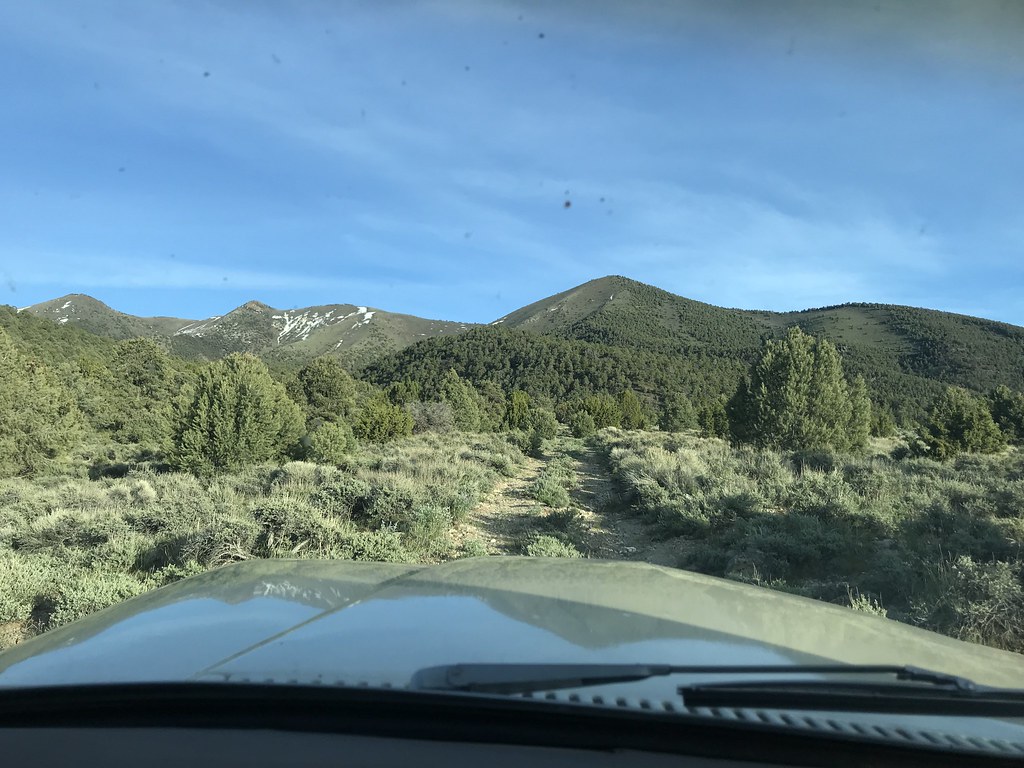
Well, the second trip with the trailer and tent was a success. Still in "shakedown" mode, not taking any extreme distance trips or hardcore trails, but this trip was further, had much more backroading, was an off grid "dispersed" camp site, and had some decently varying weather conditions.
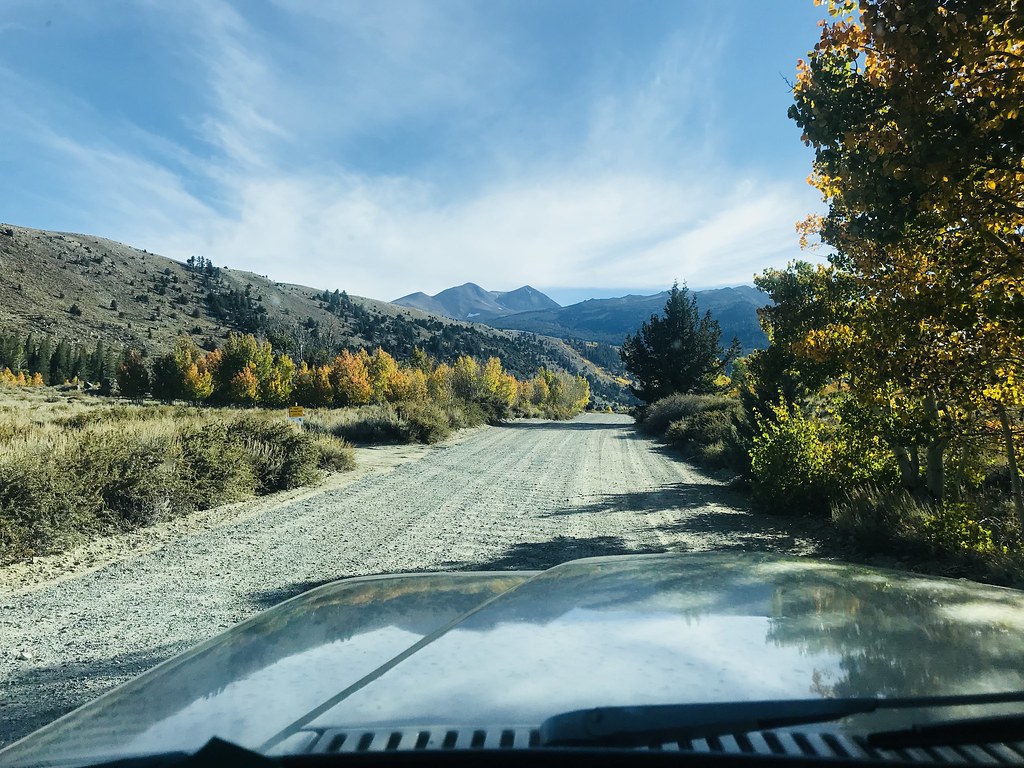
I loaded my stuff up on Thursday night, then drove the beast and trailer to work on Friday. Left the office around 2pm, and headed south down the 395. The destinationwas Green Creek area, just south of Bridgeport, CA. I was meeting up with another member of Sierra Nevada FSJ's who was coming from Sacramento. We were planning to stay at the actual campground, but upon my arrival, it was already closed for the season. Being in a national forest, that was no problem, because dispersed is allowed. Fire restrictions were in effect which kinda puts a damper on things, but oh well.
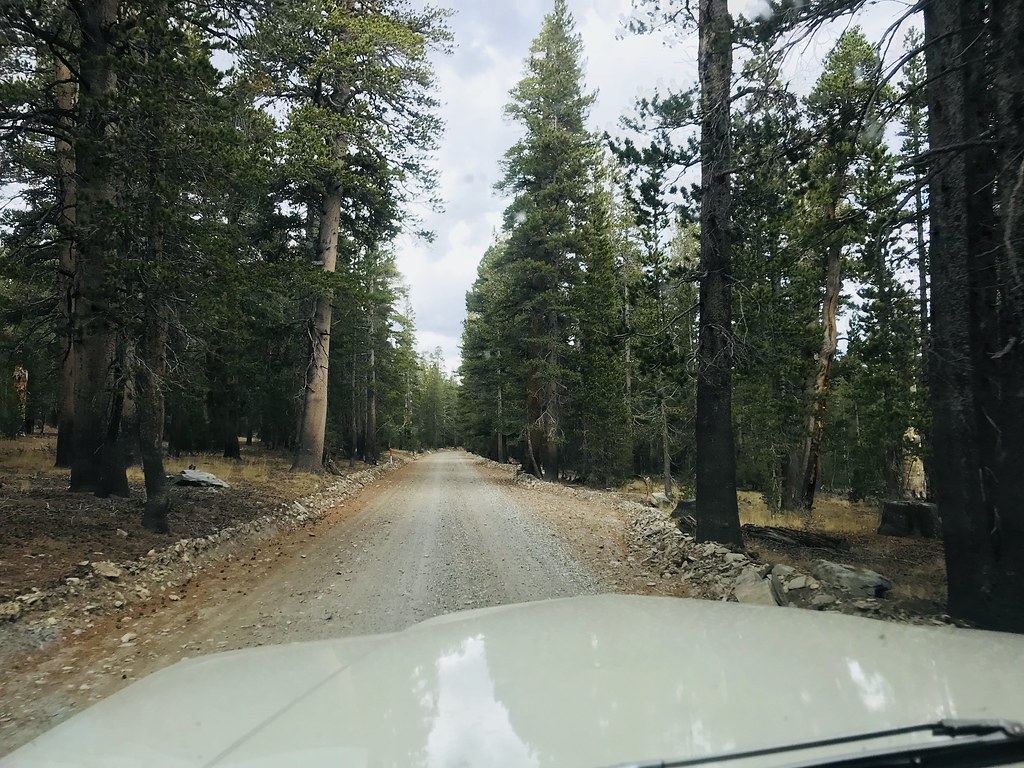
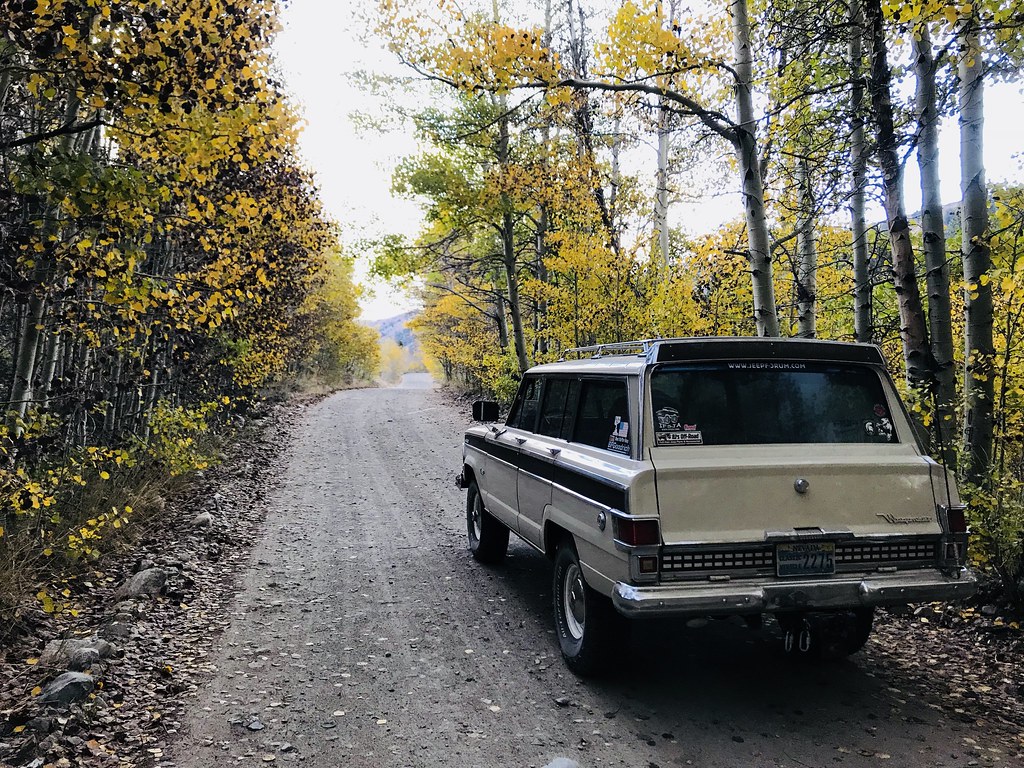
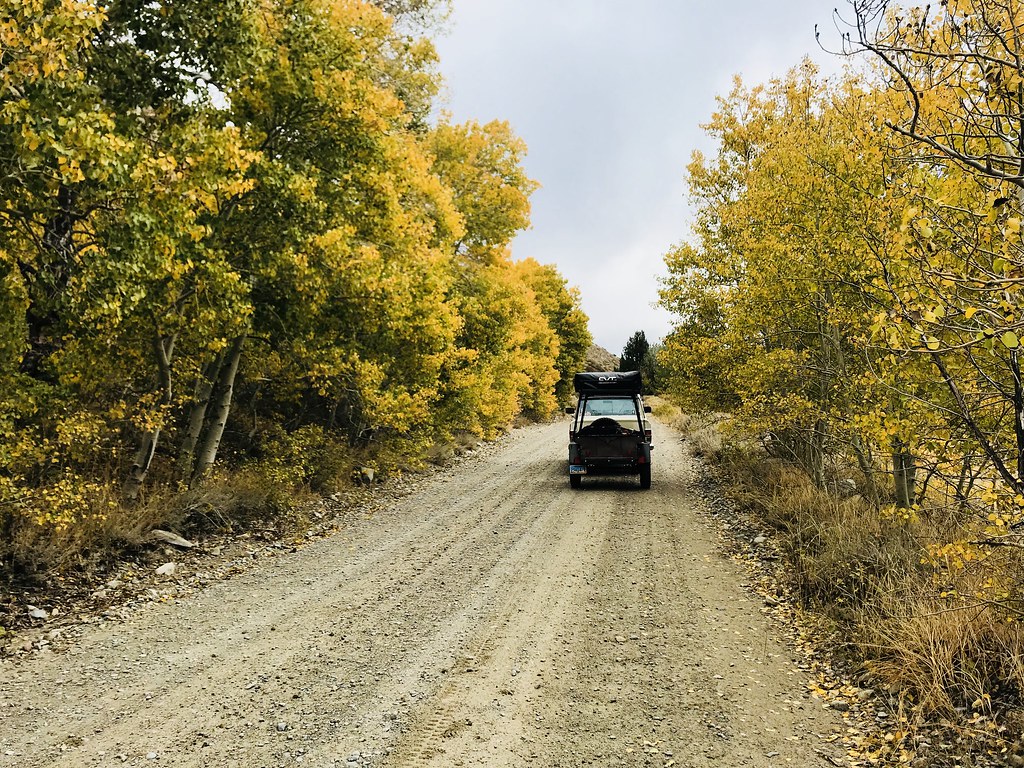
On the way. Basically just about 125 miles of highway then 12 miles of dirt road in varying conditions, most of it was just a heavily washboard graded road.
 Untitled by Marn, on Flickr
 Untitled by Marn, on Flickr
 Untitled by Marn, on Flickr
 Untitled by Marn, on Flickr
 Untitled by Marn, on Flickr
 Untitled by Marn, on Flickr
 Untitled by Marn, on Flickr
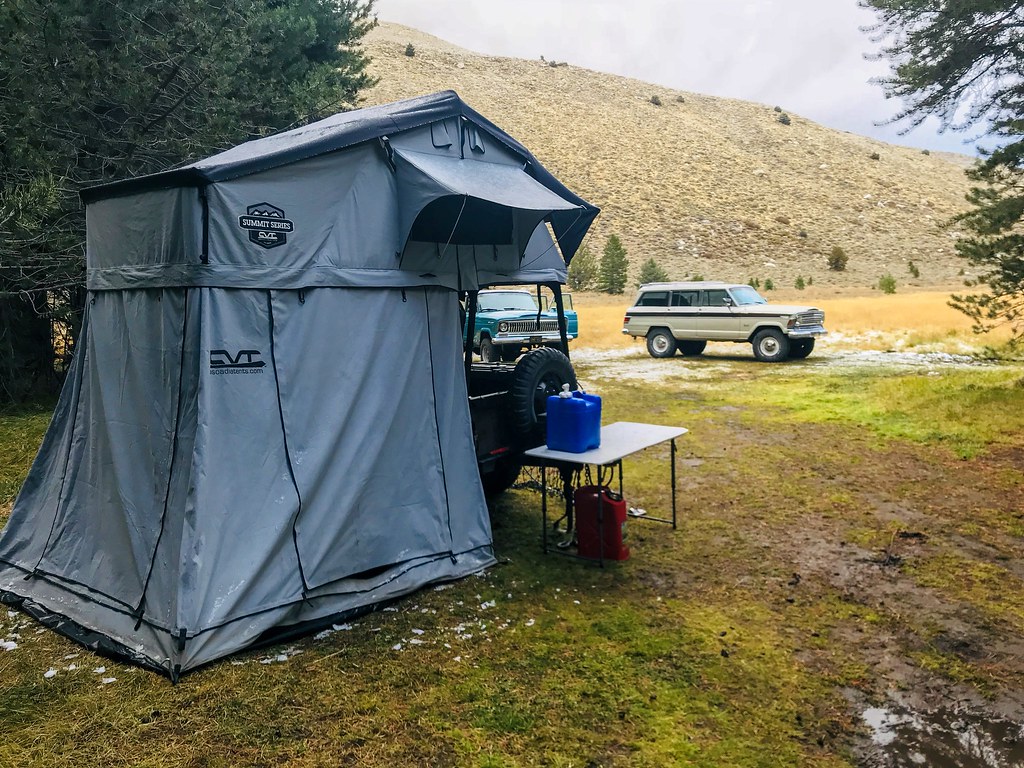
Upon finding the campground closed, I headed back out the way I came, about a mile, passing some camping areas that were occupied and some that were empty. Located a nice spot right on the bank of Green Creek and was set back a ways from the road:
 Untitled by Marn, on Flickr
 Untitled by Marn, on Flickr
 Untitled by Marn, on Flickr
Untitled by Marn, on Flickr
 Untitled by Marn, on Flickr
 Untitled by Marn, on Flickr
 Untitled by Marn, on Flickr
 Untitled by Marn, on Flickr
 Untitled by Marn, on Flickr
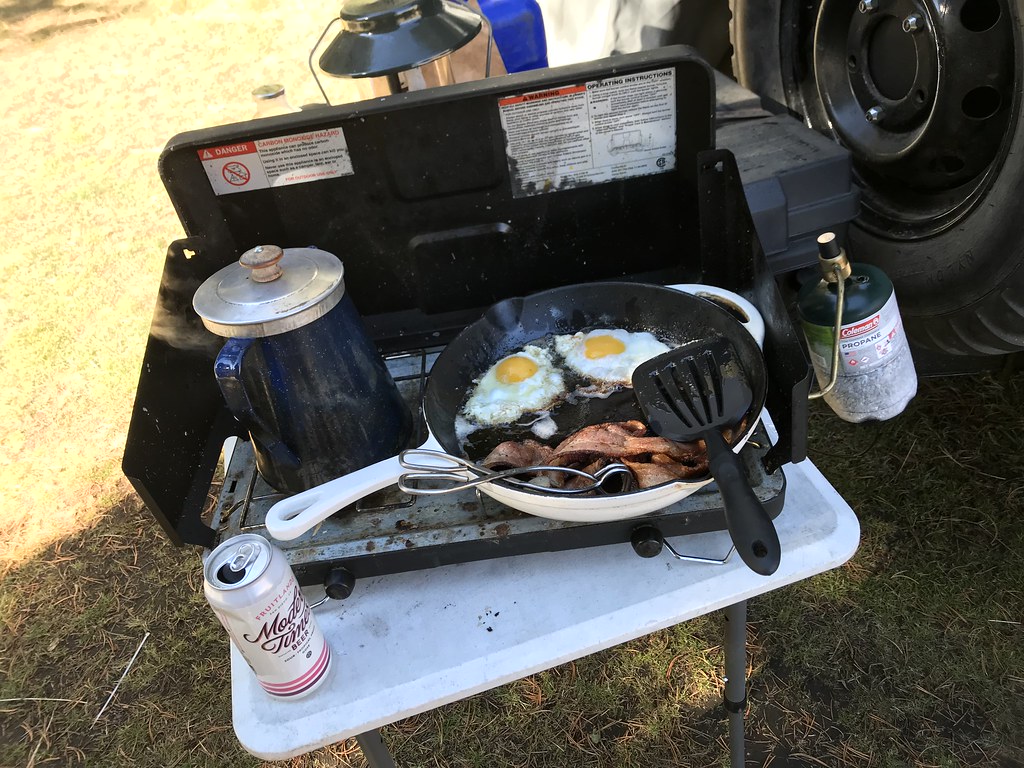
We chatted and stayed up for a bit, but then crashed out. Temps werent too bad, it was cold but not extreme. Temps were in the upper 30's that night. The next moring, breakfast was cooked, then we headed up to Virginia Lakes to do a bit of fishing. It was a fruitless effort but the scenery was good, as always.
 Untitled by Marn, on Flickr
 Untitled by Marn, on Flickr
 Untitled by Marn, on Flickr
 Untitled by Marn, on Flickr
 Untitled by Marn, on Flickr
 Untitled by Marn, on Flickr
We returned to the campsite to some weather, snow flurries mostly just on and off. Dark skies, but it was still beautiful in a somewhat foreboding way. Dinner was cooked, and right before we decided to turn in, a small snow squall came through and droped about half an inch if icy snow in about 15 minutes. That night it dropped into the low 30's.
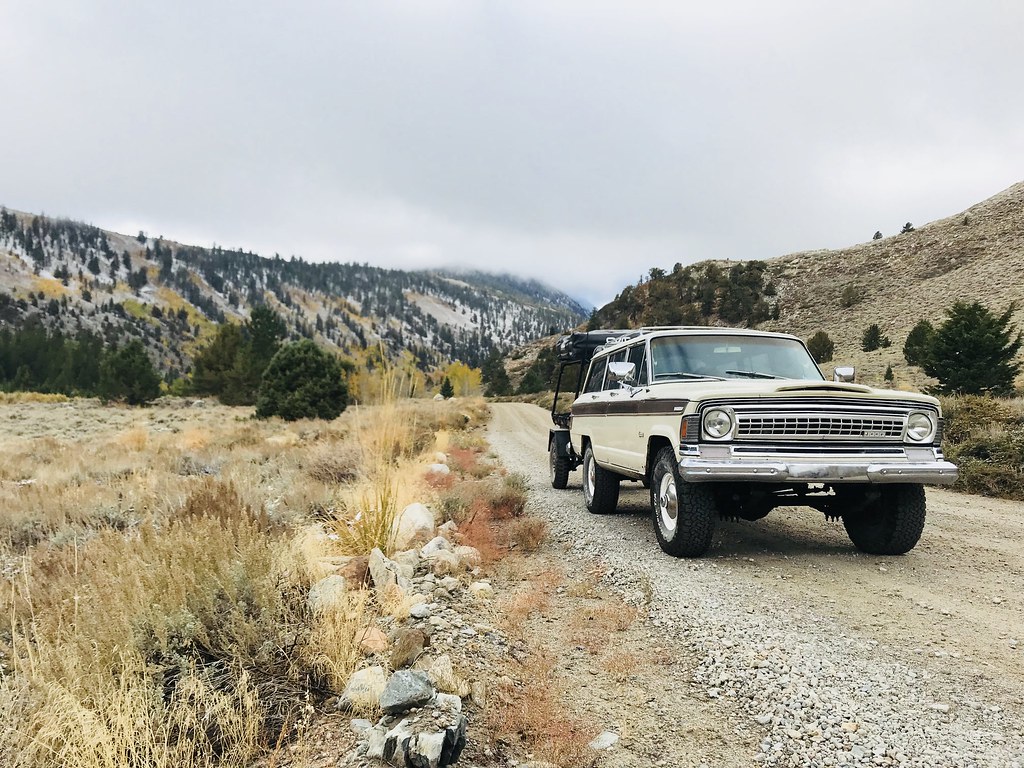
Morning came, and we both had deadlines to meet, so we simply packed up and headed on our ways. Again, beautiful scenery on the way out.
 Untitled by Marn, on Flickr
 Untitled by Marn, on Flickr
 Untitled by Marn, on Flickr
 Untitled by Marn, on Flickr
 Untitled by Marn, on Flickr
 Untitled by Marn, on Flickr
 Untitled by Marn, on Flickr
Untitled by Marn, on Flickr
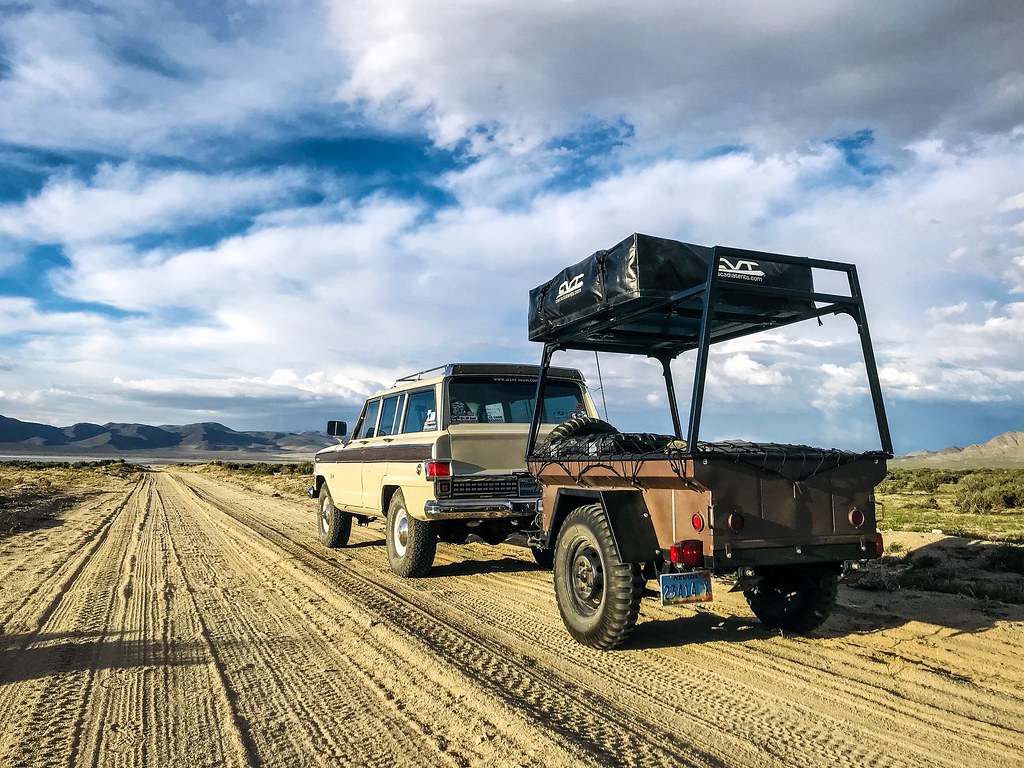
So, overall the trip was anti-climactic. The truck ran fine, no surprises or issues, and I actually landed about 12mpg towing between Bridgeport and Reno. So, thats good.
The tent is meeting my expectations, all the modifications I have made thus far are working as planned. I am getting a little more accustomed to set up and tear down, and its going a bit faster. The annex is still annoying and was overkill on this trip since I didnt have dog or wife with me, but it was good practice. PAcking it up wet and cold however, proved troublesome. I wasnt able to fold it so it would fit in its bag, and subsequently it would not fit back in the bin I keep in the trailer. Mostly user error though. The battery and LED lights were a great help. The tent stayed comfy and warm in the cool temps, and I was dry through the storm.
Trailer towed well the whole time, didnt even really notice it. I hit some good jarring rocks and potholes on the roads and trails, and the trailer was fine. I didnt get it super off camber or anything, but then again I never really intend to. All in all, I'm very pleased with the performance of this setup.
I loaded my stuff up on Thursday night, then drove the beast and trailer to work on Friday. Left the office around 2pm, and headed south down the 395. The destinationwas Green Creek area, just south of Bridgeport, CA. I was meeting up with another member of Sierra Nevada FSJ's who was coming from Sacramento. We were planning to stay at the actual campground, but upon my arrival, it was already closed for the season. Being in a national forest, that was no problem, because dispersed is allowed. Fire restrictions were in effect which kinda puts a damper on things, but oh well.
On the way. Basically just about 125 miles of highway then 12 miles of dirt road in varying conditions, most of it was just a heavily washboard graded road.
Untitled by Marn, on FlickrUntitled by Marn, on FlickrUntitled by Marn, on FlickrUntitled by Marn, on FlickrUntitled by Marn, on FlickrUntitled by Marn, on FlickrUntitled by Marn, on FlickrUpon finding the campground closed, I headed back out the way I came, about a mile, passing some camping areas that were occupied and some that were empty. Located a nice spot right on the bank of Green Creek and was set back a ways from the road:
Untitled by Marn, on FlickrUntitled by Marn, on FlickrUntitled by Marn, on FlickrUntitled by Marn, on FlickrUntitled by Marn, on FlickrUntitled by Marn, on FlickrUntitled by Marn, on FlickrUntitled by Marn, on FlickrUntitled by Marn, on FlickrWe chatted and stayed up for a bit, but then crashed out. Temps werent too bad, it was cold but not extreme. Temps were in the upper 30's that night. The next moring, breakfast was cooked, then we headed up to Virginia Lakes to do a bit of fishing. It was a fruitless effort but the scenery was good, as always.
Untitled by Marn, on FlickrUntitled by Marn, on FlickrUntitled by Marn, on FlickrUntitled by Marn, on FlickrUntitled by Marn, on FlickrUntitled by Marn, on FlickrWe returned to the campsite to some weather, snow flurries mostly just on and off. Dark skies, but it was still beautiful in a somewhat foreboding way. Dinner was cooked, and right before we decided to turn in, a small snow squall came through and droped about half an inch if icy snow in about 15 minutes. That night it dropped into the low 30's.
Morning came, and we both had deadlines to meet, so we simply packed up and headed on our ways. Again, beautiful scenery on the way out.
Untitled by Marn, on FlickrUntitled by Marn, on FlickrUntitled by Marn, on FlickrUntitled by Marn, on FlickrUntitled by Marn, on FlickrUntitled by Marn, on FlickrUntitled by Marn, on FlickrUntitled by Marn, on FlickrSo, overall the trip was anti-climactic. The truck ran fine, no surprises or issues, and I actually landed about 12mpg towing between Bridgeport and Reno. So, thats good.
The tent is meeting my expectations, all the modifications I have made thus far are working as planned. I am getting a little more accustomed to set up and tear down, and its going a bit faster. The annex is still annoying and was overkill on this trip since I didnt have dog or wife with me, but it was good practice. PAcking it up wet and cold however, proved troublesome. I wasnt able to fold it so it would fit in its bag, and subsequently it would not fit back in the bin I keep in the trailer. Mostly user error though. The battery and LED lights were a great help. The tent stayed comfy and warm in the cool temps, and I was dry through the storm.
Trailer towed well the whole time, didnt even really notice it. I hit some good jarring rocks and potholes on the roads and trails, and the trailer was fine. I didnt get it super off camber or anything, but then again I never really intend to. All in all, I'm very pleased with the performance of this setup.
So, after this trip, I'm going to be getting some LED pods to wire up at the 4 corners, to provide more light for the immediate area, as well as for my cook station etc. The under rack lights were great and super useful, but were not helpful for providing light at the table or anything.

Traveler I
So last week, half drunk at 7pm on Thursday, my wife and I decided to go camping after work on Friday. I loaded the trailer in about 10 minutes, then packed a cooler and duffle bag in the morning, loaded the dog, and drove to work planning to leave after i put in my 8 hours.
Went to Ft. Churchill State Park, pretty cool. Remnants of an old civil war era army fort, right down on the Carson River. All the cottonwoods are changing color. It was warm enough, but cool enough. Pretty basic trip, just camped at a campground then went and did about 25 miles of dirt the next day, exploring out around Lahontan.
I'm getting more efficient with the tent and annex, and getting quite efficient and packing up and leaving. Trying to get a number of trips under my belt before I make any more changes or updates to the setup.
 Untitled by Marn, on Flickr
 Untitled by Marn, on Flickr
 Untitled by Marn, on Flickr
 Untitled by Marn, on Flickr
 Untitled by Marn, on Flickr
 Untitled by Marn, on Flickr
 Untitled by Marn, on Flickr
 Untitled by Marn, on Flickr
 Untitled by Marn, on Flickr
 Untitled by Marn, on Flickr
 Untitled by Marn, on Flickr
 Untitled by Marn, on Flickr
 Untitled by Marn, on Flickr
 Untitled by Marn, on Flickr
 Untitled by Marn, on Flickr
 Untitled by Marn, on Flickr
Cheers, folks.
 Untitled by Marn, on Flickr
Went to Ft. Churchill State Park, pretty cool. Remnants of an old civil war era army fort, right down on the Carson River. All the cottonwoods are changing color. It was warm enough, but cool enough. Pretty basic trip, just camped at a campground then went and did about 25 miles of dirt the next day, exploring out around Lahontan.
I'm getting more efficient with the tent and annex, and getting quite efficient and packing up and leaving. Trying to get a number of trips under my belt before I make any more changes or updates to the setup.
Untitled by Marn, on FlickrUntitled by Marn, on FlickrUntitled by Marn, on FlickrUntitled by Marn, on FlickrUntitled by Marn, on FlickrUntitled by Marn, on FlickrUntitled by Marn, on FlickrUntitled by Marn, on FlickrUntitled by Marn, on FlickrUntitled by Marn, on FlickrUntitled by Marn, on FlickrUntitled by Marn, on FlickrUntitled by Marn, on FlickrUntitled by Marn, on FlickrUntitled by Marn, on FlickrUntitled by Marn, on FlickrCheers, folks.
Untitled by Marn, on FlickrHasn't been any progress or use on the trailer since this winter has been super crappy. Hoping to get out in the next few weekends since the rain and snow has stopped.

Explorer I
I read every word and thoroughly enjoyed the whole story of your build. Nice job!!
Well, its that time of year. Pulled the tarp off the tent, emptied out the trailer, cleaned out the leaves and stuff, checked and re-packed all gear, put the battery on the charger, put the new sleeping bag in the tent, etc etc.
Hoping for a trip this weekend.


Hoping for a trip this weekend.
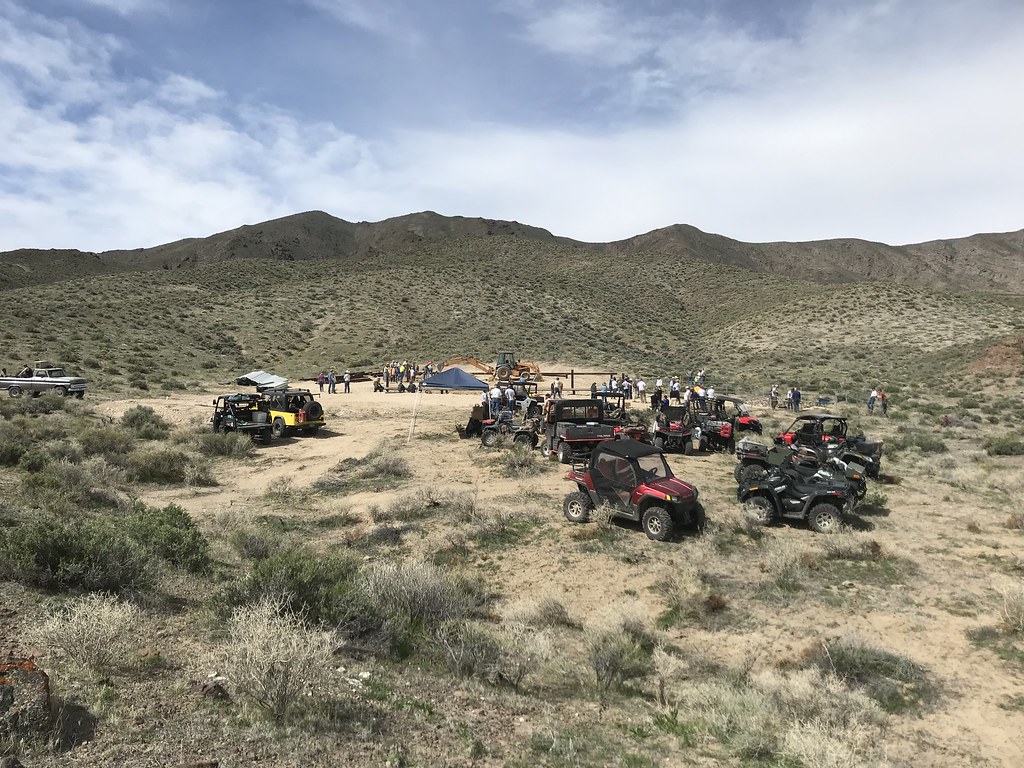
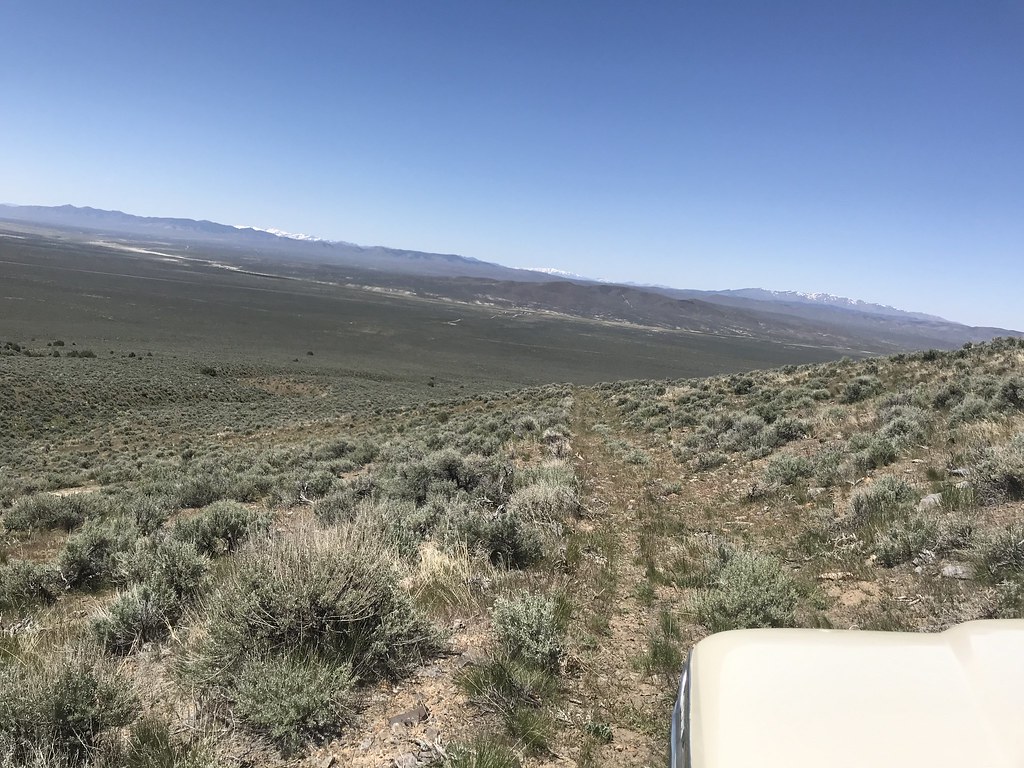
So, I went out with Nevada Bighorns Unlimited to work on a guzzler build. Was a good time, towed about 2 hours each way, mostly highway, only about 15 miles of dirt.
Sadly, my interior light burned out on the tent, and CVT will not provide a warranty repair since i bought the tent second hand. Not sure what I'm gonna do about that. Otherwise, trip went very well!
 Untitled
 Untitled
 Untitled
 Untitled
 Untitled
 Untitled
Sadly, my interior light burned out on the tent, and CVT will not provide a warranty repair since i bought the tent second hand. Not sure what I'm gonna do about that. Otherwise, trip went very well!
UntitledUntitled Untitled Untitled UntitledUntitledHad a nearly 500 mile weekend in the old girl, about 60 miles of dirt and trails. Headed out to Austin, NV to camp on some National Forest land, and do some backroading.
 Untitled
 Untitled
Pretty much all a man needs is right in this picture:
 Untitled
 Untitled
 Untitled
 Untitled
Sorry I dont have a titanium spork, just vintage plates and collapsible wine glasses.
 Untitled
Some of the more basic stuff: A Dorr-Oliver Rotary Drum Filter at the Yankee Blade mine
 Untitled
 Untitled
We saw lots of ruins and old mining buildings:
 Untitled by Marn, on Flickr
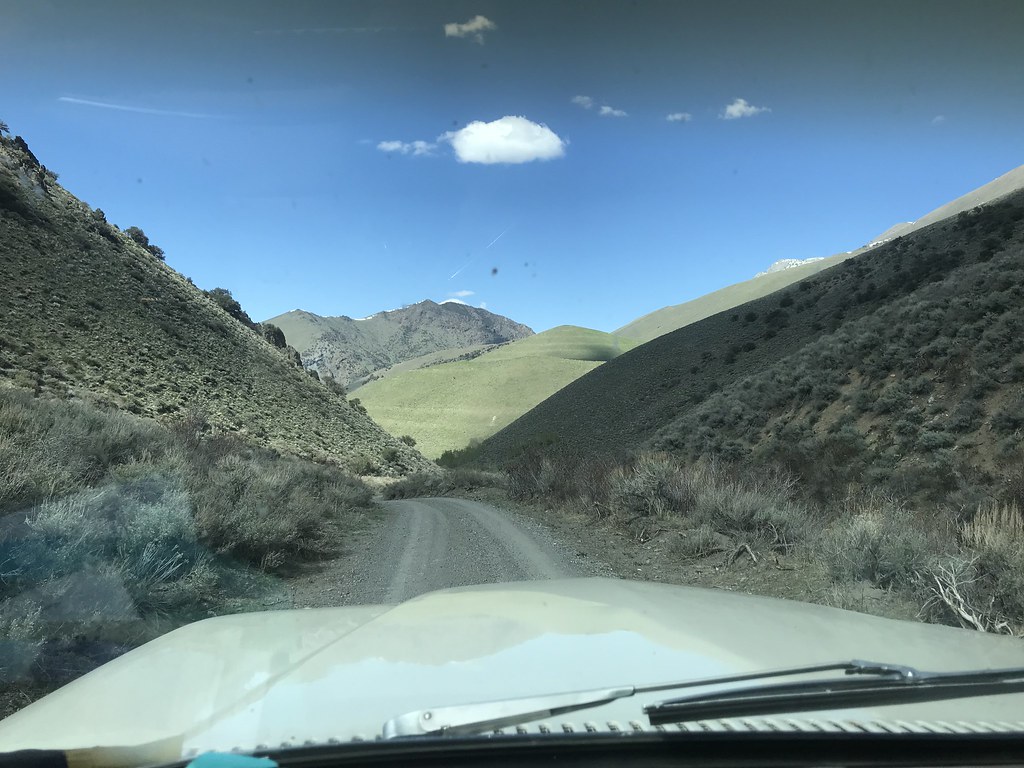
Lots of "two-tracks" if you can even call them that anymore, that hadnt been driven on in quite some time:
 Untitled
 Untitled
 Untitled
 Untitled
 Untitled
Drove south a little ways to see how far up the pass to Kingston we could get, which was still snowed in, eventually turned around:
 Untitled
 Untitled
Overall, a decent little trip. Jeep drove well, but something was leaking from underneath and splattered the trailer the whole way home. I'll have to see if I can figure out that that was.
Untitled UntitledPretty much all a man needs is right in this picture:
UntitledUntitledUntitledUntitledSorry I dont have a titanium spork, just vintage plates and collapsible wine glasses.
UntitledSome of the more basic stuff: A Dorr-Oliver Rotary Drum Filter at the Yankee Blade mine
UntitledUntitledWe saw lots of ruins and old mining buildings:
Untitled by Marn, on FlickrLots of "two-tracks" if you can even call them that anymore, that hadnt been driven on in quite some time:
UntitledUntitled UntitledUntitledUntitled Drove south a little ways to see how far up the pass to Kingston we could get, which was still snowed in, eventually turned around:
UntitledUntitled Overall, a decent little trip. Jeep drove well, but something was leaking from underneath and splattered the trailer the whole way home. I'll have to see if I can figure out that that was.

Off-Road Ranger I
- 2,876
- First Name
- Todd
- Last Name
- Hoffmaster
- Member #
4284
- Ham/GMRS Callsign
- KJ7CRJ
- Service Branch
- Air Force
I love your Jeep trailer combo. Just read the whole write up on your trailer - very nice indeed.
