Lifestyle Overland 2014 4Runner Build

  • HTML tutorial

Lifestyle Overland

Rank VI
Founder 500
Member

Pathfinder II

4,387
United States
First Name
Kevin
Last Name
McCuiston
Member #

0102

So... the Lifestyle Overland crew was naughty this weekend...

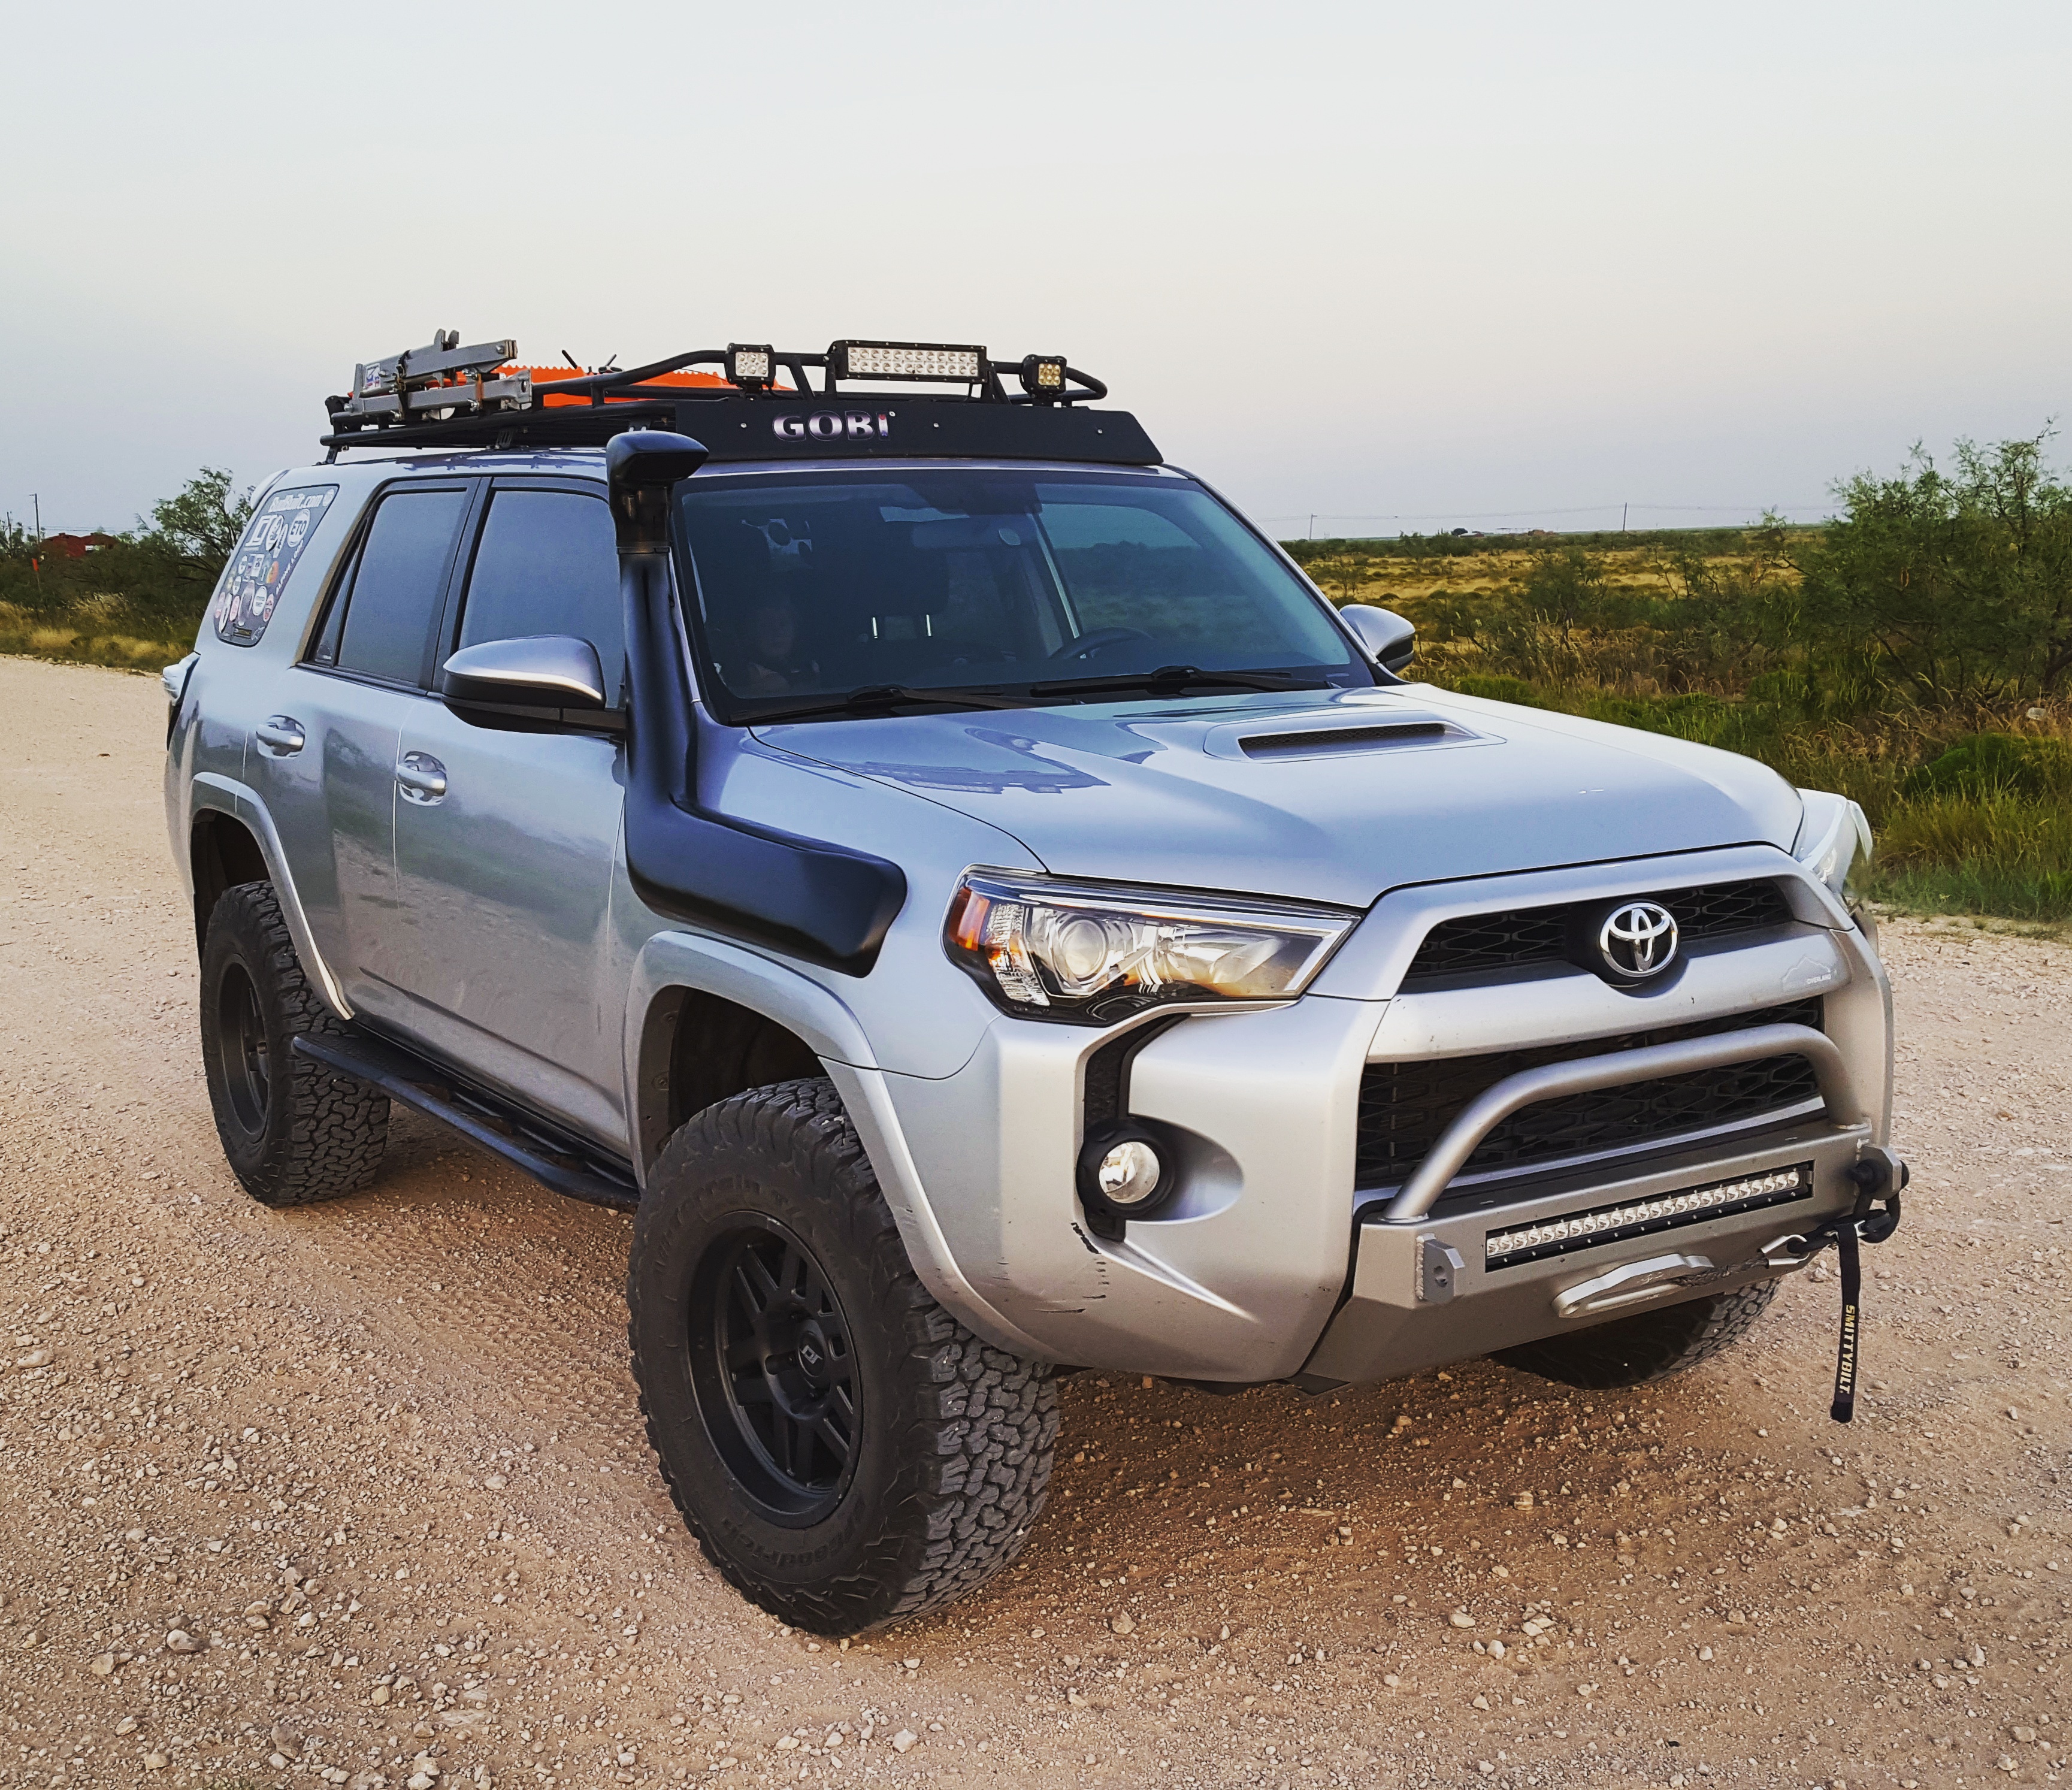
Rear Bumper Order Placed:
1a331061817a141d15e03b249e2d9fdc.jpg

Going with the ladder on the left swing out with the rotopax mount. Spare tire, highlift, and camera relocation on the right. Got a special request in with them to mount a 7 pin connector in the bumper to avoid the danger zone where the factory plug is currently located.

Looks like late august delivery.
 

JusticeZ33

Rank IV
Launch Member

Advocate II

1,018
Member #

1607

Where did they say the camera relocation actually mounts on the right arm?
 

Lifestyle Overland

Rank VI
Founder 500
Member

Pathfinder II

4,387
United States
First Name
Kevin
Last Name
McCuiston
Member #

0102

Odyssey 34R PC1500T battery now on its way to join the Odyssey 34/78 PC1500DT already on the passenger side. The factory battery just can't handle the work load anymore and I'm afraid it's going to die soon. Had to get the reversed pole configuration for the factory spot... don't ask me how I figured that out. :sunglasses:
Went ahead and grabbed the ARB diff breather kit while I was at it too. Hope to have all these goodies installed before our Shadow of the Rockies trip.
 
  • Like
Reactions: Rattlesnake44

Lifestyle Overland

Rank VI
Founder 500
Member

Pathfinder II

4,387
United States
First Name
Kevin
Last Name
McCuiston
Member #

0102

We were able to swap the Die-Hard and factory battery out for the new Odyssey units before our trip to Tennessee. The improvement was dramatic. There is no hesitation when starting and the new battery runs the accessories with ease now.
The next phase of this dual battery setup is to swap ALL accessories over to the auxiliary battery and relocate the battery monitor display to a better position for visibility on the dash.
 

Lifestyle Overland

Rank VI
Founder 500
Member

Pathfinder II

4,387
United States
First Name
Kevin
Last Name
McCuiston
Member #

0102

Build Update:

Installed some Old Man Emu 2899 "Super Heavies" rear springs in anticipation of our Southern Style Offroad rear bumper with is going to put some junk in our trunk.
Ended up with 1.75" of extra height over the Icon 3" springs we were running! Gotta weigh this baby back down soon!


Icon (Top) compared to OME (Bottom).

Before and After


Sits ok fully loaded for now, even without the rear bumper installed it doesn't ride too rough. She certainly has a nasty rake unloaded though!
 

Lifestyle Overland

Rank VI
Founder 500
Member

Pathfinder II

4,387
United States
First Name
Kevin
Last Name
McCuiston
Member #

0102

And for my last mod (yeah, right) the SSO rear bumper is here and will be installed this weekend! Crank up your compressors ladies and gentlemen, it's about to get bumpin' up in here!
 

Lifestyle Overland

Rank VI
Founder 500
Member

Pathfinder II

4,387
United States
First Name
Kevin
Last Name
McCuiston
Member #

0102

Got the Southern Style Off Road bumper installed this weekend after about 9 months of lead time (worth it). The packing job was exceptional, the hardware was well organized and individually bagged and tagged. Unfortunately, I had to modify the ladder to clear the rear hatch and was missing lower bearing seals for the swing arms as well as a few misc bolts. I was able to get it all installed but will have to remove the swing arms when my seals arrive later this week to install them.

Have to give kudos to Kevin and Gwen at SSO for answering my emails on a weekend at 10:30 PM. I know they are growing faster than they expected and are playing catch-up so I have a lot of grace for the missing parts. I heard they have stopped taking orders for this bumper until they can work down the backlog and improve quality so again, kudos to this company for their efforts.

We will have a full installation video of this unit on our YouTube channel in the near future.

On to the pics!

Naked Rear
IMG_20170218_140205_173.jpg

Main Bumper Installed
IMG_20170220_093846_265.jpg

Sexy Side Shot (There are LEDs in that step cutout)
IMG_20170220_093934_847.jpg

Camera Relocation (Worst Part!)
IMG_20170220_091846_295.jpg

All Dressed Up (Minus the Hi-Lift, gotta get some hardware)
IMG_20170219_201233_147.jpg
 

Brooke_Cances

Rank 0

Contributor I

Hey, did your 4Runner Trail come stock with Bilstein shocks? Mine did and I was wondering if you switched those out with the ICON configuration, or did you leave the original ones on? In addition to that question, did you need to raise it to the full 3.5" lift that the ICON let you for those 275 BFG tires?
 

Lifestyle Overland

Rank VI
Founder 500
Member

Pathfinder II

4,387
United States
First Name
Kevin
Last Name
McCuiston
Member #

0102

Hey, did your 4Runner Trail come stock with Bilstein shocks? Mine did and I was wondering if you switched those out with the ICON configuration, or did you leave the original ones on? In addition to that question, did you need to raise it to the full 3.5" lift that the ICON let you for those 275 BFG tires?
Mine did not come with the Bilstein. I upgraded to the Icon Vehicle Dynamics stage 2 about 20,000 mile in. I think I ended up with about 2.5" in the front and 3.5" in the rear with the new OME 2899 super heavy springs. You can actually run stock suspension with the 275's. Just get a little rub full lock, in reverse.