• HTML tutorial

Wanderlost

Rank VI
Launch Member

Member III

3,316
Caledonia, Illinois
Member #

8490

I started this thread to chronicle the dual battery system we’re currently putting together. It’s being installed in a ’17 Toyota 4Runner but can easily be adapted to just about any vehicle.

I’ve got some experience in wiring lights and building fuse/relay panels, but for this project I’ve asked for help from a company that specializes in designing and installing dual battery systems. They’re helping with the more technical aspects to make certain everything does what it’s supposed to do, all the parts are compatible with one another, and it performs safely and efficiently.


To begin I’ll list what our needs and wants are from our system.

· Simplicity in design and function. This will reduce the chance of component/part failure and make field repairs simpler.

· Must not jeopardize the starter battery’s charge. We often do solo vehicle trips into very remote places so having juice to start the engine in the morning is paramount. However, the second battery needs to have the capability to perform an emergency jump start via jumper cables in an emergency.

· Posses the most current technology. We don’t want to invest in a system that’s already out of date, obsolete, or will be soon. It also needs to work best and most efficient with our vehicles charging system. Many of the older systems don’t work well with our “smart” alternator.

· Our power needs are fairly typical; a fridge, some low amp LED works lights, and the ability to quickly charge camera batteries. We’ll remain using the starter battery to power auxiliary running lights and the winch.

· The ability to easily add a solar panel to supplement the charging when the engine isn’t running. This we’ll likely be adding at a later date. When we do, we’d like to be able to simply plug the panel in with no need for additional components.


All the pieces of the puzzle have been chosen and placed on order. As things progress I’ll be posting pictures, explaining the reasons why we chose the parts we did, basic specifications, and of course how everything goes together. When it’s all over and done with I’ll be producing a video detailing the actual nuts and bolts of the install.


This is going to be a fun project! Merri and I hope you come along for the ride.
OB_thumbnail_small.JPG
 

Wanderlost

Rank VI
Launch Member

Member III

3,316
Caledonia, Illinois
Member #

8490

What started us down this path to dual batteries was the inconvenience of buying ice for the cooler almost every day. Forever our trips have been partially routed and planned according to where we could buy ice. We would often times drive many, many miles out of our way in order to keep our food from spoiling and our beer cold.

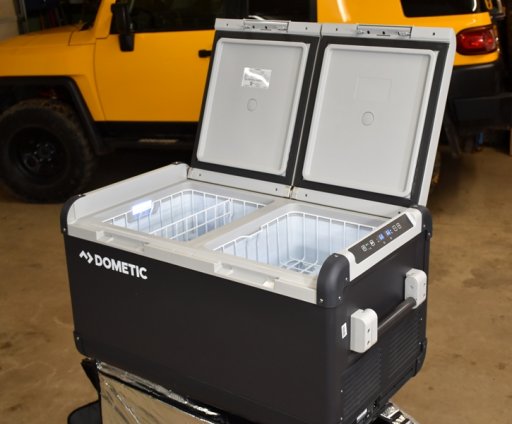
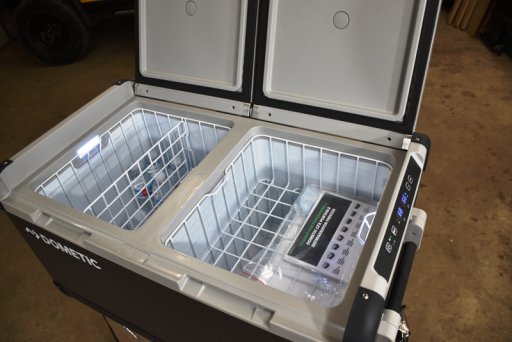
Last fall we finally broke down and bought a fridge, a Dometic 75DZW. Yup, the big one. Now we need a way to power it!


Our wants and needs that lead us to this particular unit is as follows:

· We wanted a brand that’s known for its reliability, durability, and has an excellent reputation for standing behind their products.

· A unit that was big enough to hold enough food for two people for up to seven days.

· It needed to be as energy efficient as possible, compared to other brands its size.

· It had to have a drain in the bottom to facilitate easy clean-ups, in case of an accidental spill and routine cleaning.

· Both AC and DC capabilities. For times when we want to use it in our camping trailer.

Additional features it has that are a bonus:

· Split in to two compartments. One side can be used as a freezer. Just in case we need to make ice for someone we have along that has a cooler. J

· Bluetooth controls and monitoring device. We’ll easily be able to keep an eye on it and make adjustments while we’re driving.

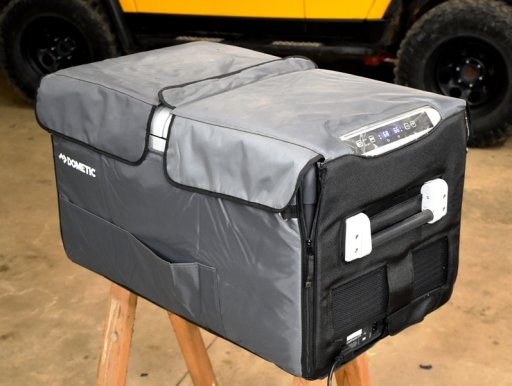
· Although it came with an additional cost, an insulated cover. This will add to its efficiency but still provide easy access.

DSC_0008.JPG

DSC_0007.JPG

DSC_0006.JPG
 

Wanderlost

Rank VI
Launch Member

Member III

3,316
Caledonia, Illinois
Member #

8490

Battery, Battery Mount, and Position of Mount


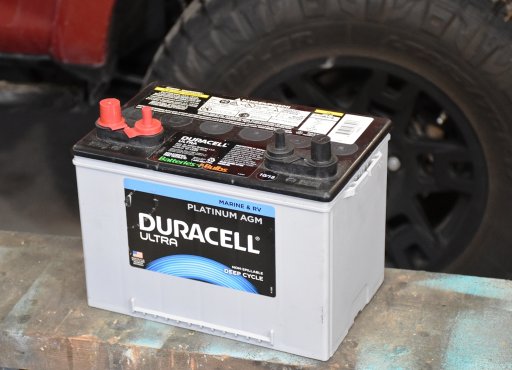
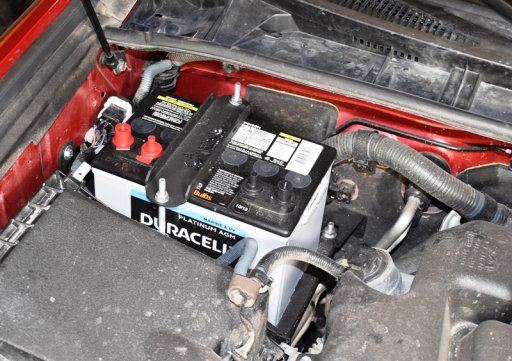
It's possible to pay a boat load of money for a battery if we wanted to. We didn't want to. After a lot of research we decided on a Duracell Ultra Platinum, AGM, BCI Group 34M, Deep Cycle, Dual Purpose battery from our local Batteries+ store. Just shy of $200 and It came with a four year free replacement warranty. We went with a dual-purpose or hybrid battery opposed to a deep-cell for the ability to use it for an emergency jump-start.


For our 4Runner there's three likely positions for a second battery.

1. Side by side with the starter battery.

Pros-

· Mounting them both there would leave plenty of room under the hood for other things, like a compressor. (We have ours mounted in the rear)

· The cables connecting the two would be extremely short; less power drop, a tidy install.

Cons-

· To fit two batteries in that space it looks like we'd have to downsize them. We want to keep the starter battery the stock size and, since it's only a year old, we want to keep it.

· That area next to the engine would be very cramped.

2. Passenger side, up front near the radiator.

Pros-

· This spot provides a nice flat, sturdy spot for mounting a universal tray.

· Cables would be short, just a radiator's width apart.

Cons-

· We would need a kit to relocate the air pump that's already in this position, adding to the overall cost.


3. Passenger side, near firewall.

Pros-

· More than enough room for a large battery.

· No modifications needed to existing components.

Cons-

· Takes a special, somewhat elaborate battery tray to securely hold battery.

· Connecting cables would be at their longest of the three choices.


For us choice #3 was the best choice. Now how to mount it there.

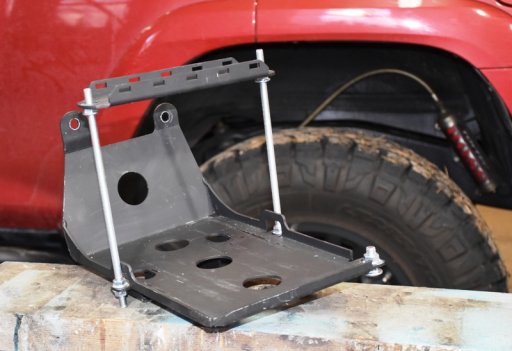
Choice of well made battery trays for this location is limited. We went with one from C4 Fab. primarily for the lower cost but after receiving it we were impressed by its ruggedness. There's no worries about it failing or bending! It does come only in bare steel but that's easily handled with some good surface prep and a rattle can of flat black.

Bolting it in is a quick and easy job, two bolts at the bottom, bolt a bracket to the firewall, then two bolts sideways into the fenderwell.

battery2.JPG battery_tray.JPG battery.JPG
 

monjorrow

Rank IV

Enthusiast III

1,135
US
Just finished up mine last weekend. I was lucky in that my Silverado already had a spot from the factory for a second battery. Added a Keyline smart isolator, an Everstart Maxx deep cycle marine battery, a 10 position accessory fuse panel and then a power panel in the bed next to our sleeping platform.

I think a small Dometic fridge in in our near future, but for now just being able to charge devices and run a fan during the warm summer months will be worth the work.


Wanderlost

Rank VI
Launch Member

Member III

3,316
Caledonia, Illinois
Member #

8490

Well, this project has taken longer than we expected but as they say, good things come to those who wait. :)
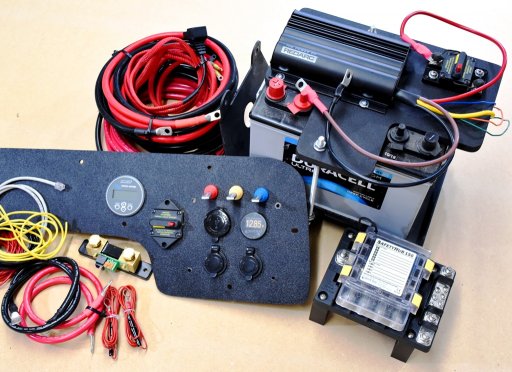
Most all the parts are sitting on the bench. There's a little wiring to do on the outlet panel. Should be up and running soon!

DSC_0976.JPGsm.JPG
 
  • Like
Reactions: Boort and Jimmy P

Boort

Rank V
Launch Member

Member III

2,779
Colorado
Member #

9314

@Wanderlost
Well, this project has taken longer than we expected but as they say, good things come to those who wait. :)
Most all the parts are sitting on the bench. There's a little wiring to do on the outlet panel. Should be up and running soon!
I'm hoping that you are planning a video on your build out and installation! I'd like to see if / how your adjust your Relay/Fuse system with the addition of the Dual battery.
Your videos have really helped get me thinking about what I need for my 4Runner. The Tool kit video was especially helpful for filling in some blanks that I had not yet thought of.

Boort
 
  • Like
Reactions: Nomadik Nova

Wanderlost

Rank VI
Launch Member

Member III

3,316
Caledonia, Illinois
Member #

8490

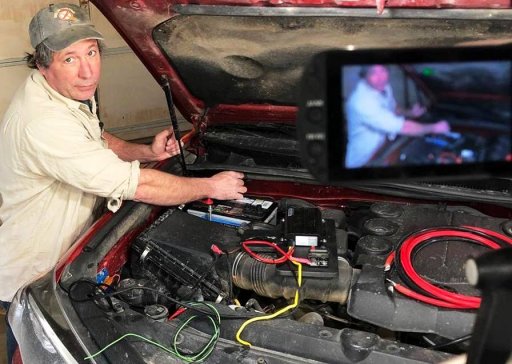
We're making progress! In fact we have the system installed and tested. Now to run the wires back to our outlet panel. The video will be slightly delayed due to me being off on the measurement of the cables going to the rear. So, we need to splice in another 18" using an Anderson plug. That should be on our doorstep tomorrow.

dual_battery.jpg
 
  • Like
Reactions: Boort

Boort

Rank V
Launch Member

Member III

2,779
Colorado
Member #

9314

We're making progress! In fact we have the system installed and tested. Now to run the wires back to our outlet panel. The video will be slightly delayed due to me being off on the measurement of the cables going to the rear. So, we need to splice in another 18" using an Anderson plug. That should be on our doorstep tomorrow.
@Wanderlost

Bummer on the missed measurement. Did the length get eaten up on routing? I look forward to seeing how it turns out.

Boort
 

Wanderlost

Rank VI
Launch Member

Member III

3,316
Caledonia, Illinois
Member #

8490

It's finally done and so far we're extremely happy with the whole setup!

This was a difficult project to do. Not the install and custom fab work, but the research and choosing of the components. The method of charging and battery type to be precise. It seemed that as soon as I made a choice I'd read in a post somewhere that there's something better, or the one I picked had flaws. It turns out there's a lot of misinformation and biased opinions out here on the interwebs. Crazy I know! That's why when it came to finally pulling the trigger we enlisted the help of professionals. They steered us towards trail proven, high quality components that will likely outlast our 4Runner.

The system we put together is not inexpensive. In fact, it cost more then what a lot of folks are willing to spend on a quality 3" lift. Some dollars can be shaved off by going with big fuses instead of the breakers, a simpler fuse hub for the outlet panel, and omitting the monitoring gauge.

We chose the AGM deepcell battery we did primarily for cost. We saw no sense in paying $400 when a $200 battery will do the same job and have the same life expectancy.

We chose the DC-DC charger over the relay/solenoid method for the health and efficiency of our battery. It turns out the AGM batteries are very finicky when it comes to charging and discharging them.

Here's the install video. We hope you enjoy watching it:


Geisterbild

Rank IV
Launch Member

Enthusiast II

1,327
Bellingham, MA, USA
First Name
Andrew
Last Name
Cunniff
Member #

6976

Hello, this might be the right thread as it is directly related to what I am looking to accomplish. I am curious if anyone knows if a 2016 Jeep Wrangler has a variable voltage alternator (smart alternator), or a fixed voltage alternator? I am looking to install a Redarc DCDC (BCDC1225D) for a crank, and house batteries (battery manufacture to be decided later). Also if anyone has a recommendation for a dual battery tray, and a clever mounting location for the DCDC it would be much appreciated.

My single battery is on its way out. If I am going to spend money to replace it, I should just plan on doing it proper and just install a second battery for my fridge and other accessories.

Thanks!
-Andy
 

El-Dracho

Ambassador, Europe
Moderator
Member
Supporter
Investor

Inventor I

13,232
Lampertheim, Germany
First Name
Bjoern
Last Name
Eldracher
Member #

20111

Ham/GMRS Callsign
DO3BE
When I looked for a second battery setup for my rig about 10 years ago I had no idea what to buy. All these fancy "intelligent" systems around... BUT I do not want a fancy system, I want something which is simple in function and design. So I left the starter battery untouched and just connected all rig related electrics to it. All electrics for living and camping such as the compressor fridge is wired to an auxiliary battery. This battery is just charged via a solar panel and a proper high quality reguator designed for that purpose. This setup works since about 8 years now. In case the feed form the solar panel would not be sufficient I have mounted a battery charger near the aux battery. That´s it - simple and working good.

Cheers, Bjoern
 

ThundahBeagle

Rank V

Advocate I

1,548
Massachusetts
First Name
Andrew
Last Name
Beagle
Member #

0

Just finished up mine last weekend. I was lucky in that my Silverado already had a spot from the factory for a second battery. Added a Keyline smart isolator, an Everstart Maxx deep cycle marine battery, a 10 position accessory fuse panel and then a power panel in the bed next to our sleeping platform.

I think a small Dometic fridge in in our near future, but for now just being able to charge devices and run a fan during the warm summer months will be worth the work.


I have the same truck as Monjorrow. I'll be following that, but may try to make my fuse setup more stock by entering the box he put that he put his fuses on top of.


Also lucky, as I had the extra battery tray already
 
Last edited: