That looks awesome! Nice work!Very impressive. Making a rtt is Challenging, a little frustrating and fun. Takes alot of time. Saves one alot of money. And you get it the Way you want it.
Husband and I finished our diy rtt last year. View attachment 81908
DIY Roof Top Tent using 80/20
- Thread starter Will Macia
- Start date
You are using an out of date browser. It may not display this or other websites correctly.
You should upgrade or use an alternative browser.
You should upgrade or use an alternative browser.

Traveler III
- 1,265
- First Name
- Steven
- Last Name
- Scoville
- Member #
12363
- Service Branch
- USN
Very impressive. Making a rtt is Challenging, a little frustrating and fun. Takes alot of time. Saves one alot of money. And you get it the Way you want it.
Husband and I finished our diy rtt last year. View attachment 81908
Wow that is awesome! Any thoughts of doing a how-to in yours?


Influencer I
I'm curious about this too. Any issues since you have used the tent now?You will find that everything will loosen up. From my experience 80/20 is great for concepts and getting stuff dialed in. I would recommend welding all the joints and through bolting anything you can once you have your design nailed.
Influencer I
Very nice setup. Would like to know more about it.Very impressive. Making a rtt is Challenging, a little frustrating and fun. Takes alot of time. Saves one alot of money. And you get it the Way you want it.
Husband and I finished our diy rtt last year. View attachment 81908


Very nice setup. Would like to know more about it.
Sure you Can follow us on Instagram.
I watch the guy on youtube DIY hardshell RTT
There is a facebook group too. Where ppl talk about their ideas.
Influencer I
There is a facebook group too. Where ppl talk about their ideas.
Do you have the link???
To bring a rtt to mexico is almost as expensive as the rtf itself...
A bunch of little issues. I am remaking the rain fly and tent this month. As they were a little sloppy for.my liking, and the rain fly fabric I originally chose did not hold a shape well. Going with a dimemsion-polyant sail material for the next one. Added better inserts for the extension rods as the drilled holes in the 8020 were a dumb idea. They moved around too much once inserted, and in a windstorm the canopy would shift over the peak of the roof. Overall, though, it's a cozy little home on the road.I'm curious about this too. Any issues since you have used the tent now?
Coming soon..Wow that is awesome! Any thoughts of doing a how-to in yours?
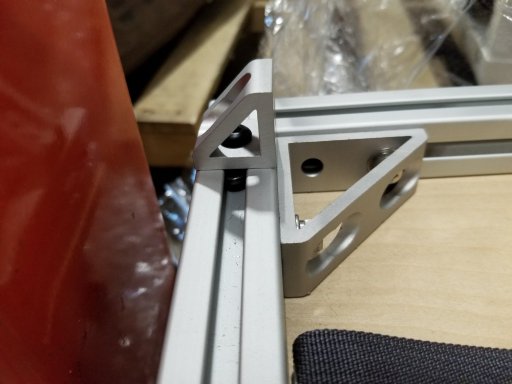
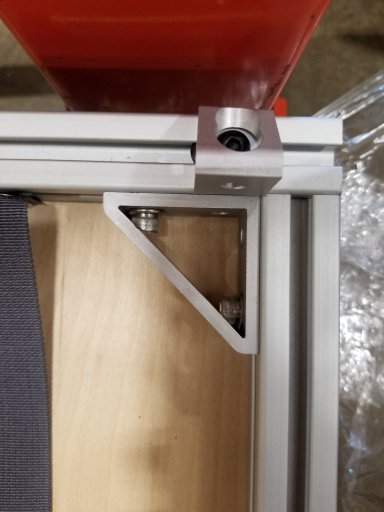
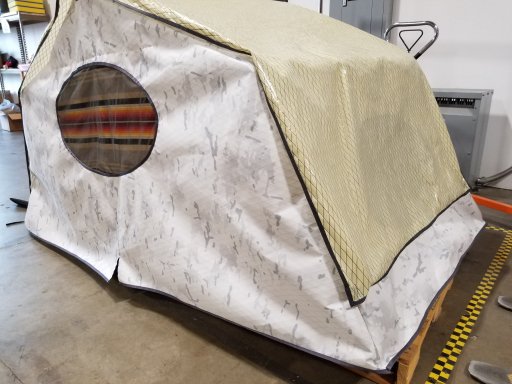
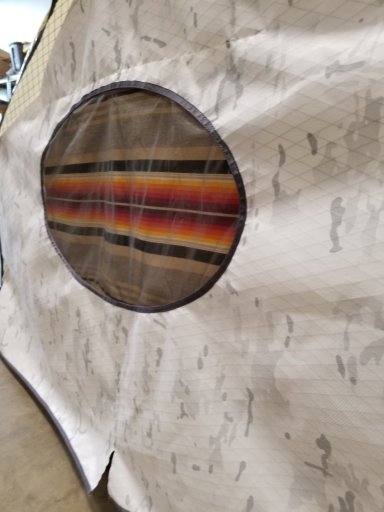
I finally got around to modifying a new canopy and rainfly. I changed the overall size of canopy by giving about 1/2" additional allowance in the length of the side walls and lengthened the top fabric panel the same. This allows a bit more ease in set up overall as it lays a bit looser on the frame. I also added better attachments for the rain fly stays. The fabric on this version is Dimension Polyant X50 laminate Multicam print in snow. I chose the white for better reflection of light, however, these fabrics are laminated and do not breathe, so I enlarged the windows for airflow to help the greenhouse effect. I altered the zipper door to be a U-shape instead of the camera bag opening I had previously. I also am connecting the base of the canopy to the frame using hook/loop. I'll detail that later as it is kind of unique an important to the build. Lastly, I modified the stays and where I place them on the frame. Previously, I had drilled holes in the sides of the frame to insert the stay rods into, but that was an impatient and poor choice (mandatory on any of my builds) so I added these small right-angle gussets to insert the rod ends into. To keep the rod ends from sliding through, I placed some shaft collars on the ends of the rods about 1" up from the end. Works like a charm, and you can angle the brackets to provide outward tension on rain fly.
I have a whole parts list compiled and will also post the .dxf for the pattern soon.
I have a whole parts list compiled and will also post the .dxf for the pattern soon.
Attachments
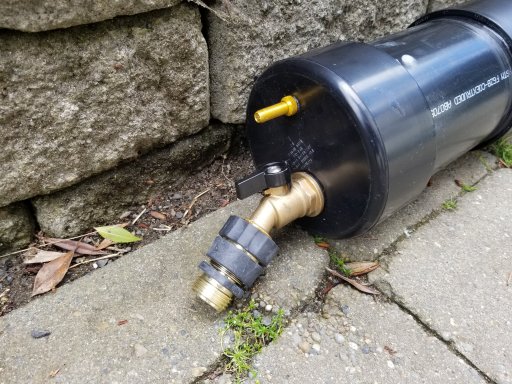
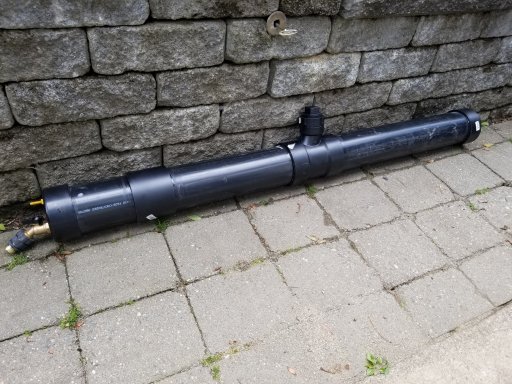
Here's my DIY shower for the Tacoma. Went to Home Depot and found 2 cut-off lengths that were priced cheap ($3/ea?), bought 2 caps and, the T, a coupler and the 2" plug for about $36 for pipe. Note, when you buy the caps, make sure they are flat faced on the inside. Some have a raised ring which will not allow you to seat the spigot or valve properly. If you do get one with the ring, you can machine it like I did. I bought a spigot on Amazon for $15 (rain barrel specific) and the valves on Amazon as well ($12 for 2). It measures only 5ft and is just over 3 gallons full, so enough for 2 short showers in the field.