DIY Roof Top Tent using 80/20

Crunch time... I sewed the windows and got the panels together. The fit is a bit tight on the long sides, but I have not put the 2 expansion slots on the side panels which are critical when you close it as they allow for geometry to change without ripping the fabric. So, I put the tent on for a quick fitting and for the most part, it's pretty sweet. Added a cool window shade for fun. The sewing part was not perfect and I could have done better had I spent a bit more time, but oh well. I will square it up tomorrow and post more pics. View attachment 58764View attachment 58765View attachment 58766

Sent from my SM-G950U using OB Talk mobile app
Looks great what are you sewing this on?

Sent from my SM-G965U using OB Talk mobile app
 
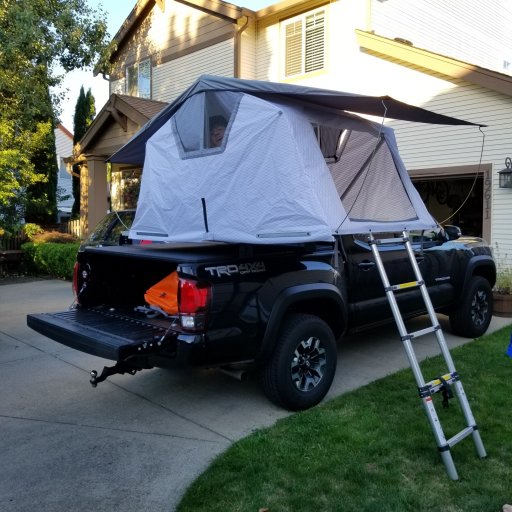
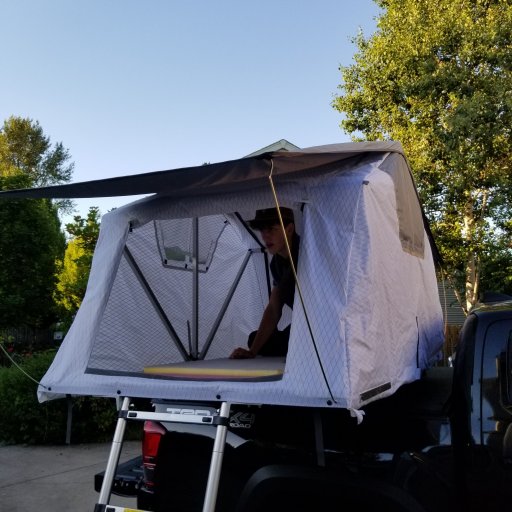
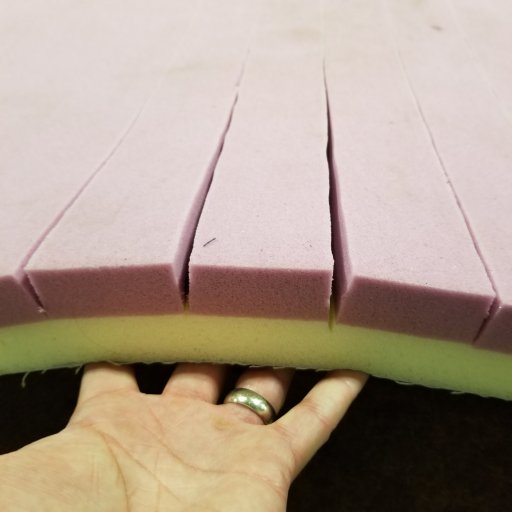
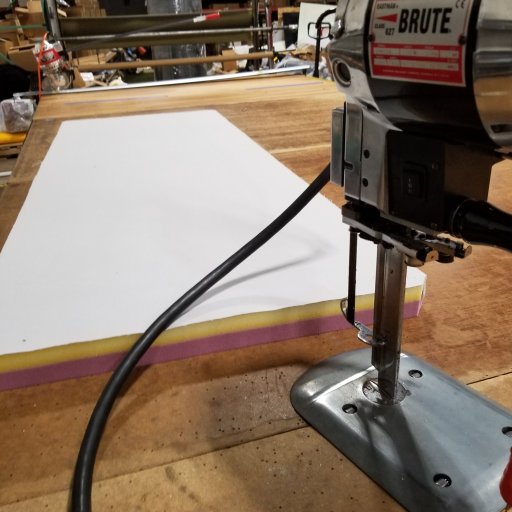
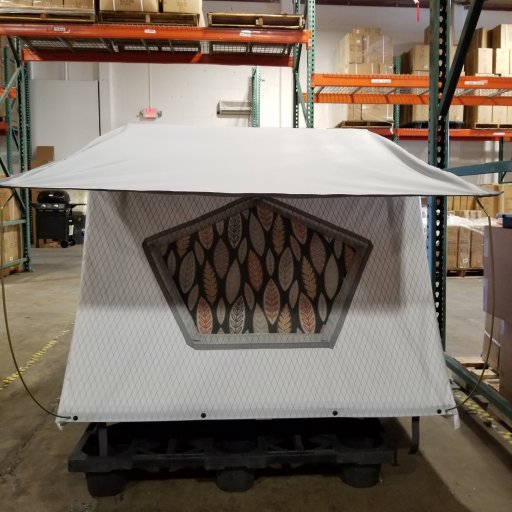
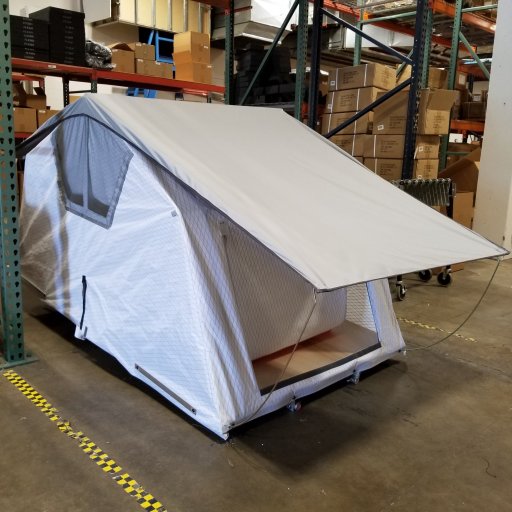
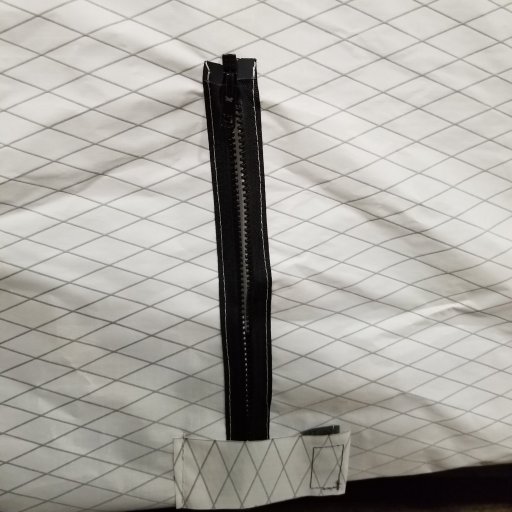
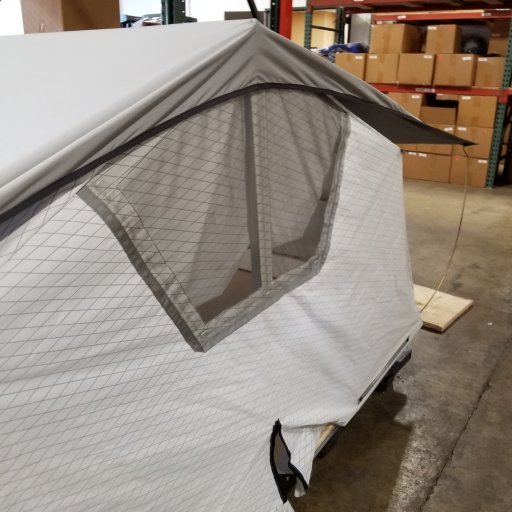
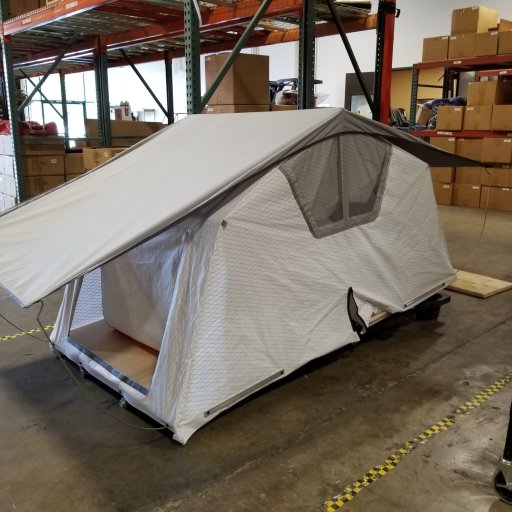
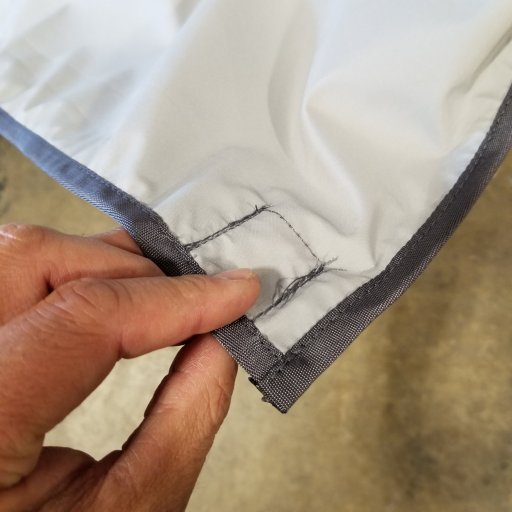
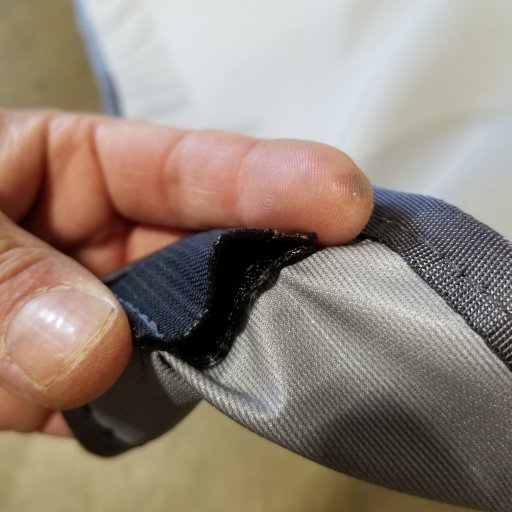
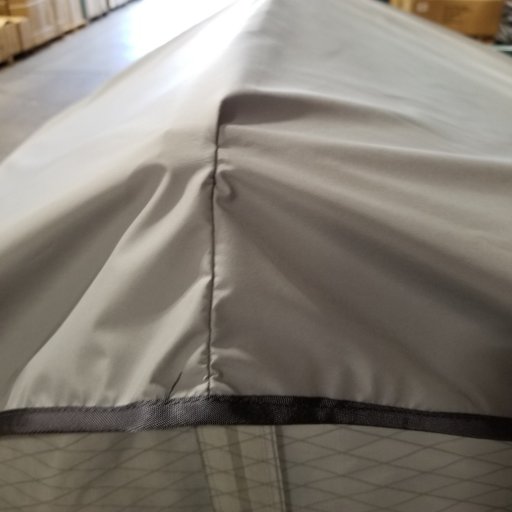
I was able to get some time in this weekend after traveling for 4 months solid. Since NWOR is this weekend, I figured I better get it done... Here is the last of it... Both fabric portions will need to be remade, but these will do for one weekend. For the main cabin, the pattern is a bit too tight still. I need to increase the long piece running end to end a bit, and widen it slightly as it is being pulled at the corners. This will fail eventually, so I need to be smarter on a side attachment and skirt. To allow for the fold of the tent, I slit the center at the bottom on both sides and installed zippers there. For now I used a cheesy little flap to hold that in place. I will also need to use stiffer plastic rails on the sides as one day in the sun already warped them a bit. I used aluminum on the sides and that seems to work well. Next, I cut the fly out of a waterproof breathable gore-tex material, but it is too narrow to make a proper fly without seam sealing, so that will be the next round after this trip. I bought the rods for the fly from CVT (8 ea for $50) - I am only using 4 for now. The windows got a little fun 'Tahiti' print for shades that attach on the inside. The fly is under a decent amount of tension and would work better if it covered the sides, but oh well. I'll risk some rain this time. I laminated a piece of memory foam to some urethane furniture foam and covered with a grey canvas. I used spray adhesive and then cut using a vertical fabric saw. I am spoiled having a lot of these tools but none if it is too hard with ordinary trips to Home Depot. Last, I made a waterproof orange cover for it out of 180z tarp vinyl, sewed crossing straps with 1" s/r buckles and then welded the corners seams to make it waterproof. It isn't too pretty but I'll make another with the new tent cabin later. Finally, I mounted it to the rusting Voodoo fab racks that I need to strip and have powder coated. 1 year old and they are rusting everywhere. Lame.
 

Attachments

  • 20180625_200209.jpg
    20180625_200209.jpg
    835.7 KB · Views: 424
  • 20180625_200201.jpg
    20180625_200201.jpg
    728.6 KB · Views: 419
  • 20180625_151647.jpg
    20180625_151647.jpg
    334.7 KB · Views: 397
  • 20180625_151157.jpg
    20180625_151157.jpg
    524.9 KB · Views: 380
  • 20180625_144156.jpg
    20180625_144156.jpg
    583.7 KB · Views: 382
  • 20180625_144145.jpg
    20180625_144145.jpg
    646.1 KB · Views: 389
  • 20180625_144107.jpg
    20180625_144107.jpg
    507.5 KB · Views: 368
  • 20180625_144054.jpg
    20180625_144054.jpg
    571 KB · Views: 363
  • 20180625_144050.jpg
    20180625_144050.jpg
    633.3 KB · Views: 377
  • 20180625_143916.jpg
    20180625_143916.jpg
    502.9 KB · Views: 368
  • 20180625_143913.jpg
    20180625_143913.jpg
    545.2 KB · Views: 359
  • 20180625_143902.jpg
    20180625_143902.jpg
    1.6 MB · Views: 367
  • 20180625_143854.jpg
    20180625_143854.jpg
    435.5 KB · Views: 354
  • 20180625_143849.jpg
    20180625_143849.jpg
    546.2 KB · Views: 322
nice job, it looks great!
 
  • Like
Reactions: Will Macia
This project is amazing. How much did all of the materials put you back?
About $300, but I spent about $450 with trial and error... Some of my best laid plans didn't work. The worst of it is the hinges, they were $60 from Equipt. I probably could have found those cheaper. I also have a full textile manufacturing facility, so I have a luxury of making the fabric portion without a lot of complication or cost.
 
  • Like
Reactions: Broke
About $300, but I spent about $450 with trial and error... Some of my best laid plans didn't work. The worst of it is the hinges, they were $60 from Equipt. I probably could have found those cheaper. I also have a full textile manufacturing facility, so I have a luxury of making the fabric portion without a lot of complication or cost.

That's awesome. Well your tent looks great, I hope you get some good use out of it!
 
If i was you, id take that talent and start up a company creating budget friendly tents.
Funny you say that... We thought about it, hard, but it is a bit of a departure from our bag company overall. I think selling kits might be a good idea, but then again, you could buy all the parts off of 80/20 yourself without any markup. It would be nice to have an econo option in the market, other than the Yakima doohickey...
 
  • Like
Reactions: Broke
Thanks for the referral. Their pricing is better than 80/20... Happy Trails...
Check out 80/20's eBay store. Better pricing. Also, you can load your cart and submit it for a combined price. Saves cost especially shipping. I am on my third 80/20 project and love working with the stuff. I have bought a vertical mill now and aluminum chop saw so I can cut and shape the 80/20 as needed. That saves quite a bit too.
 
I would definitely be Interested in having just the tent available for sale and build the rest myself . You might be onto a great idea to get more people into a RTT but still have the creativity and pride of making part of it themselves.