Corey's 2007 Toyota FJ Cruiser Build

  • HTML tutorial

Corey

Rank V
Launch Member

Influencer I

2,503
Auburn, WA.
Member #

1771

Second Set Of Maxtrax Added 2-17-2017

Friday afternoon at the mods!
Yep, added another pair just now.
Why???
I also use my Maxtrax for leveling the FJ Cruiser when camped on uneven terrain, and two is not enough sometimes.
Now if I need to level both the front and rear, I am covered.

I went for Stealth Black Maxtrax this time around, as I really do not need the bright orange as I do not do mud where the orange would be beneficial if they get buried.
These are handy for sand as well, and they stand less of a chance of disappearing into sand than they would in mud or very loose dirt on a trail.

Bought these from the fine folk's at CVT Tents, same place I got my Outer Limits first aid kit from.

Link:

MAXTRAX MKII

Pictures:


Nice sturdy box, and wrapped with bubble wrap to protect them


Back in black!


Got some Oreo Cookie action goin' on here
Yes, the BajaRack ladder is in dire need of a new powder coating, disappointed in how it is peeling.


Rotopax water jerrycans and Maxtrax secured with a heavy duty Kryptonite cable and lock, as that is a lotta moola sittin' on the hind end


Filthy rig from the snow last week, needs a good bath some day
 

Corey

Rank V
Launch Member

Influencer I

2,503
Auburn, WA.
Member #

1771

ARB Intensity LED Lightbar Installed 3-3-2017

When I saw this lightbar last year in development I knew I was going to get one as it will compliment the two ARB Intensity LED round light I had installed on my ARB front bumper over the summer.

This has the same beam pattern, spot on the left side, and flood on the right side like my round lights.
Like the round lights, the lightbar is designed by ARB, but actually made by Rigid Industries in the USA, so you know it is of the most excellent high quality.

I talked with John the owner of Auburn Car Repair & Offroad earlier in the week, and the wiring harnesses had just shown up on Wednesday at ARB headquarters which is a few blocks away from John's shop.
I do believe I may be the first rig in the USA to have these, but not 100% sure.
ARB had another lightbar on display in their showroom, but no harness for it yet late last year.

These lights will burn your retinas for sure, so they are not for use at all if you have traffic in front of you or coming at you.
I have been using my round ones on the way into work in the wee hours of the morning when there is no traffic, and it is light night and day compared to just the stock headlights.

Will try and get a video at a later date in the dark and update my thread with it.
I could go with another one on top of my rack by the BajaRack spoiler, but I had bad experience years ago with my '91 4RUnner with Hella 500s up there, it reflected off the hood, they were pretty much useless, but they looked cool


Links:

ARB Intensity LED 20 Inch LED Light Bar - Combo Beam (AR40CARMP)

Auburn Car Repair & Offroad

Video from ARB they just released March 2nd 2017:


Pictures:


Upper switch is for the lightbar, middle switch is for the rocklights, and the bottom switch is for the round ARB lights, and with the key on, the switches light up green when the lights are off
Some of you may remember the upper switch was for the round ones, and I wanted the tech to put the new lightbar switch above the old one, but alas there was no room.
So he swapped the wires on the first switch over to the new lightbar since the lightbar is higher up on the bumper than the round ones.
Worked out great!


When the lights are turned on, the switches light up amber


All LED lights off


Upper lightbar on only


Both the lightbar and round lights on


Headlights turned on too on low, they do not stand a chance to outshine these ARB Intensity LED lights
 

dblack

Rank V
Launch Member

Pathfinder I

2,484
Sherwood Park, AB
Member #

3725

Looks awesome. I love my ARB lights too.

Would you mind throwing up a photo of the bar led mounting on the bumper please? I want the same bar on my bumper, but when I open the hood of the Tundra I have millimeters of clearance between the grill and the bumper. Just want to see the mounting so I can gauge the clearance. I've seen the ARB schematics/measurements, but a photo is worth a thousand words.
Thanks,
 

dblack

Rank V
Launch Member

Pathfinder I

2,484
Sherwood Park, AB
Member #

3725

If it's convenient I'd appreciate it. If not I can always buy them and make it fit with a little hacksawing or duct tape.
 

Corey

Rank V
Launch Member

Influencer I

2,503
Auburn, WA.
Member #

1771

See if these pics help, but it is kind of hard to get good clear shots with the Hi-Lift jack and its ring mounts in the way too.


Corey

Rank V
Launch Member

Influencer I

2,503
Auburn, WA.
Member #

1771

That is a bummer, so the rear of the bracket sticks back to close to the leading edge of the hood?
This lightbar is so bright too.
 

dblack

Rank V
Launch Member

Pathfinder I

2,484
Sherwood Park, AB
Member #

3725

That is a bummer, so the rear of the bracket sticks back to close to the leading edge of the hood?
This lightbar is so bright too.
Thats right. As the hood raises, the grill clears the top bar by 1/4" or so. I had seen the schematics on ARB, which was good, and was hoping that the brackets were tilted ahead by another few degrees. If they were I'd be ok, but the top thickest part of the bracket looks like it would hit my grill.

Definite bummer. I think the bar would round out my lighting coverage and look awesome.
2017-03-03 18.10.10.jpg
 

Corey

Rank V
Launch Member

Influencer I

2,503
Auburn, WA.
Member #

1771

Added Rotopax Fuel Can 3-4-2017

Took off one of my 2 gallon Rotopax water jerry cans, and swapped in a 2 gallon fuel can.
Having the two water ones would be nice, but still not enough H2O for a long camping trip, so I will still have to carry water inside the rig.

I figure it might not be a bad idea to carry a little extra fuel, that is about 32 miles worth of fuel if I get low.

Link:

2 Gallon Gasoline

Pictures:


  • Like
Reactions: grumpy

Corey

Rank V
Launch Member

Influencer I

2,503
Auburn, WA.
Member #

1771

Relocated Fire Extinguisher And Mounted Fiskars Axe 3-19-2017

Took the fire extinguisher off of my Springtail Solutions rack/table from my rear door, and relocated it to the Springtail Mpac Siderack next to the Powertank.
With it in the other location, I had to take it out of its holder whenever I wanted to put the table down to do any cooking on the rear table.

Also picked up a Fiskars X15 chopping axe at 23.5" long.
I like the axe after watching videos and seeing reviews on it, as it has a wedge shape in the head which helps with splitting firewood.
All set now for campfire wood duties with the small Gerber Bear Grylls hatchet I picked up over the winter for kindling, and the Katanaboy folding saw for sawing up downed limbs/logs.

I had some Quick-Fist mounts from some Four Trek mounts I use to use on the stock roof rack when I had an axe and shovel mounted up there oh so long ago.
I did move the first aid kit to the far right, it was over to the left some before, but I had to move it so the axe would clear.

I was also able to keep the Molle bag on the rear door that holds the two new small backpacking type stoves I just got, a couple of fuel bottles, a small MSR cookpot, and plastic silverware.
The table folds down now with no problems with having to remove anything first like I did before with the fire extinguisher.

Links:

Fiskars X15 Chopping Axe, 23.5-Inch

GERBER Bear Grylls Survival Hatchet

Silky KatanaBoy Professional Series, 500mm XL Teeth

Pictures:


Quickfist mounts bolted to the rack


Fiskar axe all mounted up


Table down with the two stoves, and a few pots on them I picked up over the winter
I often use those inside my home as they are non stick, and very light weight.


Shot with the Gerber hatchet and Katanaboy 500 saw


Another shot of the hatchet and Katanaboy


The Adventure Tool Company Toolroll sure came in handy today


With the Molle bag back in place again on the rack


Fire extinguisher in its new home, only the 4th time it has been relocated, and hopefully the last
 
  • Like
Reactions: hopdup

Corey

Rank V
Launch Member

Influencer I

2,503
Auburn, WA.
Member #

1771

Eezi-Awn Bat 270 Awning Installed 4-21-2017

Been a month since the last mod.

I have had the Campinglabs awning on my rig since spring of 2008 shortly after I got my Autohome Maggiolina Airlander roof top tent installed.
The awning has been very nice to have, but kind of a PITA to setup on some of the solo trips I have gone on.

Within the past year of so I have seen these 270 degree awnings pop up on forums, and there are a few brands out there.
I am already a fan of Eezi-Awn gear as I have two of their tables I keep in the rig full time which I use one for the chuckbox, the other for dining at.

I bought the awning from Paul May of Equipt Expeditions in Utah, and it had been stored on my living room floor for three plus weeks.
I attempted to install it a few weeks back with the help of a couple that lives next door, but we could not get it aligned up, and quite frankly I am glad we had a snag.
The awning is much heavier than the Campinglabs one, and Paul and BajaRacks had warned me it might bend the BajaRacks awning mounts outwards with the additional weight of this new awning.

Jason the tech at Auburn Off-Road put it on, and indeed it was a little heavy.
But not to worry, him and John the owner of the shop said they could either weld a gusset in there much like you see on a pair of rock sliders, or tie a flat piece of metal stock in there and tie the Eezi-Awn bracket to the horizontal part of the BajaRacks awning bracket together, same as gusseting it.
And it worked!

If I need more stability, I still have the middle BajaRacks awning bracket on the roof rack, but the Eezi-Awn awnings only utilize two positions.
Paul sells the brackets, and if needed, Jason could make up a third piece and tie it in, but we really do not think that will need to be done at this time.
I will keep my eye on it and see how it is holding up.

This awning is such a joy to deploy, as you just walk around the rig with the strap and the awning unfolds for you.
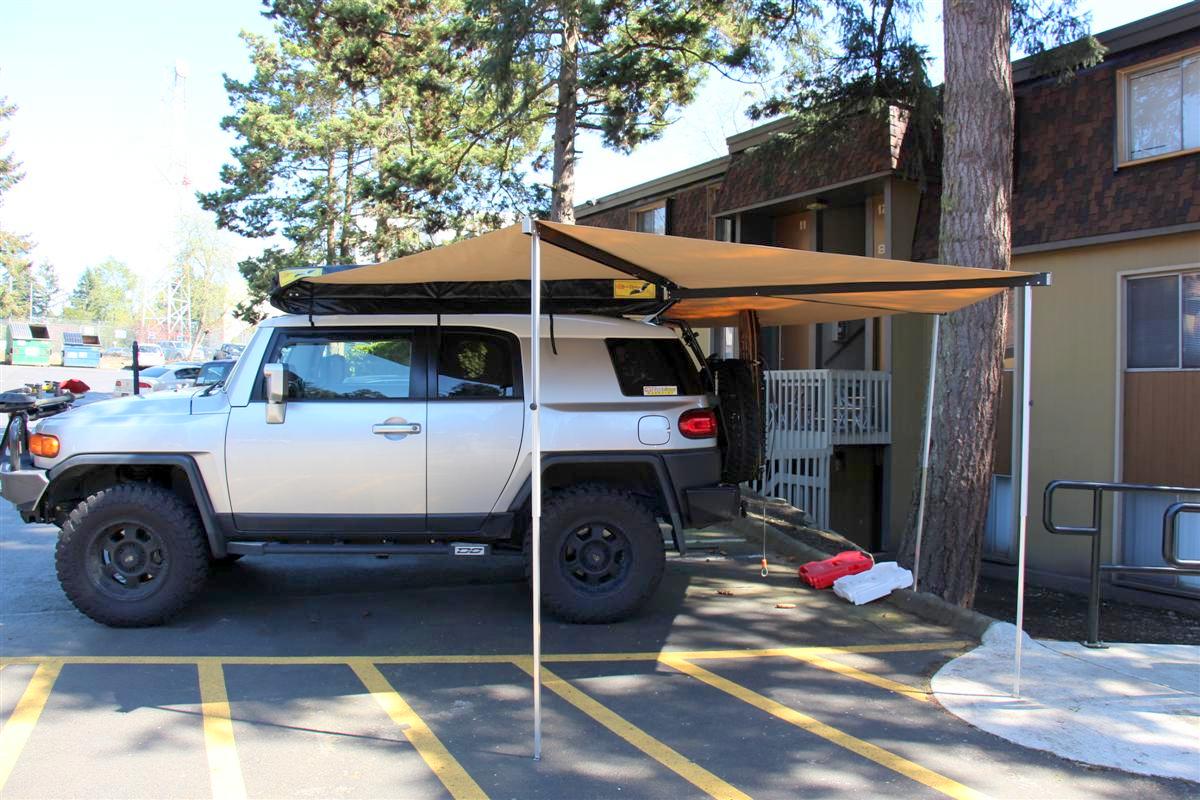
This is a free standing awning, but if rain or wind is expected, it has built in legs you can extend and stake to the ground to make it more stable.
Instead of me making a video of it opening (I may if I get time later) here is a video of Paul May opening the same awning, but his is installed on the right side of the rig instead of the left like mine is.
The make both a left and right hand version, they are not interchangeable from side to side.


Links:

Eezi-Awn Bat 270 Awning Left Hand Side (Driver)

Auburn Car Repair & Offroad

Pictures:


Stock BajaRacks awning bracket in the middle, and the Eezi-Awn bracket bolted to the one on the left


Closeup of the Eezi-Awn bracket


Modified bracket so it would mate to the BajaRack bracket


Both Eezi-Awn brackets bolted up


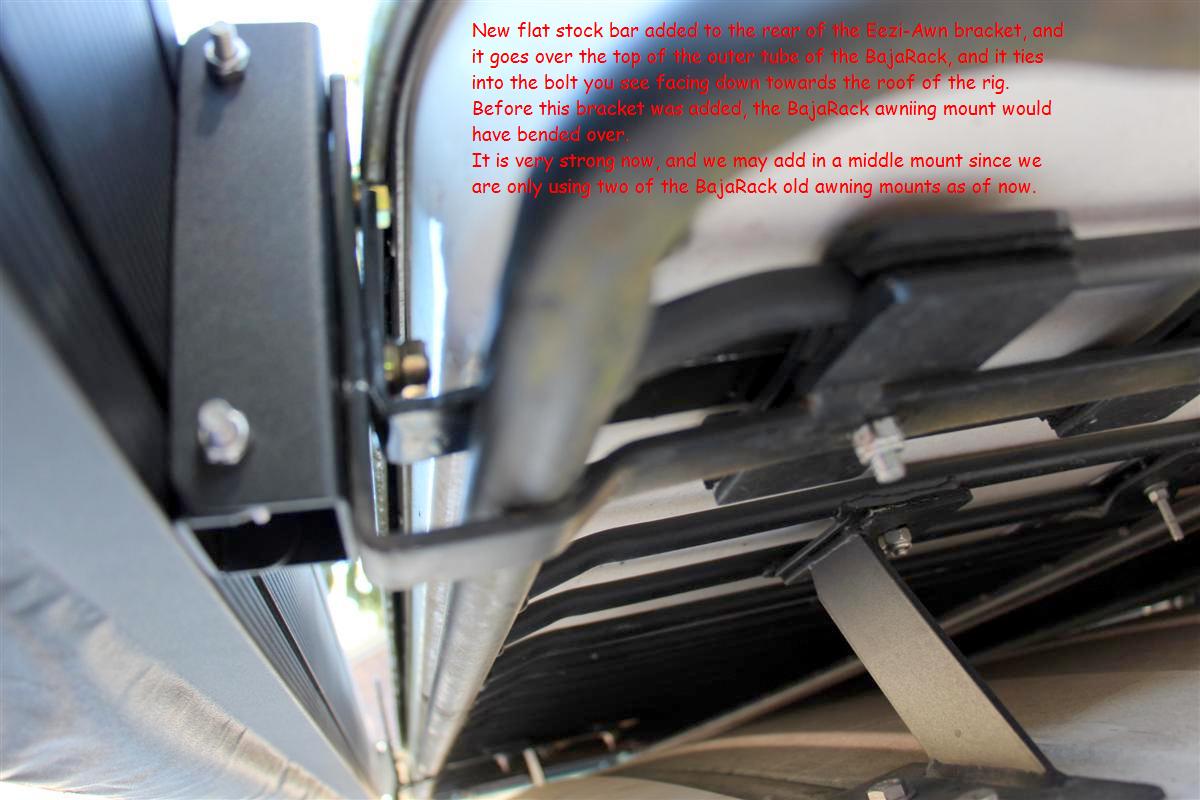
You can see the extra metal piece Jason fabbed up that ties the back of the Eezi-Awn bracket, and it goes over the long outer tube of the BajaRack that holds the tent, and it ties into the top and bolts though the BajaRack awning mount


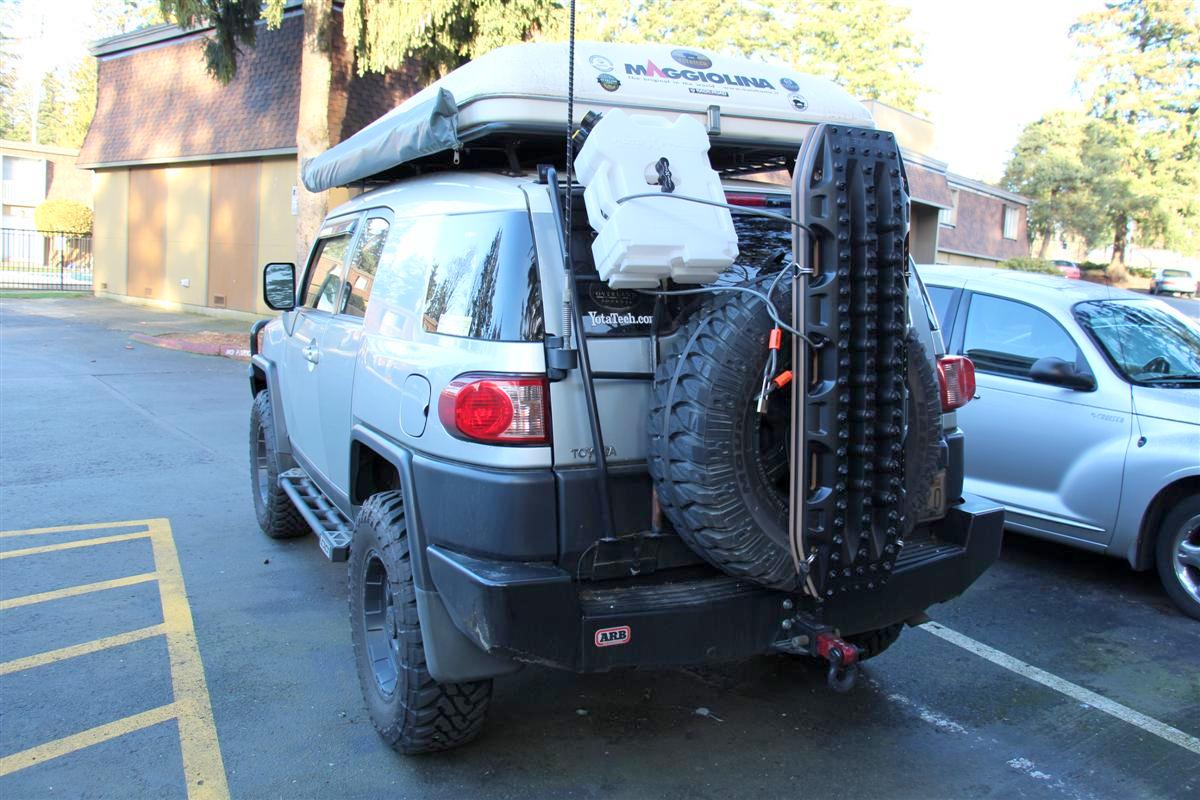
Side shot of the very dirty rig with the new awning all zipped up


Case unzipped, and the canvas hanging down before you grab the strap and go for a walk around the rig to open it up


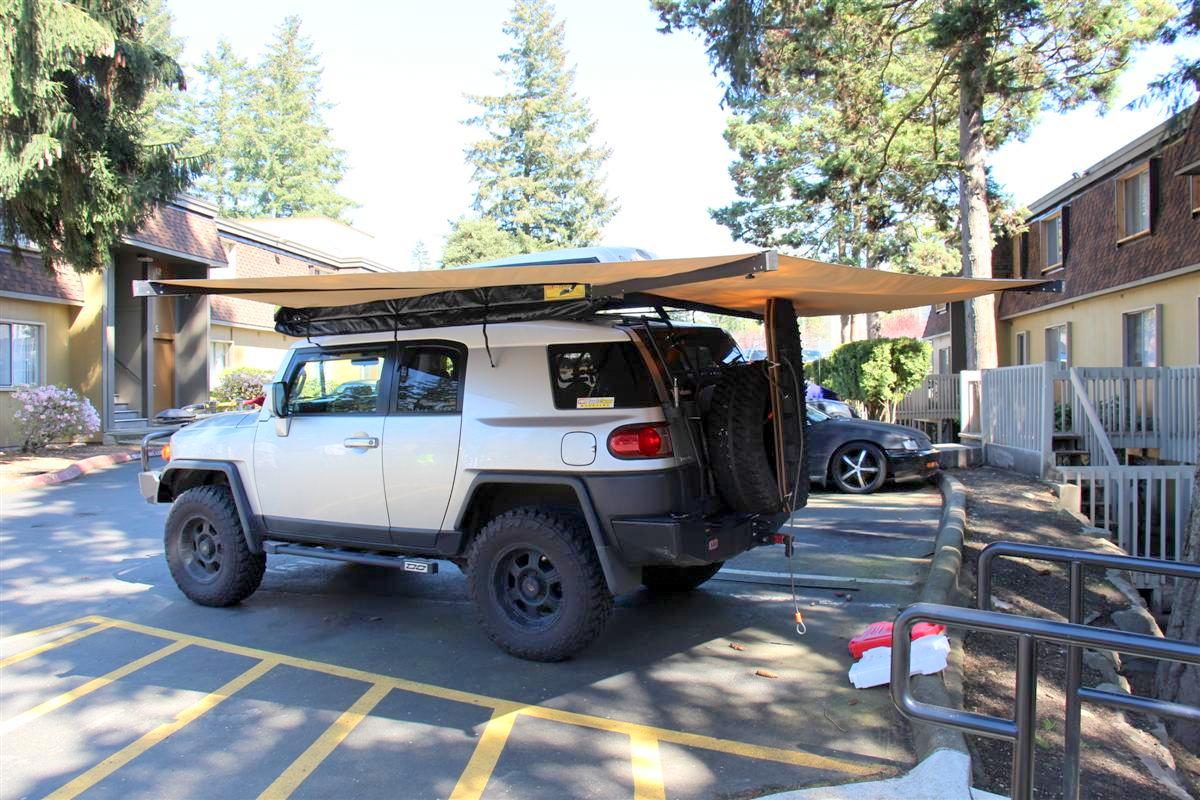
Awning deployed, no legs down yet, and it seemed pretty stable with a light breeze


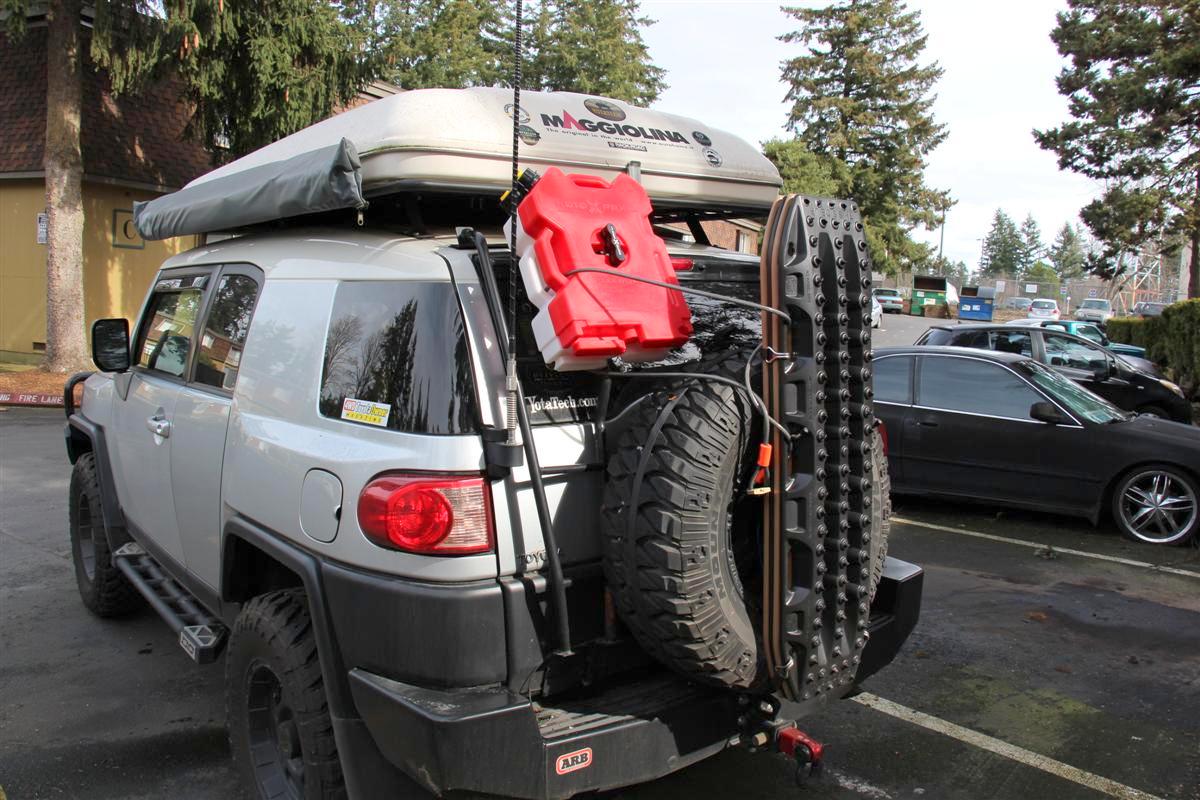
I had to remove the Rotopax cans, but the aluminum support arm that goes to the right side cleared the Maxtrax just fine


Look at those nice legs


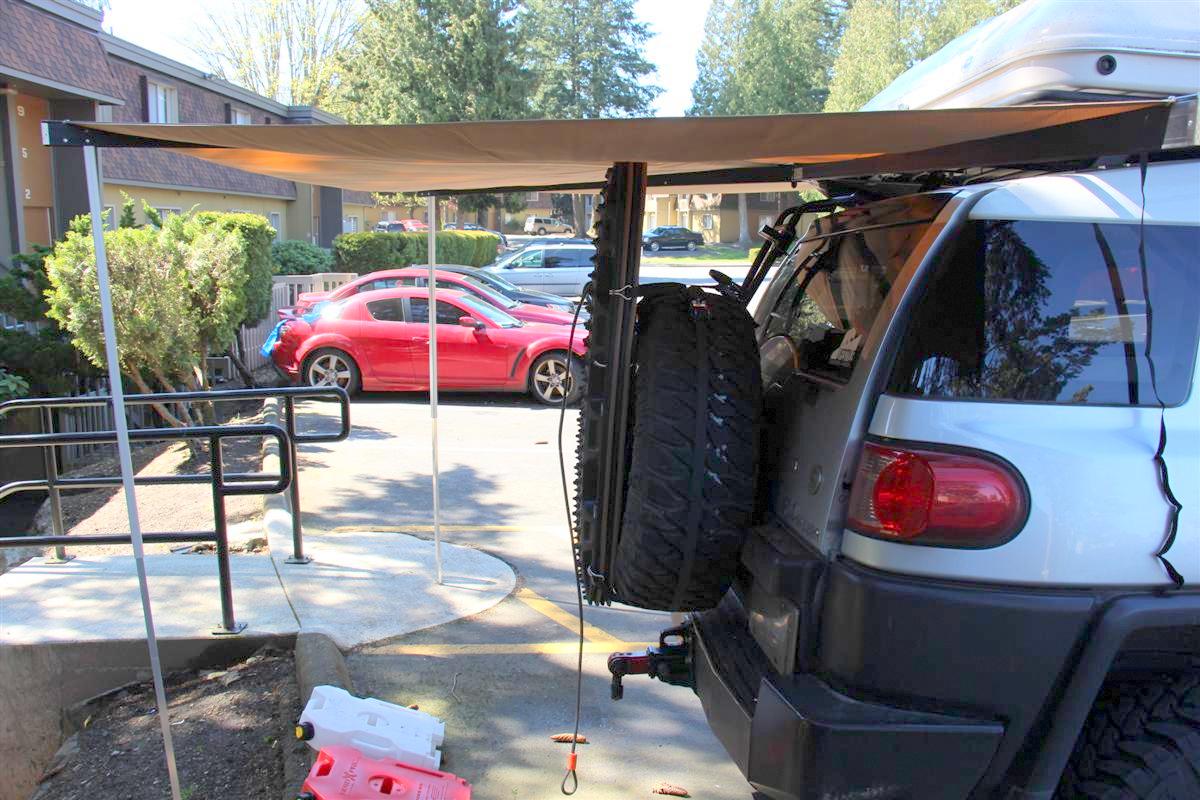
Another shot from the back side


The strap you grab when you go for a walk around the rig to deploy it has a hook on the end, and it fits just perfect around the BajaRacks right side front leg support that bolts to the roof


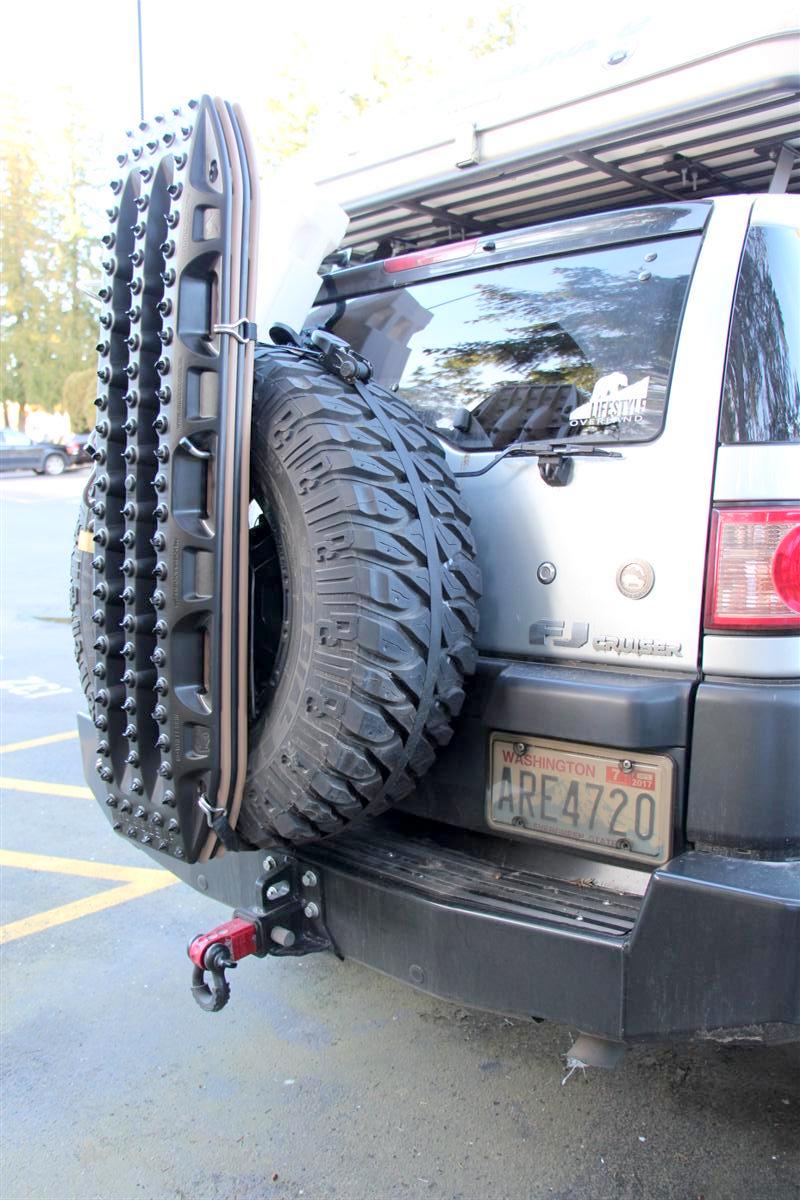
Side shot showing the Maxtrax, they rub a bit, I will have to find out if they will wear on the canvas, if so, I will come up with a solution


Rotopax back on, and they clear the canvas


Closeup of the aluminum arm with the name Eezi-Awn on it, and you can see it is much lower than the high point on the Rotopax, and this is why they must come off to deploy the awning

What I am going to do when I get time it to turn the Rotopax mounting plate that is on the ladder 90° and lower it some, and the cans will sit sideways, and a little lower, and I think that will solve the problem so I do not have to remove the cans each time.
I do have to remove the CB antenna, but that is on a quick disconnect mount, and very easy to take off in less than two seconds.

Overall I am very pleased with this new awning.
One thing you have to do is make sure you get the three top strap parts out that help tighten up the canvas when it is rolled up.
Not bad though for my first time deploying it and putting it away.

Stand by for tomorrow, as I have another mod that was done today, and it is for the Renogy 100 watt solar panel that keeps the auxiliary battery charged up since that runs the new National Luna Weekender 50 Twin fridge/freezer.
 

Corey

Rank V
Launch Member

Influencer I

2,503
Auburn, WA.
Member #

1771

Anderson SB50 Plug & Cable Added To Aux. Battery For Solar Panel Installed 4-21-2017

This was done Friday, but I just got pictures and hooked up the solar panel an hour ago.
The auxiliary battery under the hood is primarily used just to power the new National Luna Weekender 50 Twin fridge/freezer I picked up last fall.
It also supplies power to the comm units in my rig, both CB and ham.

For my Renogy folding solar panel the way I hooked it up before to the auxiliary battery was with the supplied battery clamps like you see on jumper cables which you will see in a few pictures below.
Had to pop the hood for this each time, and I wanted a better setup.
The Renogy kit already came with and Anderson SB50 plug, so I had Battery Stuff make me up a short cable that would go to the battery, and the other end would go to an Anderson plug and be on the outside of the rig so I did not have to pop the hood open.
I also had them make me up an extension cable that would extend the range by about 20'.
They did not however install a 15 amp fuse on the shorter cable, I had to do that myself.

However as I was waiting in the waiting room at Auburn Off-Road getting my new awning installed, I was looking through a copy of 4WD Toyota Owner Magazine from last summer (I had read the article before) I saw a solar panel company called Overland Solar that has the same cable and extensions that come fused.
Wish I had known about them, I would have bought the shorter cable from them already fused, and just got the non fused extension from them too.

The external Anderson SB50 plugged is attached to the side of the ARB Intensity LED light bracket.
It makes for a pretty stealth installation, and is way better than drilling into the bumper.

From testing the setup today in very overcast conditions, I was very impressed how fast it brought up the voltage from 12.3 to 13.4 volts.
When I fire up my rig to drive it, both voltage displays go to about 14 volts, then back down to 13.4 volts when cruising, so I am impressed, I already said that right :)

Links:
Renogy 100 Watt 12 Volt Monocrystalline Foldable Solar Suitcase
This one has a newer charge controller than the one I have one mine, and they got away from the Anderson plugs, not good in my opinion, as I prefer the Anderson SB50 A plugs.

Custom Cable 4' 10 Gauge with Rings & SB50 10ga4ringSB
They also made the 20' 10 gauge cable for me with the Anderson SB50A plugs on each end, but you will have to call them to custom order it.

On with some pictures:


The Renogy kit comes with a new semi-hardshell case


The old battery clamp cable on the far left I use to use, the new Anderson plug equipped one that connects to the battery in the middle, and the 20' extension on the far right


The charge controller on the rear of the solar panel, and a mugshot of me got in there somehow :)


Cable attached to the auxiliary battery, and yes, it is a mess of pine needles under there, as I park under trees at home and at work


Anderson SB50 plug attached to the side of the ARB Intensity LED light bracket


Beginning voltage on the auxiliary batter is 12.3 volts


The charge controller needs the date and time set, but it lights up as soon as it detects the auxiliary battery attached, and you can also see a smiley face in the display, all if good, plus the green light for working
Sorry, I could not get a good focus on the display.


Cable plugged into the Anderson SB50 plug on the rig


Solar panel soaking up the rays, and it is highly overcast here this morning, very impressed as you will see in the other voltage picture


About fifteen minutes or so later, the 12.3 volts jumped to 13.4 volts, about the same as when I am driving down the road with the alternator charging up both batteries, I am impressed
 
  • Like
Reactions: YPD1