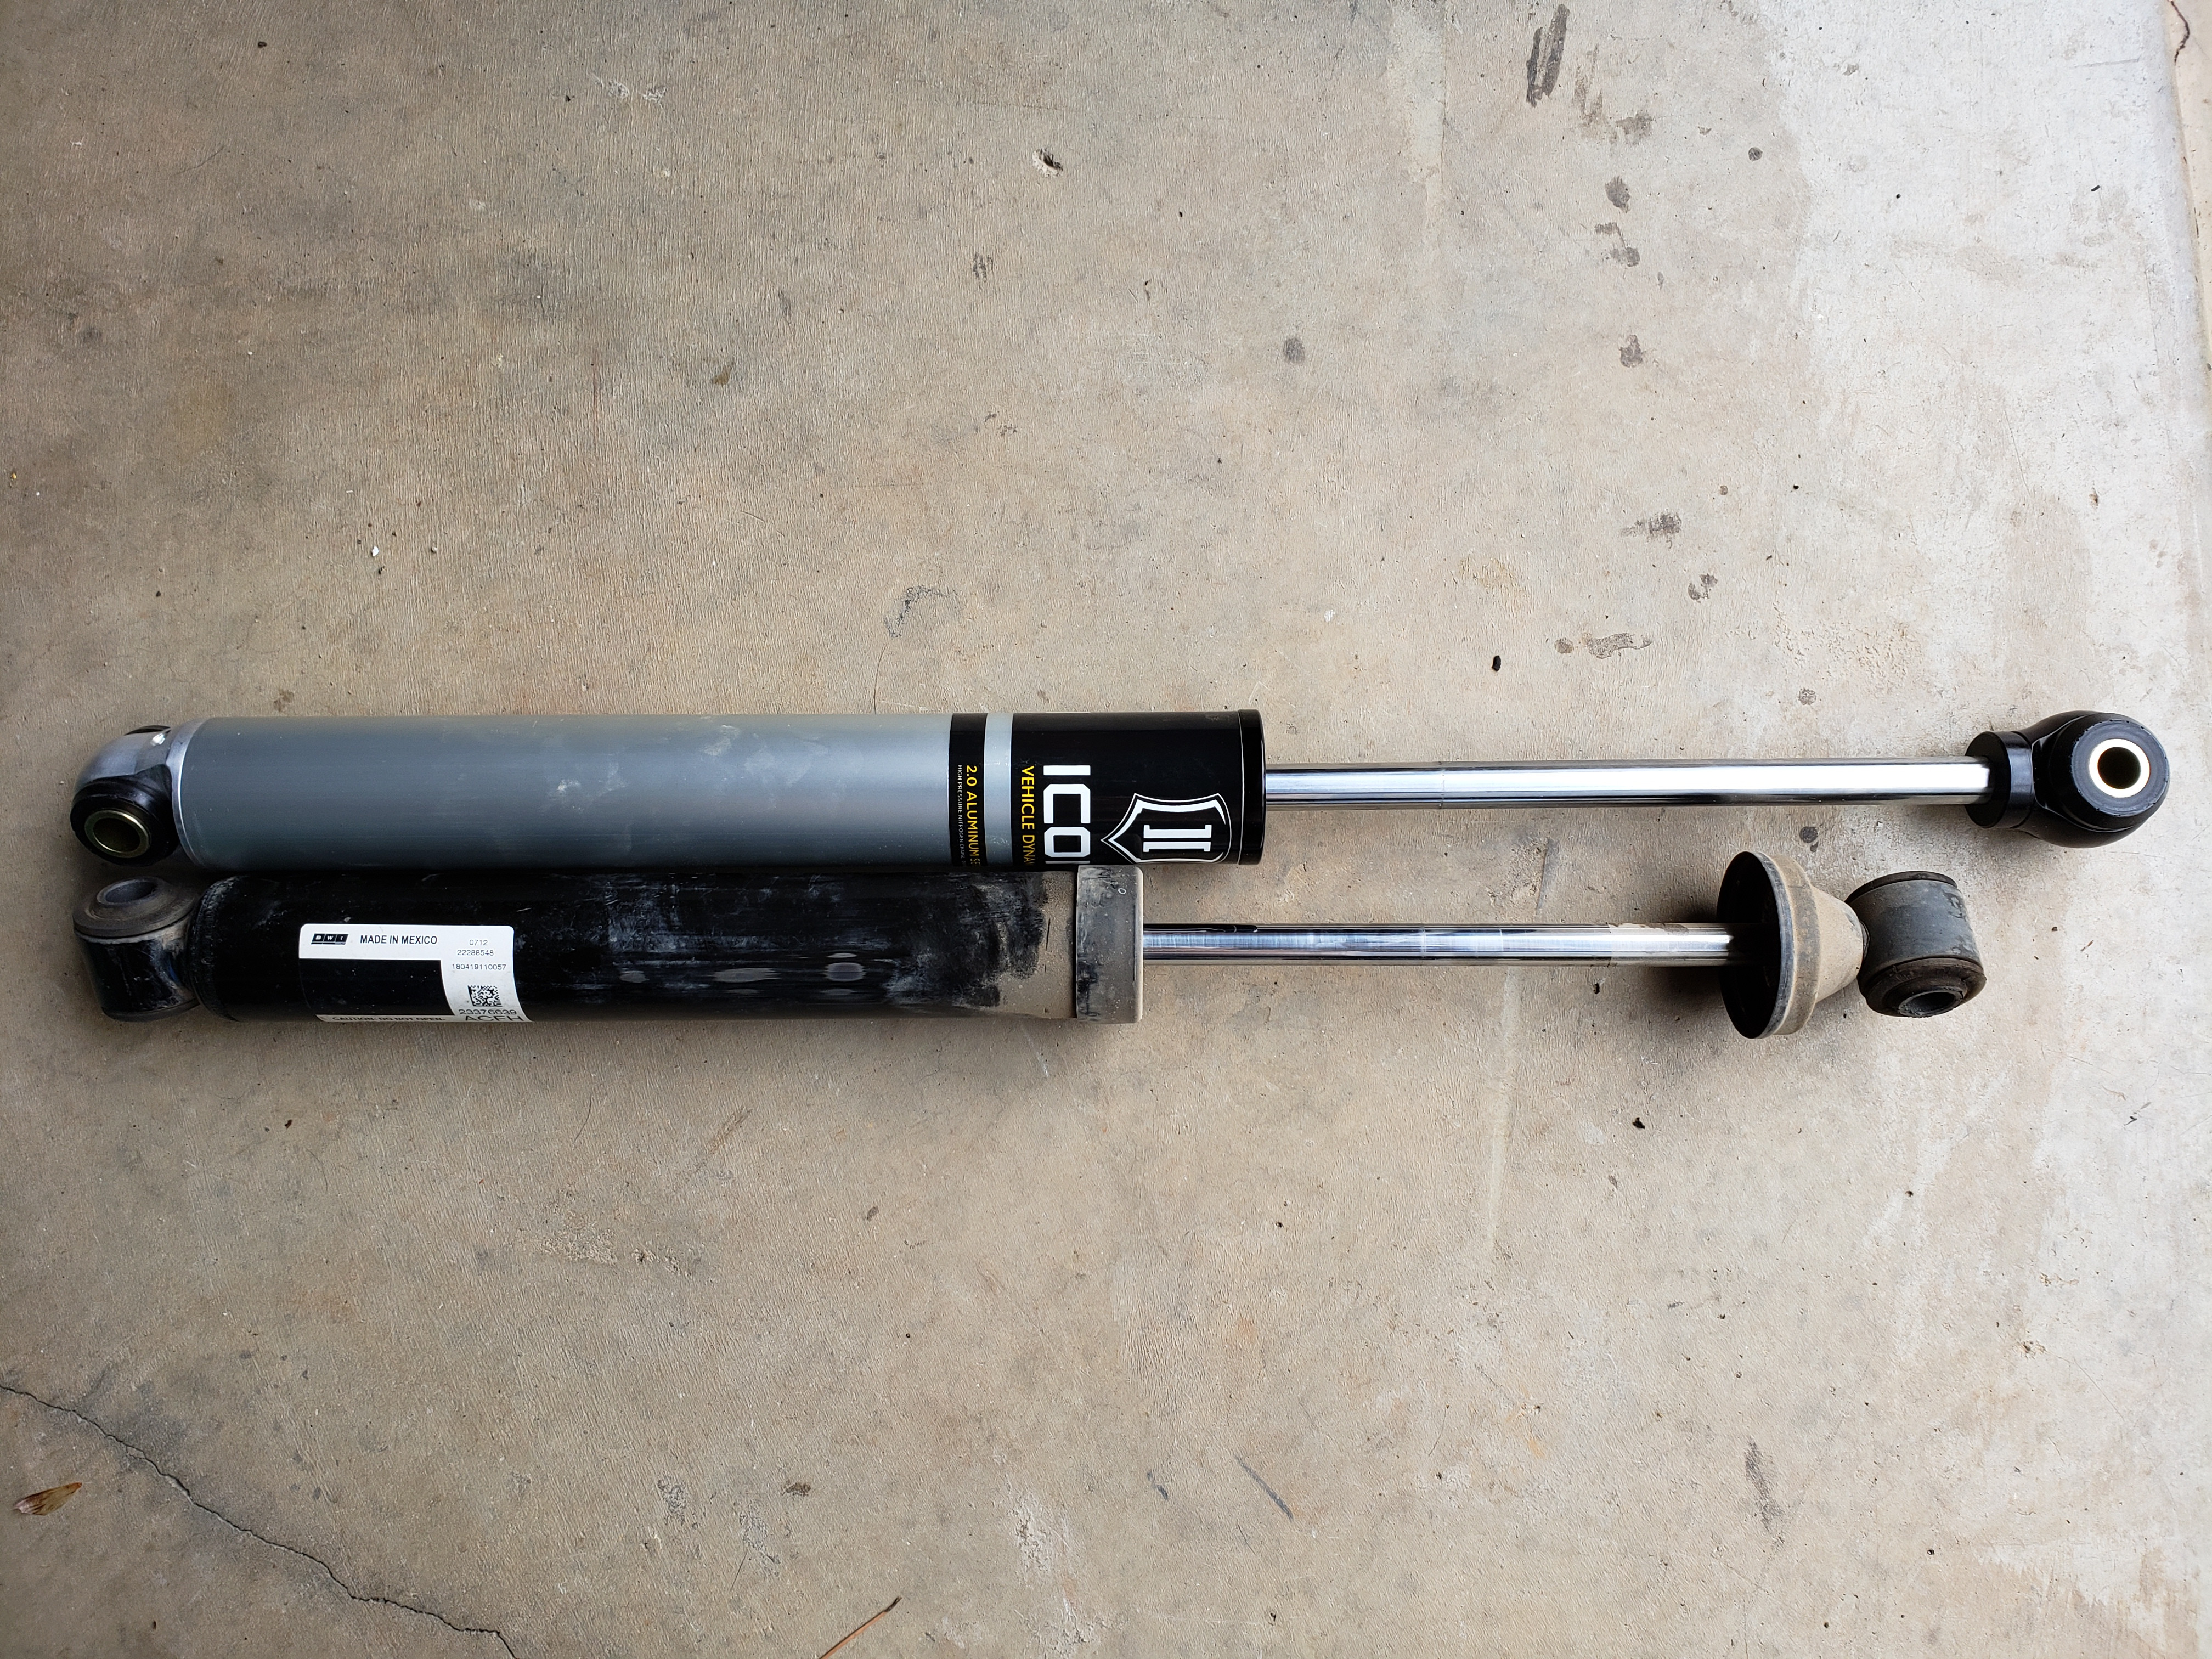
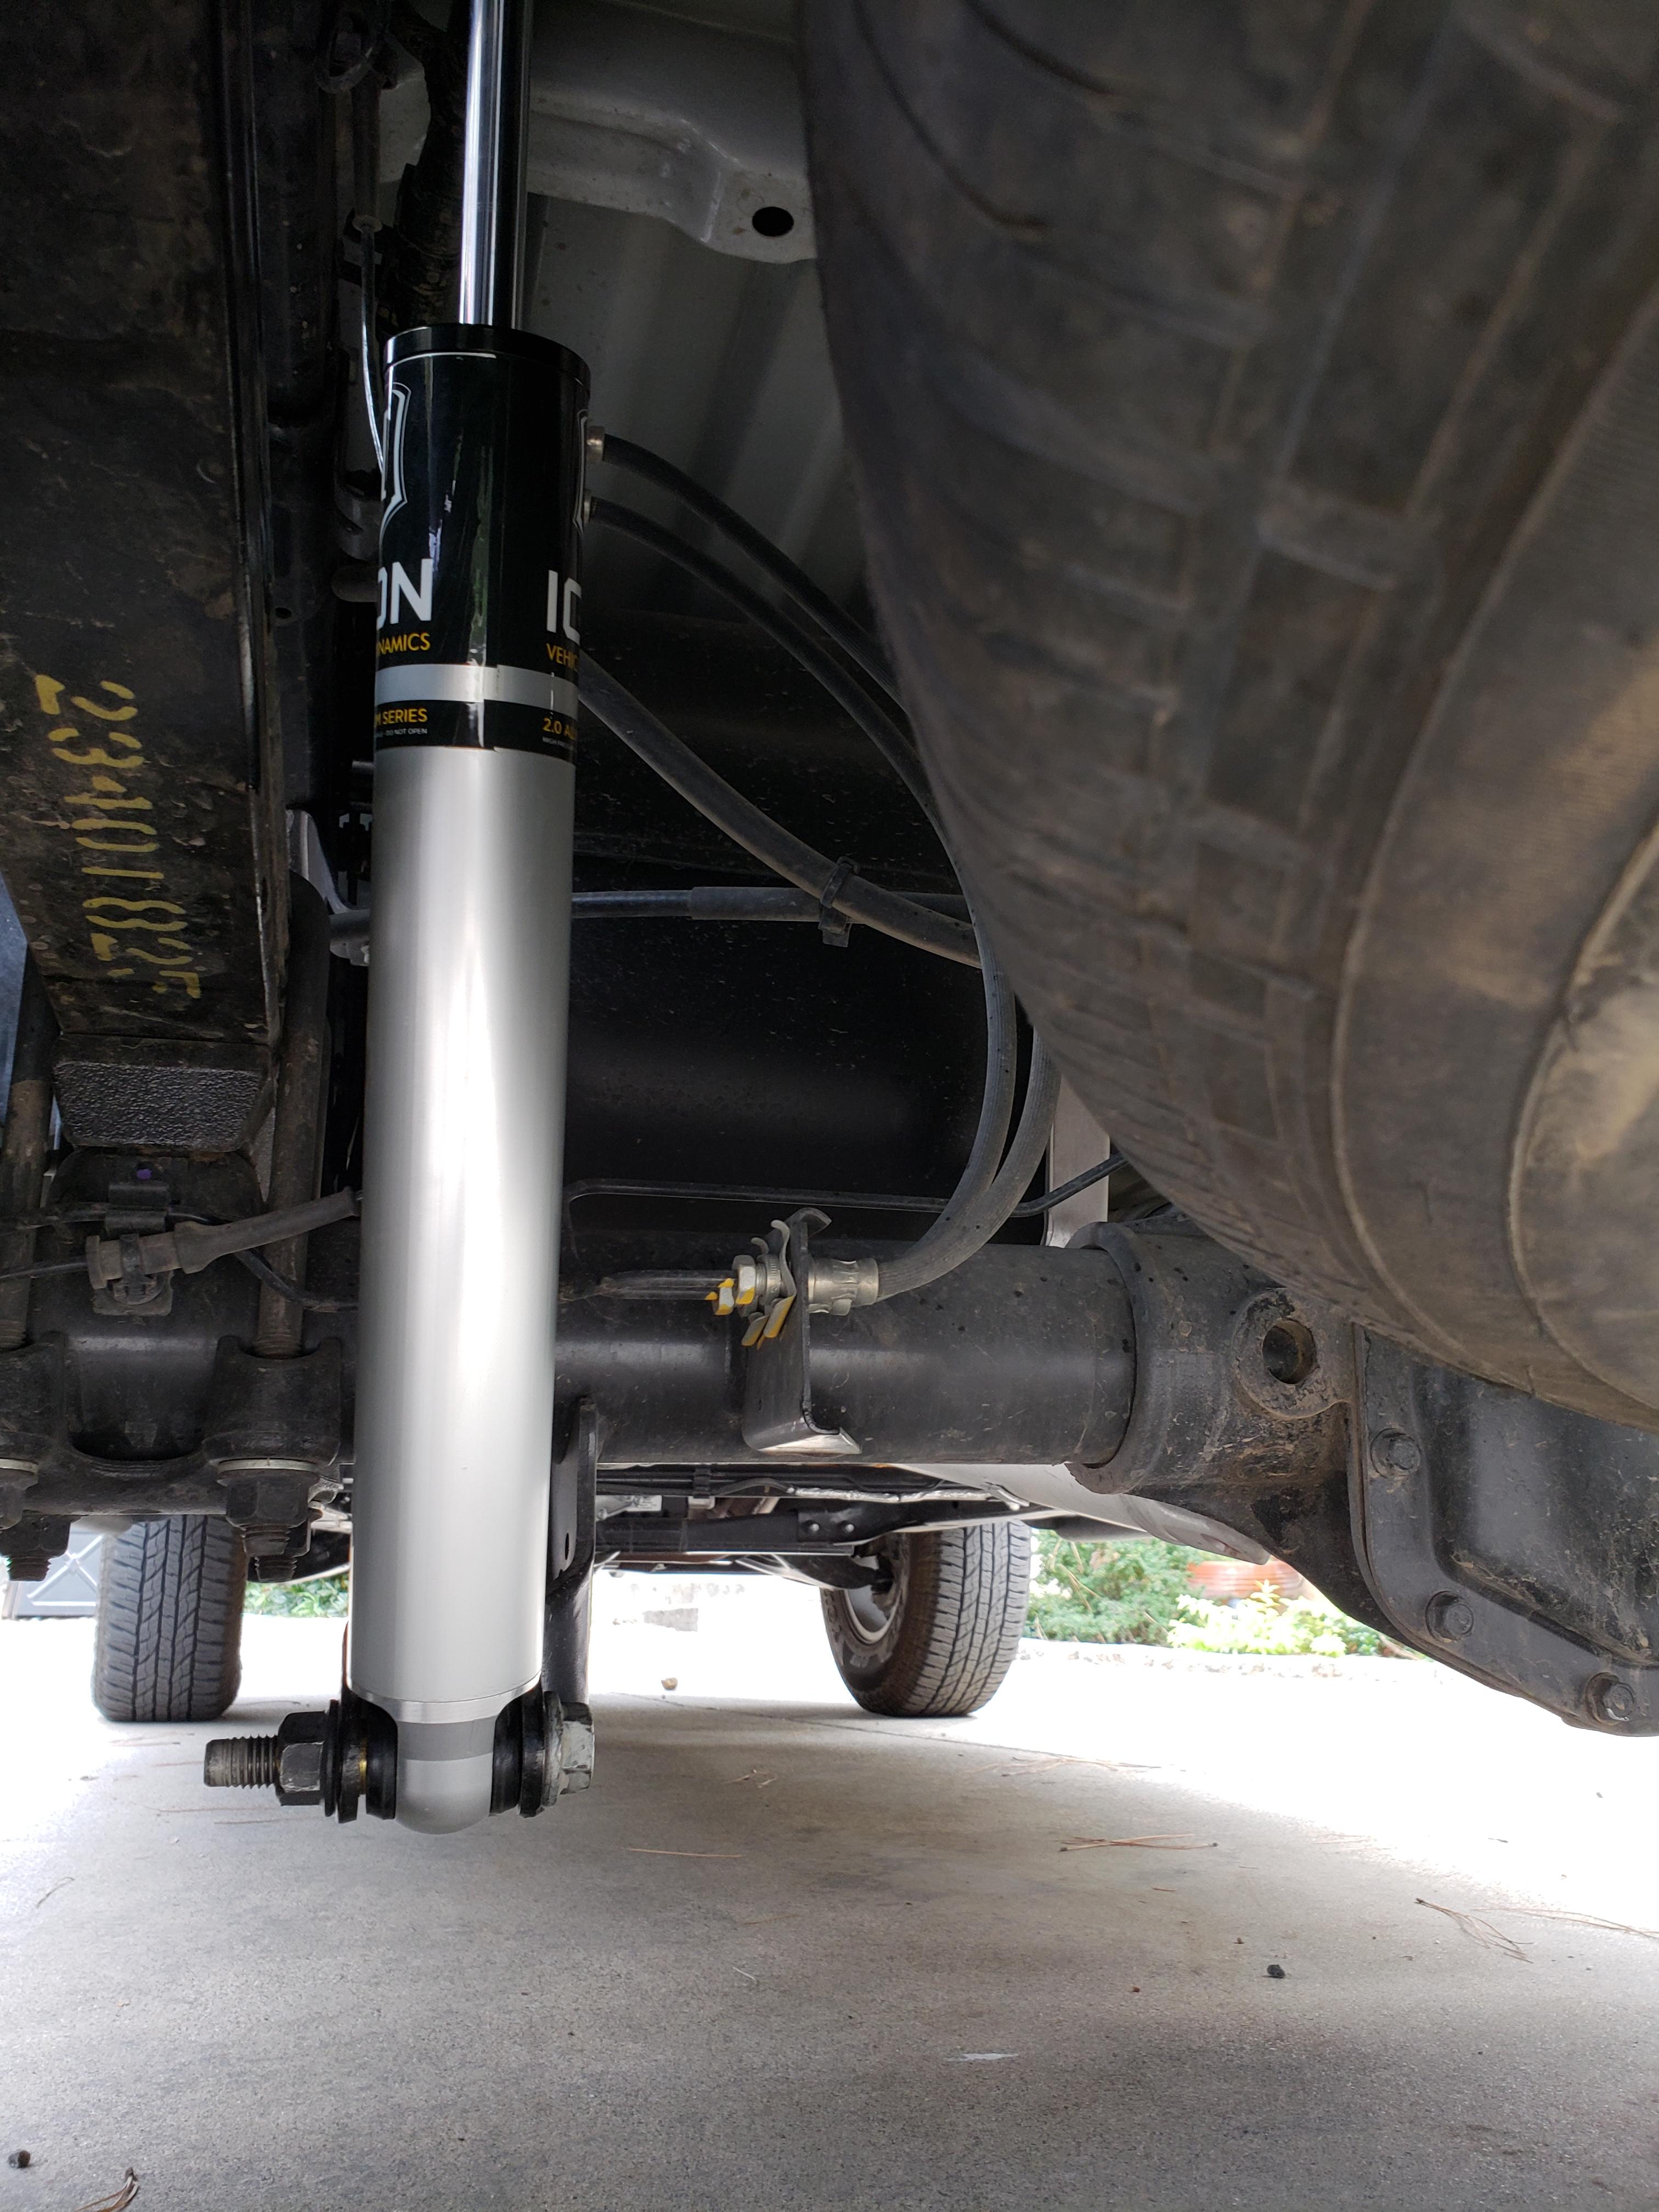
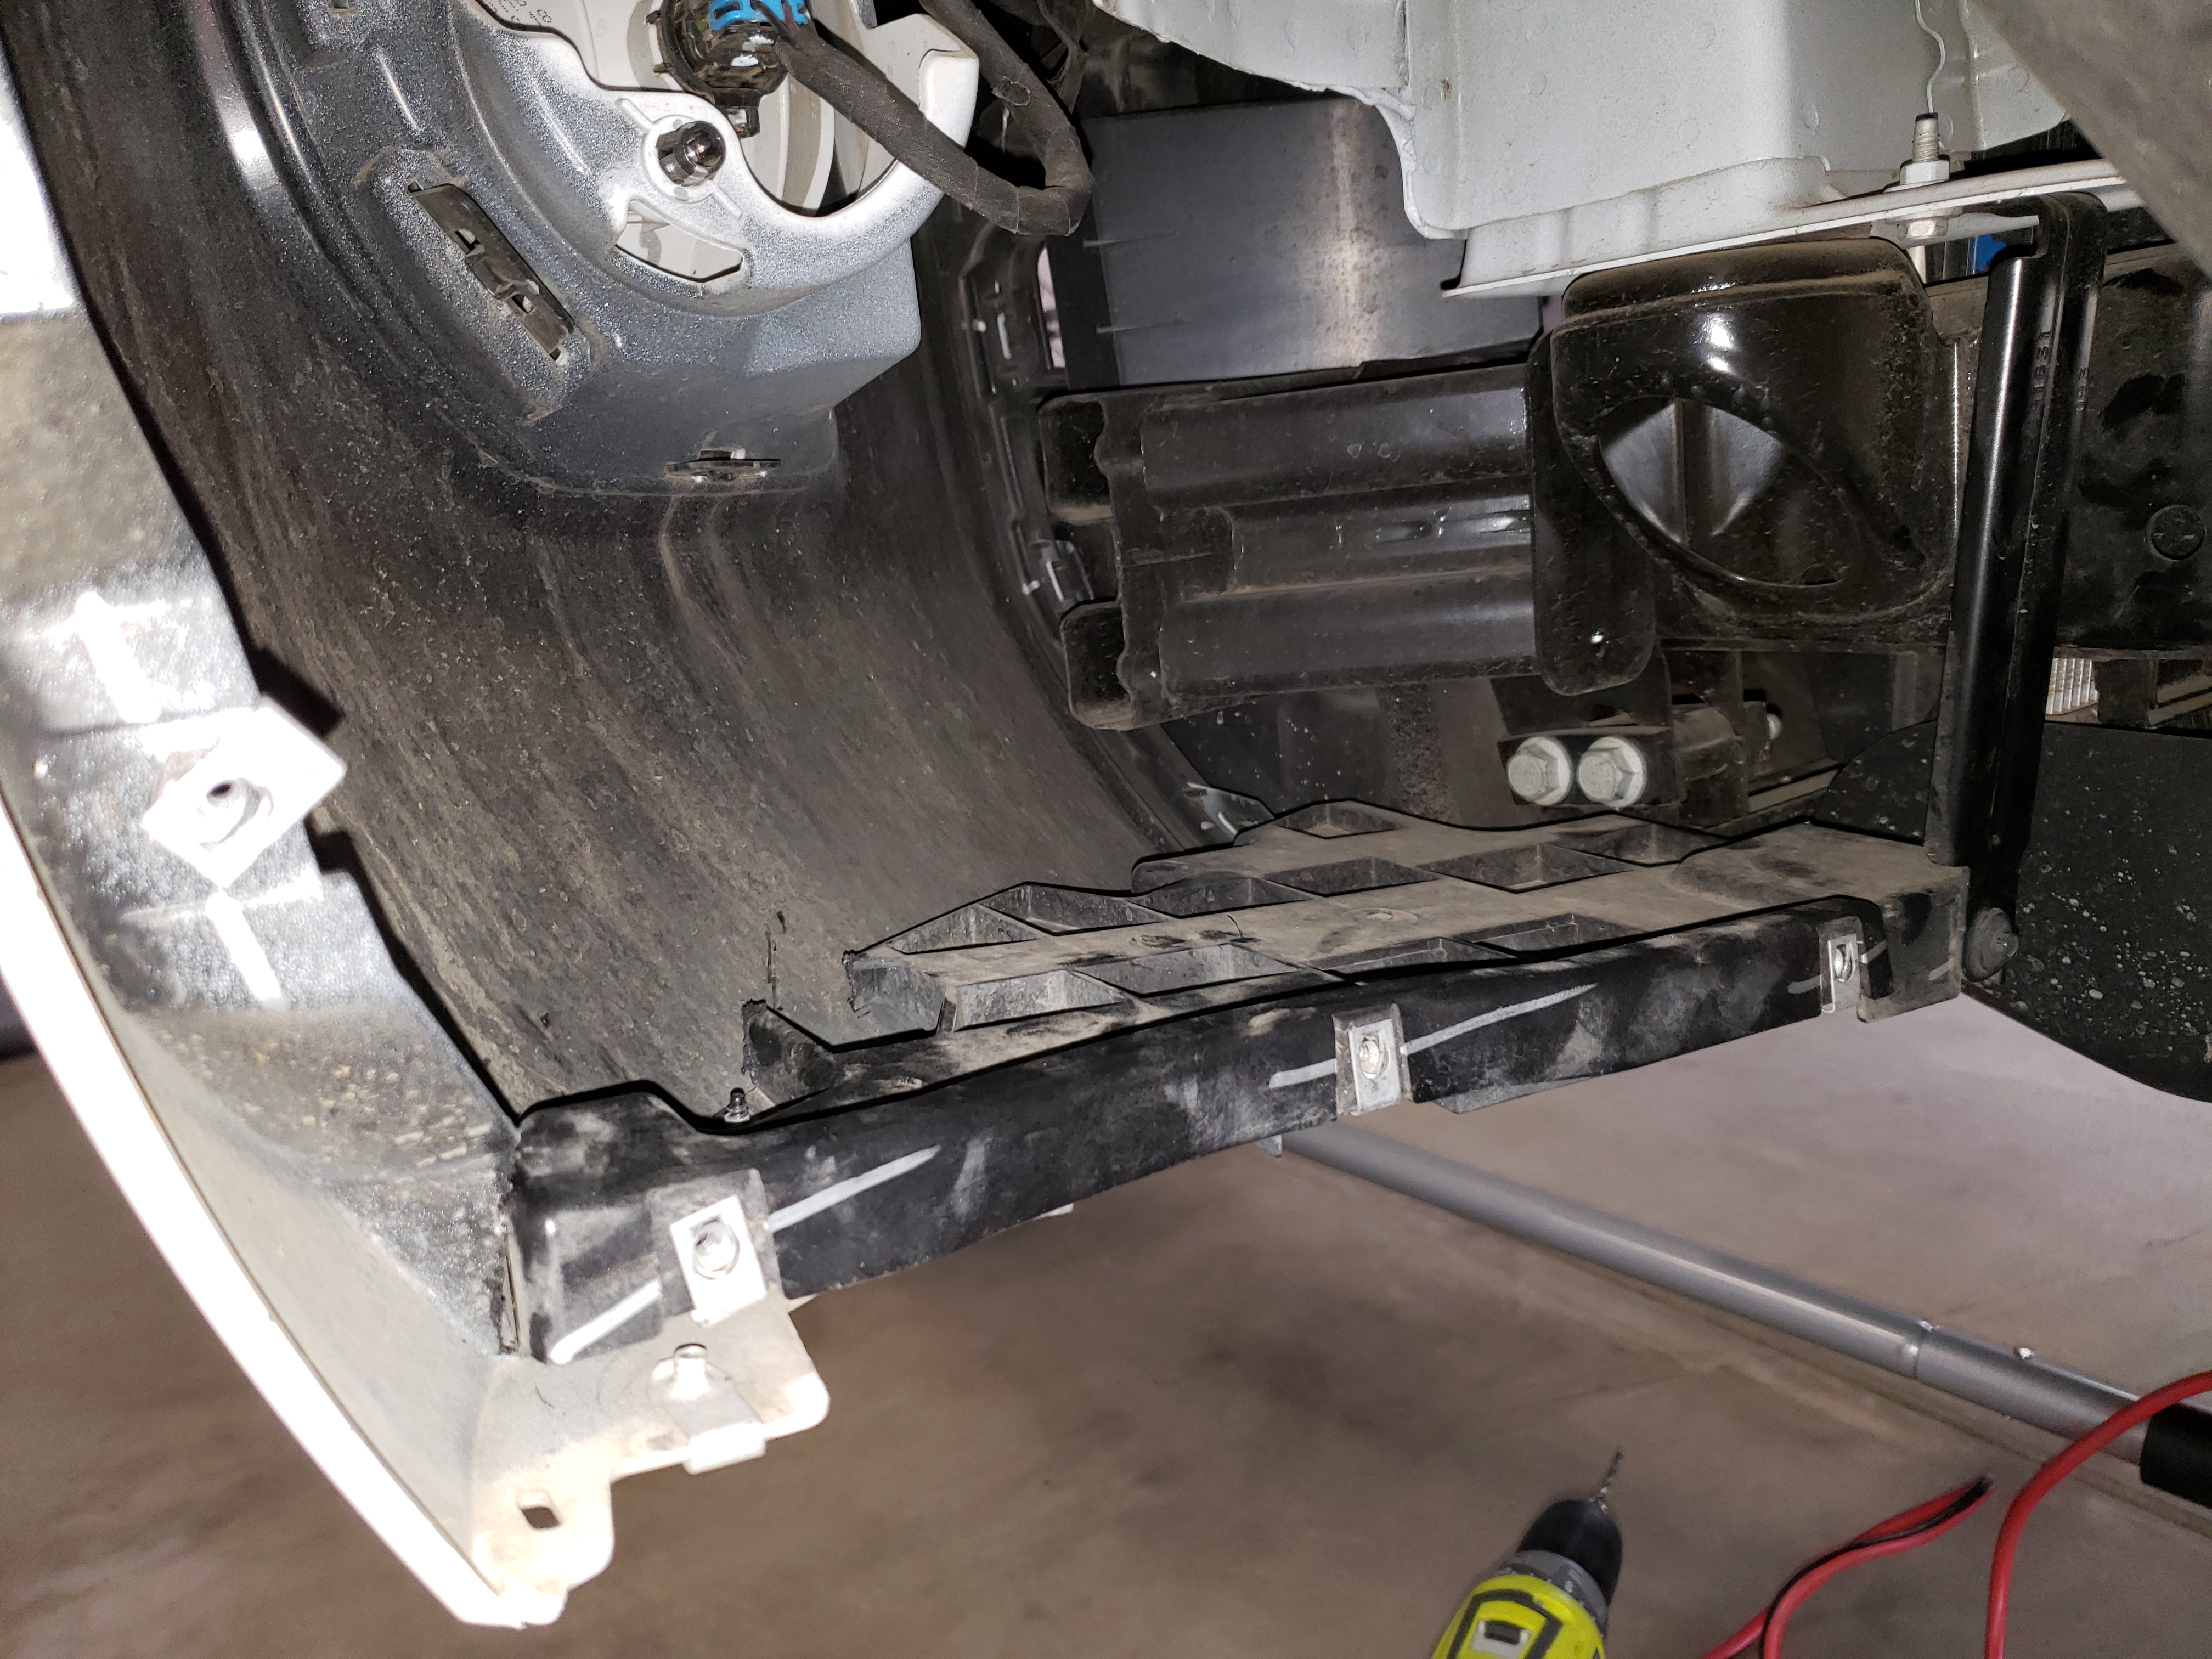
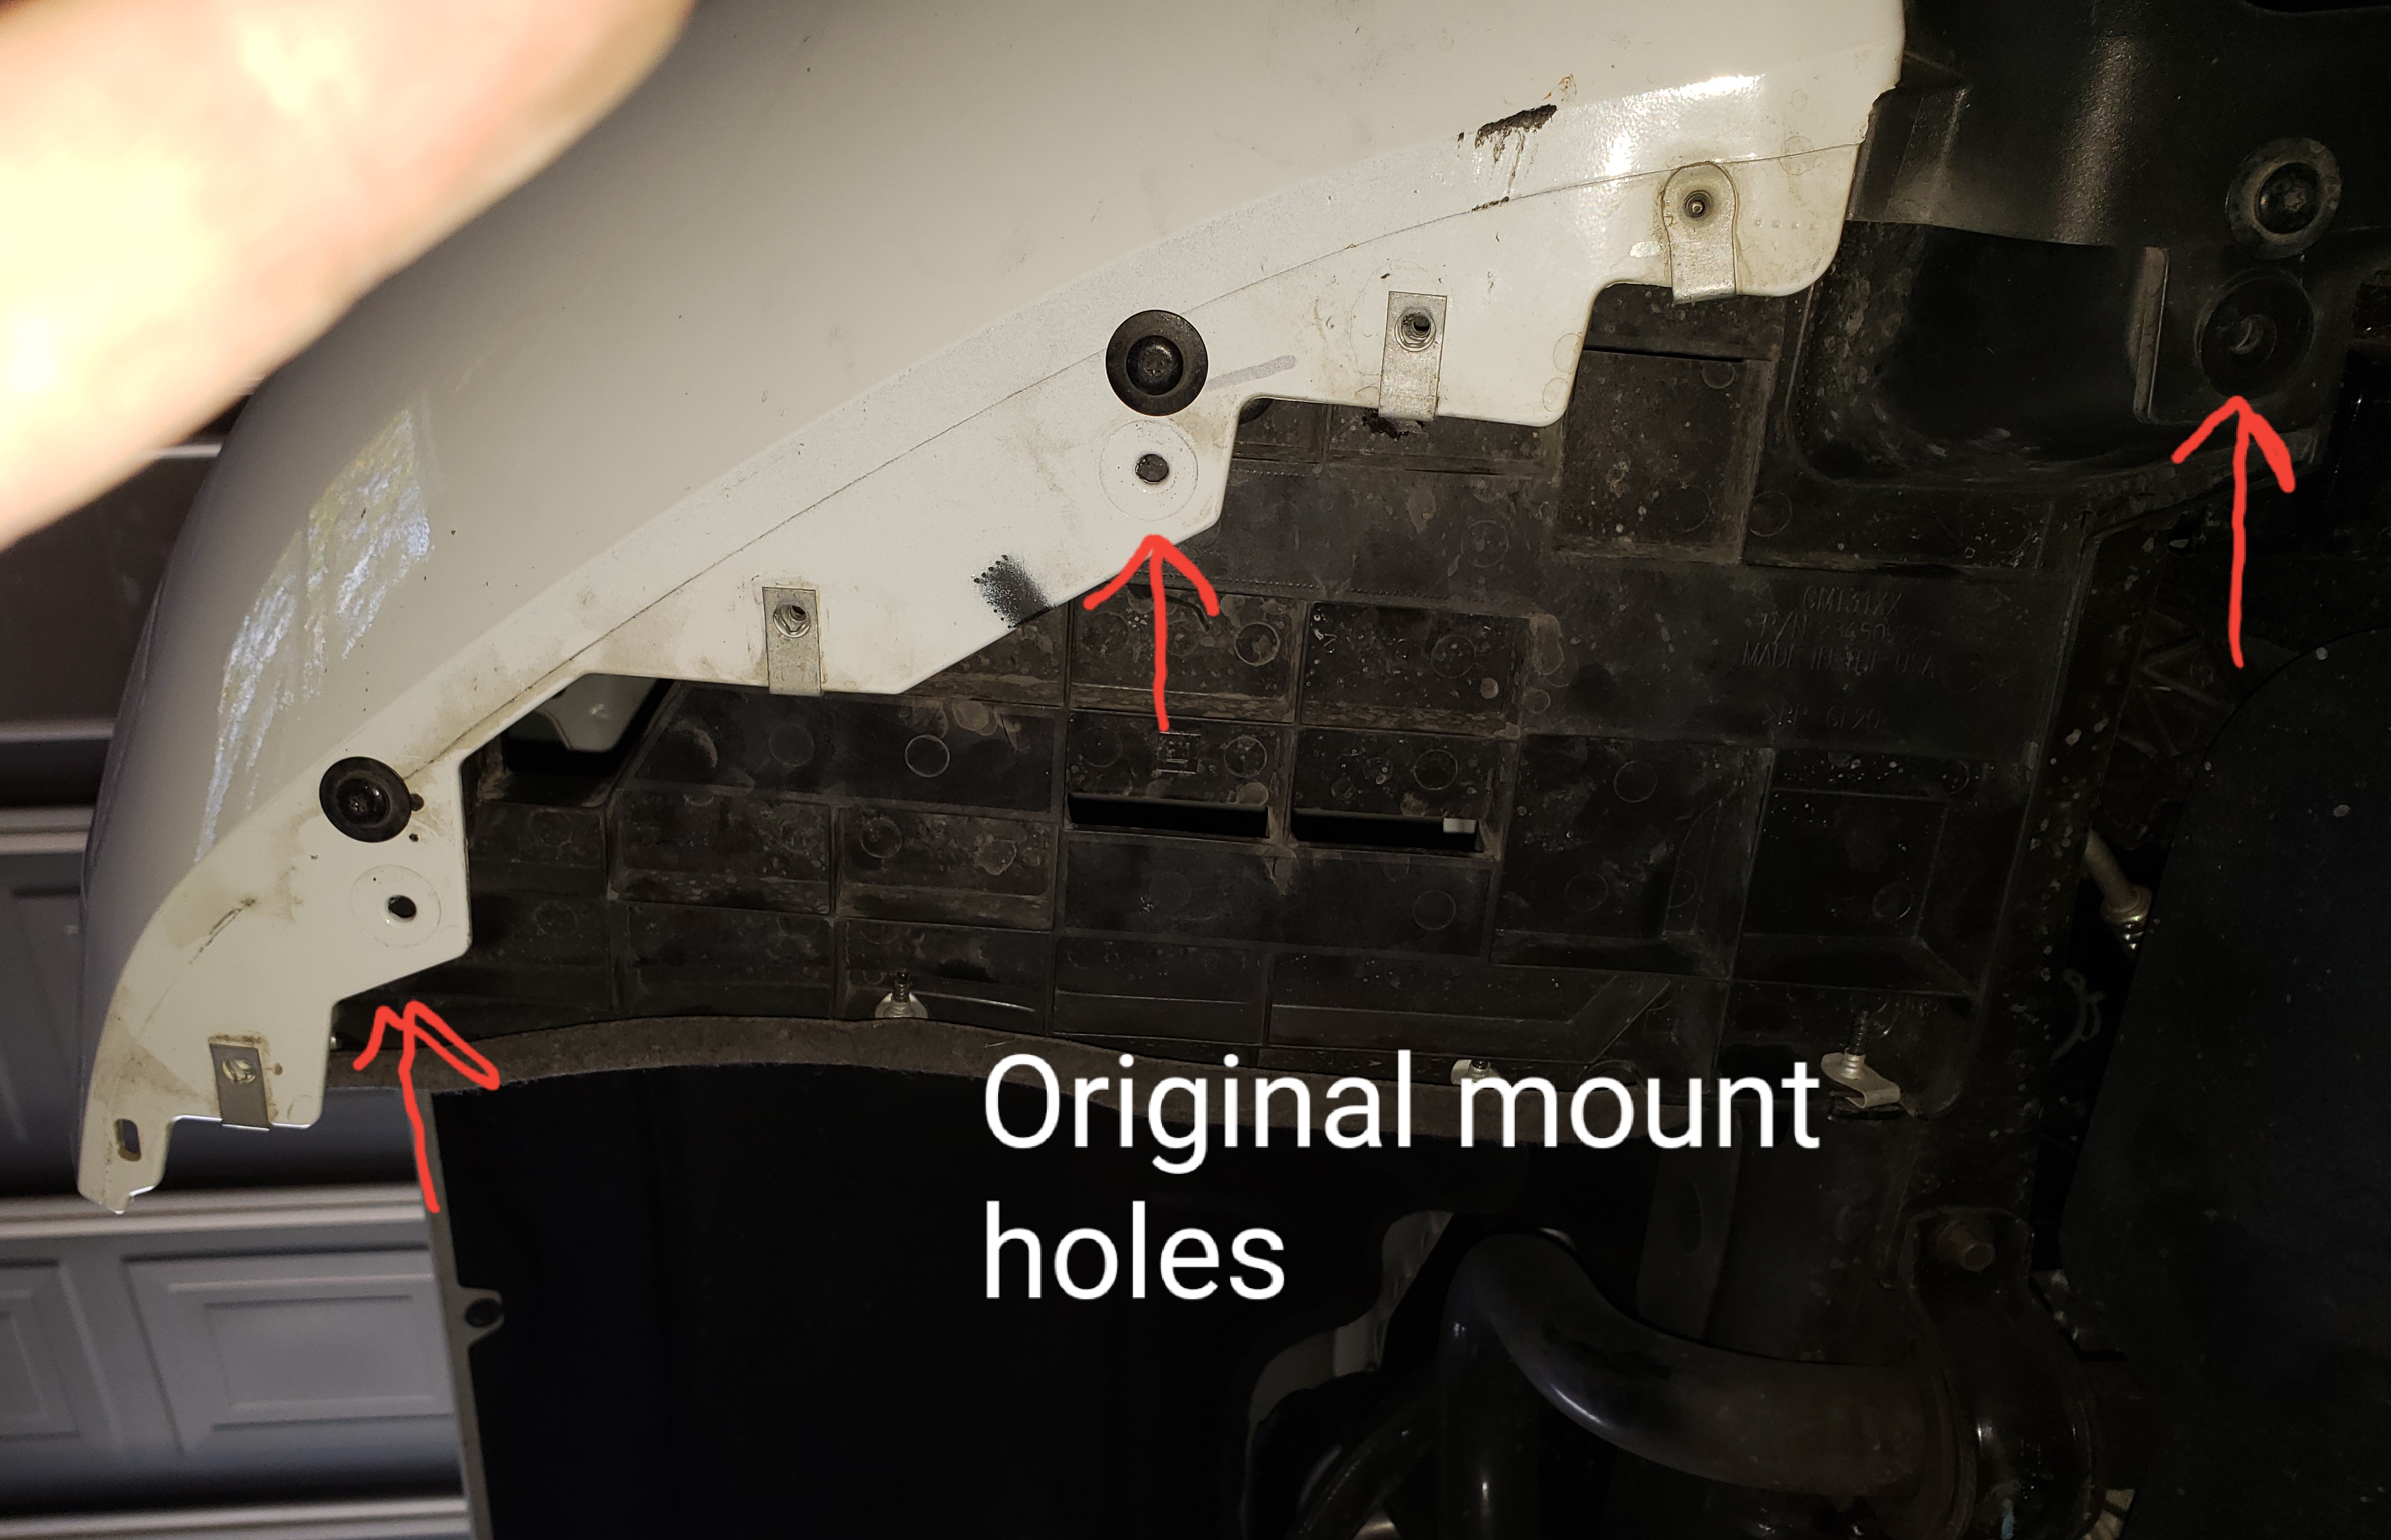
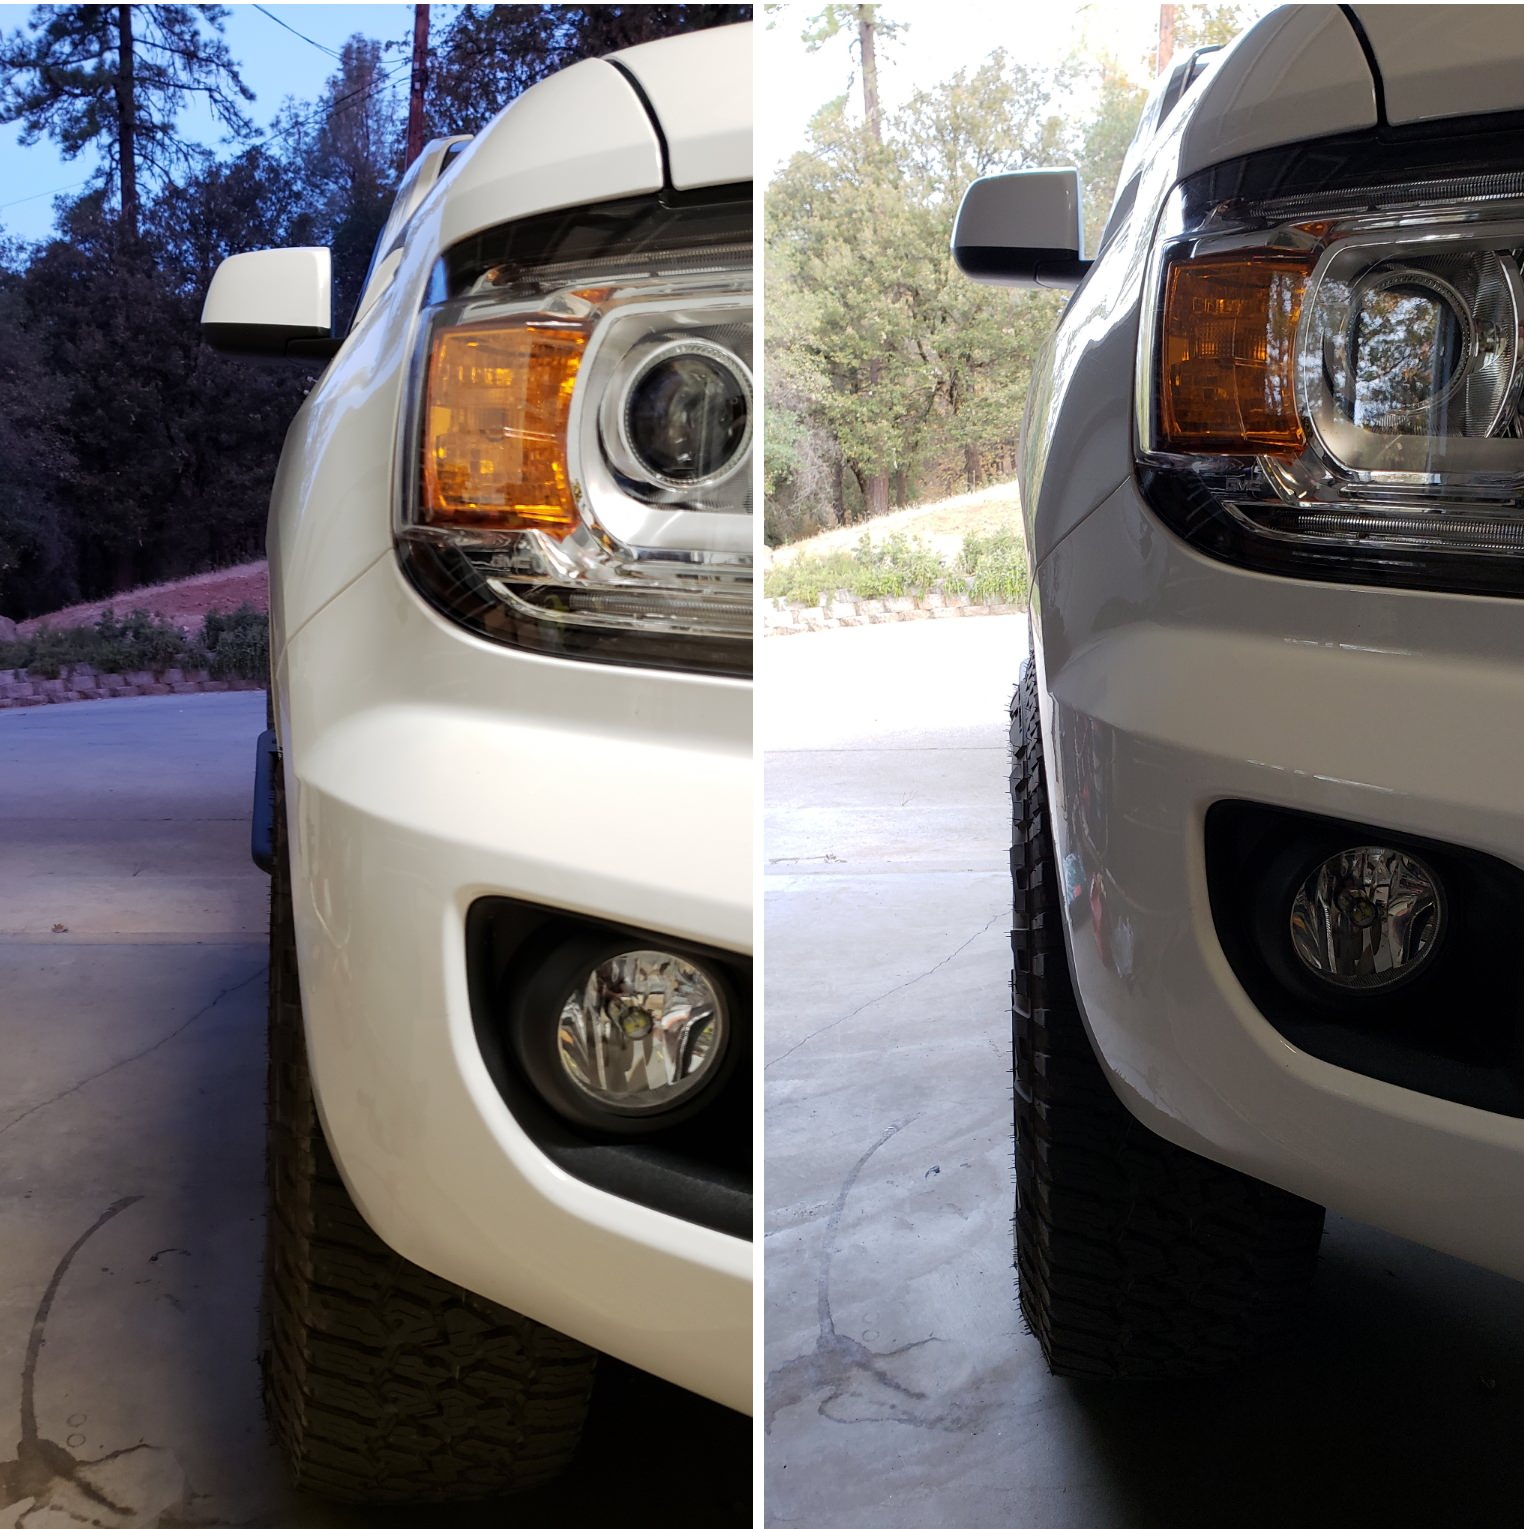
2018 GMC Canyon MTB/Overland/Adventure Rig

  • HTML tutorial

JCWages

Rank V
Launch Member

Pathfinder I

2,271
Grass Valley, CA, USA
First Name
Justin
Last Name
Wages
Member #

18693

I am doing a fuel economy test with my air dam removed/installed as well. With it on I got 26.0 mpg on the trip and 25.45 calculated by hand. Just started the air dam off portion. My driving is flat at sea level. 70% slow hwy driving and 30% around town. Starting on a cold drive train every 52mi or so. Most of the hey driving is 60mph with small 55 and 70mph sections.
What's the distance?
 

great08

Rank V
Launch Member

Member III

2,741
Elizabeth City, NC, USA
First Name
Martin
Last Name
Mitchell
OK. I am back home from work.

First pic was of the result of 3 days worth of commute. Actual pump calculation ended up being 25.45mpg... which could have been a different pump squeeze. I used the same pump for each and every refill so far. I have the 2018 Z71 4x4 V6 and aired tires up perfectly to 35psi @70-75degF

First section proof... Air Dam On

IMG_0520.JPG

Next two pics are of the Air Dam Removed. I noticed a good 2mpg difference @70mph. Not too much of a difference @ slower speeds of 60mph or less. I think the temps dropping over the last week made a difference. The next pic below was topping off a warmed drivetrain and doing the rest of the drive into work. Then the second pic is what my gauge read once parked @ home. So it looks like my drive is 52.7 miles each way. On the way home the outside temps dropped to 75degF and my fuel economy suffered as well. Starting my truck up Cold... reading 27mpg for the average... saw it drop RAPIDLY to 24.4mpg. Took the whole trip home to get the average back up to that 25.9mpg.

First Leg... Air Dam Off...
IMG_0632.JPG


Second Leg after starting from Cold... and running home in cooler weather(cold air is more dense/more fuel required to keep proper air/fuel ratio)

IMG_0633.JPG
 

JCWages

Rank V
Launch Member

Pathfinder I

2,271
Grass Valley, CA, USA
First Name
Justin
Last Name
Wages
Member #

18693

I installed the AutoSprings add-a-leafs (1" to 1.5") today. It's pretty straightforward. I had a little trouble getting the new longer bolts in place and managed to punch myself in the face HARD when a wrench slipped off the shock bolt. My nose didn't bleed because I was already lying down so #winning . I somehow ended up with a blood blister under my thumbnail as a result of some other part that didn't want to play nicely. :)

My main reason for this mod was to reduce the amount of rear sag when fully loaded for camping. Besides making the truck appear unbalanced I hate having to re-aim my headlights every time I want to load the truck up and I certainly don't like blinding oncoming drivers if I don't re-aim them.

Here it is with the RTT, Maxsa boards and a full tank of gas on level ground.

Suspension Mods: Eibach 2.7" front, 1" Silverado blocks and AutoSpring Add-a-leafs with 32" tires.

Passenger Rear: 39 1/2"
Driver Rear: 39 1/4"

*Measured from ground through center of wheel to bottom of fender


It doesn't appear quite so raked in person but if it looks out of control without the added weight of the rack-mounted gear (around 230lbs) then I can easily remove the 1" blocks to tame it a bit. :) I anticipate the rear to pop up another 1" when I remove the rack and tent which is how it sits for 1/2 the year.
 

JCWages

Rank V
Launch Member

Pathfinder I

2,271
Grass Valley, CA, USA
First Name
Justin
Last Name
Wages
Member #

18693

The Icon 2.0 rears showed up today and it didn't take long to get them on.


I had planned on measuring droop before and after but my jackstands are not tall enough to let the axle droop much with the wheels on and I'm too exhausted to remove and reinstall them. What I did find is the OEM shocks are near maxed out with the truck sitting on the ground. No wonder the ride was rough whenever the rear wheels wanted to drop. Note, I have 1" Silverado lift blocks and AutoSpring AALs so I have around 2" of lift in the rear.

This is the OEM shock with the truck on jackstands but the tires are resting on the ground lightly.


Same as above but with the Icon shock


OEM vs. Icon 2.0 shock length comparison. The Icons are designed for 0"-2" of lift. Most other shocks (for these trucks) are only 0"-1".


Installed


I'm a little concerned about their comment in the instructions about needing a crush washer or sleeve if the OEM shock uses a through bolt. Does this look right?


After I buttoned things up and took it for a test drive I fully expected the ride to be harsh after reading all the posts from anti-Icon folks but the shocks felt great. The ride felt more solid and damped in the rear. Small bumps could still be felt but they were more muted, less sharp and the axle didn't feel like it was ready to explode upwards when the rear tire dropped off bumps. This was a very short test drive so I'm not sure if all of this will remain true but for now I am impressed and happy with the purchase.
 
Last edited:
  • Like
Reactions: Willys_2014

JCWages

Rank V
Launch Member

Pathfinder I

2,271
Grass Valley, CA, USA
First Name
Justin
Last Name
Wages
Member #

18693

Love the bed rack, how much was that?
It was a simple custom job. He had some angle iron lying aound which formed the base and we ordered a length of 1" x 3" rectagnular tube steel to form the hoops. Later we added some flat steel between the hoops to mount stuff to but we need to weld in some extra support for those as the move too much when the RotoPax are full and mounted. For $60 and free labor I dare not complain.

I tried to clean the metal before applying bedliner in a can but I'm still fighting rust and flaking of the bedliner. Next time we do some welding on it I'll do a better job of "painting" it but for now it works. :)
 

JCWages

Rank V
Launch Member

Pathfinder I

2,271
Grass Valley, CA, USA
First Name
Justin
Last Name
Wages
Member #

18693

The Gen2 Colorado/Canyon wheel wells can fit a 255/75/17 (32.1") tire with no problems but when stepping up the width you quickly run out of room when turning the wheel left and right. To fit larger tires like a 285/70/17 (33") you need to trim back the pinch weld behind the tire in the front wheel wells as well as push the front fender liner forward. Those are the two areas that will contact a 33" tire on these trucks without a major lift. 33" is pretty much the standard "max size" we can do without more serious modifications.

Most people remove the "waffle" (large piece of plastic between the bumper cover and wheel well that the liner attaches to) and trim about an inch or so off it then ziptie the wheel well liner back on. I think that method looks a little janky so I loosely followed the technique another forum member used and simply drilled mounting new holes on the enderside of the bumper cover and pushed the waffle and liner forward. Still looks factory and I gained a little more than and inch or so of clearance in front of the tire which should do the trick.

I also caught the Discount Tire Direct eBay sale and picked up a set of Wildpeak A/T3W P285/70/17s for $592. If all goes well I'll be back in here tomorrow posting pics of the new tires. Yee!

Fender liner lifted exposing the "waffle". Most trim the back edge closest to the front of the tire then ziptie the liner in place because you've cut off the factory screw clips.


The liner is pushed inward and I retained all of the screws and factory mount points.


Viewed from underneath the front of the truck. You can see the original screw holes and the new ones. Don't mind the other clips. Those are for the factory air dam. I put it on for long trips. It's worth about 1mpg at high speed.
 

JCWages

Rank V
Launch Member

Pathfinder I

2,271
Grass Valley, CA, USA
First Name
Justin
Last Name
Wages
Member #

18693

Got the 33s put on today. They look pretty rad but you can definitely feel the weight in the steering wheel and the way the suspension behaves. It's not as spritely off the line either. It's all about tradeoffs though. My fender clearancing work made them fit perfectly but the OEM wheel offset is what's hurting me right now in the form of tire rub on the swaybar and the frame. So now I'm combing through forums looking for an easy fix that doesn't involve new wheels or thick wheel spacers. :)

She finally looks the way I want though! All my bed gear is off to make room for furniture hauling.


I chose to mount them with the raised lettering facing out. Looks more aggressive to me although most people mount them smooth side out.
 
  • Like
Reactions: Willys_2014

JCWages

Rank V
Launch Member

Pathfinder I

2,271
Grass Valley, CA, USA
First Name
Justin
Last Name
Wages
Member #

18693

I installed a Hypertech inline speedo calibration module to correct for the oversized tires. I've been using a Scangauge II to monitor my actual speed but with the 33s I noticed the truck isn't shifting quite as well and sometimes doesn't want to downshift when at WOT. The only way to adjust the ECU for upsized tires in our 2017+ trucks is through this module or a custom tune. So I found a used module for sale and figured I'd give it a try. So far so good.

I also ordered Bora 1.25" wheel spacers for the front to stop the tires from rubbing on the frame and sway bar. Just to be safe I ordered a sway bar drop bracket that lowers the sway bar to help flatten it out after a lift but it also shifts the whole bar forward a bit which might help with tire clearance. It's rubbing the bar and frame pretty hard even before full lock.


I just hope the spacers don't push the wheels outside of the wheel well too far. It looks good now so I don't want to screw it up. lol


  • Like
Reactions: Willys_2014

JCWages

Rank V
Launch Member

Pathfinder I

2,271
Grass Valley, CA, USA
First Name
Justin
Last Name
Wages
Member #

18693

Installed Bora 1.25" spacers up front to stop the tire from rubbing the frame and sway bar. I was worried the tires would poke too much but it actually looks good. Now I'm rubbing on the back of the wheel well so I need to trim more.


Power seats are rad. lol
 
  • Like
Reactions: Willys_2014

hamiltonj2w1

Rank 0

Traveler I

Are you still liking those ICON Shocks? I am getting ready to order the 1" Rough Country front Spacer and the ICON 1" rear lift block and some Fuel D579 Vectors in 17X8.5 +7 and put my 265/65 Duratracks on them. Hopefully the tires won't look to small..... They shouldn't considering they are what comes on the ZR2. Need to keep some rake for towing.
 
Last edited:

JCWages

Rank V
Launch Member

Pathfinder I

2,271
Grass Valley, CA, USA
First Name
Justin
Last Name
Wages
Member #

18693

Are you still liking those ICON Shocks? I am getting ready to order the 1" Rough Country front Spacer and the ICON 1" rear lift block and some Fuel D579 Vectors in 17X8.5 +7 and put my 265/65 Duratracks on them. Hopefully the tires won't look to small they shouldn't considering they are what comes on the ZR2. Need to keep some rake for towing.
I think they work well, especially at speed on washboard roads. They keep the rear planted WAY better than the oem shocks which would cause the rear end to skip around dangerously. If you want a somewhat softer shock you can go with Fox but get the Silverado shock which is longer.
 
  • Like
Reactions: hamiltonj2w1

hamiltonj2w1

Rank 0

Traveler I

I think they work well, especially at speed on washboard roads. They keep the rear planted WAY better than the oem shocks which would cause the rear end to skip around dangerously. If you want a somewhat softer shock you can go with Fox but get the Silverado shock which is longer.
That is good news because I notice the rear of my truck doing that as well even while pulling my camper on forestry service roads.
 

JCWages

Rank V
Launch Member

Pathfinder I

2,271
Grass Valley, CA, USA
First Name
Justin
Last Name
Wages
Member #

18693

That is good news because I notice the rear of my truck doing that as well even while pulling my camper on forestry service roads.
I just read a report from a friend who put the Fox Silverado shocks on the rear and he said it is very well planted and soaks up bumps at speed but that the ride is very firm. With only a 1" lift in the rear you have a bunch of shocks to choose from. At 2" it becomes very limited unless you step up to a Silverado shock but that may be stiffer due to our lower weight. Honestly I think the Icon or Fox will work well for your setup. You can PM @nubbins on coloradofans to get his take on the Fox shocks in the rear. I'm surprised he reports they are very firm.
 
  • Like
Reactions: hamiltonj2w1

JCWages

Rank V
Launch Member

Pathfinder I

2,271
Grass Valley, CA, USA
First Name
Justin
Last Name
Wages
Member #

18693

I cut more out of the rear of my front fender well to make room for the big tires. We have a ton of room in there but the stupid plastic trim piece is sort of a pain to work with. It is hard to melt and reform without it looking like crap and the little plastic clips that hold it to the body break easily. Once I get it formed and have enough clearance I will probably buy a new set and mold those for a cleaner look or maybe just cut them off after the first screw entirely if I can do it and avoid dirt/mud building up behind the felt liner.

Here is what I did on the passenger side.


Here is what it looks like after cutting and bending. I gained about 1/2" or a little less.


With the trim piece reinstalled. Cutting off the trim piece after the first screw could yield another 1/4" or even more. Melting the trim piece to better conform to the newly cut areas will increase clearance but it's hard to melt and bend without marring the plastic. I'm sure this can be done cleanly but it's hard when you are trying stuff for the first time.
 

JCWages

Rank V
Launch Member

Pathfinder I

2,271
Grass Valley, CA, USA
First Name
Justin
Last Name
Wages
Member #

18693

Besides the honey-do list I snuck in just enough time to try out rubber "shims" between the top 2 leaf springs to stop the rear end clunk I get when articulating entering/exiting driveways and parking spots with dips. It has worked for a bunch of other Colorado/Canyon owners. I also installed LEDs in my backup lights. Figured I'd try a different style than I used in my 2016.

1/8" rubber sheet cut into 2.5" x 6" strips then glued on one side and inserted between the first two leafs.


JDM LEDs for the reverse lights.


And finally measured the rear fender height without anything in or on the bed. 29psi in the rear tires.
 
  • Like
Reactions: Jimmy P

JCWages

Rank V
Launch Member

Pathfinder I

2,271
Grass Valley, CA, USA
First Name
Justin
Last Name
Wages
Member #

18693

Finished my honey-do list and decided to paint the chrome window trim. It's easy they said. It'll be fun they said....

Broke a damn clip.


It's cold and raining so I broke out the Heater Buddy to help dry the paint. :)


A few hours later

I REALLY hate painting......

I did a crappy masking job on the window trim and when I peeled the tape off I could see stripes of chrome. So I re-taped the bad areas and sprayed them again and somehow ended up spraying about 8" of rubber above the chrome where I didn't mask. mothe%^&&^$#!

I'm going to try removing the "overspray" with rubbing alcohol today. Next time I'm just going to remove them and have a real painter do the work. lol


Last edited:

JCWages

Rank V
Launch Member

Pathfinder I

2,271
Grass Valley, CA, USA
First Name
Justin
Last Name
Wages
Member #

18693

While trying to diagnose some of my clunking issues, the local mechanic shop (Applegate Garage) bent this bracket down a bit to extend the brake line when the rear reaches max droop. They were pretty maxed out with the truck on the lift and the rear end hanging. It bends easily be hand and provides a little extra insurance. Check the thin black hose clipped on the frame (in this photo it looks like it's touching the shock) while you're down there. Mine was stretched bad so we readjusted it by loosening the clip, pulling the tubing down and reclipping it.