2009 Hummer H3 Alpha

  • HTML tutorial

MarkW

Rank V
Launch Member

Advocate II

2,566
Member #

773

This is the build thread for my H3 Alpha. I didn't start a build thread until about a year ago so not much detail on what was initially done.

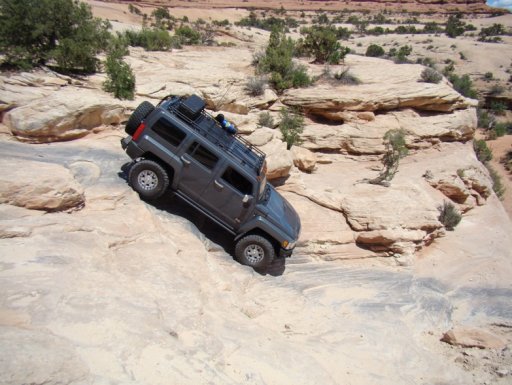
It's a 2009 H3 Alpha with Adventure and Lux packages. Stock the Alpha package gives you the 5.3 liter V8 and the Adventure package gives you front and rear lockers, 4:1 low range transfer case and 33" tires.

The day I brought it home from the dealer.

dayoneside.jpg

dayonerear.jpg

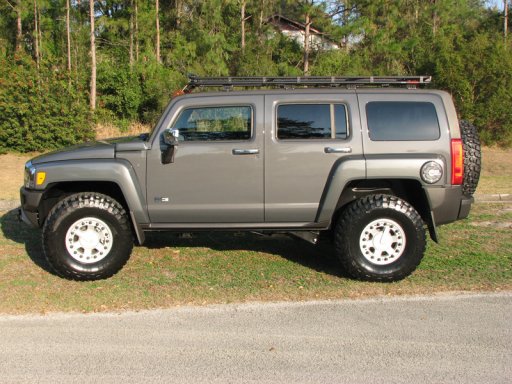
Couple of days later leveled out with extended bump stops and Bilstein 5100 shocks up from and the OEM rock rails installed.

leveled.jpg

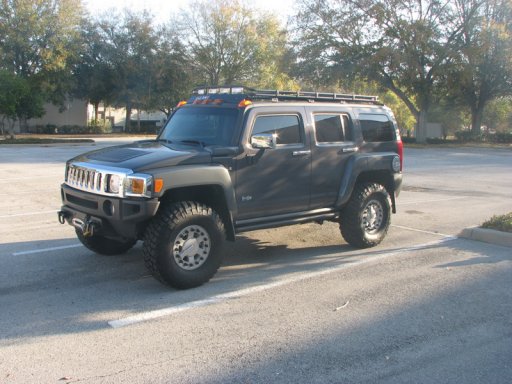
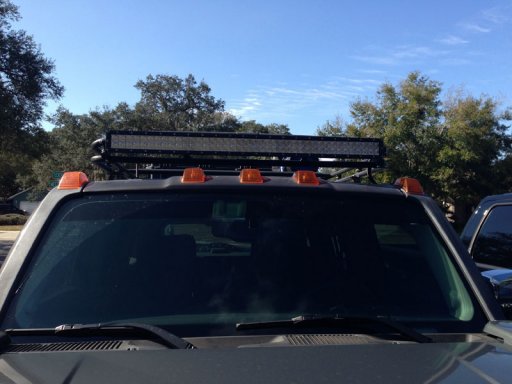
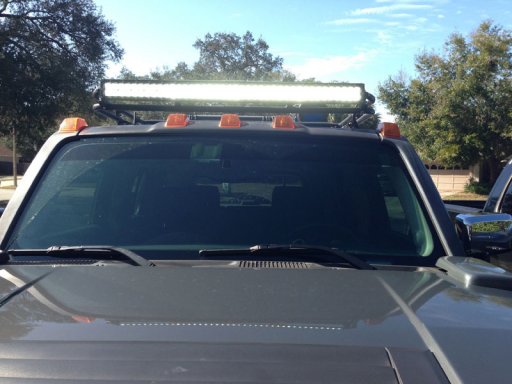
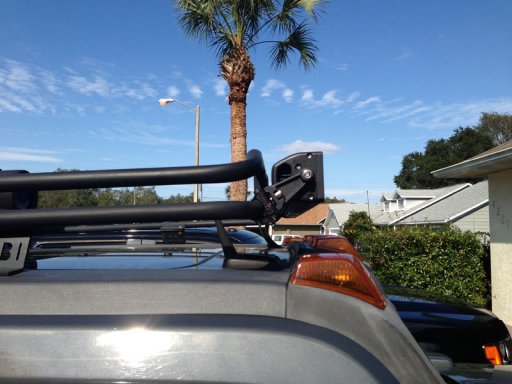
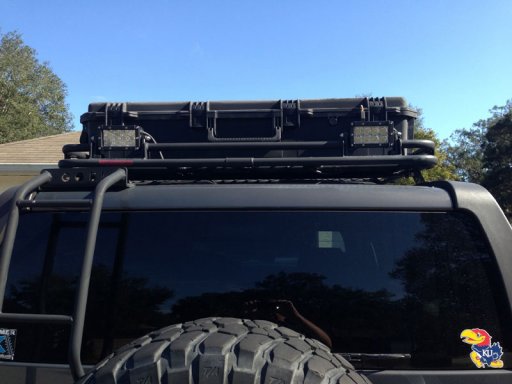
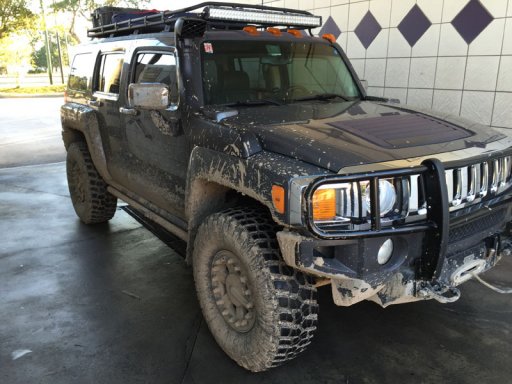
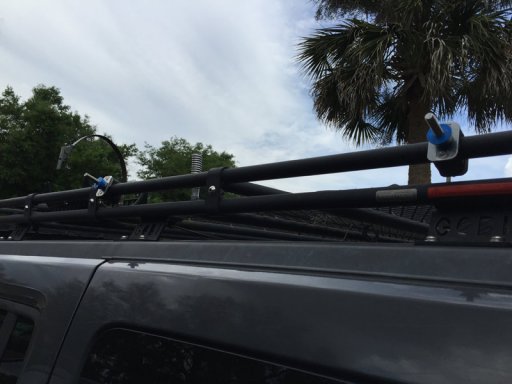
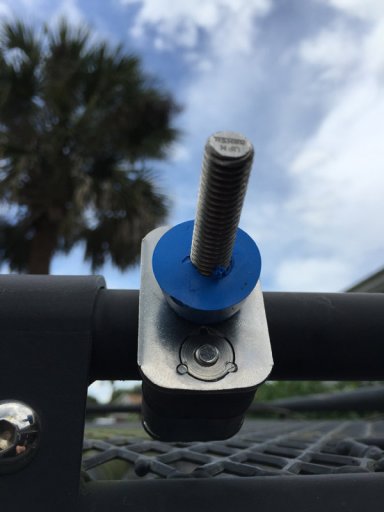
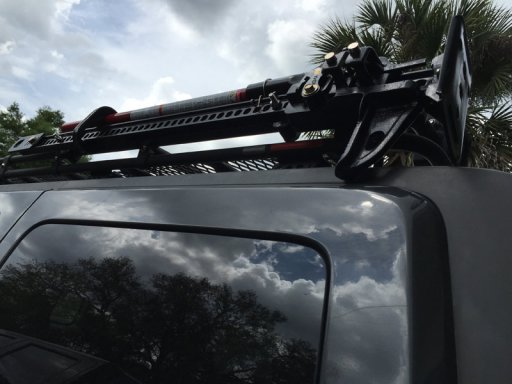
Part of the deal when I traded my '06 H3 Adventure was the dealer transferred the Gobi Stealth rack, DOI winch bumper w/TMax 10K winch and synthetic line as well as the UCP over to the Alpha for me before I took delivery.

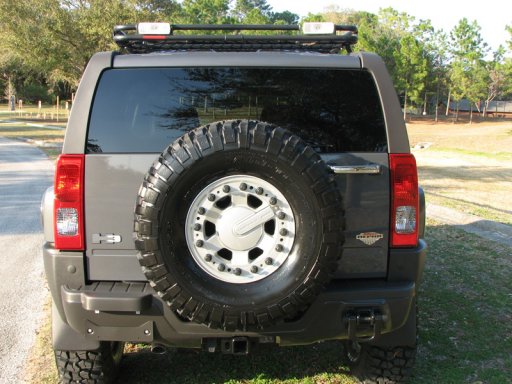
They also mounted the BFG 35" (315/75/16) KM2 mud terrains on Hutchinson dual beadlocks made to look list factory H3 wheels. They also installed TOMP low profile rear shock mounts which I provided before delivery.

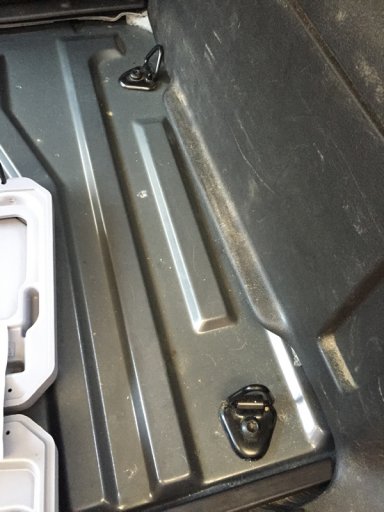
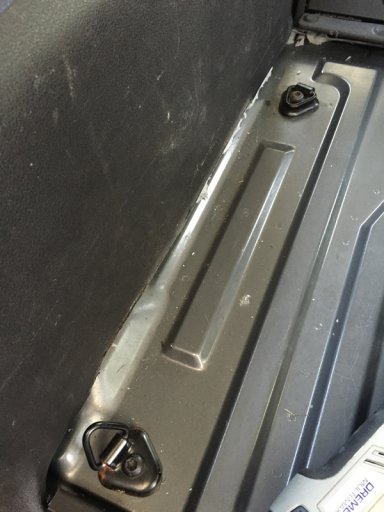
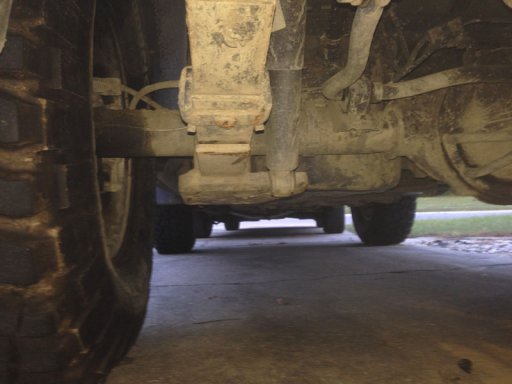
Shot of the TOMP shock mounts from 2014 after 5 years of use.

TOMPshockmounts.jpg
 
Last edited:

MarkW

Rank V
Launch Member

Advocate II

2,566
Member #

773

Before heading to Moab UT in June 2009 I added a few more items. To carry spare parts and tools I installed a Pelican case to the Gobi. These are extremely well made and water tight cases. In the 5 1/2 years I had it up there not once did I ever have any signs of water getting in and we have some serious thunderstorms down here. For air I purchased a 10lbs Power Tank and also mounted it to the Gobi. Not really visible but for comms I went with a Cobra 75 CB. I decided to go with the 75 because all the controls are on the mic and the guts can be installed hidden away behind the stereo bezel, nice and clean.

pelican case.jpg

powertank.jpg
 
  • Like
Reactions: Luis Merlo

MarkW

Rank V
Launch Member

Advocate II

2,566
Member #

773

In December of 2012 I decided to change out the PIAA light on the Gobi for LED bars. On the recommendation of Phil at Trail Duty I went with an Alien 40" bar for the front and a pair of 4" bars for the back.

I went with the 40" because it would fit within the Gobi which would help protect it to some degree.

LED Front.jpg

LED Front on.jpg

It does sit forward of the rack slightly. I also needed to modify the Gobi fairing to by notching it slightly to accommodate the mounting brackets for the LED bar. After running without it for a while I decided to leave it off as there is less wind noise without it.

LED Front Profile.jpg

LED Rear.jpg

LED Rear On.jpg

Will have to take a pic and add but also took a pair of Alien LED pods which I mounted on clamps and wired about 6' each of wire to a switch and 12V plug. I use them when camping or if I need a work light. With the clamps I can mount them anywhere on the Gobi or on the hood if working on the engine to get light where I need and being LEDs they use very little power.
 
  • Like
Reactions: Luis Merlo

MarkW

Rank V
Launch Member

Advocate II

2,566
Member #

773

Around October 2014 I added a Sherpa Snorkel and a brush guard.

About to get a bath after playing.

Snorkel.jpg
 
  • Like
Reactions: Luis Merlo

MarkW

Rank V
Launch Member

Advocate II

2,566
Member #

773

Since the Alpha is no longer my DD and is now my off road toy having full access to the cargo area has become less important than having organization for tools, recovery gear and camping supplies. I have wanted to do it for a while now so decided while off for the holidays to build a cargo drawer system.

I first started out by removing the rubber cargo area mat. I didn't realize until I went to remove it but it's one piece that goes up over the wheel wells. Thought it was just a mat that could simply be removed but had to cut it out. I cut it so that if I ever one to put it back you shouldn't be able to tell it was ever removed.

cargo1.jpg

The base of the plastic interior piece on either side of the cargo area curves in at the very bottom which reduces the overall width of the usable space by 1"-2".

cargo2.jpg

So to utilize all available space I trimmed this section off on both sides.

cargo3.jpg

I figured there would be more road noise with the rubber mat removed and I didn't want metal on metal when I install the drawer system so I covered the cargo area with sound deadening material.

cargo4.jpg

Then it was time to build the frame for the system. I had draw everything up and was ready to build. Had a friend that was going to weld it up for me but our schedules hadn't lined up and I was off for the holidays so decided to buy a cheap welder and teach myself


Of course what would have taken him maybe a day took me three days and my welds would probably make him cringe, if not cry, but it works and nobody will see them


Frame all built and test fit. Note the small section on the left side. Had everything built and when I did my first test fitting I realized that when the cargo door is open it does not give clearance for a drawer to go the full width to the left side. Time to pull it and figure out a work around without wasting space.

cargo5.jpg

I have a tool set with a wide selection of sockets and extensions that I always carry with me. The problem with this set is the case would take up a lot of room in one of the drawers and wouldn't fit in the new narrower left drawer. This is a great set and very handy on the trails so wanted to keep it and it ended up working almost perfectly to use the space on the left for it.

I welded in gussets to use the four existing tied down anchor points in the cargo area to anchor down the system as well as four on each side to secure tie down points on either side on top of the system.

Here it is all finished up, well almost. I still need to do a few things like carpet the inside of the drawers, cover the left front and cover the left top. Waiting to cover the left top until I decide exactly what I want to do. The original plan was to have the fridge/freezer on a drawer so it can slide out but am rethinking that now. I also had planned on building a third drawer that would go on top on either side but with the issue of the narrower drawer on the left that won't work. Going to load everything up and see if I even need to additional drawer or not.

cargo6.jpg

Tool set in it's cubby for easy access. As an added bonus it allows for air space around the base of the fridge/freezer with is a requirement of the compressor.

cargo7.jpg

Was a little worried at first when I got the fridge/freezer that it wouldn't fit int the cargo area without folding down the seat but my measurements were correct, couldn't go a 1/4 inch larger


cargo8.jpg

26" by 13.5" and 18.5" drawers will give some nice storage. One of the main goals was to get the weight of the tools carried in the pelican case on the Gobi rack down lower rather than up high and this should work pretty good.

cargo9.jpg
 

MarkW

Rank V
Launch Member

Advocate II

2,566
Member #

773

Finally got around to taking a couple of pics of the finished product. At this point I have decided I am not putting the fridge on a drawer.

cargo10.jpg

Still need to organize but all the tools are on the left and most of the recovery gear is on the right. With some other mods I am planning I might be able to get everything in the left drawer and leave the right drawer for camping gear.

cargo11.jpg
 

MarkW

Rank V
Launch Member

Advocate II

2,566
Member #

773

For about 5 years now I have been using a RAM mount for both my laptop then my iPad as well for mapping wheeling trips. The factory nav is great for getting you there but I like to be able to import different maps and record wheeling trips.

Our total route for the Virginias trip covered in the Feb Four Wheeler.

NAV1.jpg

This has worked great for all this time when I am by myself but the big problem with this setup is that it takes up passenger leg room as well as the issue if the air bag goes off so I only use it when I don't have a passenger.

NAV2.jpg

NAV3.jpg

To cut down on bulk of the setup I switch from using the laptop to using the iPad which takes up much less room due not only to it's size but also the smaller mount it requires. This was an improvement but still used the base that mounts on the passenger side and takes up leg room. Moving to smaller and smaller last week I bought a replacement stereo bezel out of a wrecked H3 so I could go back to stock without any holes if I wanted to. I mounted a CB microphone clip on one side of the stereo (never had a good place for it) and on the another side I mounted a RAM ball mount. I attach either my iPad or iPad mini (mini shown) mounts to the ball and no more leg room issue.

NAV4.jpg

It's out of the way while still be very accessible. It can be positioned at any angle as well as portrait or landscape.
NAV5.jpg

Or positioned for the passenger to use.

NAV6.jpg
 

MarkW

Rank V
Launch Member

Advocate II

2,566
Member #

773

Finally got a chance to install my dual battery setup and I have been collecting parts for. Basically put together my own setup with Optima yellow tops rather than paying a whole bunch more for a preassembled system.

Components used:
Optima Group 35 yellow top batteries
Atec Industries dual battery mount for Optima group 24 and 35 batteries
4-AWG wire for positive and negative runs
Cole Hersee 24106 solenoid for battery separation
Shoreline Marine battery terminals
ANL Fuse Blocks and 80 Amp fuses for each battery
Ring and Lug terminal insulators
Brass crimp ring terminals

With all the parts collected now it's time to remove the factory battery.

DualBattery1.jpg

Once the battery and box are removed you need to drill out the spot welds for the battery strap bracket and cut off the clamp bolt. I then hit each spot with some paint to protect them from rusting. I just used black since I didn't have anything that matched and it's not like anybody is ever going to see this area again anyway.

DualBattery2.jpg

Once that was completed it was time to mock-up everything making the correct cable lengths on the bench.

DualBattery3.jpg

DualBattery4.jpg

To mount the solenoid I used two L brackets mounted to the battery mount. Once everything was placed and wired up I tore it down and painted the battery mount. I also cut down the L brackets and ground off and rounded the ends for a cleaner look with no sharp edges and painted them.

Once the paint and prep was done everything was installed. Used self drilling screws to secure the mount though you can also remove the inner fender liner, drill holes through and use bolts to secure it but I was amazed how secure it was.

Everything installed and connecting the 12V trigger line from the fuse box to the solenoid.

DualBattery5.jpg

All wired up and ready to go. I still have a few tweaks to do and need to put larger diameter terminals on my winch line and power lines for the LED bars to fit the marine terminals but other than that all finished.

DualBattery6.jpg
 
  • Like
Reactions: Luis Merlo

MarkW

Rank V
Launch Member

Advocate II

2,566
Member #

773

Now that the dual battery setup was done I needed to run power to the back cargo area off the house battery to run the fridge and other accessories. Ran an 8 gauge power cable through the firewall then down the driver side of the truck to the cargo area. Once in the cargo area it went into a distribution block.

cargopower1.jpg

From the block two leads went to a pair of 12V sockets...

cargopower2.jpg

Another lead went to a switch for a strip of LEDs I installed on the headliner just inside the cargo door...

cargopower3.jpg

LEDs give nice coverage for the cargo area at night and allow me to leave the factory dome lights turned off.

cargopower4.jpg

From the cargo area distribution block I ran another 8 gauge lead to the cargo door and another distribution block.

cargopower5.jpg
 

MarkW

Rank V
Launch Member

Advocate II

2,566
Member #

773

When stopping for lunch when wheeling it would be nice to have a table to get your food read and handy when camping as well. I didn't want to carry around a table so I figured I build one into the cargo door while also adding storage. I had already run the power to the door as I knew I would be doing this. First I cut the trim to remove all the recessed section of the panel including the access panel for the jack.

Cargo1.jpg

Still a rough cut which I needed to clean up a bit.

I then cut a 1/2 piece of birch plywood to fit.

Cargo2.jpg

I attached cables from the framework of the door to the table for support when it's open. I also installed a couple of panels of velcro which I purchased so I can attached items I want to store there. I plan to use the storage for camping items like utensils, silverware and other small items.

Cargo3.jpg

The velcro panels are most likely going to be temporary as I use this setup for a while and determine what works best. I originally was planning on trimming some of the unnecessary frame work out of the door to make more room and still might do that. Of course I had to remove the factory jack to do this but it's doesn't really do me any good anymore anyway.

The power was run to the door for a couple of reasons. First is this unit with 4 USB and 2 12V outlets for charging phones, GoPro batteries or whatever need comes up. I wired it into it's own switch so it isn't drawing power for it's LED when not in use.

Cargo4.jpg

I also wired in another strip of LEDs which give really nice coverage at night.

Cargo5.jpg

There is some tweaking still to be done but here it is after a week long overland trip. It will get fine tuned as I do more trips and figure out what works best and what isn't needed.

Cargo6.jpg

After spending a week wheeling and living out of the truck camping and have to say some of the recently mods made a huge difference.

Everyone was impressed with the cargo door table and storage and I have to say it made life camping and on the trail much nicer. There will be some tweaking done but overall it worked great. I need to post up some pics of how it was setup for the trip.

The drawer system was also a game changer. It was so nice having everything accessible at any time versus having to uncover cases that might be buried under other items.

Dual battery system was great to have as well but I needed to trouble shoot it the first night. For some reason my 12V trigger for the solenoid was not working so the house battery was not getting charged. Moved it to another location on the fuse box and it worked flawlessly after that.
 
  • Like
Reactions: Luis Merlo

MarkW

Rank V
Launch Member

Advocate II

2,566
Member #

773

Created a custom mount to the Gobi rack for my HiLift versus paying what they want for their mount.

Used a clamping hanger with 350 lb capacity with a mounting plate for a 3/16 stud.

HiLift1.jpg

Attached to the rack with round rubber bumpers to prevent metal on metal contact.

HiLift2.jpg

HiLift3.jpg

With the HiLift mounted, held with wing nuts. Was able to purchase a locking knob for HiLifts with the proper threading so it is secure.

HiLift4.jpg
 

MarkW

Rank V
Launch Member

Advocate II

2,566
Member #

773

As part of my effort to move weight from down off the rack I decided to move the Power Tank down to the Gobi ladder. This not only gets the weight lower but all makes using it easier and I won't even have to take it off the mount. On the rack it was laying on it's side, they have to be upright when in use. The issue with doing this move was security. Wanted to make sure somebody couldn't just unbolt the tank mount from the back side to take the whole thing even though the take is locked in the mount. I ended up going with some vibration-dampening U-bolts. The urethane protects the ladder from damage as well as clamping down on it and preventing vibration. Somebody could cut through these to steal it but they would have to get to both sides on all three and it would not be easy.

PowerTank1.jpg

PowerTank2.jpg

PowerTank3.jpg
 
  • Like
Reactions: Luis Merlo

MarkW

Rank V
Launch Member

Advocate II

2,566
Member #

773

Storage is always at a premium when living out of your truck for a week so I am always looking for new ways to take advantage of what space there is. The rear driver side window is not usable to visibility (at least not the driver) and somewhat wasted space. Using a kit designed to bungee items to kayaks I can not store items in that window and they will stay in place. Not sure if I will do the same for the passenger side or not, there are occasions especially on the trails where that little bit of visibility is useful.

Window1.jpg

Window2.jpg

The bungee cord that came with the kit is a bit short so I had to order some more and have since replaced it. As you can see in the first pic it was a bit tight and pulling up the bottom window trim need the center. Longer cord took care of that issue and the two ends connect.
 

MarkW

Rank V
Launch Member

Advocate II

2,566
Member #

773

Like many I use GoPro cameras to get video on our wheeling trips. I normally run two or three cameras and anybody that has run multiple GoPros at once knows they can be a hassle. First you always have to worry about the batteries then there is starting and stopping the recording on all your cameras when you want. The last trip I hard wired power to all three of the cameras I was using which took care of the battery issue but meant the external cameras were no longer exactly waterproof with a hole drilled in the case and I had power cables to deal with. The issue of starting and stopping the cameras I took care of by connecting them all to the Wifi remote so in theory with a push of a button I could start or stop all three cameras. This worked well for the cameras on the dash and brush guard but most of the time did not work for the camera on the rear of the truck. It was constantly dropping it's connection and not recording. Then you have the issue that if you stop anywhere in public you have $400 cameras mounted around your truck that anybody can just grab so you have to constantly remove and reinstall depending on where you go. I knew I wanted a better option and have been thinking about it for at least a couple of years now and finally did what is at least a proof of concept with a mobile DVR.

On the front of the cargo drawer system right behind the passenger rear system I installed a 4 channel HD DVR that records to SD cards, has built in Wifi and GPS.

DVR1.jpg

I ran the cable for the dash camera, power switch and controller up through the center of the dash. Power is feed to the cameras from the DVR through the cable so no more issues with batteries.

DVR2.jpg

I then mounted the dash camera and power switch to the Daystar dash storage unit. The round unit next to the storage tray is the DVR event controller allowing me to just push the button to start and stop the recording. The LED on the event controller blinks and changes from color (green or red) to show current status such as recording/idle or if the SD card is full/not installed.

DVR3.jpg

I then routed cables for the front camera on the brush guard and the rear camera on the Gobi rack.

DVR4.jpg

DVR5.jpg

The external cameras are waterproof and automatically switch to infrared for low light. I also have a 4th camera with is the same model as the dash camera. I will use GoPro mounts to temporarily place it where I want on the truck when wheeling.

The DVR has Wifi which allows me to login via the iPad to control the device, changes settings on the cameras and view the cameras either individually or all four at once.

Camera settings screen.
DVR6.jpg

View from dash camera.
DVR7.jpg

View from brush guard camera.
DVR8.jpg

View from rear camera. Was messing with he settings so this image is actually reversed.
DVR9.jpg

Displaying all cameras, fourth is not connected.
DVR10.jpg

Have not yet gotten a chance to really test the system out and try it wheeling but overall for a proof of concept I like it. The one thing I don't like about this DVR is that there is a time/date stamp in the upper right hand corner or the screen for each camera and no way to turn it off. Have talked with the manufacturer about getting a custom firmware without this but not sure if they are going to do that or not. They want me to purchase their new model that allows it to be turned off. Of course that means buying another DVR and all new cameras though the other cameras I believe are better quality. Time will tell but right now I think it's going to be a much more convenient alternative to the GoPro cameras.