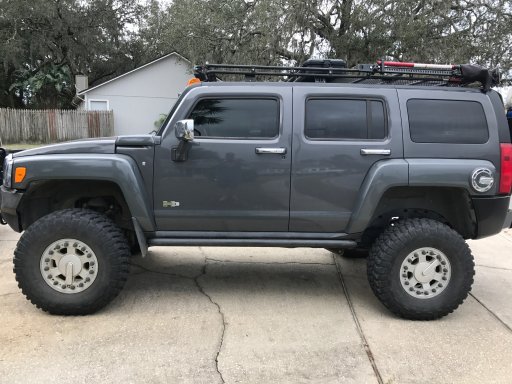
2009 Hummer H3 Alpha

  • HTML tutorial

MarkW

Rank V
Launch Member

Advocate II

2,566
Member #

773

Haven't done a lot lately but added the ARB 8' awning several months ago. Hadn't gotten to use it until recently and man it was nice to have in a treeless clay pit in 95 degree weather.

IMG_3853.jpg IMG_3854.jpg
 
  • Like
Reactions: Daniel Etter

MarkW

Rank V
Launch Member

Advocate II

2,566
Member #

773

Since I don't drive the H3 as much these days I was getting a bit tired of paying for XM that was rarely used. At the same time I always appreciated having XM when on some remote trail with either no FM radio stations in range or at a minimum no good radio stations. Factor in since I installed the snorkel and did't want the antenna sticking further out I have been running without one at all. I had been using Schwarttzy's quick and simple audio input which allowed me to play songs off my phone which was nice but also wanted a better way and with the NAV disc in the factory head unit getting more and more outdated I decided it was time for a change. I don't generally do mods unless they either increase the capabilities of the truck off road or it's functionality as an overland vehicle being lived out of for a week at a time. Normally I wouldn't mention changing out the head unit but it's actually does have a benefit when wheeling but more on that later.

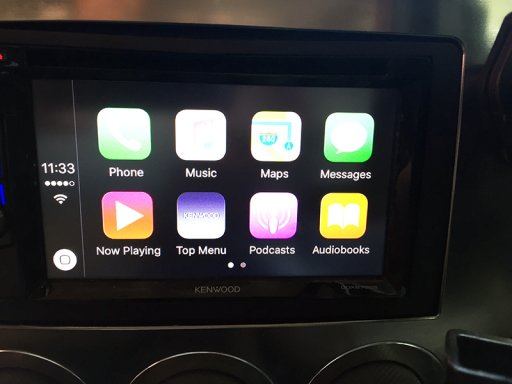
I had been looking at the features of CarPlay for a while and being a iOS guy liked what I saw. Factor in what you can get in a CarPlay head unit for much cheaper than a standard NAV head I decided that was the route I was going to go. Did a lot of research and comparison and settled on the Kenwood DDX6702S. Could have gone with something with a slightly larger screen or more bells and whistles but I didn't need them and for the money this had everything I was looking for.

Kenwood DDX6702S with 6.2" display
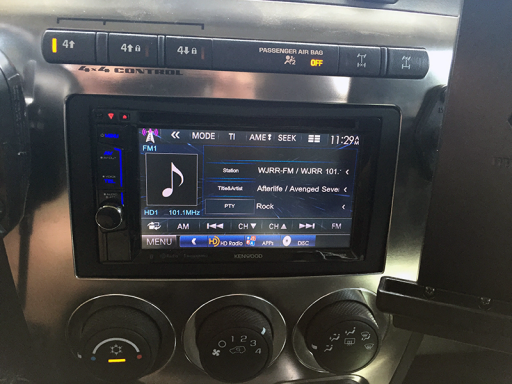
HeadUnit.png

CarPlay on the DDX6702S
CarPlay.jpg

Added the rear camera to the obviously scratched of bumper. Will see how I like this position of if I want to change it when I go to a new bumper.
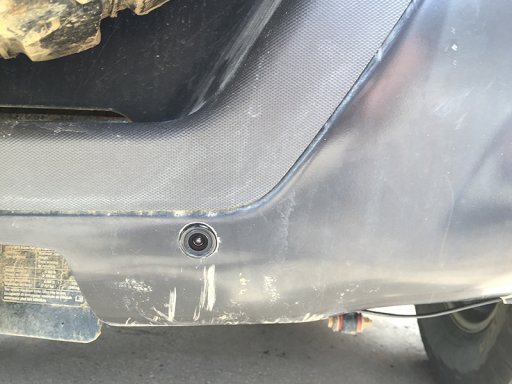
RearCamera.jpg

One feature I like about this head unit (I am sure it's becoming more common if not on most now) is that I can pushing the volume knob for a few seconds at any time and pull up the rear camera view, no need to be in reverse. This will be handy when following one of the cardinal rules of wheeling, always keep the guy behind you in view.

I added a USB port to the driver side of the center console below the center stack. This is used to plug the phone into the unit for CarPlay to work but you can also read media off a USB device. Have not yet tried but need to see if I can view video files recorded on to SD cards by the DVR using a USB SD card reader.
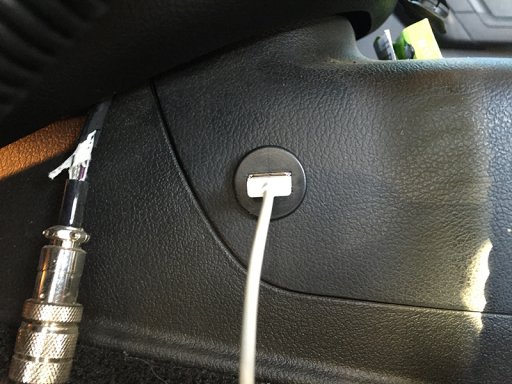
USBPort.jpg

For better FM reception since I am was not running an antenna I installed an amplified antenna from AntennaX.com. Ran the cable up the passenger A-pillar and mounted the antenna in the upper right corner of the inside of the windshield. Using it out in the Ocala forest a few weeks ago I would say the reception is at least as good as it ever was with the stock antenna and there is nothing to hang up on tree limbs.
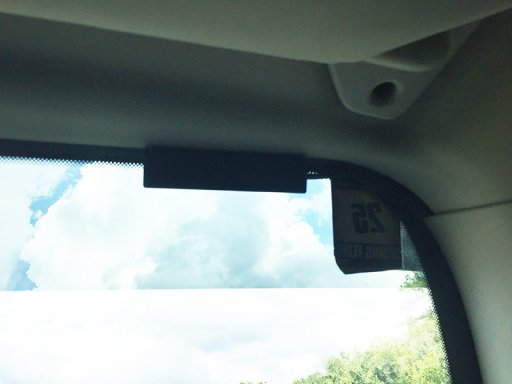
Antenna.jpg

Now the feature that really influenced my decision to go with this unit and will be a benefit when wheeling was the ability to have second forward facing camera. I installed the camera in the center of the plastic facia just above the winch bumper.
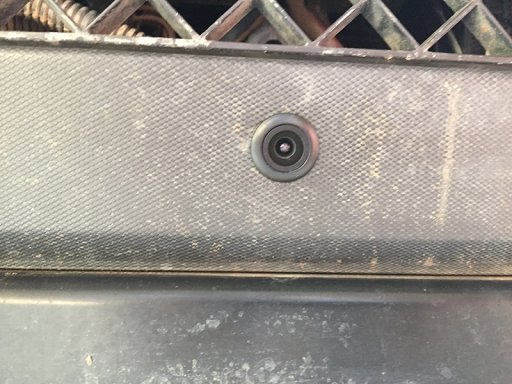
frontcamera.jpg

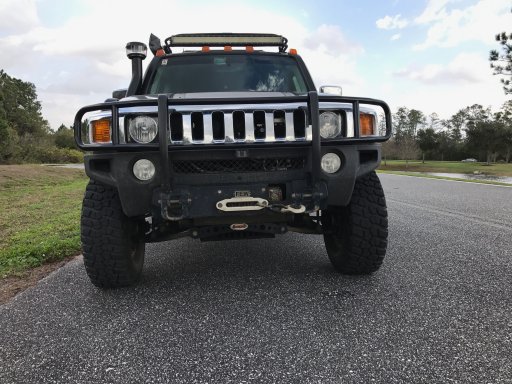
When wheeling I can pull up this camera when say cresting a hill or dropping off a ledge where you can not see anything in front of the truck or picking a line through some rocks. I can think of many times in the past where this would have come in handy and should frequently eliminate the need for a spotter.
Just a parking lot view but you get the idea of how this will be handy on the trail.
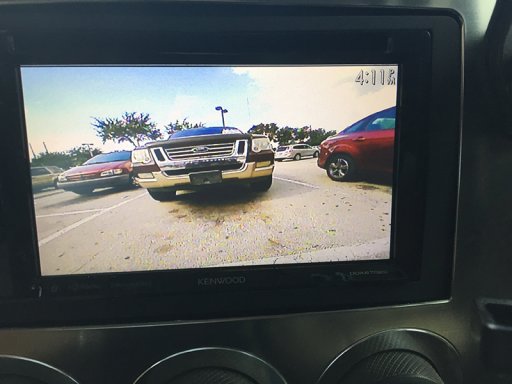
FrontCameraView.jpg

With the limited use I have had with it so far I am very happy with the selection of this unit. Has the features I needed/wanted and the NAV will be much better with CarPlay since it's constantly updated and has traffic. Hopefully they will continue to add more features and open it up more and more to developers. Would like to see them allow apps such as Dash Command which i am using on the iPad now to read my OBDII reader. Would be nice if that was on the head unit all the time.
 

MarkW

Rank V
Launch Member

Advocate II

2,566
Member #

773

Have not been on for a while so thought I would do some updating on my build thread.

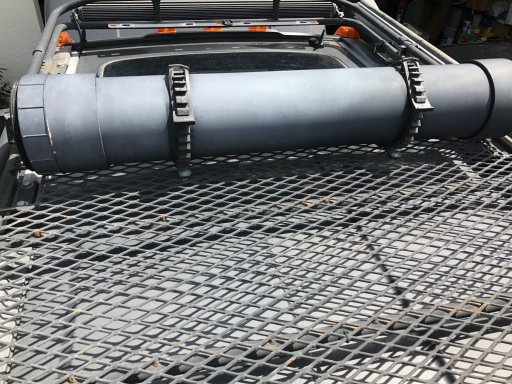
When I build the drawer system and moved my tools down from the Pelican case on the Gobi rack I removed the case but still needed someplace to store spare parts like the CV axles. I didn't want to store them in the cargo area because they just took up too much valuable space and weren't items that you would hopefully need to access very often if at all. A little over a year ago I mounted a PVC tube to the rack with a pair of Quick Fist clamps. The only tube I could find that would fit a CV axle had a 6" inner diameter.

IMG_0009.jpg

This served the purpose and carried the axle and a two each inner and outer tie rod ends but I had a few issues with it. First it sat at a total hight of about 8 1/2" and was really wasted space. The minimum inner diameter I needed was right at 4 1/4" to fit the axle so it sat higher than I really liked. Two other issues I found were if you do need to get into it the screw on PVC cap I put on it was extremely hard to get off and even with caps on both ends it was not water tight. So the search started for a new solution.
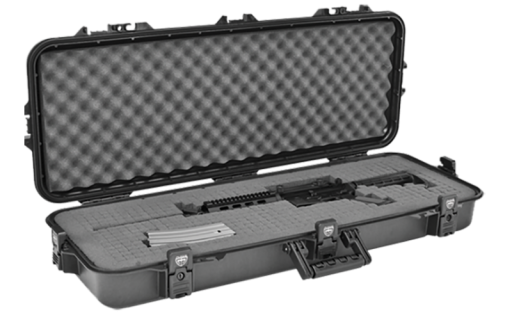
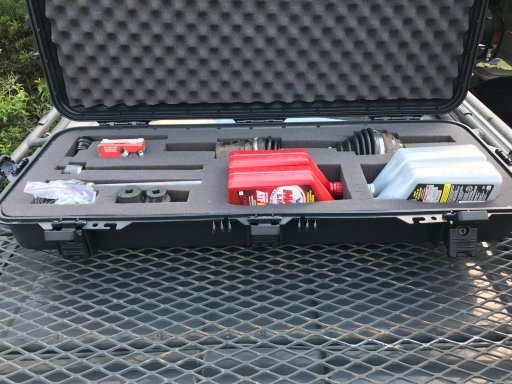
I thought about building my own box but then came across the Plano 108362 all weather tactical case.

108362_2.png

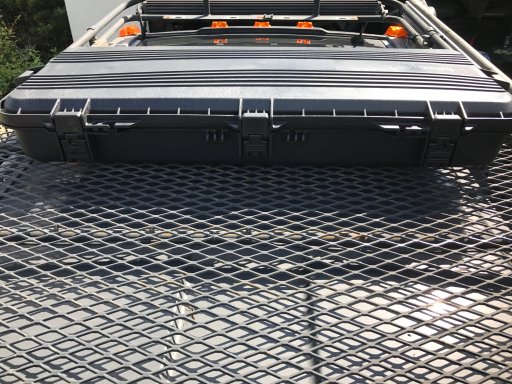
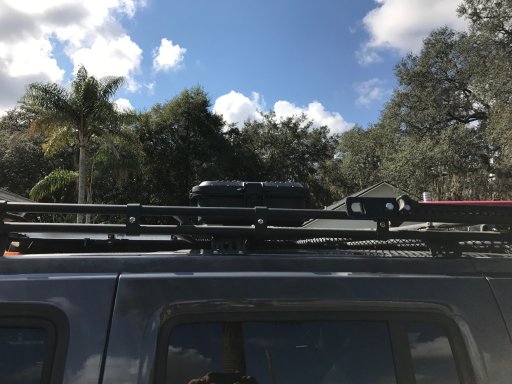
With and interior size of 37" X 13" X 5" there was enough room without being too tall or too long to fit in the Gobi rack. The case is water tight with a built in pressure value like the Pelican which had zero signs of moisture inside in the 5 years it was up there. It also has locks built into two of the latches. I mounted it the same way as I did with the Pelican, bolted through the bottom to the Gobi. The holes drilled into the case are the exact diameter of the bolts (tight enough they had to be threaded through) with gasket material and fender washers on either side of the case to help hold out water.

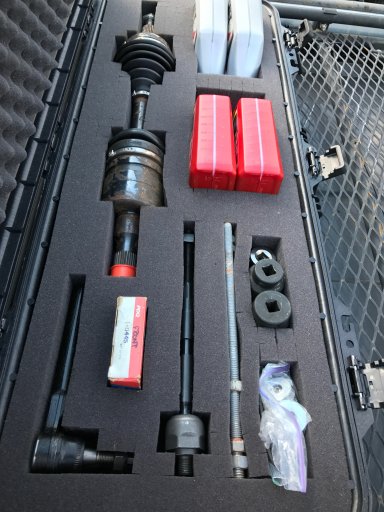
While I could have had room to store even more stuff I left the pluckable foam so everything has it's place and there won't be any shifting or rattling.

IMG_0023.jpg

IMG_0025.jpg

Perfect storage for items I always carry but hope not to have to use, spare CV axle, two each inner and outer tie rod ends, u-joint, fluids, serpentine belt, spare parts and specialty items for changing tires on the bead locks as well as a few specialty tools that would not be regularly accessed.

Overall I like the fit and at 5 1/2" its not nearly as tall. Might add some anchor points to the lid. Will see after a few trips if they are needed.

IMG_0032.jpg

IMG_0030.jpg
 

Attachments

  • Like
Reactions: Steve

MarkW

Rank V
Launch Member

Advocate II

2,566
Member #

773

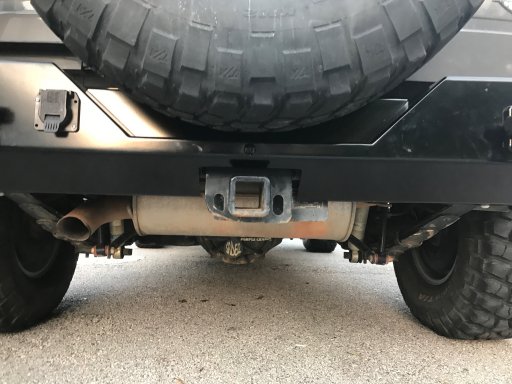
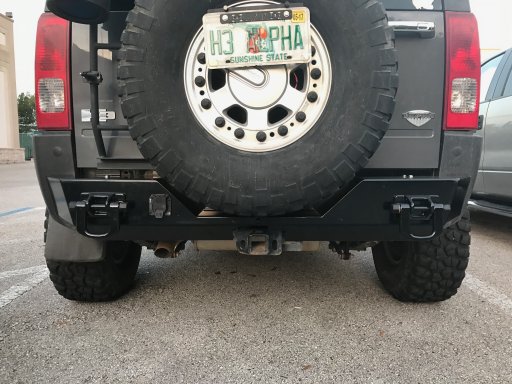
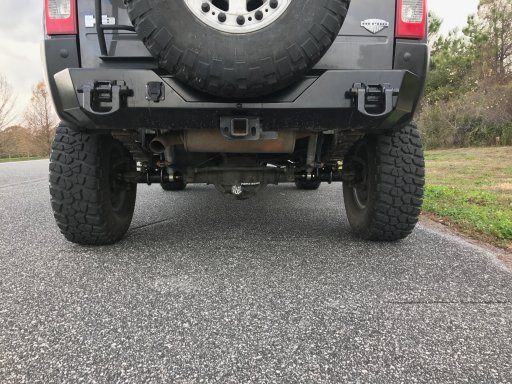
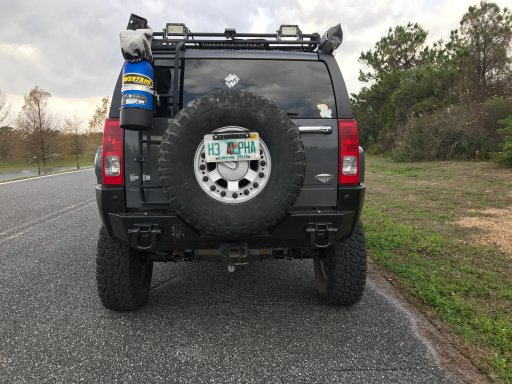
Changed out the rear bumper for the Thor Parts rear. It's a very solid and well designed bumper. First I made a bracket to move my license plate to the spare tire and ran the wiring for the lights. The bracket uses the existing threaded holes in the wheels used for assembly. Might go back and redo the mounting holes in the bracket as the holes in the wheels don't line up to be level when the tire is mounted on the carrier. Doesn't look bad but is noticeable.

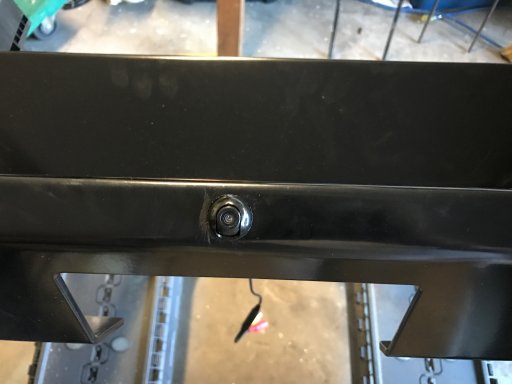
Next I drilled a hole to mount my rear camera. Of course I painted the hole after drilling to prevent rust and as you can see got a bit of paint where it wasn't supposed to be but that cleaned up.

IMG_0062.jpg

Tire covers about the upper 1/3 of the shot but this was the best place for the camera and does the job. Unfortunately it will probably be useless when I have the Trasharoo on the spare.

IMG_0068.jpg

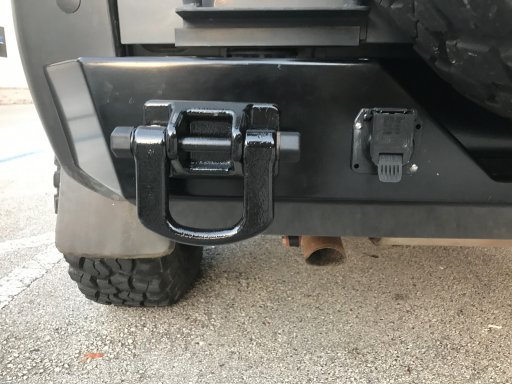
I also mounted a D-ring on the driver side so it now has one on each for the four corners. This is tied into the frame and a fully functional recovery point.

IMG_0067.jpg

Overall I am very happy with the look, finish and function of the new setup.

IMG_0066.jpg
 
  • Like
Reactions: Ironhide Fx4

MarkW

Rank V
Launch Member

Advocate II

2,566
Member #

773

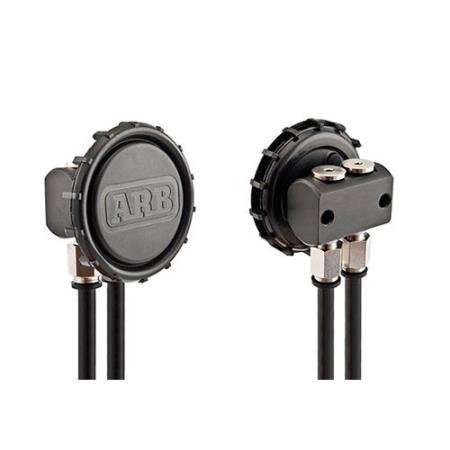
Finally got around to installing the ARB Differential Breather Kit I have had on my work bench for months. As well as the standard breather kit I also ordered their kit with additional tubing and fittings to vent the transfer case and transmission along with the diffs.

ARB_Breather.jpg

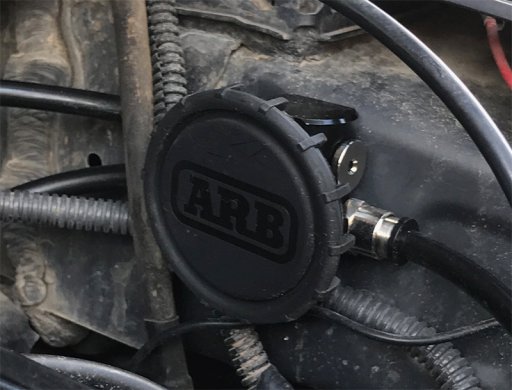
I looked at a lot of options on where to place the manifold and filter, finally decided on the driver side of the engine compartment toward the firewall.

Filter1.jpg

This area normally stays dry even when hitting water pretty fast. The filter itself is splash proof so even if water does spray up in this area it won't be a problem. If I have standing water up to this point I have bigger problems to worry about than if water is getting into the breather lines.

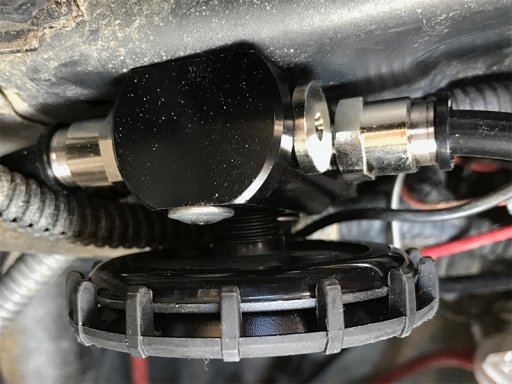
Top view of the manifold where you can see the connections a little better. Note that one of the fitting is currently replaced with a plug. Didn't have time to get to the transmission vent line which is on the top of the transmission so went back a week later and added it.

Filter2.jpg

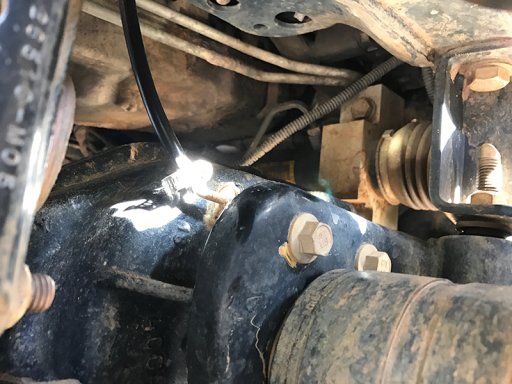
I was concerned about snapping the vent tube connector off the front diff because there is no way to get a wrench on it to remove it that I could tell so I left factory connector and used a hose clamp on it.

FrontDiff.jpg

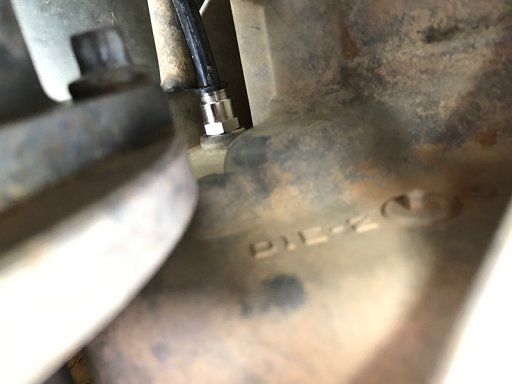
Was able to replace the factory fitting on the transfer case with the ARB push fitting.

TransferCase.jpg

I have run the new tubing back to the rear diff but capped it there. The rear diff has a larger hose barb on it and again like the front diff it was hard to see how to get a wrench on it to remove the factory fitting. When I dropped the rear axle for the spring over I finished up it's breather.
 

MarkW

Rank V
Launch Member

Advocate II

2,566
Member #

773

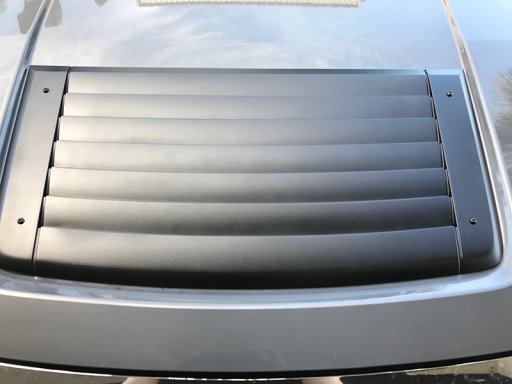
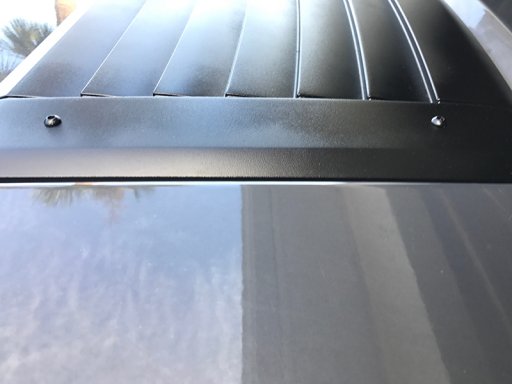
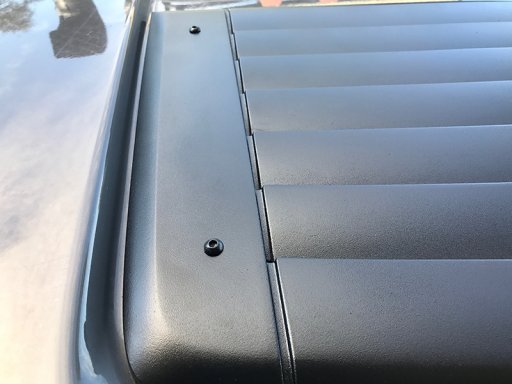
Not really a mod but a fix that many of us will run into if you have not already. There was a recall on the fake hood vent due to the clips failing and the vent flying off. Their solution was to glue it down which I didn't want done so I just had them mark the recall as done. Mine finally started coming loose so I came up with a fix for it. Sorry I didn't take any detailed pics as I didn't originally plan on posting this in the build thread but have seen a few people mention losing theirs lately so though I would post it.

Fist I took the vent off and removed all the clips. While I had it off I painted it with Rustleum Bumper and Trim paint.

After the paint had fully cured I drilled one hole in each corner of the vent. I just eyeballed where they would look good, there isn't really a specific location you need to put the screws. I then positioned the vent and used a punch to mark the first hole. After drilling the hole in the hood I tapped it for an M6 100 screw. I placed the vent again, secured it with the screw then marked, drilled and tapped the opposite corner. I did this so the vent would be held secure at opposite coners while I did the remaining two holes and not shift so everything would line up properly. After drilling and tapping all 4 holes I touched them up with paint to prevent rust. After allowing the paint to dry I mounted the vent with button cap screws which I also painted to match as well as prevent them from rusting. Pretty simple method and seems to be very secure. You need to hold the drill steady when doing the holes in the hood as depending on where you place the screws (mostly the front ones) you might hit the reinforcement on the underside of the hood. Depending on where you hit it the drill bit might want to wonder creating an oblong hole which would not work for tapping threads. You can always use longer strews and just use a nut on the underside of the hood if you don't have a tap set or have an issue with a hole. Overall I like how it came out, almost looks like it came that way from the factory. Hope this helps others with loose vent issues.

HoodVent1.jpg

HoodVent2.jpg

HoodVent3.jpg
 

MarkW

Rank V
Launch Member

Advocate II

2,566
Member #

773

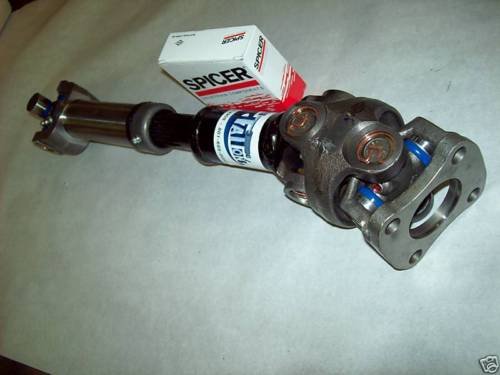
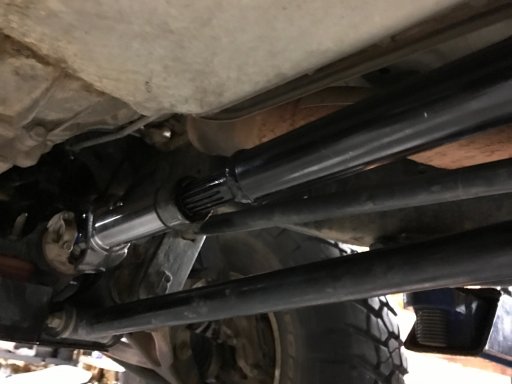
With the Rancho lift dropping the front diff 4" the CV on the front drive shaft tends to wear a lot quicker. There are a couple of options out there to upgrade, Outfitter Design now offers a replacement HD front drive shaft and Thor parts offers an adaptor plate so that you can order your own driveshaft and make it work. I highly recommend either of the options and not only for those that have a lift.

I ended up going the Thor Parts route and mated it with a custom length 1310 Hack & Tap drive shaft from Tatton's Driveline Service in UT.

FrontDriveShaft2.jpg

Everything went it perfectly and on the half hour drive home last night there was absolutely no vibration from the new driveshaft and adaptor. As an added bonus this driveshaft will also work if I ever got to a solid axle up front but of course I am avoiding that.

FrontDriveShaft.jpg
 

MarkW

Rank V
Launch Member

Advocate II

2,566
Member #

773

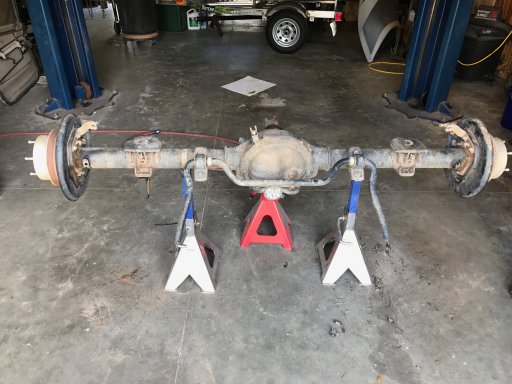
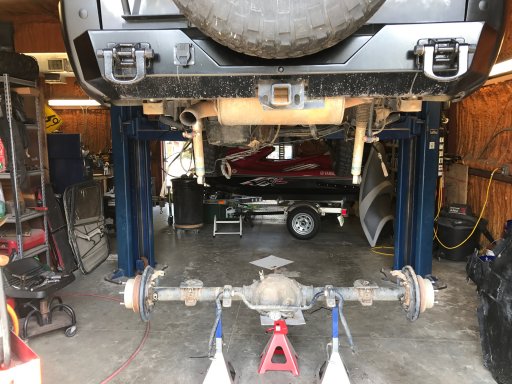
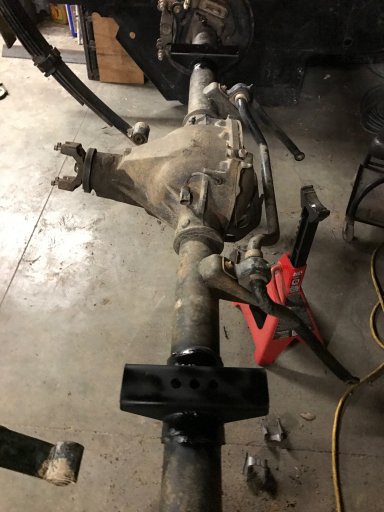
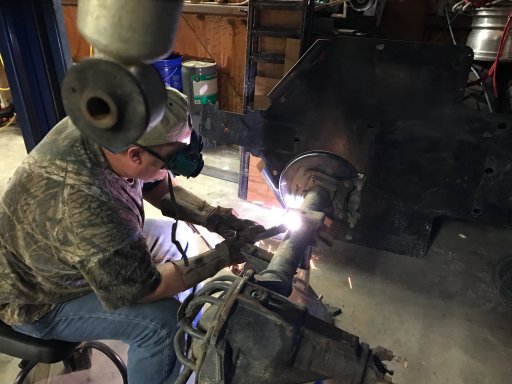
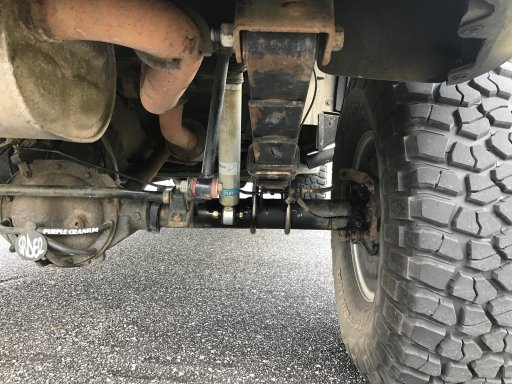
It was finally time to do my long awaited spring over in the rear. Have been running the Rancho leaf springs for about 16 months and of course they sagged pretty quickly. Purchased new spring perches, spring plates and shock tabs from Ruff Stuff. Was originally going to replace the stock from spring hangers as well with some from Ruff Stuff that are about 2" smaller but ended up staying with the stock hangers.

First step of course remove the rear axle and Rancho leaf springs.

axleout.jpg

axleout2.jpg

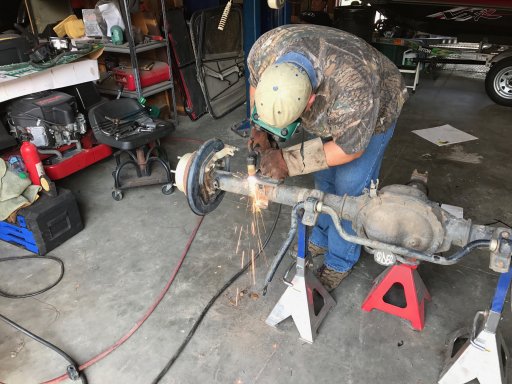
Next up was to take the plasma cutter and remove the stock bump stop pads as this is where the new spring perches will go.

bumpstoppad.jpg

With the bump stop pads removed, everything ground down and cleaned up it was time to get the pinion angle right and put on the new perches.

newperch.jpg

With the new perches of we flipped the axle and removed the factory perches to clean up the bottom of the axle.

oldperch.jpg

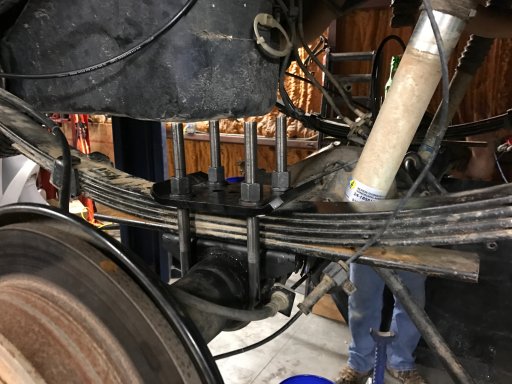
At this point we install the stock springs and mounted the axle making sure everything was lining up right.

springsmounted.jpg

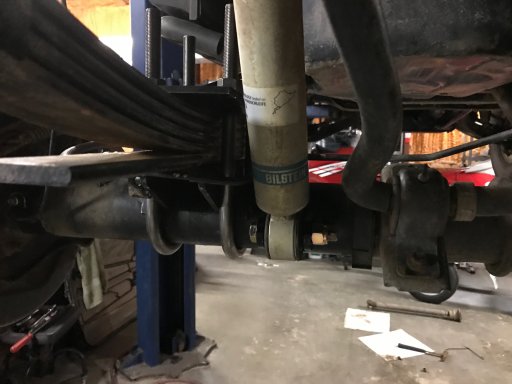
With everything looking good it was time to mount the shock tabs.

shocktabs.jpg

Had to do some rerouting of brake lines and weld the mounts to new locations for better clearance but everything looked great so it was time to put everything back together.
 

MarkW

Rank V
Launch Member

Advocate II

2,566
Member #

773

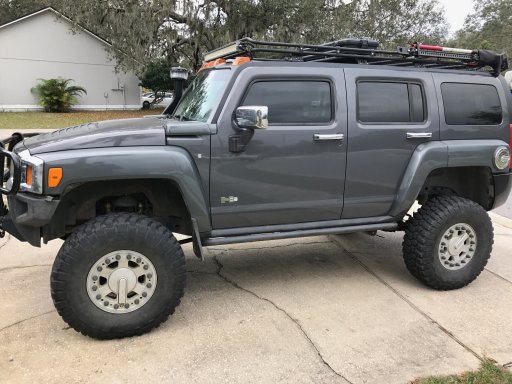
She is definitely much taller now and the 35s are starting to look a little small. I expect the back to settle a little bit, an inch or two but I am fine with that.

sideview1.jpg

sideview2.jpg

rearview.jpg

rearviewlow.jpg

closeview.jpg

frontview.jpg

Putting a few miles on her to help the rear settle to it's final height then will take some measurements to order a new driveshaft. At full droop there isn't much of the slip yoke left before it comes out of the transfer case. Overall I am very happy with how it came out, no driveline vibration what so ever and the ride is better with the factory springs than it was with the Rancho springs. Should get better flex out of the stock springs as well though the new longer perches will have an affect on that but I am willing the sacrifice a slight bit of flex for them as they will help prevent axle wrap.
 
  • Like
Reactions: Steve

MarkW

Rank V
Launch Member

Advocate II

2,566
Member #

773

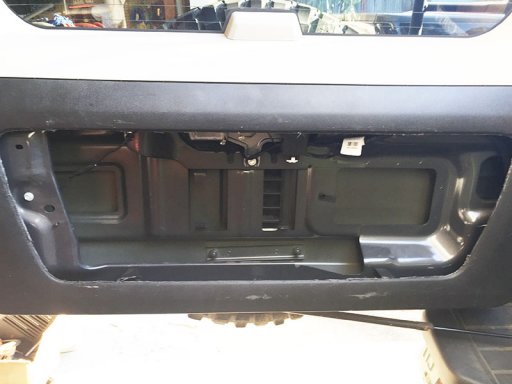
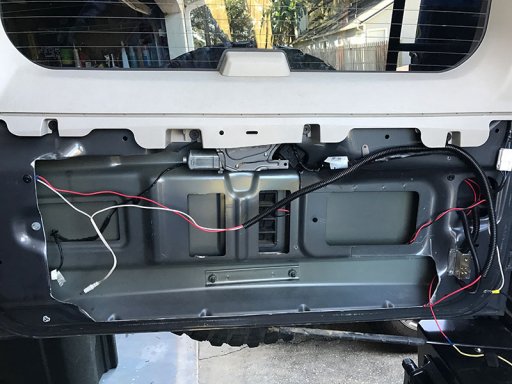
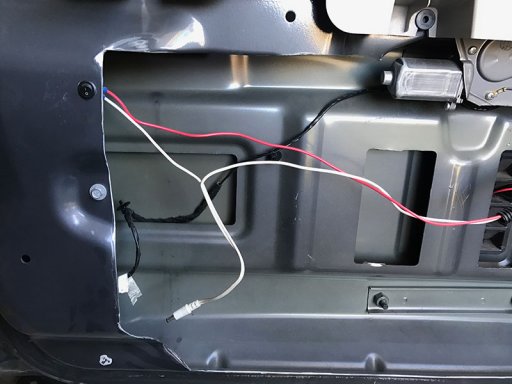
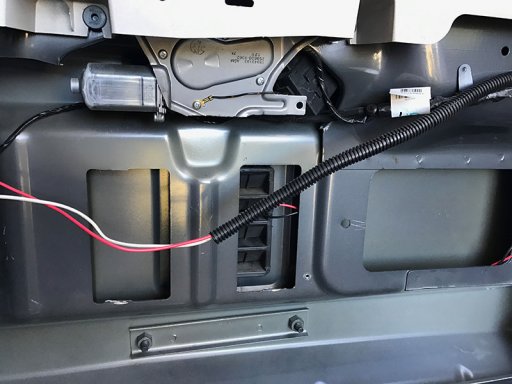
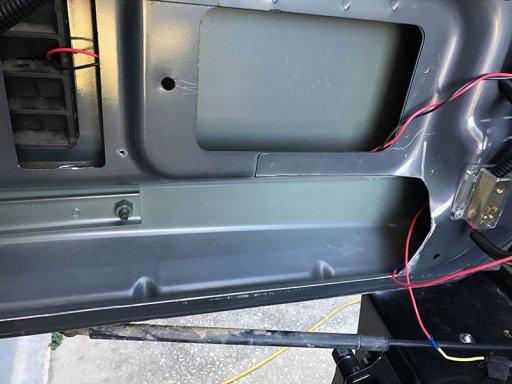
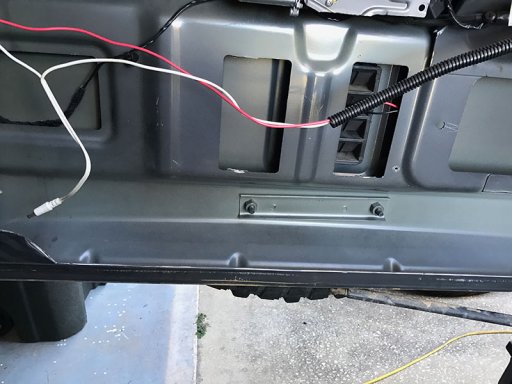
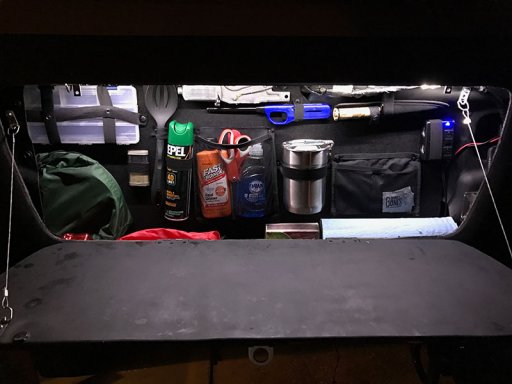
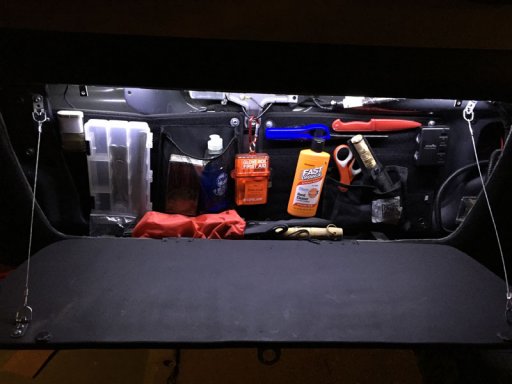
Decided it was time to utilize more of the space in the cargo door and redo my storage back there.

Here you can see after I had originally cut the trim the amount of space that is lost due to brackets that aren't really needed anymore such as for the jack.

original.jpg

So I trimmed what I knew was no longer needed as well as what I thought I could without sacrificing support the the door and spare tire. I believe I could have removed even more but some of it would have had very little gain so better to keep the support it might provide.

IMG_0190.jpg

IMG_0191.jpg

IMG_0192.jpg

IMG_0193.jpg

IMG_0194.jpg

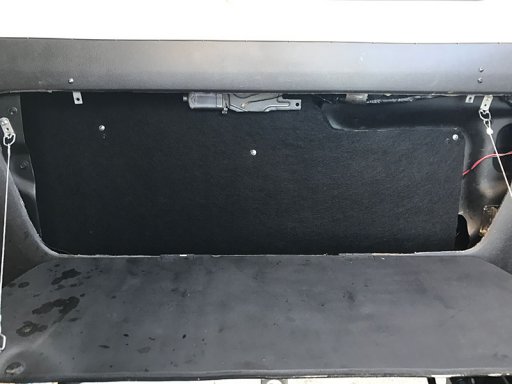
I then cut a piece of 1/4" ply to fit the space, covered it with speaker carpet and installed.

IMG_0195.jpg

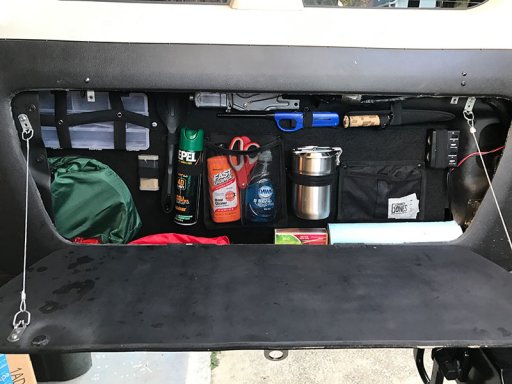
Then came the arranging what is kept back there. I used elastic strap material to hold items in place, some utilizing snaps.

IMG_0197.jpg

Same shot but at night with the light on.

IMG_0200.jpg

Compared to the original layout there is more utilizable space for additional items that were there before and I think it's a bit better organized.

IMG_3039.jpg
 

MarkW

Rank V
Launch Member

Advocate II

2,566
Member #

773

Well after 8 years of wheeling the Alpha the torsion bars had pretty much worn out and could not hold the truck up. It would not settle completely done but could not hold the front end up after it had been raised, would settle back down within a short drive. Looked at the options available such as OME and SwayAway. The OME didn't seem to be much of an upgrade especially for the price so didn't even check into availability. Called Sway-A-Way to check availability of their H3 torsion bars (part # 1766) and was told they had some in production but could not give a time frame for delivery. I think it's a standard response but could be wrong. Then came the pricing which I was expecting, $1,200 for the pair. I know there have been group buys offered by them in the past for $500-$600 a pair but I didn't have time for that so stock replacements is it.

There are 4 variants of the torsion bars offered by GM for the H3.

Left Part # Right Part # Diameter
L93357121 L93357122 30.5mm Strongest for V8
L93357119 L93357120 30.1mm
L15906133 L15906134 29.36mm
L15082981 L15082982 28.3mm Weakest for I-5

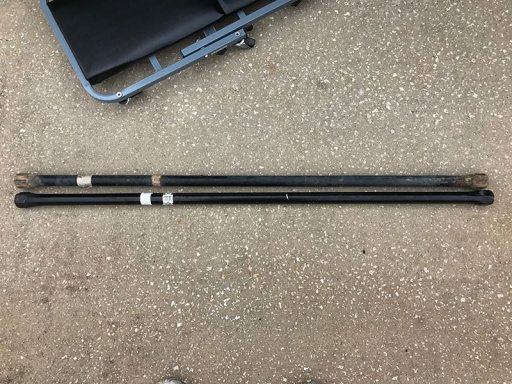
According to the dealer and the part searches I did the 29.36mm bars were the ones that came on my truck but they are the second weakest and I have an Alpha. I ended up going with the 30.5 mm bars. It's hard to tell in the photo below but you can feel a difference when holding them.

torsionbarssmall.jpg

At under $200 shipped for the pair they might not be as good/strong of an option as the Sway-A-Ways but at I can change them out ever year for the next six years and still save a few dollars and at this point I am pretty happy. Maybe 10 minutes a side to swap them and then a bunch of raising the truck to adjust and measure over and over to get the ride height right but they are holding nicely. I am hoping that before I need to replace them again (if at all) somebody comes up with a coil over option for the H3 so I can git rid of the torsion bars all together.
 
Last edited:

MarkW

Rank V
Launch Member

Advocate II

2,566
Member #

773

Thanks guys, appreciate the feedback. Always looking for something new to do but running out of ideas.