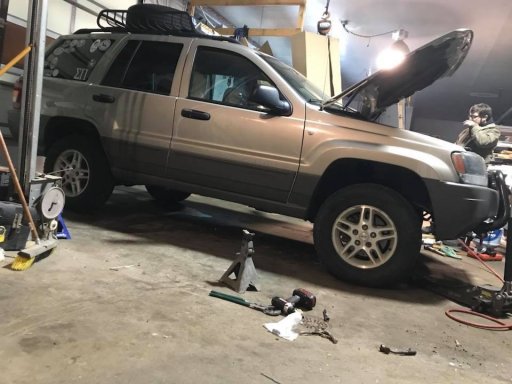
2004 WJ Laredo

  • HTML tutorial

stickel

Rank V
Launch Member

Member III

2,268
Las Vegas, NV
First Name
Mike
Last Name
Stickel
Member #

9020

Let me start by saying I'm no expert here. The way I look at it is this, if you're already hitting trails/going off-road what is the biggest worry or thing holding you back?
  • Hearing lot's of dings underneath or worried about scraping/damaging the underside? Get armor.
  • Can't get to where you want to go because of clearance issues or really seeing droop when loaded up? Get the lift and shocks.
Of course, my personal preference if there isn't a massive need for one over the other would be to go with the lift kit/shocks first. :smile:
 

adventure_is_necessary

Rocky Mountain Region Local Expert Kansas
Member

Traveler III

4,007
Bonner Springs, Kansas, United States
First Name
Lucas
Last Name
Antes
Member #

7082

Ham/GMRS Callsign
KE0ZXA
The low beams were sad and dim so I slapped in some super bright halogen bulbs. The glass on the liftgate has been needing new struts since I bought the rig over 2 years ago, so I decided to replace them as well. Stuff almost all of the gear in my trunk space in the spare wheel well so the back end is so much more organized.
 
  • Like
Reactions: stickel

adventure_is_necessary

Rocky Mountain Region Local Expert Kansas
Member

Traveler III

4,007
Bonner Springs, Kansas, United States
First Name
Lucas
Last Name
Antes
Member #

7082

Ham/GMRS Callsign
KE0ZXA
Hoping to get pics up, but I added full floor mats from Quadratec, the rear seat covers from Covercraft to match the fronts, and did a little tuning with a Superchips Flashpaq F5
 

Eddiebrs

Rank I
Launch Member

Traveler I

271
Phoenix, Az, USA
First Name
Eddie
Last Name
Barrows
Member #

15627

Great job on the build so far. I inherited my Dad's WJ this summer and have slowly been working on it. I went the DIY route with the rack and build one. I love having the tire up there b/c it frees up all that cargo space in the back. I would def go with the lift next. If youre going to do the lift, you would probably want to put in new spring isolators. Youd be surprised how easily the spring seat can rust out under there
 

adventure_is_necessary

Rocky Mountain Region Local Expert Kansas
Member

Traveler III

4,007
Bonner Springs, Kansas, United States
First Name
Lucas
Last Name
Antes
Member #

7082

Ham/GMRS Callsign
KE0ZXA
Great job on the build so far. I inherited my Dad's WJ this summer and have slowly been working on it. I went the DIY route with the rack and build one. I love having the tire up there b/c it frees up all that cargo space in the back. I would def go with the lift next. If youre going to do the lift, you would probably want to put in new spring isolators. Youd be surprised how easily the spring seat can rust out under there
I ended up sticking the spare up top. Haven't noticed any difference in MPG or driveability. I think I'm going to start with armor honestly. Lift would be nice, but armor is more important at this point
 

NightCrawler

Rank VI
Launch Member

Off-Road Ranger I

3,976
Moreno Valley, Ca
First Name
Steven
Last Name
DeLong
Member #

7620

Ham/GMRS Callsign
W7DTH
I ended up sticking the spare up top. Haven't noticed any difference in MPG or driveability. I think I'm going to start with armor honestly. Lift would be nice, but armor is more important at this point
I did the lift first and any large boulder made me rethink some of my lines more than a few times. I have rock sliders now but the under armor is next on the list...gotta wait and see what Santa brings me!
 

adventure_is_necessary

Rocky Mountain Region Local Expert Kansas
Member

Traveler III

4,007
Bonner Springs, Kansas, United States
First Name
Lucas
Last Name
Antes
Member #

7082

Ham/GMRS Callsign
KE0ZXA
I did the lift first and any large boulder made me rethink some of my lines more than a few times. I have rock sliders now but the under armor is next on the list...gotta wait and see what Santa brings me!
I just ordered a couple bits of armor. Sliders are next on the list I believe and then the lift. I like the piece of mind I'll have with the underbody protection, plus one of the pieces I just purchased is a high clearance trans crossmember, and should yield about an inch more of ground clearance.
 

Eddiebrs

Rank I
Launch Member

Traveler I

271
Phoenix, Az, USA
First Name
Eddie
Last Name
Barrows
Member #

15627

I did the lift first and any large boulder made me rethink some of my lines more than a few times. I have rock sliders now but the under armor is next on the list...gotta wait and see what Santa brings me!
LOL, I know what you mean. My wife is gonna be pissed at Santa this year:laughing:
 
  • Like
Reactions: NightCrawler

adventure_is_necessary

Rocky Mountain Region Local Expert Kansas
Member

Traveler III

4,007
Bonner Springs, Kansas, United States
First Name
Lucas
Last Name
Antes
Member #

7082

Ham/GMRS Callsign
KE0ZXA
Nice jeep and excellent information. I lived in Emporia for 25 years, it's a nice town.
Thanks! It's a drawn out build for sure. Budget friendly and Jeeps never mix, but this one hasn't been too bad so far. Piece by piece, she's coming together nicely.
 
  • Like
Reactions: NightCrawler

adventure_is_necessary

Rocky Mountain Region Local Expert Kansas
Member

Traveler III

4,007
Bonner Springs, Kansas, United States
First Name
Lucas
Last Name
Antes
Member #

7082

Ham/GMRS Callsign
KE0ZXA
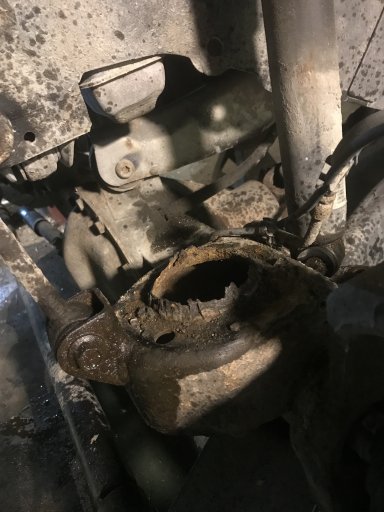
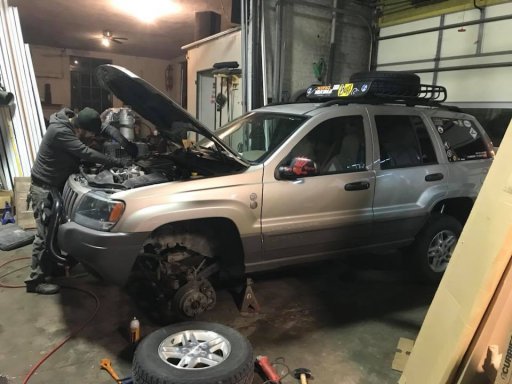
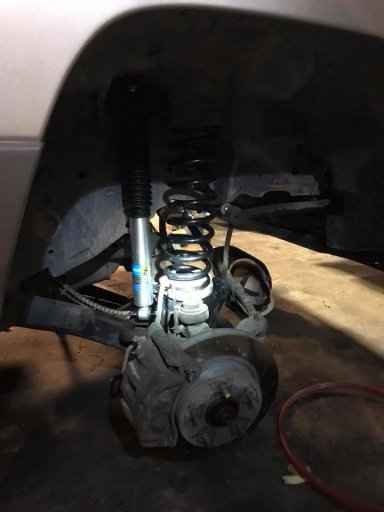
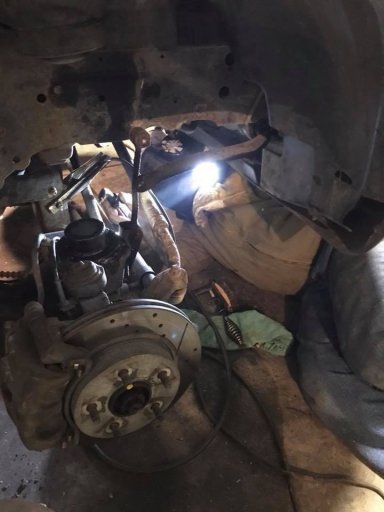
Well...started on the lift this weekend. Got the rear springs and shocks in. Totally raked out like an old school muscle car. Front lower spring perches were rusted out and the new ones are on the way. So the front end is apart and waiting. Pics to follow.
 
  • Like
Reactions: maxfederle89

maxfederle89

Rank IV

Pathfinder I

1,212
US
Well...started on the lift this weekend. Got the rear springs and shocks in. Totally raked out like an old school muscle car. Front lower spring perches were rusted out and the new ones are on the way. So the front end is apart and waiting. Pics to follow.
Congratulations! I look forward to seeing your work.

Sent from my SM-J320V using Tapatalk
 

adventure_is_necessary

Rocky Mountain Region Local Expert Kansas
Member

Traveler III

4,007
Bonner Springs, Kansas, United States
First Name
Lucas
Last Name
Antes
Member #

7082

Ham/GMRS Callsign
KE0ZXA
I'll get more pics up soon of the lift now that I've but a few miles on it. Aside from a slight knocking noise from the rear end as I hit bumps, it works flawlessly. I believe it may be a bad sway bar link. I'll get around to disconnecting it here soon and seeing if that does anything. The clunk is for sure on the driver side. I cannot get it to make the noise in my shop while cycling the suspension (jumping on the hitch receiver) but it for sure happens over 10mph. Next on the list aside from fixing the clunk, is installing the driveline armor. I've had a tcase skid and high clearance trans crossmember for a couple months. Now that the rig sits higher, I should be able to install these pieces without having to jack the rig up.
 
Last edited:

adventure_is_necessary

Rocky Mountain Region Local Expert Kansas
Member

Traveler III

4,007
Bonner Springs, Kansas, United States
First Name
Lucas
Last Name
Antes
Member #

7082

Ham/GMRS Callsign
KE0ZXA
So after re-checking the torque on all of the nuts/bolts on the suspension, I realized things had come loose after a little driving. Tightened it all up and less of a clunk. I have determined it is due to the stiffness of the suspension and the hitch mounted tow point flopping around in the receiver. I'll still look at replacing the sway bar and endlinks with something more suitable for the lift and upgraded ride quality. Getting some more bits in the mail this week. Hoping to address comms, campsite, and tools this weekend.
 
Last edited:

adventure_is_necessary

Rocky Mountain Region Local Expert Kansas
Member

Traveler III

4,007
Bonner Springs, Kansas, United States
First Name
Lucas
Last Name
Antes
Member #

7082

Ham/GMRS Callsign
KE0ZXA
Part of the bits I picked up below.
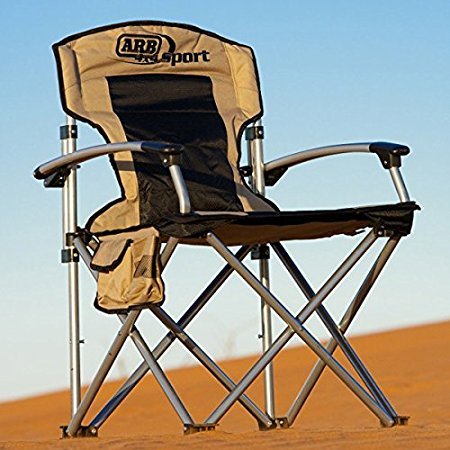
arb chair.jpg
ARB chair because who doesn't want a sturdy camp chair? A major plus aside from the built construction is the fact that it fits well inside a Plano case.
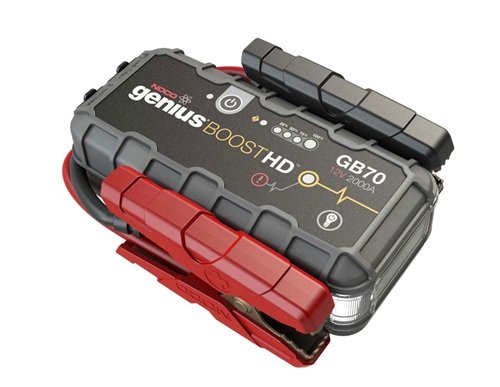
NOCGB70-3.jpg
This jumper box will come in handy in the event I have a dead battery.
 
  • Like
Reactions: netherwolfe

adventure_is_necessary

Rocky Mountain Region Local Expert Kansas
Member

Traveler III

4,007
Bonner Springs, Kansas, United States
First Name
Lucas
Last Name
Antes
Member #

7082

Ham/GMRS Callsign
KE0ZXA
Pics pending, but this weekend I managed to get my roof basket extension added. This yielded about 2ft of extra length which will come in handy when fully loaded. Also got the CB wired up and working. Might need to fine tune the antenna and CB tuning, but it works!

Also, I changed the oil and PCV last night. I was fed up with the common lifter (lash adjuster) tick that's common on these 4.7's. It felt like it wasn't ever going to get better. I was about to take it into my mechanic, but I decided to change the oil as it's been 3 months or so since I did it last and it was dirty after about 1500 miles. One bottle of MMO and 5qts of Mobil1 high mile syn and she's not ticking anywhere near as bad, especially in these colder temps. Fingers crossed that it continues to work so I don't have to dump a large amount of money to have the lifters replaced. I should have been using this oil all along.

Next project is building a kitchen chuck box to fit my Coleman Stove and the lantern I've been rebuilding. Hoping to make it lightweight and sturdy to eliminate the need for a larger case for all my kitchen stuff. With the same materials, I plan to build a sleeping platform that will level out the sleeping space, yield a slot to put my spare, and still allow easy access to the spare wheel well. I plan on covering it in carpet. The platform will sort of unfold over the backseat seat backs when they're all the way down.