1984 Ford Bronco Project

  • HTML tutorial

M Rose

Local Expert
Mod Team
Member

Advocate III

5,584
Northeast Oregon, United States
First Name
Michael
Last Name
Rose
Member #

20990

Ham/GMRS Callsign
W7FSB
Service Branch
US ARMY Retired
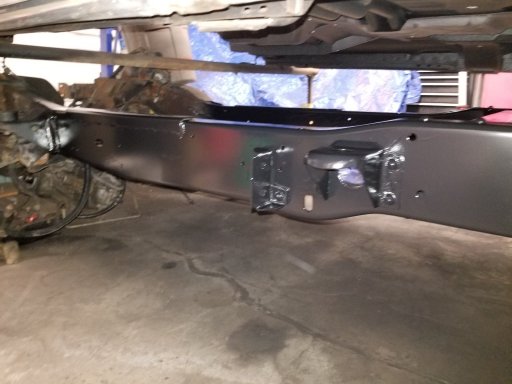
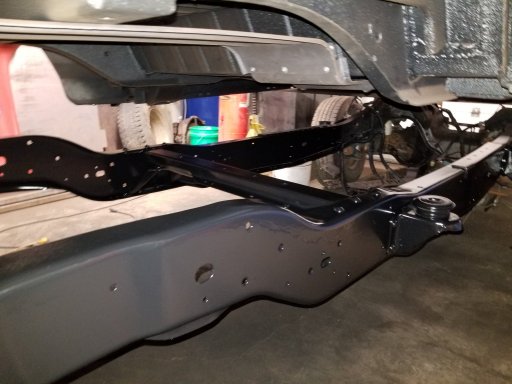
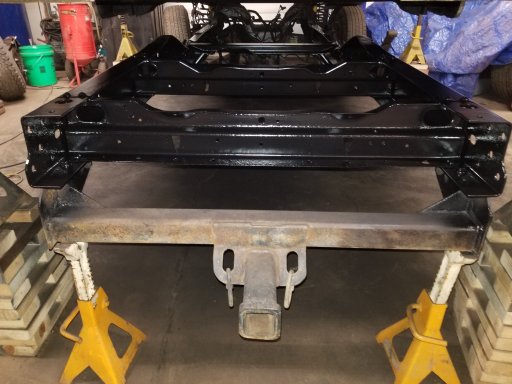
Mines never going to look that good... for now ill settle on fixing my minor cosmetic issues and work out a plan for huge upgrades in a few years.... need more time in the mountainswith her to know how im really going to drive her.
 

Enthusiast II

1,250
Hartford, SD
I know what ya mean. I didn't plan to go this far into it. But after deciding to make it my daily driver as well as family adventure mobile it grew. I was given some requests and definite needs to included or upgrade. And so the tools and parts started moving.
 

M Rose

Local Expert
Mod Team
Member

Advocate III

5,584
Northeast Oregon, United States
First Name
Michael
Last Name
Rose
Member #

20990

Ham/GMRS Callsign
W7FSB
Service Branch
US ARMY Retired
I hear ya there.... Mine is my DD as well... she lets me do what ever I want to the bronco, but everything I do to it is making it more comfortable to hear and the kids
 

Lanlubber In Remembrance

Rank V
Launch Member

Member III

2,827
Mimbres, NM, USA
First Name
Jim
Last Name
covey sr
Member #

16986

Ham/GMRS Callsign
none - BREAKER BREAKER HAND HELD CB AND WALKIE TALKIE
Last edited:
  • Like
Reactions: Dakota Houligans

Enthusiast II

1,250
Hartford, SD
Also pressure washed the newer frame that I will be using so I can get it cleaned up for some paint. Going to replace the leaf spring brackets since a few are getting pretty thin.

20191030_214728.jpg

Did find a spot for another repair. Nothing a little cutting and welding and reinforcement couldn't fix.

20191026_091304.jpg

20191026_154441.jpg

Ended up with a little helper for a bit.

20191027_152553.jpg

Drivers side spring and brackets removed.

20191030_214718.jpg

Passenger side almost removed...

20191101_220011.jpg

After the brackets are off I started to clean up with a wire wheel.

20191105_232001.jpg

Now just a lot more time with the wire wheel then its clean up and paint.
 
  • Like
Reactions: bonsaidave

Lanlubber In Remembrance

Rank V
Launch Member

Member III

2,827
Mimbres, NM, USA
First Name
Jim
Last Name
covey sr
Member #

16986

Ham/GMRS Callsign
none - BREAKER BREAKER HAND HELD CB AND WALKIE TALKIE
Also pressure washed the newer frame that I will be using so I can get it cleaned up for some paint. Going to replace the leaf spring brackets since a few are getting pretty thin.

View attachment 126920

Did find a spot for another repair. Nothing a little cutting and welding and reinforcement couldn't fix.

View attachment 126921

View attachment 126922

Ended up with a little helper for a bit.

View attachment 126923

Drivers side spring and brackets removed.

View attachment 126924

Passenger side almost removed...

View attachment 126925

After the brackets are off I started to clean up with a wire wheel.

View attachment 126926

Now just a lot more time with the wire wheel then its clean up and paint.
Cant open attachments !
 

Lanlubber In Remembrance

Rank V
Launch Member

Member III

2,827
Mimbres, NM, USA
First Name
Jim
Last Name
covey sr
Member #

16986

Ham/GMRS Callsign
none - BREAKER BREAKER HAND HELD CB AND WALKIE TALKIE
Cant open attachments !
Okay they opened. I can appreciate all the work your doing on the clean up of parts. I've done it several times and I know how hard it is and time consuming. The last time I did it I just took it to a sand blaster who also rust primed it. Didn't really cost that much and I still had to final paint it. You sure work fast, it seems like only yesterday you were taking the body off both rigs.
Your doing good superman !
Lanlubber
 

IronPercheron

Rank VI
Launch Member

Pathfinder I

3,346
Sweeny Texas
Member #

0990

That 9 inch can be converted to a high pinion rear... protecting the driveshaft and increasing ground clearance.

You can buy the 3rd member from Hi-9 or you can make the conversion at home. You look like you could handle it, the trick is to build a oiling system (slinger style) to keep the pinion bearing bathed in oil.

They run surprisingly low temp, and create the mentioned benefits above.

Keep on keepin on.
 

IronPercheron

Rank VI
Launch Member

Pathfinder I

3,346
Sweeny Texas
Member #

0990

I was talking about the side steps hanging down, not the bumpers. I never heard of a 10.25 rear gear ratio, what did that come out of. The tires must have been 60" diameter. 4.10 is a good all around gear as long as the tires stay under 35" Dia. (IMHO)

OHHHHH

Those aluminum steps are off now, I stored them to sell later.
 

Lanlubber In Remembrance

Rank V
Launch Member

Member III

2,827
Mimbres, NM, USA
First Name
Jim
Last Name
covey sr
Member #

16986

Ham/GMRS Callsign
none - BREAKER BREAKER HAND HELD CB AND WALKIE TALKIE
That 9 inch can be converted to a high pinion rear... protecting the driveshaft and increasing ground clearance.

You can buy the 3rd member from Hi-9 or you can make the conversion at home. You look like you could handle it, the trick is to build a oiling system (slinger style) to keep the pinion bearing bathed in oil.

They run surprisingly low temp, and create the mentioned benefits above.

Keep on keepin on.
That's good for the rear diff. What about the front, I've never heard of doing it to the front (by a do it yourselfer) which I think is far more vulnerable. I don't think he is planning a rock crawler, just challenging trails etc.
What about that Dakota ? What terrane are you going to challenge ?
 

M Rose

Local Expert
Mod Team
Member

Advocate III

5,584
Northeast Oregon, United States
First Name
Michael
Last Name
Rose
Member #

20990

Ham/GMRS Callsign
W7FSB
Service Branch
US ARMY Retired
That's good for the rear diff. What about the front, I've never heard of doing it to the front (by a do it yourselfer) which I think is far more vulnerable. I don't think he is planning a rock crawler, just challenging trails etc.
What about that Dakota ? What terrane are you going to challenge ?
On the FSBs and F-150 the front diff is already very high with the TTB suspension. Longarms, home brewed control arm brackets, and custom axle housings can lift the third member higher if you feel that the stock geometry leaves the diff vulnerable. Or you can do a solid axle swap and achieve the same resaults
 

Enthusiast II

1,250
Hartford, SD
Yea the front doesn't get much higher. Most of the fords come with a high pinion front axle from the factory. I've considered the Hi9 before. at the time it didn't seem worth the money. It already has the gears I want and an air locker in it. rebuilt it all 4-5 years back. I may be wrong but if I remember right you needed to run a special ring and pinion with the hi9 to get the correct mesh and at the time it actually made the ring and pinion weaker due to running on the coast side of the gear set. But It's been years since I looked at them so some of the down sides have probably been corrected. I did like the idea of getting it up higher. I'll have to look into it some more.

I've been in some decent boulders but nothing compared to whats farther west. I won't say It will never be rock crawling but it isn't my primary focus. Mostly it will be rough back country roads and mild to medium mountain trails. Hope to make it out to the Southwest again at some point to do some exploring and camping with the kids. So I'm sure some minor rock crawling will be involved. Since this one is nicer than the last one. It will probably stay about 2/3 or less of the way up most difficulty scales. Challenging enough to be fun. With the wife along I'll have to keep the crazy down a little and the water below the hood! Trying to make it capable enough to get me down almost any trail I get the urge to explore and still drive home.
 
  • Like
Reactions: TexasGMG

Enthusiast II

1,250
Hartford, SD
I got the rest of it cleaned up this weekend. Lots of fun time with the wire wheel and wax/grease remover. But I got it.

20191210_223728.jpg

20191221_132937.jpg

After a final srub with was and grease remover I sprayed 2 coats of epoxy prime on the frame.

20191221_200503.jpg

20191221_200550.jpg

Then I put 2 coats of valspar industral semi gloss black paint on.

20191222_074602.jpg

20191222_074548.jpg

20191222_074529.jpg

It is a little shinier than I would like but I'm pretty sure I'll get over it. Now to let it dry and start putting some things back together.
 

Attachments

Lanlubber In Remembrance

Rank V
Launch Member

Member III

2,827
Mimbres, NM, USA
First Name
Jim
Last Name
covey sr
Member #

16986

Ham/GMRS Callsign
none - BREAKER BREAKER HAND HELD CB AND WALKIE TALKIE
  • Like
Reactions: Dakota Houligans

Enthusiast II

1,250
Hartford, SD
Super nice, you've been working your butt off on this project. You should be pretty proud of your accomplishments in such a short amount of time. I'm very impressed with your ability for detail !
Thanks. My chiropractor has been liking all the extra hours and work. It's a good thing I don't sleep much normally! Probably being more fussy than I need to be for it's intended purpose. But the hope is that it will last for awhile.
 

Lanlubber In Remembrance

Rank V
Launch Member

Member III

2,827
Mimbres, NM, USA
First Name
Jim
Last Name
covey sr
Member #

16986

Ham/GMRS Callsign
none - BREAKER BREAKER HAND HELD CB AND WALKIE TALKIE
Thanks. My chiropractor has been liking all the extra hours and work. It's a good thing I don't sleep much normally! Probably being more fussy than I need to be for it's intended purpose. But the hope is that it will last for awhile.
At least another 50 + years !