'08 Hummer H3 Alpha build

  • HTML tutorial

JPaul

Rank V
Member

Pioneer I

2,596
Mendon, UT, USA
First Name
Paul
Last Name
Allen
Member #

11021

Ham/GMRS Callsign
N1JPA
Some shots showing the routing of the negative cable through the rear pillar. I'll be adding split loom along the length and some ABS pipe where it exits the pillar at the bottom to protect the cable. While it is the negative cable and does not pose a hazard if it wears through, it isn't good for the life of the cable.


JPaul

Rank V
Member

Pioneer I

2,596
Mendon, UT, USA
First Name
Paul
Last Name
Allen
Member #

11021

Ham/GMRS Callsign
N1JPA
I notched the lower and upper trim panels for the positive cable and the upper panel is notched for the ground cable as well. I had to do some additional notching for the positive cable due to a misjudgment on my part of how everything was going to fit. That subwoofer unit is really in the way and taking up a lot of useful space, but I also like the better sound I get with it, so it's a real toss up. Maybe someday I'll pull the subwoofer out and leave the Monsoon amplifier in place to use the space for something else, but for now I'll just work around it.


The positive cable is actually for a Kenworth tractor, it is 3/0 SAE SGX flex (though it doesn't flex near as much as the ground cable which is 2/0 marine cable with a more flexible jacket). I picked it up for a steal, especially considering the first item they sent me was some 2 gauge instead of 2/0 like the auction was originally labeled for but they let me keep in addition to sending me the "right" cable. However it was also 18' long, which was roughly 5-6 feet longer than I needed. Here is where having to rough fit everything first and then cutting the cable and crimping it outside of the car is a challenge, I may or may not have still ended up with it being too long. I won't know for sure until I get everything all put together. I am thinking though that I may cut the cable right where it curves around the subwoofer and make a junction to tie in another length of cable to use for powering a rear winch and/or providing house power to my trailer.

Tomorrow I hope to go get the material to start making the power center panel brackets and finish getting this closer to buttoned up.
 

JPaul

Rank V
Member

Pioneer I

2,596
Mendon, UT, USA
First Name
Paul
Last Name
Allen
Member #

11021

Ham/GMRS Callsign
N1JPA
Didn't get as much done as I was planning on today, instead I spent most of my time wandering around Lowes figuring out how to put the brackets all together and buying Christmas decorations for 75% off.

I did get the brackets in place tonight though. I used 1/8" x 1" aluminum angle and bolted it in place using the existing holes/slots the trim panel's clipped into.

Lower:


Upper:


Another shot of the upper showing the spacers (washers) to get it to fit correctly. Initially I used 1/2" nylon spacers, but those were too thick, then I tried 1/4", but that was still too thick, so I dropped down to 3 washers which is just about right.


The upper bracket is extremely sturdy, the lowering has some flex towards the rear but it should tighten up nicely once the panel is bolted into place. I'm debating if this will be strong enough to handle the dynamic load of my ham radio's main chassis, it's pretty heavy weighing in around 5 pounds. So even with how strong this should all be once it's fully assembled, I am worried about horizontal loading from the radio possibly eventually work hardening the lower rear sheet metal from flexing back and forth. I may just mount the radio chassis to the lower trim panel since it would be able to withstand the load just fine, but we'll see how it all works out. I am thinking of adding a brace from the rear-most bolt for the lower bracket to another bolt a few inches lower that the subwoofer assembly uses to help stiffen everything up, which would probably be a good idea no matter which way I go with mounting the radio chassis.

The next step is going to be measuring where the brackets are located in relation to the window glass, then putting the upper trim in place and marking where to drill, then drill pilot holes through the trim and the brackets. Then I will pull the trim back off, drill the trim to size for the mounting bolts, and then drill the brackets out to accept rivnuts and install those. I have a set of various sizes of metric rivnuts which will work great for this setup, I can simply bolt through the trim when installing the main panel for the electrical. I chose to go with metric for as much as possible on the H3 since virtually every bolt and nut on it is metric. It's a lot easier to only have to carry one set of tools to work on my rig, either at home or out in the field.
 
  • Like
Reactions: Jimmy P

JPaul

Rank V
Member

Pioneer I

2,596
Mendon, UT, USA
First Name
Paul
Last Name
Allen
Member #

11021

Ham/GMRS Callsign
N1JPA
Slow going thanks to the cold and just being tired from this entire year.

Managed to at least get the rivnuts in. Started out by measuring everything off the glass and marking the glass with a sharpie.


Next up was putting the trim back on, transferring my measurements and marking the drill locations, then drilling 1/8" pilot holes through the trim and the aluminum angle. I then drilled out the aluminum for the rivnuts. Since I am using metric rivnuts my standard drill bit sets didn't have the size I needed, so I ended up having to take some time running over to Harbor Freight and buying one of their 29 piece fractional sets.

For the installation I just used a M6 bolt, nut, and a piece of flat strapping that already had holes in it. It's a cheap and easy method for installing rivnuts without buying the tool that may or may not break on you unless you spend a couple hundred dollars. You simply hold the flat stock in place so that the rivnut doesn't try to spin, hold the bolt in place as well using a wrench, and then turn the nut with a wrench to set the rivnut.


I also added some red threadlocker to help secure the rivnuts. While they can hold in place pretty well usually, and in this case especially since it's able to bite into the aluminum nicely, you can run into instances where the rivnut may spin if it's over-tightened or the bolt seizes in it. Hopefully neither will happen in my case, but it doesn't hurt to be proactive.


I should have done some testing on the extra bit of aluminum angle to make sure the rivnuts would work the way I was anticipating, but I used a mirror to make sure they were flaring correctly. It's a bit hard to see here but if you look you can see the rivnut flaring out and biting into the aluminum.


Rivnuts all in place and ready for the electrical panel to be bolted in (once I fabricate it of course). This whole setup should be plenty strong and provide years of service.


  • Like
Reactions: Jimmy P

JPaul

Rank V
Member

Pioneer I

2,596
Mendon, UT, USA
First Name
Paul
Last Name
Allen
Member #

11021

Ham/GMRS Callsign
N1JPA
Finally got it mostly buttoned up today. It's complete enough that I was able to get the trim back on and the seats in so that my kids can ride with me again.

First up was making a chafing guard for the upper hole. I used some door edge trim that I cut to allow it to flex enough.


To make a sheath for the ground cable I took some heater hose, cut it in a spiral (so that it will stay on even with bends), and wrapped it around the cable. I ran into trouble feeding it back through the pillar as the heater hose kept getting caught and then trying to peel off. To fix that I used some of the adhesive heat shrink and used that to fasten the one end of the hose to the cable. Taking the subwoofer out to gain access to another hole in the pillar helped as well. I'm going to put some heatshrink on the upper end as well once I have everything all in place to make it clean.

 
  • Like
Reactions: Jimmy P

JPaul

Rank V
Member

Pioneer I

2,596
Mendon, UT, USA
First Name
Paul
Last Name
Allen
Member #

11021

Ham/GMRS Callsign
N1JPA
Next up was routing the positive cable. I gave myself several extra inches when I shortened it, since I know it's easier to shorten it again than it is to have to buy a whole other cable. Turned out to be a good thing as the extra length I gave myself ended up being just right once I had the cable properly routed and fastened into place.


And here it is with the trim back in place:


Now that this part is done, I am going to take my time to get the rest of it finished up. I still need to fabricate the panel that will go in the window, get that mounted as well as the fuseblock, run the cables up in the engine bay, and then start on the rest of the wiring for the fridge, radio, inverter, etc.
 
  • Like
Reactions: Jimmy P

JPaul

Rank V
Member

Pioneer I

2,596
Mendon, UT, USA
First Name
Paul
Last Name
Allen
Member #

11021

Ham/GMRS Callsign
N1JPA
Been a while, work has been keeping me busy and the weather has not really been cooperating when I do have free time, plus trying to get the house packed up and ready to sell has been chewing a lot of my time. I've made zero progress on the rear power of course, but with a trip to Moab coming up this weekend and then in May I'll be going to the Overland Expo West, I needed to get some work done.

To start, I am going to be putting some 20w (10w really, they're Chinese knockoffs of the KC Hilites, but still are just what I was wanting in a light as far as pattern went) flood lights on the roof as camp/area lights as part of this, but getting all the parts I needed for the switches and whatnot was not only going to take longer than I wanted, but I knew that getting it all hooked up would take forever as well. Fortunately my wife is very understanding and agreed that it would be best in the long run to just go with the Switch Pros SP-9100 instead of either trying to roll my own, or using some cheap Chinese knockoff that may or may not work well. Thankfully Amazon had it available with next day, so I received it yesterday and even better was the weather cooperating tonight and not raining on me like it originally was planned to.

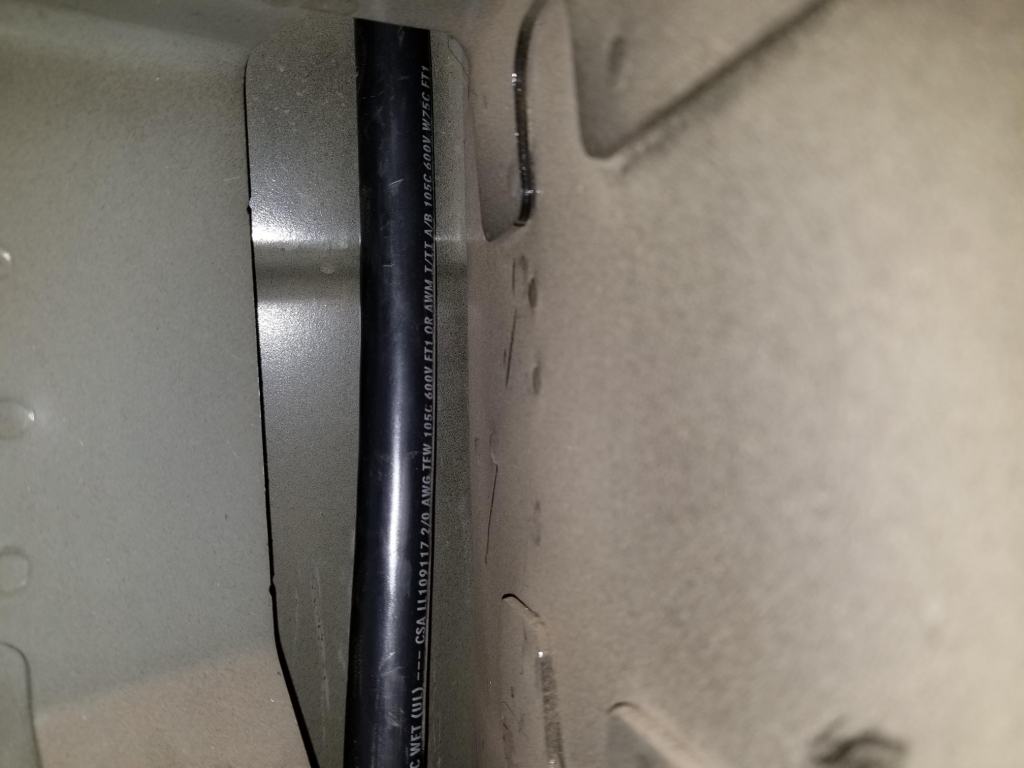
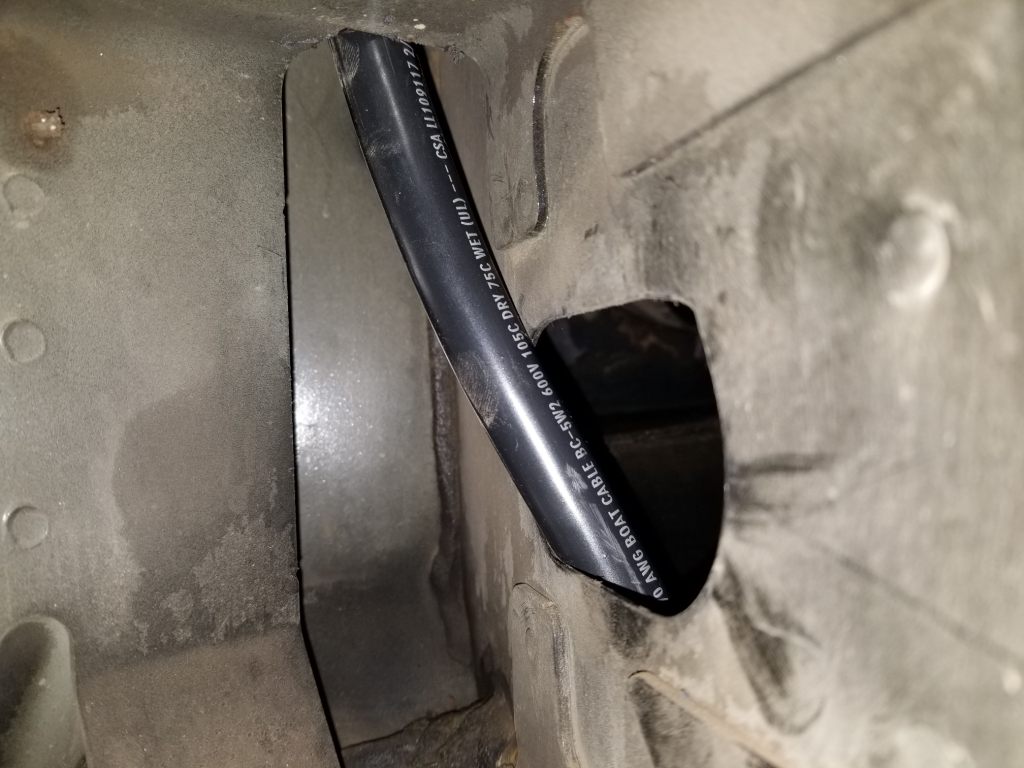
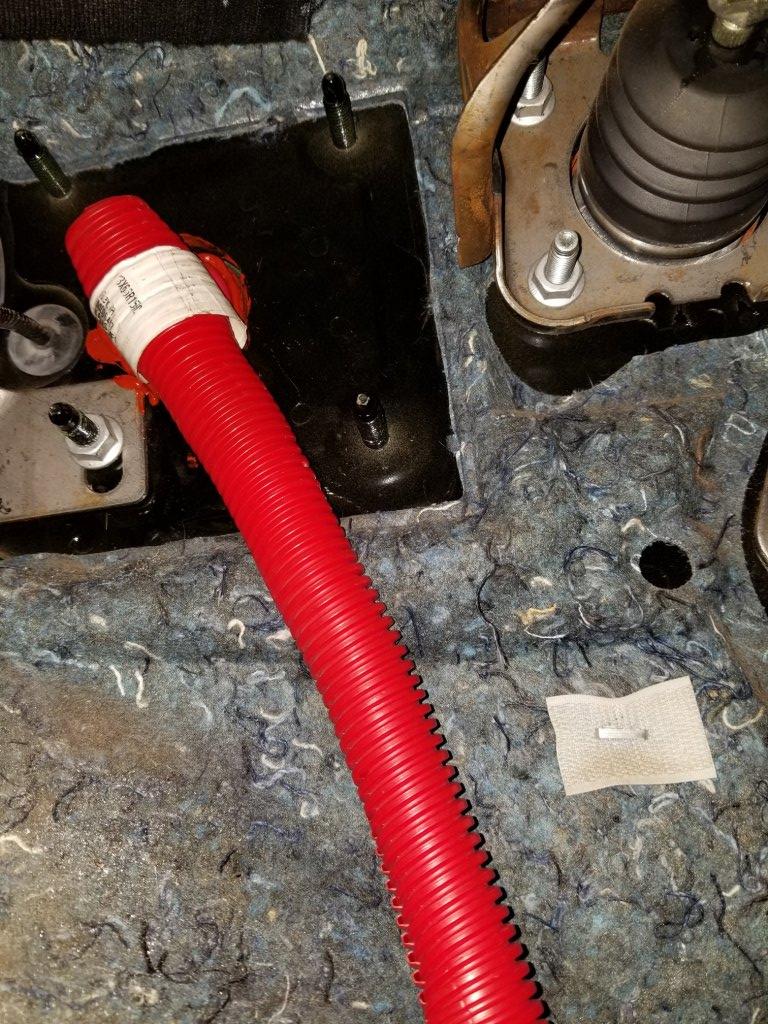
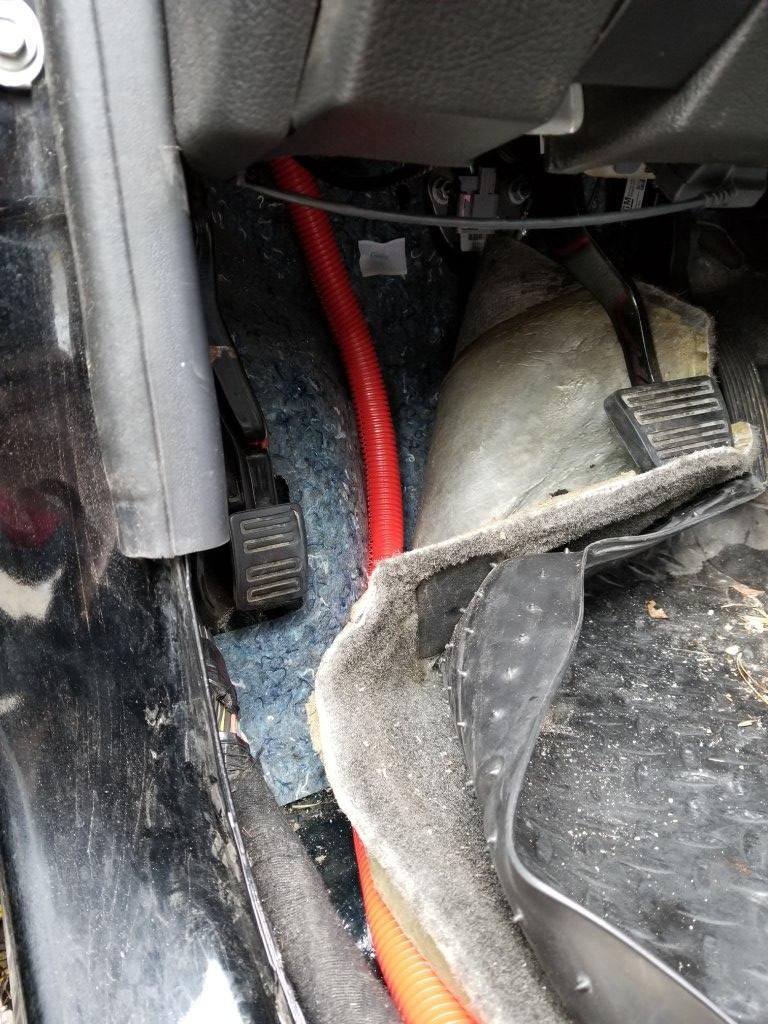
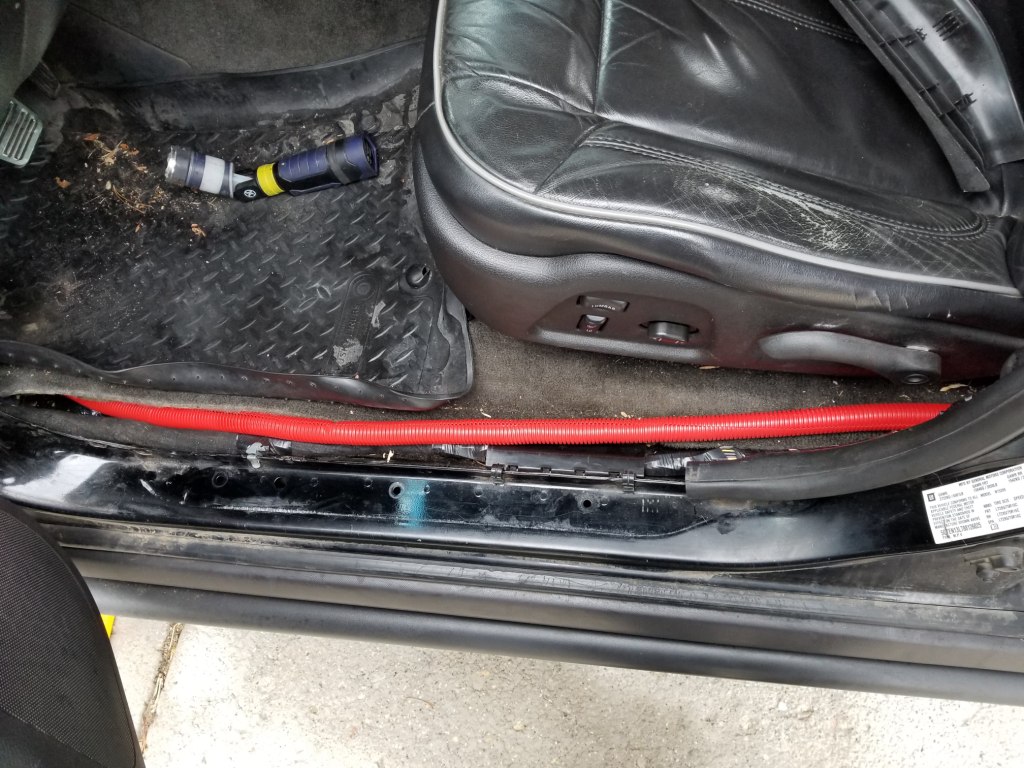
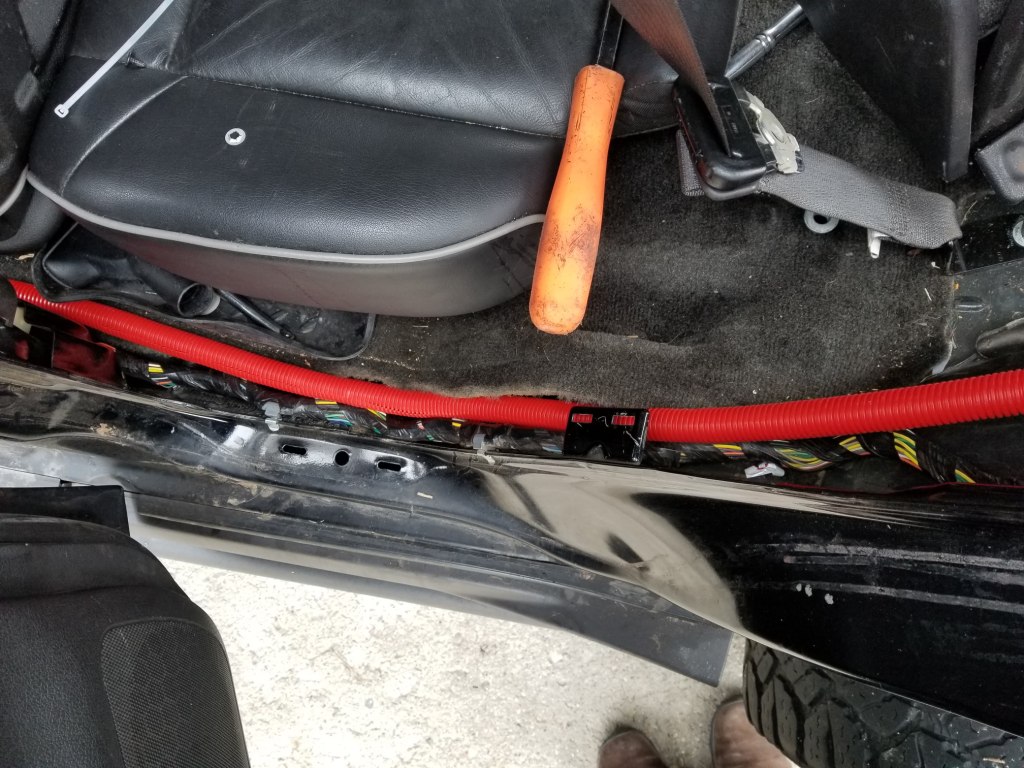
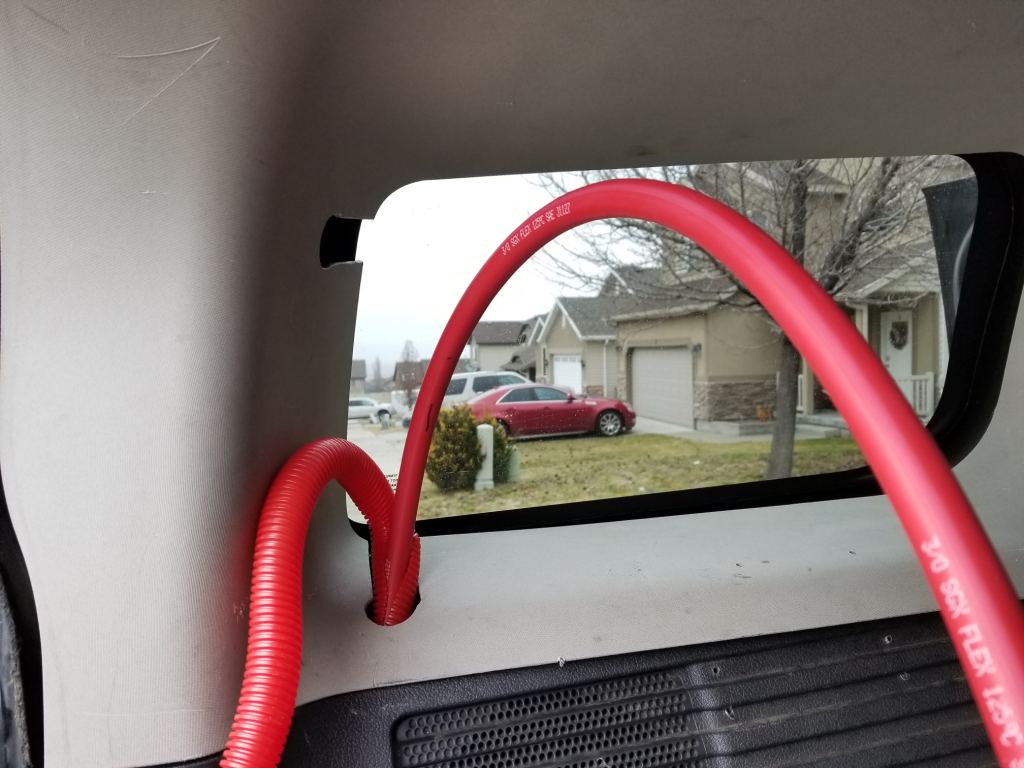
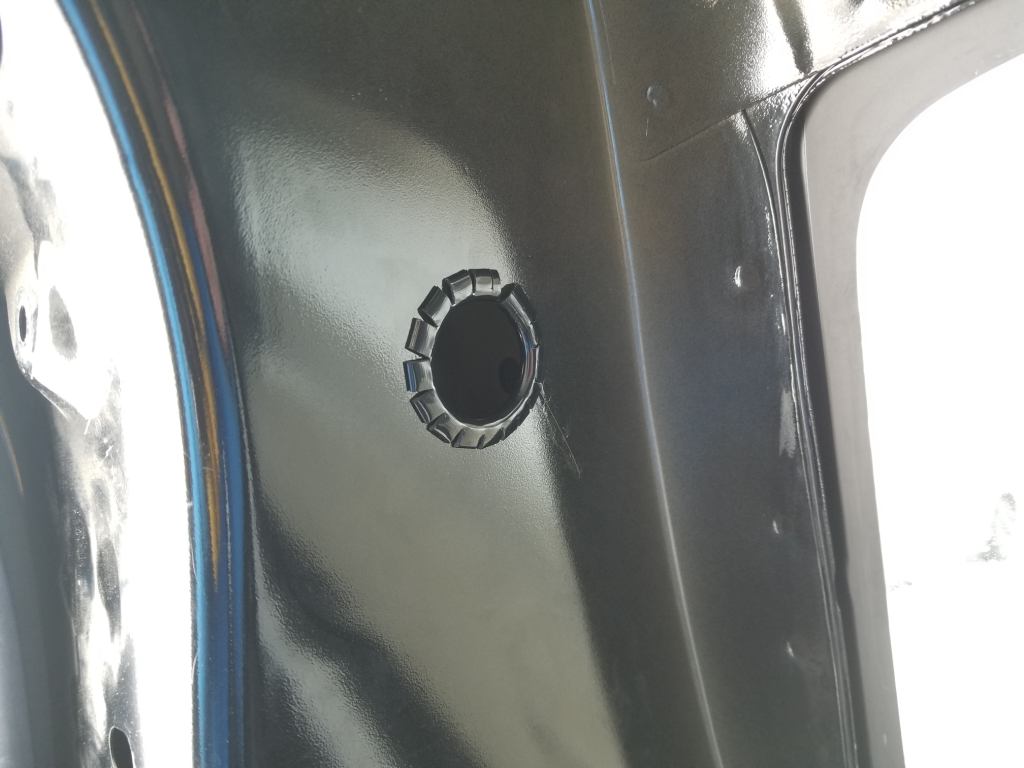
First up was finally drilling the hole in the firewall for the boot I've had sitting around almost a year and getting that installed so that I could route the control panel cable in, as well as the cables for my oil pressure gauge. The gauge is still housed in the cardboard insert from the original packaging, but at least now the cables aren't being fed in through the door opening. Did I mention I've had very little free time the last year or so?


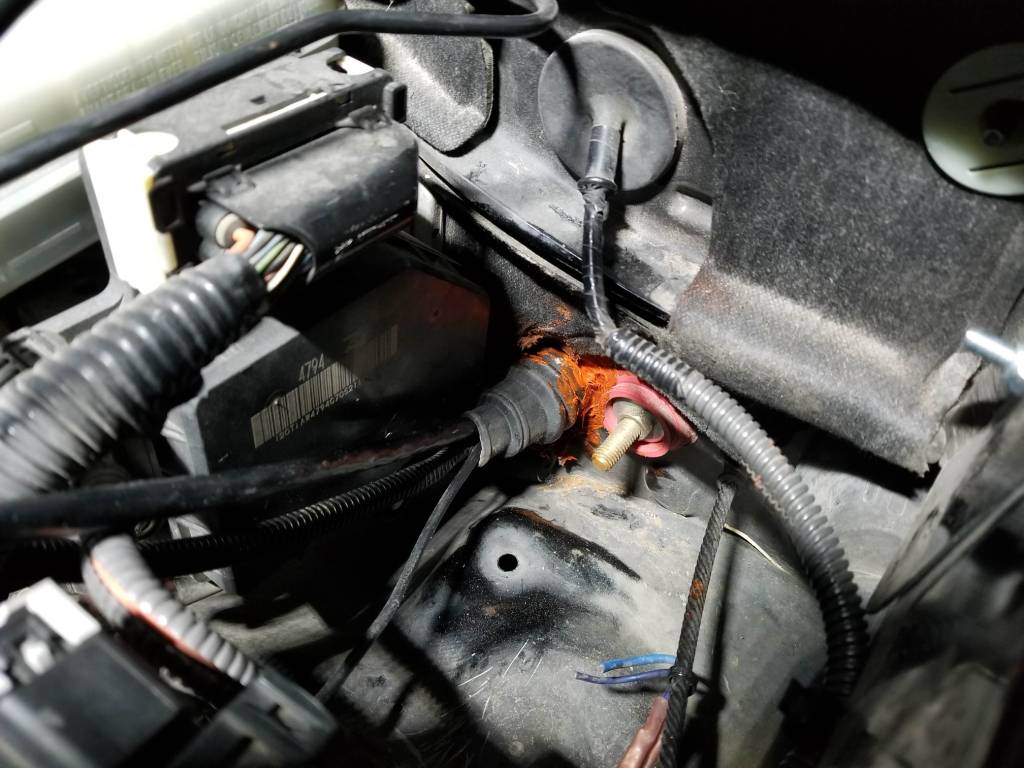
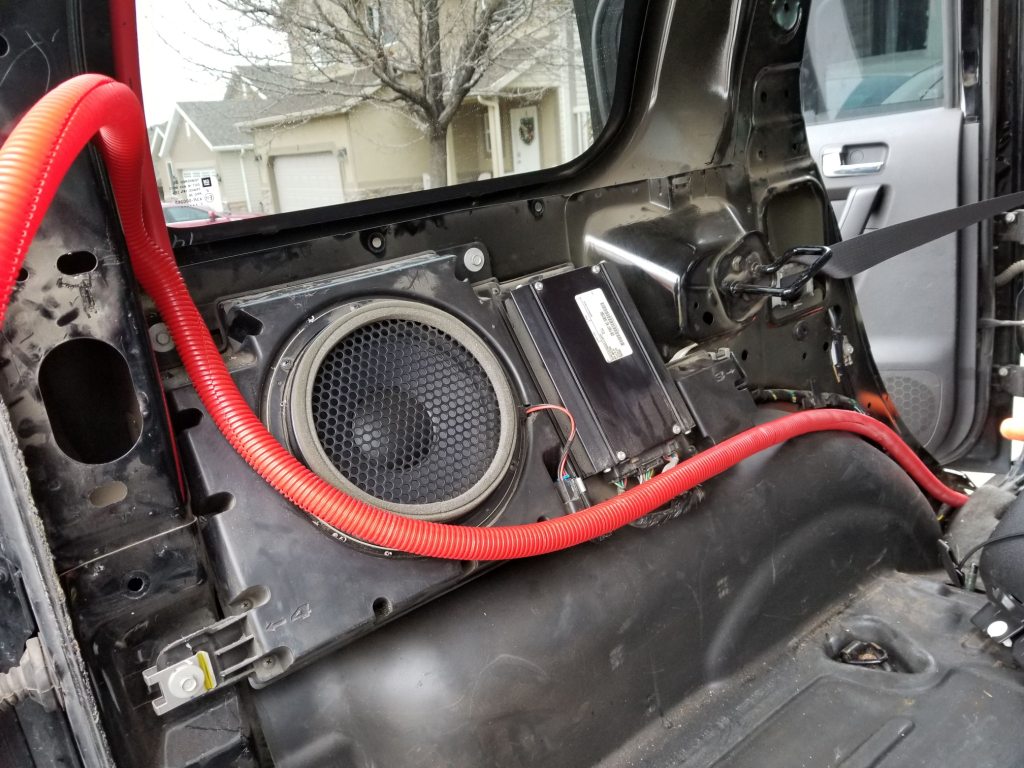
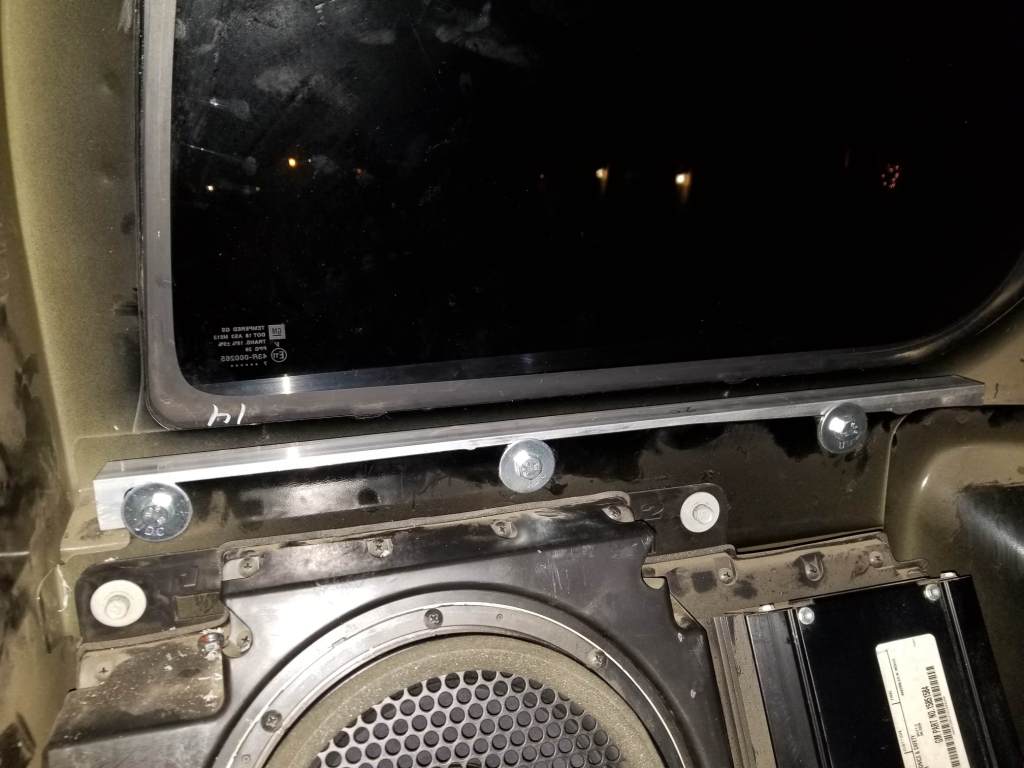
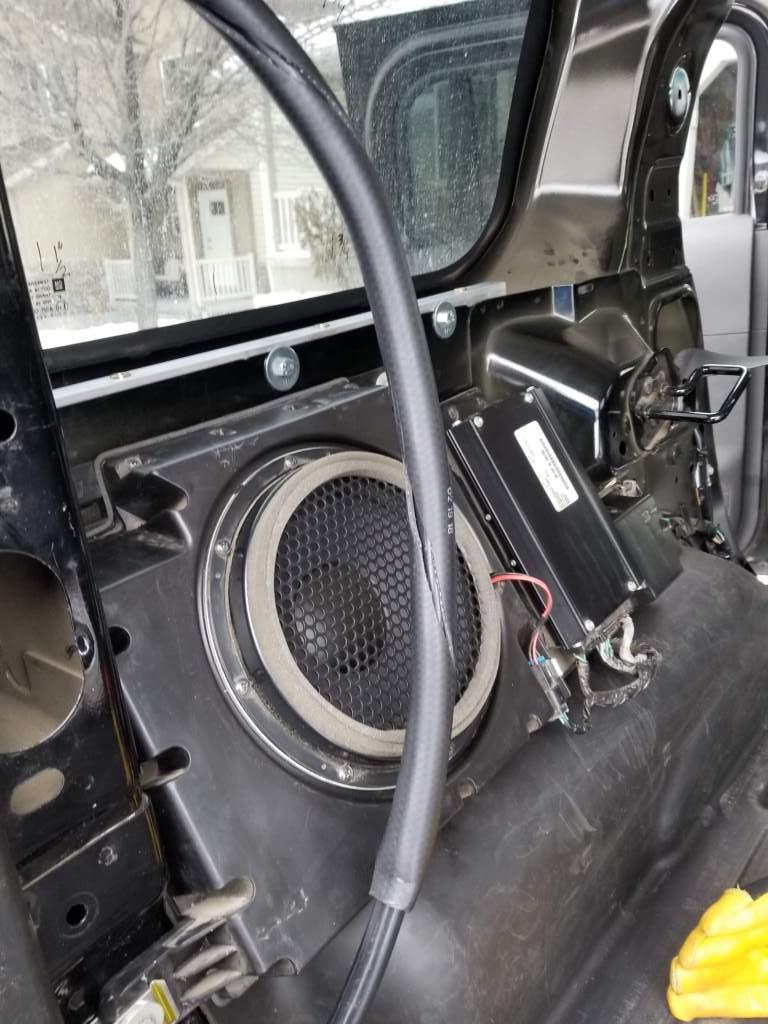
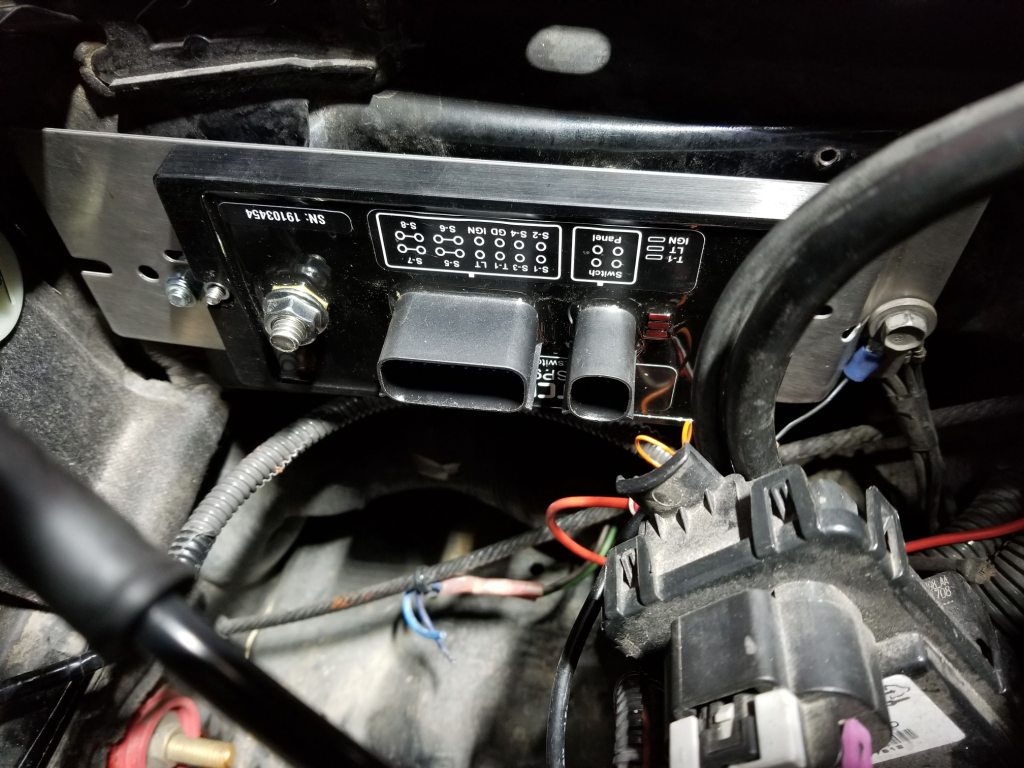
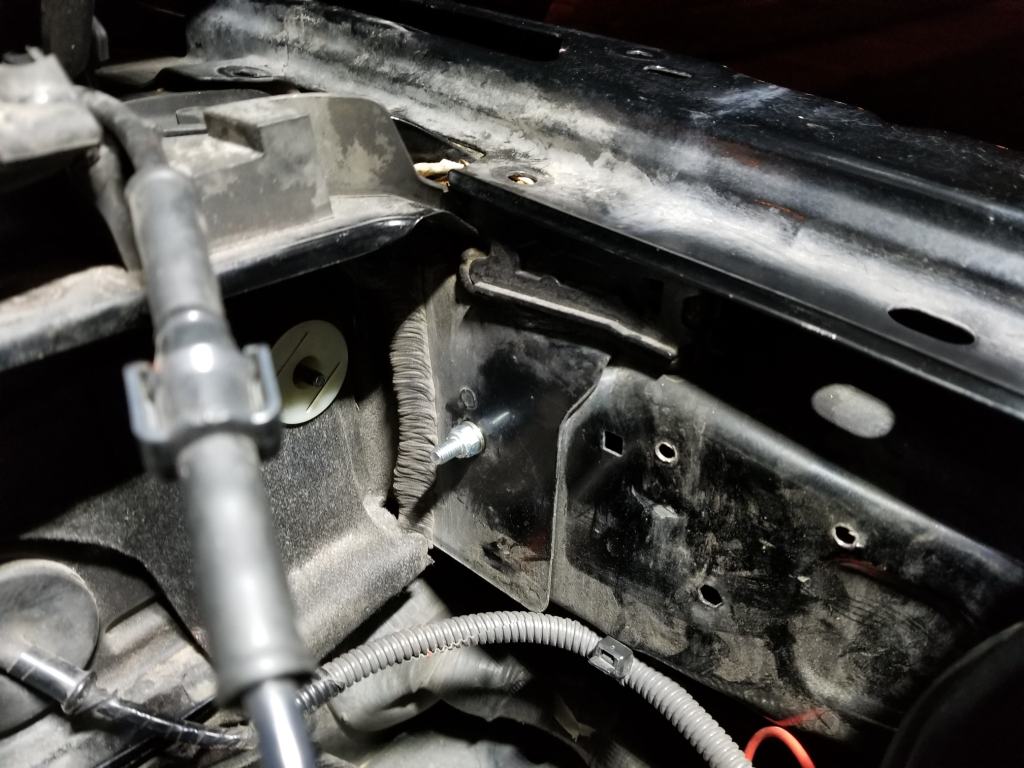
So that part didn't take me very long, maybe a half hour or so and that included trying to find my sealant. Next up was figuring out where and how to mount the control unit for the SP-9100. Since the warranty dictates that it has to be mounted upright instead of flat, I had to find somewhere to put it that permitted that orientation. Unfortunately the Hummer H3 is very, very short on space and surfaces in the engine bay, especially when it has a V8 shoehorned into it. I eventually figured out that I could mount it on the fender wall on the driver side. There happened to be an existing hole that I could put a bolt through after pulling the wheel well liner, and then the bracket would use that bolt plus an existing bolt used for a ground point after bending a "Z" in the bracket to space it correctly.


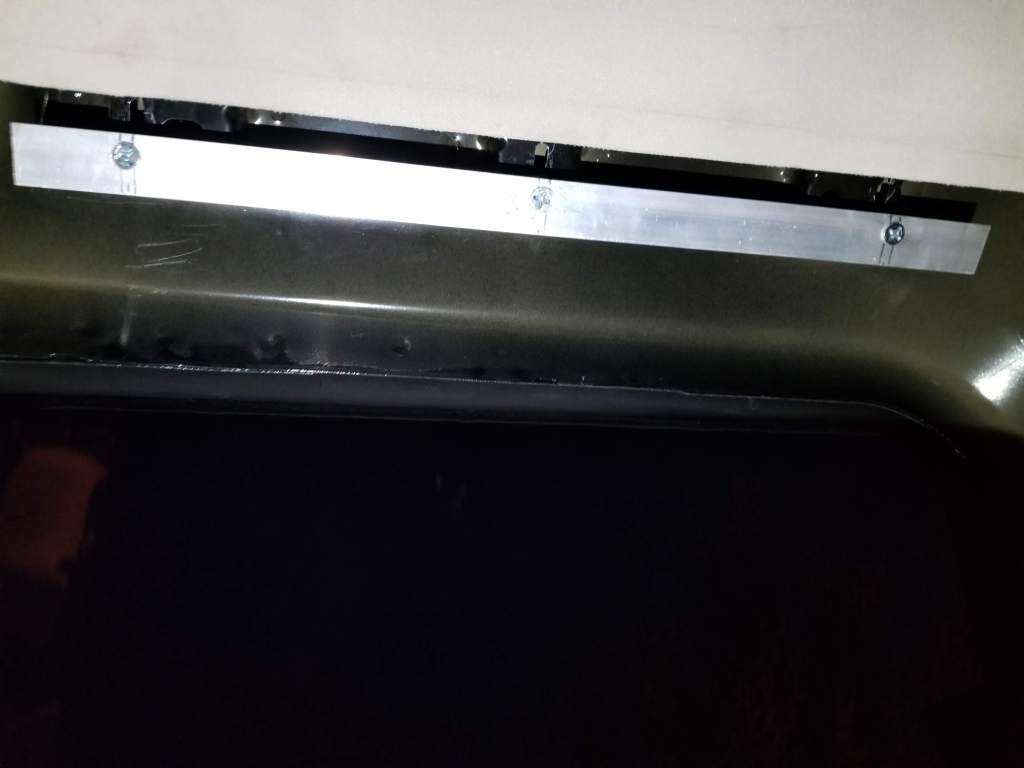
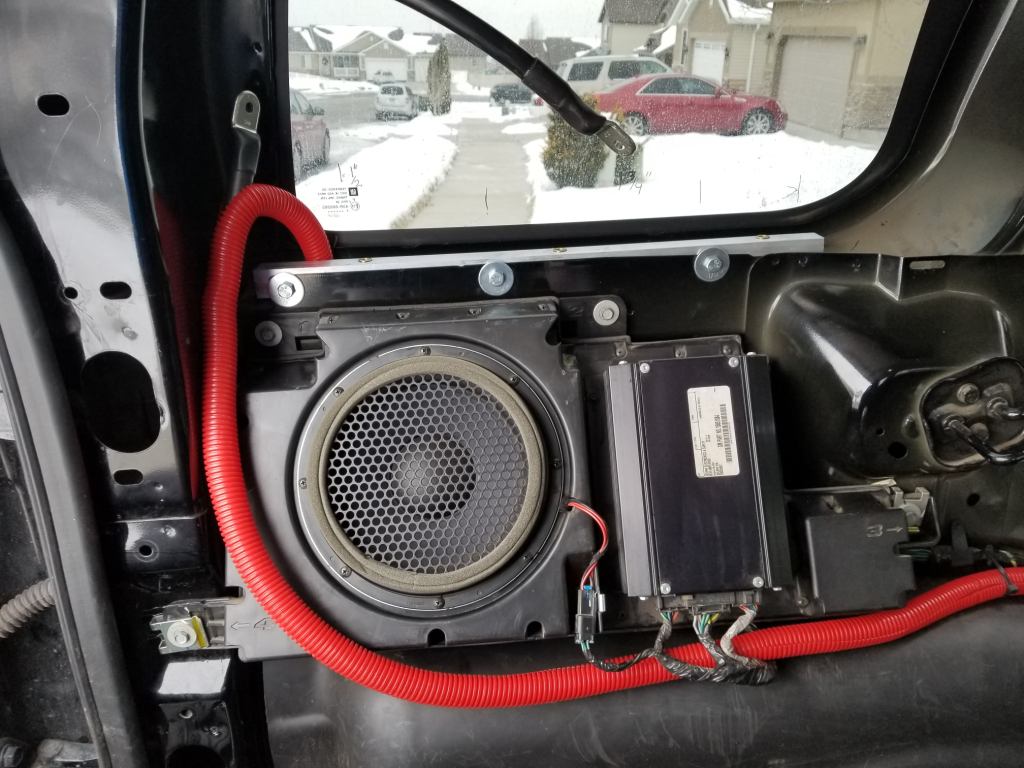
Here it is with the bracket and power unit all in place. This is as far as I was able to get tonight, but considering it originally was supposed to rain all day and night, I'm pretty happy to have gotten this much done. It took me a lot longer than I would have liked to get just this part mounted, but at least it's done right.


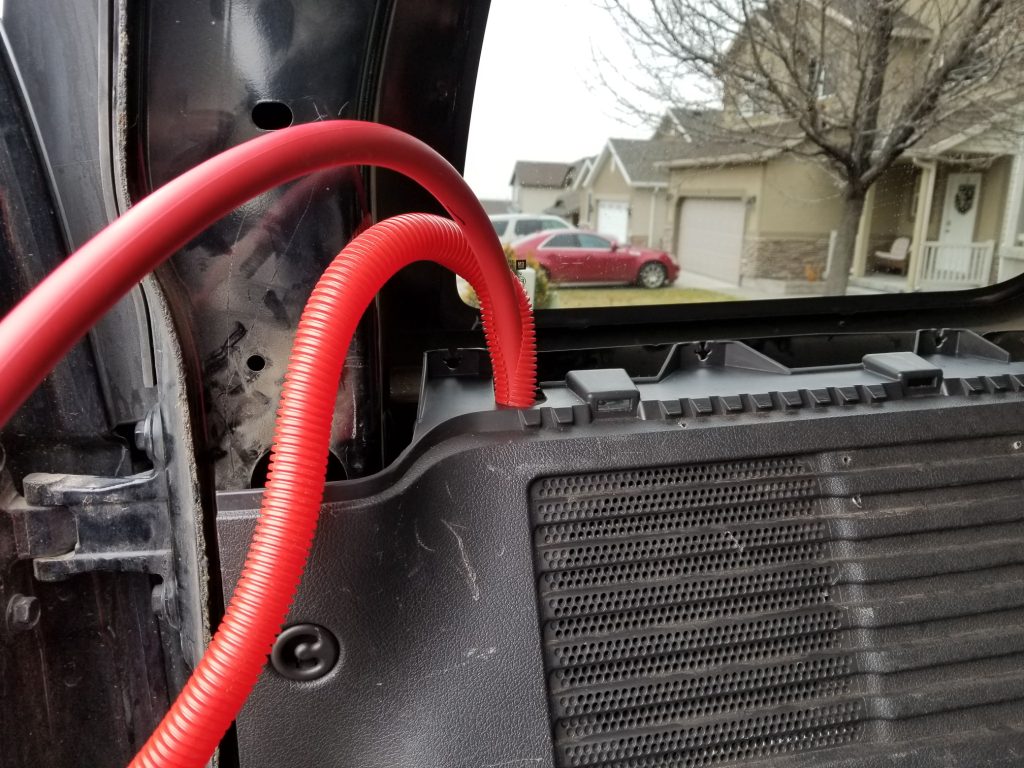
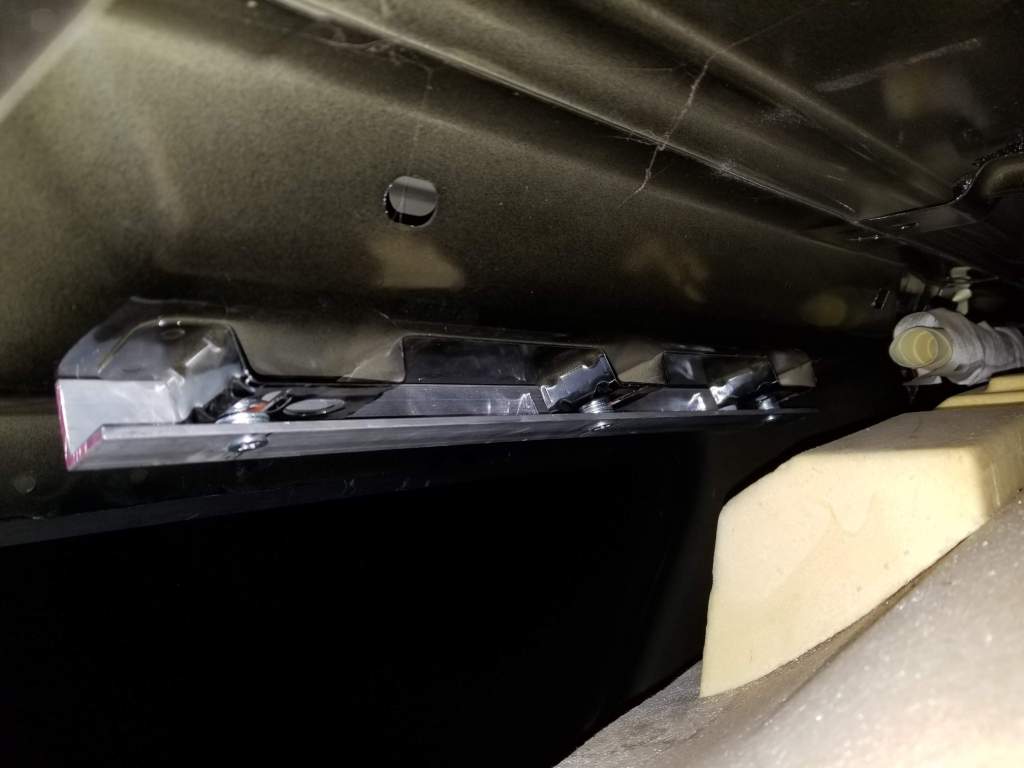
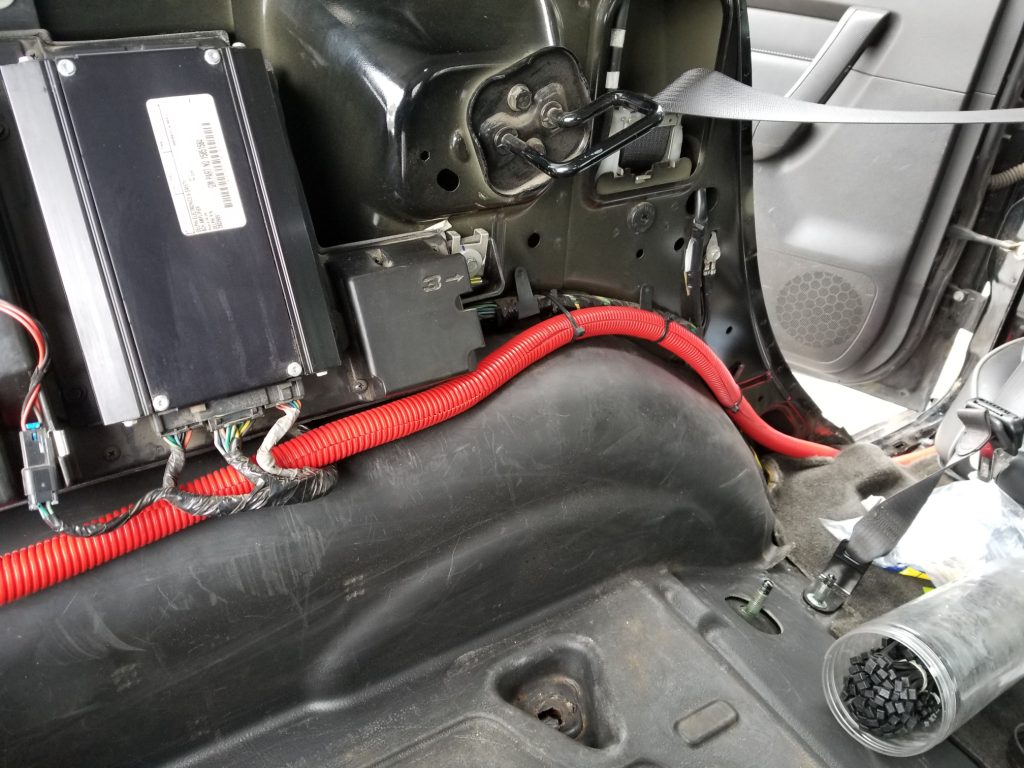
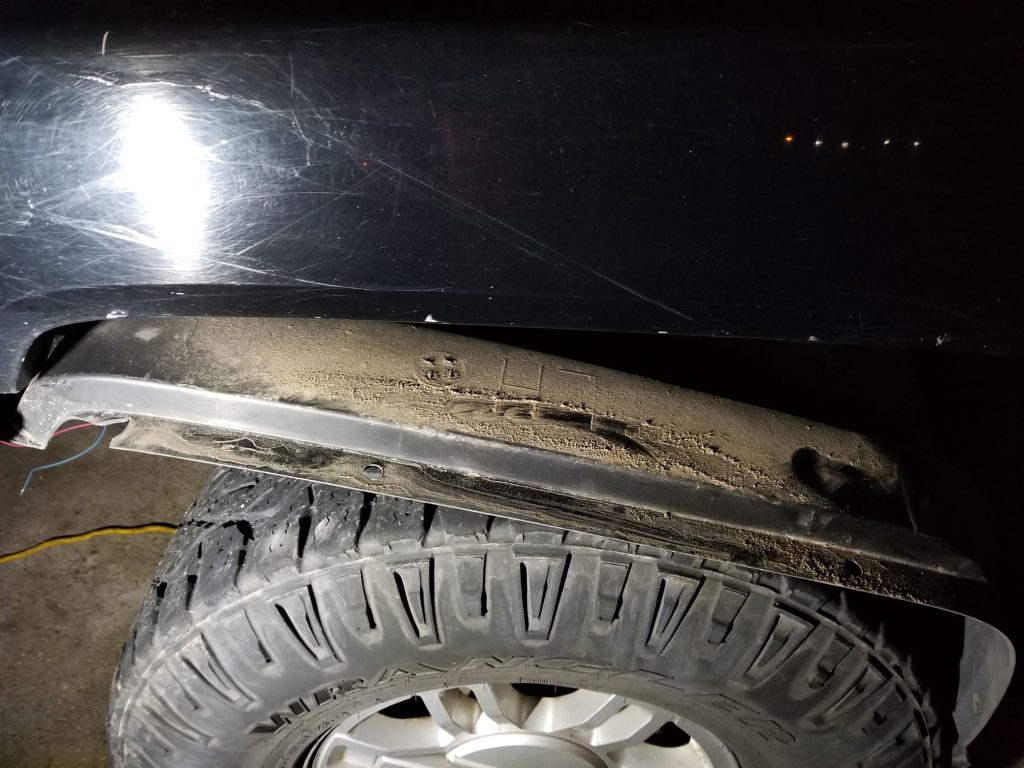
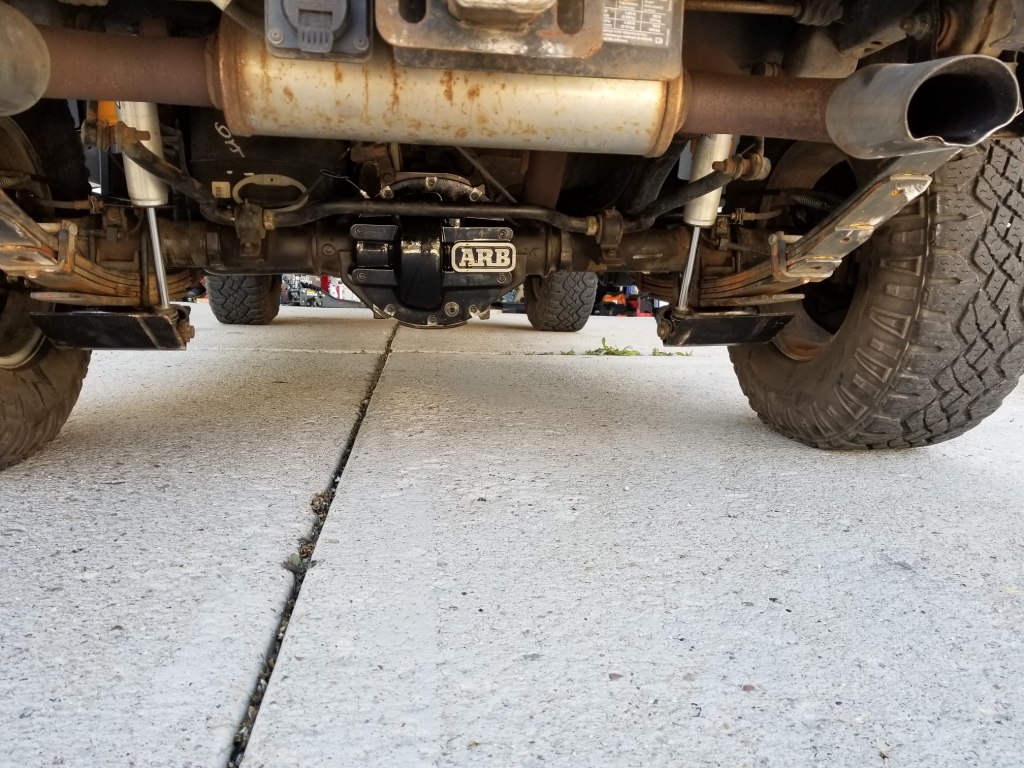
And while I had the wheel well liner removed, I took a shot to show why having a snorkel installed before the Moab trip is one of my (loftier) goals.


That is not several years of dust and dirt. That is less than a year's worth. I has moved the wheel liners over from my red H3 to this one since they were already cut for the Thor bumper. Considering we're just getting out of winter here, that is really only several months worth of grit built up in there. And to top it off I have done very little actual offroading with this truck so far. Most of it has been on the street.

While this is the driver's side, I am sure the passenger side where the engine air intake pulls from is just as dirty. So don't think that just because an intake is pulling from inside the wheel well that it's getting relatively clean air. There is still lots of dust getting kicked up in there while driving around, so for me having a snorkel (or raised air intake if you will) is a necessity to help my filter life while offroading, and just driving around in general.
 

JPaul

Rank V
Member

Pioneer I

2,596
Mendon, UT, USA
First Name
Paul
Last Name
Allen
Member #

11021

Ham/GMRS Callsign
N1JPA
Any updates?
I had to focus on getting ready for my Moab trip. I'll update the thread when I get back home. I have the Switch Pros installed but it's not hooked to any lights yet. Tried out the Bluetooth and it seems to work well so far.
 

JPaul

Rank V
Member

Pioneer I

2,596
Mendon, UT, USA
First Name
Paul
Last Name
Allen
Member #

11021

Ham/GMRS Callsign
N1JPA
So this happened:


Blew the spider and axle gears in the rear differential on Metal Masher down in Moab this week. I was trying to get up a short ledge/waterfall (maybe three feet) and apparently hit it just wrong and popped a gear apart, by the time I got up it and started getting to the next obstacle there was a really good pop coming from the rear axle. I tried to get it up the next obstacle but that just blew the gers even more and punched a hole in my diff cover. Fortunately I was with a great group of guys and they helped my get the cover sealed back up and all the chunks out, then I used Alrock as an anchor and winched myself up the rest of the next waterfall obstacle and then he pulled me the rest of the way up the trail with a strap until we crested the hill we were on. I then was able to drive the rest of the way out in front wheel drive. The next day Reloader and Alrock very graciously offered to tow me the 4 hours home with Alrock's truck and Reloader's trailer.

Once I got my side of the garage cleaned out and the truck inside and unloaded, I pulled the cover back off the next day to re-inspect the damage. Turned out I broke more than I originally thought.

Passenger axle gear (I had already seen the damage to this while on the trail:


Cracked about a third of the gear off. It's only staying in because it has a stepped collar that goes into the carrier.


Then there is the driver side axle gear, I didn't see this damage until I got home.

Couple teeth busted off this side and left a small hole in the back of the gear:


Then I turned the axle 180 degrees and saw this part too:


But the nice thing about those holes is it let me inspect the locking pins for the Eaton E-Locker. They are starting to be rounded off, a lot more than I think would have happened from how much and how I have been using the rear locker since I bought it. The rear has never been rebuilt though so for >160k miles they aren't too bad.
 

JPaul

Rank V
Member

Pioneer I

2,596
Mendon, UT, USA
First Name
Paul
Last Name
Allen
Member #

11021

Ham/GMRS Callsign
N1JPA
Unfortunately there was also damage to the ring gear and tiny nick to the pinion from what I can see.


Looks like a chunk was wedged between the nose of the pinion and the carrier:


A small flake is all I saw on the pinion:


So now I'm trying to determine what exactly to do. I was going to buy a used axle off Ebay and just swap it out, but the seller was being adamant about not doing a warranty since the RPO codes didn't match exactly (only difference was one had a locker, the other didn't) so I backed out of it. I theoretically could just get new spider/axle gears and run it for a while, but I'm not sure if the bearings got eaten at all from the debris, though I didn't drive it very far at all until I cleaned it out, maybe a couple hundred feet, and at only a few MPH.

Otherwise I am going to just pull the front and rear axles and take them to a shop to have them rebuilt with 4.56 gears instead of the 4.10 gears, and probably go with ARB air lockers. I really don't like the way the Eaton E-Locker functions, there is a fair bit of slack that needs to be taken up to fully lock them, and then if you need to roll backwards at all they unlock and then relock, so it's a trick to make sure that you're not in a situation that can cause the locker to slam lock which just breaks stuff. With the ARB you still have some rotation to lock it, but it is a fraction of what the Eaton needs, and once it's locked it stays locked until you unlock it regardless of forward or backward motion. Obviously it's the much more expensive solution, but it's also the stronger and more reliable solution in my opinion.

I spoke with a shop yesterday that was recommended to me and they should be calling me back today with a quote. I talked to another shop and labor for front and rear was going to be approximately $1400, so I'm figuring redoing everything is going to end up running around $4500 or so if I go with front and rear ARB lockers. If I am going to do it I should do it all and do it right. It's still cheaper than a ZR2.
 
  • Like
Reactions: GITINOVRLND EXPLRR

JPaul

Rank V
Member

Pioneer I

2,596
Mendon, UT, USA
First Name
Paul
Last Name
Allen
Member #

11021

Ham/GMRS Callsign
N1JPA
More pictures of the damage. I pulled the axle assembly completely out in preparation for taking it to the shop that will be rebuilding it for me, and tore it the rest of the way down but left the carrier installed in case they wanted to check everything, plus I know you need to keep the caps with their respective sides and orientation.

Back of driver gear. Starting to see the slots rounding off.


Locking pins. All starting to round off a fair bit from the looks of it.


Closer look at the front and back of the passenger gear:


Passenger axle bearing surface and splines:


Driver axle bearing surface and splines:


No apparent damage to the axles themselves and the bearing surfaces seem fine. The passenger axle splines look a bit excessively peened though, so I'm not sure if I am going to want to replace them anyway.

It's just as well that I am having the diff rebuilt, after getting everything pulled out and flushing it some more with brake cleaner I tried rotating the ring/pinion gear, and some little bit has apparently worked its way into either the carrier bearings or the pinion bearings and now it binds really badly. I can only turn the carrier maybe 20 to 30 degrees in either direction before it binds up. But I talked to the shop again and rebuilding the diff with an ARB, 4.56 Nitro gears, and new bearings and whatnot is only going to run around $1800 or so all together. The front will be similar so I'm pretty pleased, especially since I was figuring it would run towards $5k for both axles. They said they should have no problem getting the rear axle done before my trip down to Overland Expo West in May, so I should be OK. Just need to get the axle over to them and find out when the locker is going to come in, sounds like it might not be until the end of next week, but that should be OK.
 
  • Like
Reactions: CementTaco

JPaul

Rank V
Member

Pioneer I

2,596
Mendon, UT, USA
First Name
Paul
Last Name
Allen
Member #

11021

Ham/GMRS Callsign
N1JPA
Dropped the axle and ARB locker off at the shop, hopefully they can get it done this weekend and I can pick it back up on Monday. I'm going to pull the front axle this weekend and get that all prepped as well. The front ARB locker is taking longer to get to me but that's OK. It'll be great to get this thing back on the road soon, and I'm looking forward to seeing how it performs with the 4.56 gears.
 

JPaul

Rank V
Member

Pioneer I

2,596
Mendon, UT, USA
First Name
Paul
Last Name
Allen
Member #

11021

Ham/GMRS Callsign
N1JPA
Talked to the shop today, rear axle should be ready tomorrow so I'm borrowing my friend's truck again to pick it up. Hopefully I can have it installed tomorrow night and be back on the road again. I spent last night and tonight pulling the front differential and CV axles. Turned out to be a good thing I'm doing it.

Here's that CV that had the boot popped loose:


And then when I was pulling the front drive shaft I started to undo the bolts at the transfer case, pulled my ratchet out and noticed it had grease on it. At first I thought I somehow got grease on it from working on the axle above, so I wiped it off and went back to loosening the rest of the bolts for the driveshaft at the transfer case. Pulled the ratchet back out and there was MORE grease!! Crap.

Turned out to be a nice little line of grease from the CV for the front drive shaft on the crossmember:


Turns out the clamp for the boot somehow got crushed by a rock or something (guessing it pinched a rock between the clamp and the outer portion of the CV) and now it's just loose enough that grease is starting to come out. Brilliant.


It's the original driveshaft from the looks of it, so it's probably just as well that I have to replace it now. The question now is what do I do? I have a few options.

1. Replace the CV with a Cardone unit
2. Replace with a used or new stock driveshaft
3. Upgrade to a aftermarket driveshaft (Tom Woods has one, bit pricey though but supposedly nice and uses a double cardan with Spicer 1310 joints, Outfitter Design has one that costs even more than Tom Woods but is simpler as it doesn't use a double cardan joint.)

Fortunately this issue can wait for a bit, it's probably going to be a while before the front diff s rebuilt. But it's just another issue that has come up. I am really surprised to find so many things broken/breaking after this last Moab trip, I didn't think I was anywhere near this hard on the rig. But when I am done it's going to be practically a brand new truck from the frame down.
 

JPaul

Rank V
Member

Pioneer I

2,596
Mendon, UT, USA
First Name
Paul
Last Name
Allen
Member #

11021

Ham/GMRS Callsign
N1JPA
Got the axle back today. Unfortunately it took me all evening to replace the u-joints on the rear drive shaft. It didn't help that you need a special tool to press the old u-joints out, which I had to fabricate:


But the driveshaft is ready now, so hopefully tomorrow evening I can get the axle installed and take it out for a test drive.
 

JPaul

Rank V
Member

Pioneer I

2,596
Mendon, UT, USA
First Name
Paul
Last Name
Allen
Member #

11021

Ham/GMRS Callsign
N1JPA
Finally have the rear axle back in. Took me until 4AM to get it all finished, though that included replacing the front swaybar links. Those ACDelco "professional" links are apparently pieces of garbage. The driver side was completely sheared off the studs, and the passenger side's lower stud just spun in the ball joint (it has flats to use to remove/install the nut, that part kept still while the stud itself spun...)

Had to wait until this morning to run to Lowes and then Home Depot to get new metric bolts for the diff cover since ARB only includes standard threaded bolts with the cover for the GM 10 bolt. Got that all done and lube in it, jacked the rear up and put the transmission in neutral and spun everything by hand to make sure lube was on everything before I took it for a drive. Drove it around the block and everything seems to be OK.


I'm going to drive it until Tuesday and then change the fluid before I leave for Overland Expo on Wednesday. I was just going to leave Thursday morning but KC Hilites is having a shindig Thursday afternoon at their place that is not too far from the Expo, so I am going to go to that and just drive partway down Wednesday and camp overnight somewhere, then head the rest of the way down Thursday morning. It'll make the trip more enjoyable so I am looking forward to it.

I have the front diff with the shop to get matching 4.56 gears and the new front ARB locker installed. Just going to drive in RWD until that is all ready. I'm just glad to have the H3 back on the road again.
 

JPaul

Rank V
Member

Pioneer I

2,596
Mendon, UT, USA
First Name
Paul
Last Name
Allen
Member #

11021

Ham/GMRS Callsign
N1JPA
Two days of driving so far and I think it's working out well. Pretty sure most of the noise I hear is my Duratracs showing their age, plus I tweaked everything pretty well apparently.

Glove box now barely brushes against the passenger door, there's a creak when stopping and starting as the weight of the nose of the truck shifts up and down, the front bumper is ~1/2" higher on the passenger side than on the driver side (or the body is lower now, one of the two), the upper radiator bracket is now turned at an angle (used to be perpendicular to the radiator and support, so the passenger side of the radiator is probably higher than it used to be or something that is causing it to shift over), rear door looks a bit cockeyed, driver side tail lamp isn't staying snapped into place anymore, etc, etc. Oh well. Play stupid games, win stupid prizes. I am pretty sure I know exactly when I tweaked the front corner, and yes it was while doing something stupid. The rear on the other hand I'm not so sure about, but it was likely during the same incident. Really I am surprised I didn't actually break more stuff, especially nothing on the front aside from the swaybar links. When I drained the fluid from the front diff to pull it I saw no indication of any issues, so that was good to see. The rest of the issues I'll eventually work through.


Also fixed the AC today with putting in the new condenser. I still need to put another 120 grams of refrigerant in but it's blowing cold air again. I think I have it working better than before even, but by the time I finally got to the point of actually charging it the ambient temps were down below 70 so it's hard to say for sure, I was getting 44 degree air out of the vents. We'll see how it is tomorrow during the day when it's warmer.

Still need to get the truck cleaned out and start getting packed for the trip to Overland Expo, I was hoping to have done that today but it took so long to get the AC done thanks to not having the right seals, needing a wrench to get the fan clutch off so that I could have room to get the new condenser in, the first OReilly's giving me a gauge set and vacuum pump that both had issues so then I had to go back out to return them and drive to another store to get ones that weren't buggered up, blah blah blah.

Oh, and I discovered that Les Schwab did a crap job on my alignment and didn't torque down the upper control arm bolts enough so they started slipping and causing everything to go out of alignment. You could see where the adjustment cams started out because it was relatively clean where they used to be. So I used the clean spots as a guide and put everything back in place and made sure the bolts were properly torqued down. I am going to get it re-aligned after I get the steering rack swapped and the front drivetrain back in, and I will definitely be taking it somewhere else then. May just try doing it myself, it's really not all that hard from what I have researched and I am tired of botched work.
 

JPaul

Rank V
Member

Pioneer I

2,596
Mendon, UT, USA
First Name
Paul
Last Name
Allen
Member #

11021

Ham/GMRS Callsign
N1JPA
Truck did great going down and back from Overland Expo West. I had a lot of fun, got to meet Ronny Dahl as well as some new friends that I camped next to.

Still have lots to do, not the least of which is replacing the steering system amd getting the front axle back in. But man those 4.56 gears are worth it. I think that with the V8 the 4.56 gears put it back into its powerband compared to the stock 4.10 gears. I have not noticed any degradation to my fuel economy, and on the highway up hills it hasn't downshifted into 2nd yet, even with towing a decent sized load up to my storage unit this morning.

I'm waiting until I get the front axle in and broken in before I really let loose on it, but so far it's been a really nice improvement. I am beginning to think that the 4.10's were probably more meant to be used with the stock 31 inch tires, but when you add the Adventure package it moves up to 33 inch tires but they don't change the gearing in the axles. Seems like if I went to 35's I would want to go to 4.88 or something, but the front diff won't take anything over 4.56 so that is the limiting factor.

There is rumor of a HD front diff coming out from someone this summer for the H3, so maybe that will open up that possibility, otherwise I'd have to go with a SAS.