'08 Hummer H3 Alpha build

  • HTML tutorial

JPaul

Rank V
Member

Pioneer I

2,596
Mendon, UT, USA
First Name
Paul
Last Name
Allen
Member #

11021

Ham/GMRS Callsign
N1JPA
Well, thought I'd add an update of sorts. Been working on selling our house so that we can move farther north and get out of the city, but the market for our area apparently slowed to a crawl right when I listed it back at the beginning of June. Hopefully we can sell and finish moving before the end of the year, but we'll see.

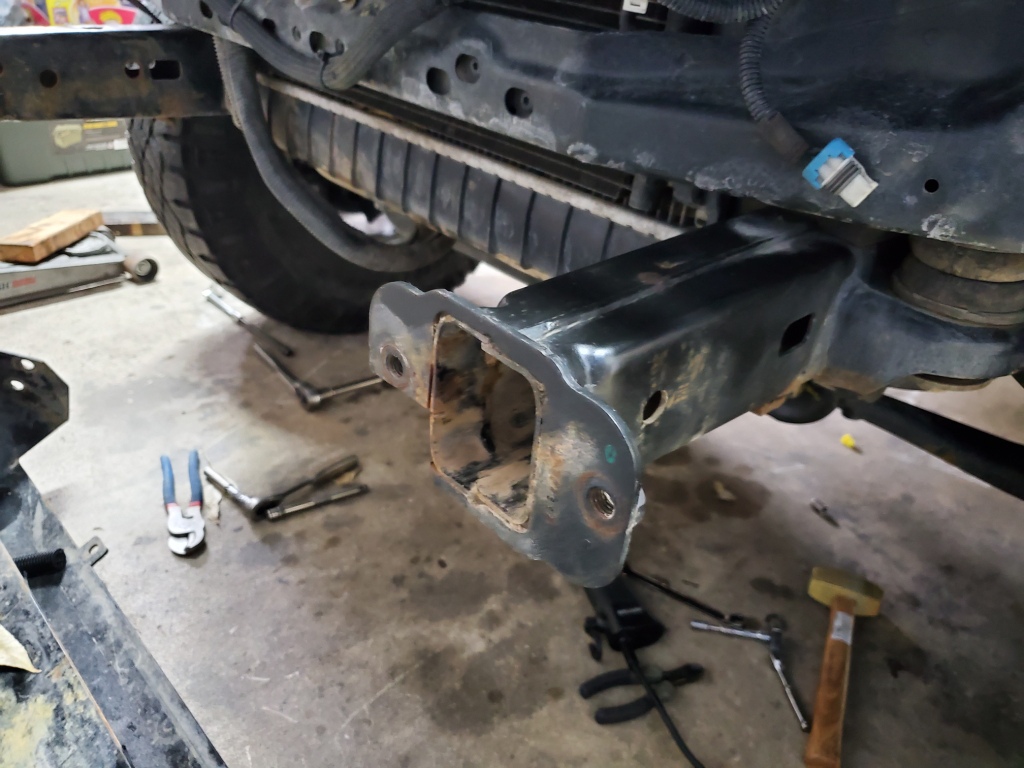
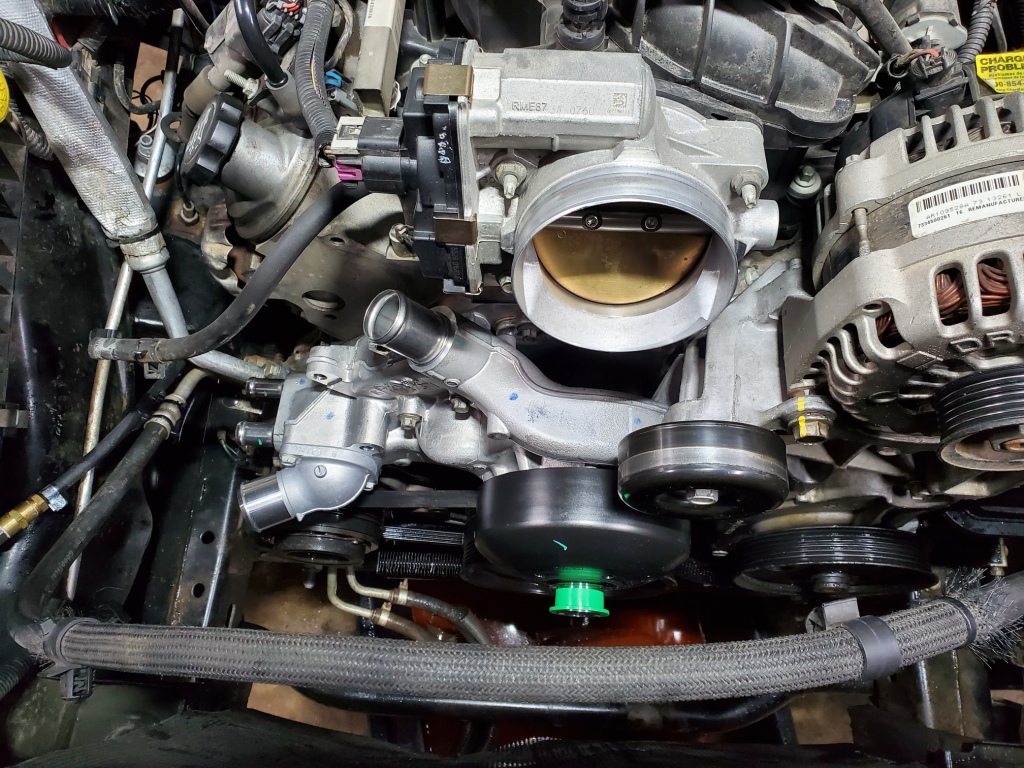
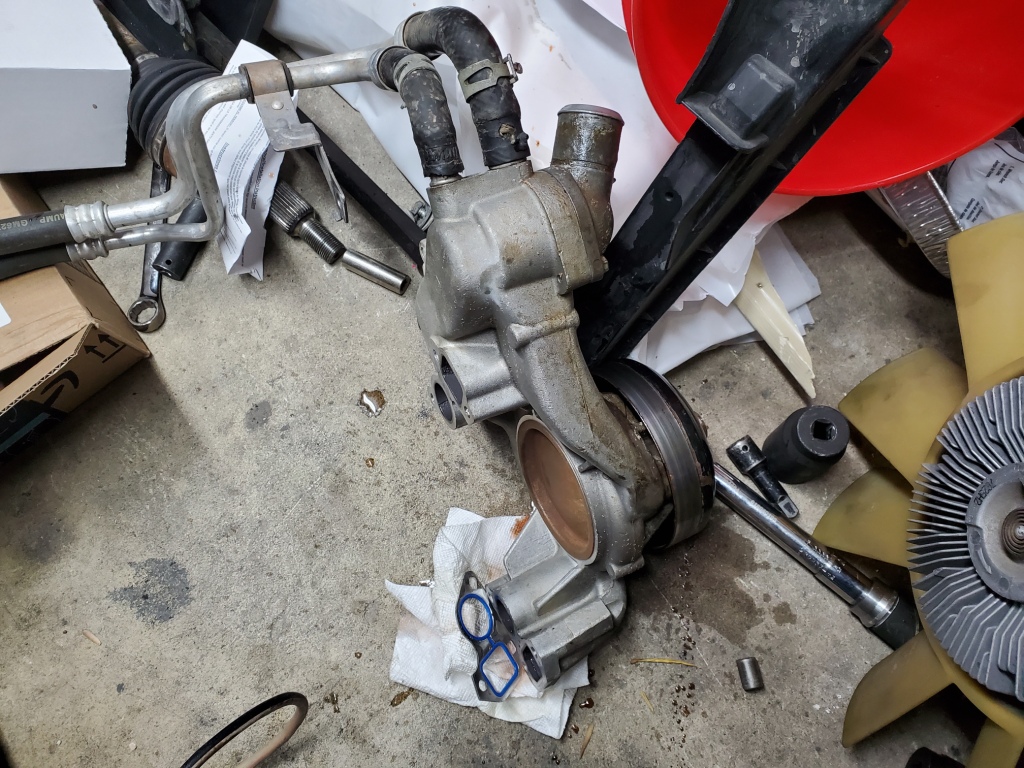
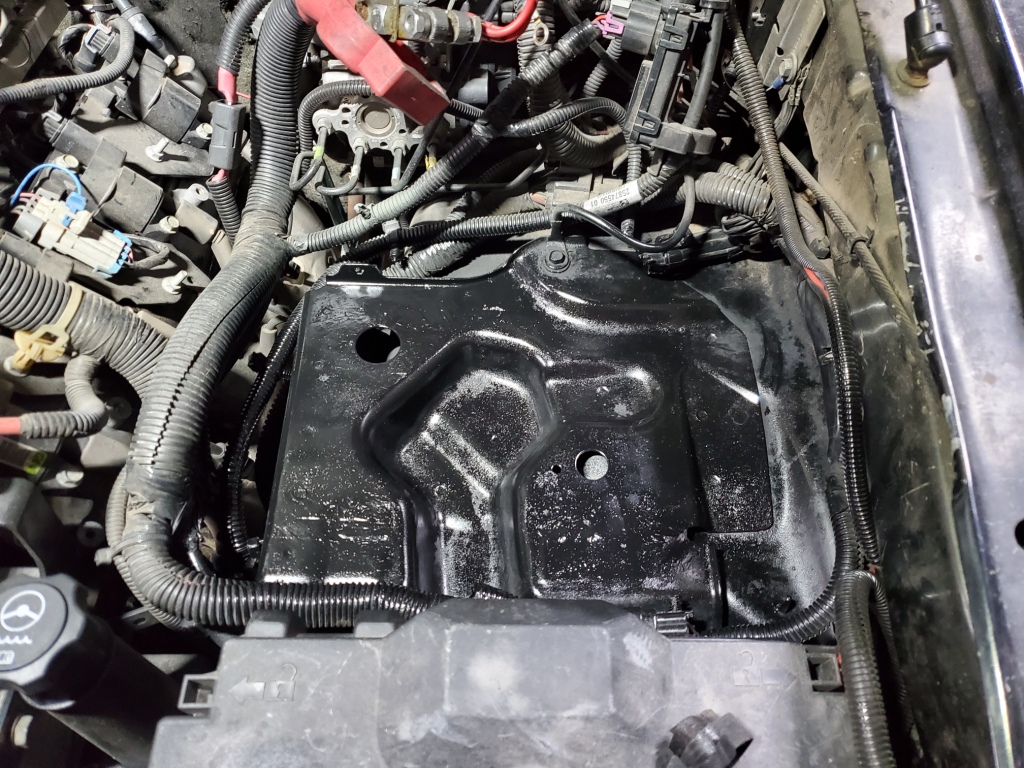
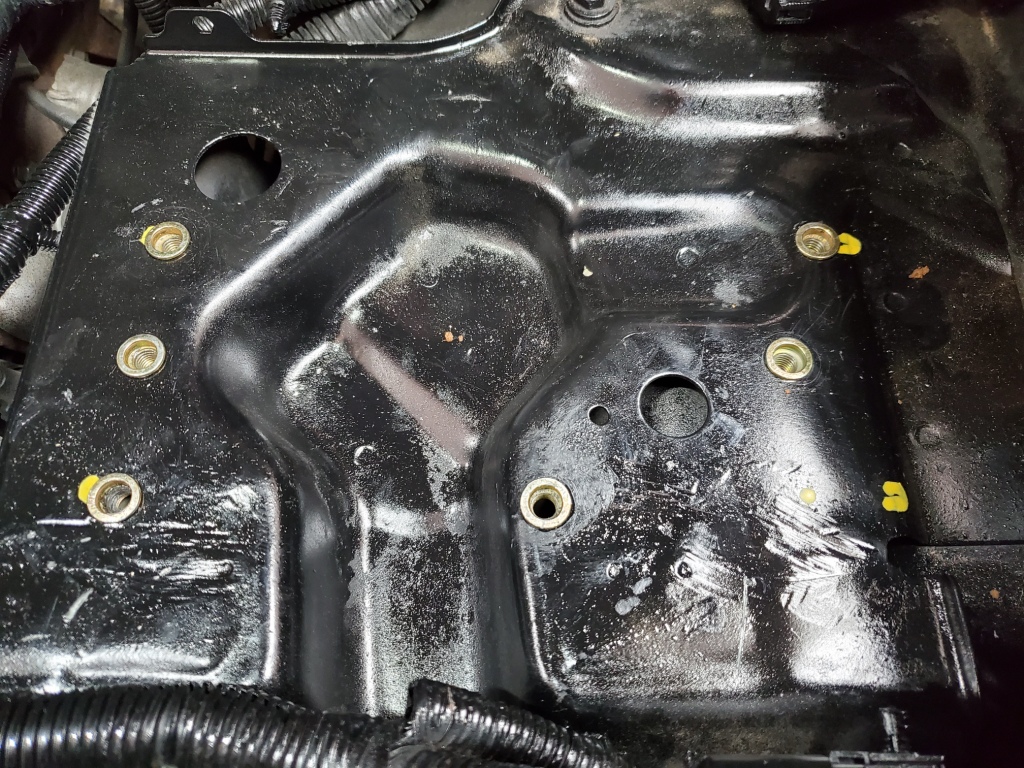
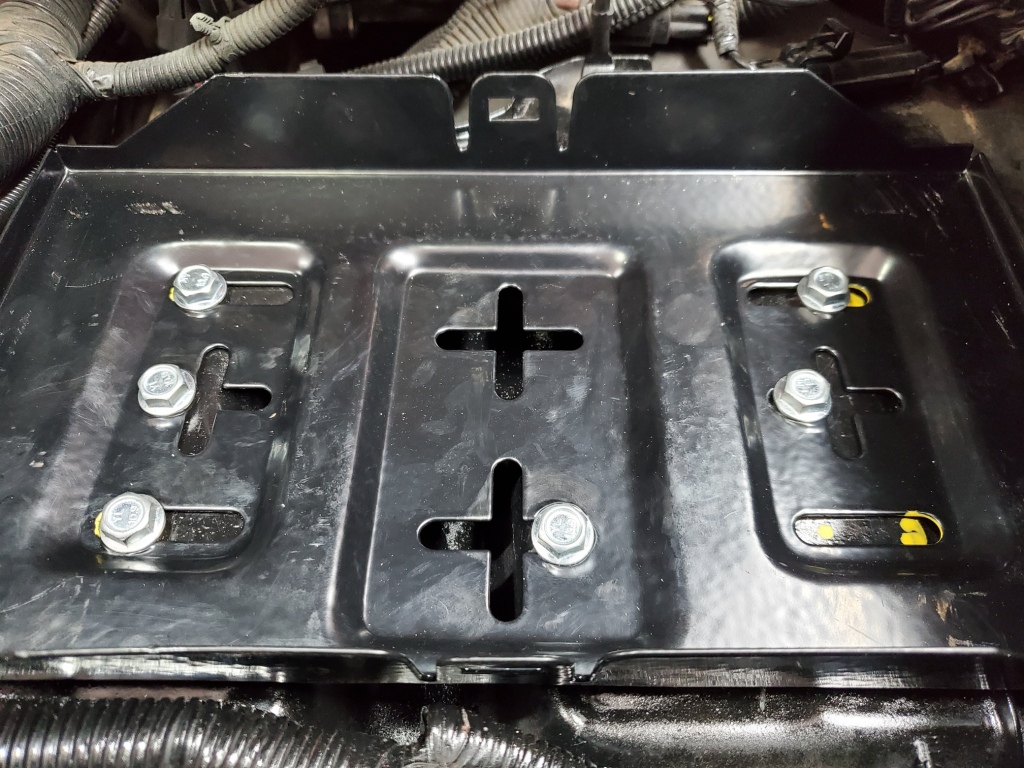
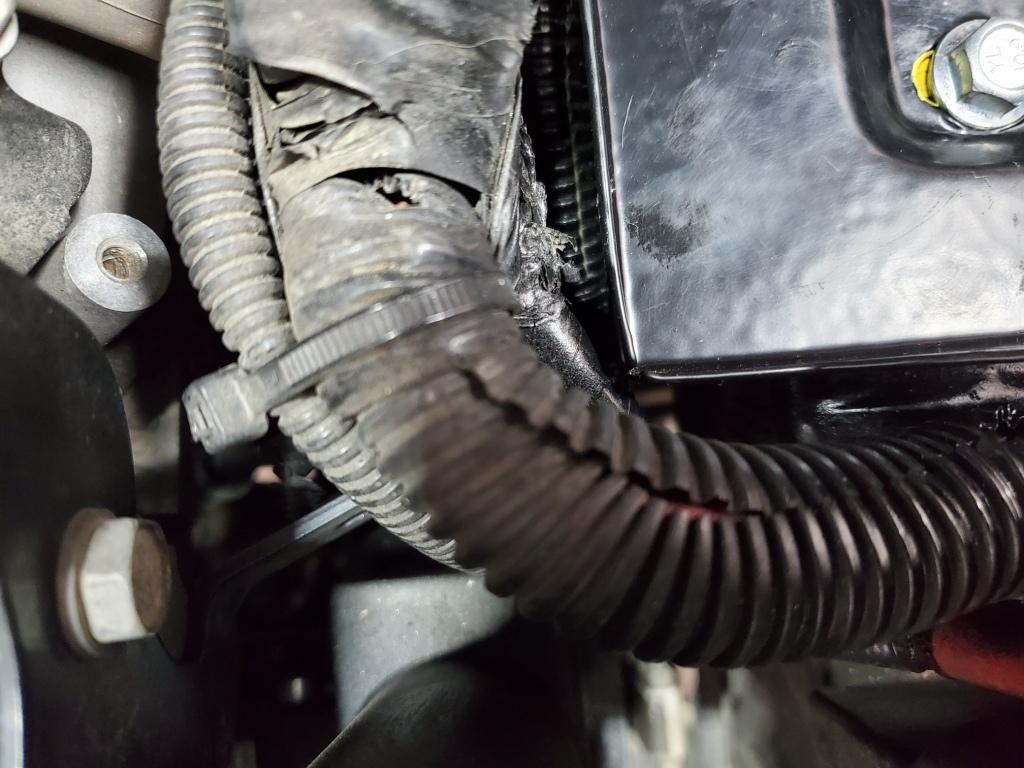
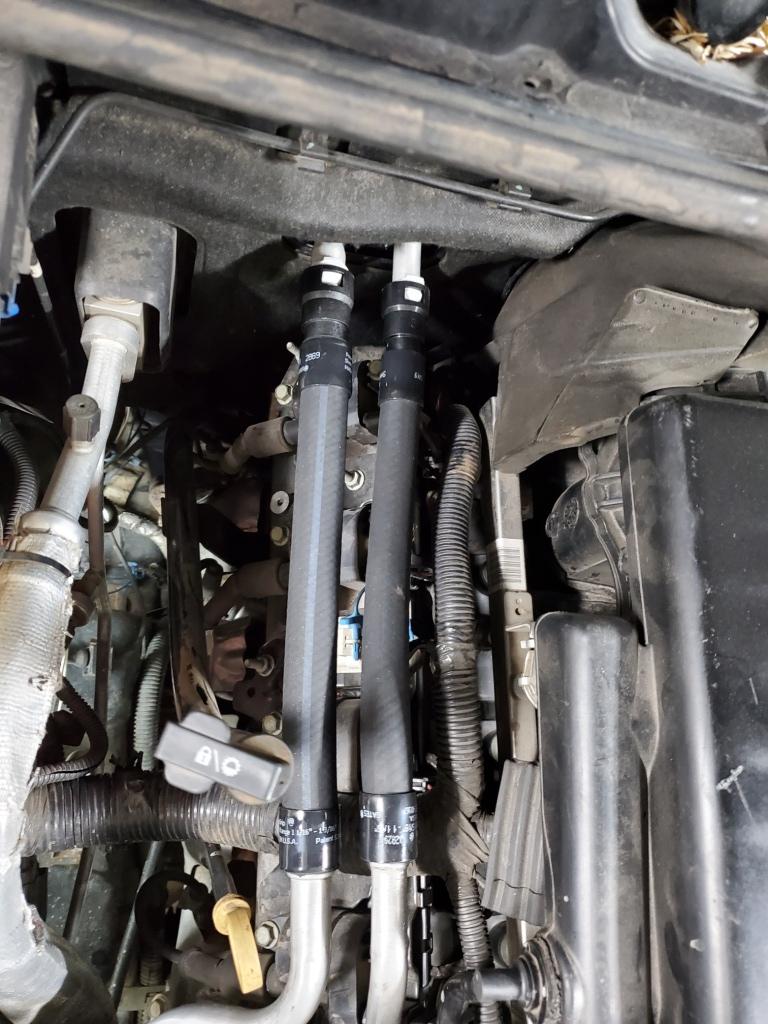
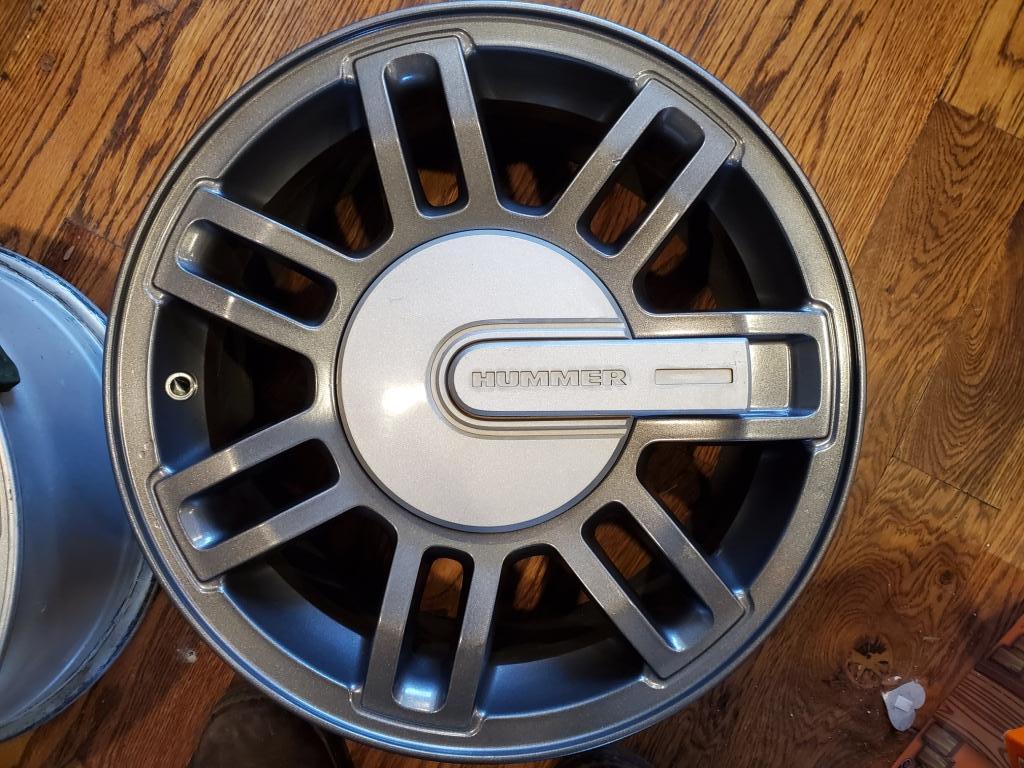
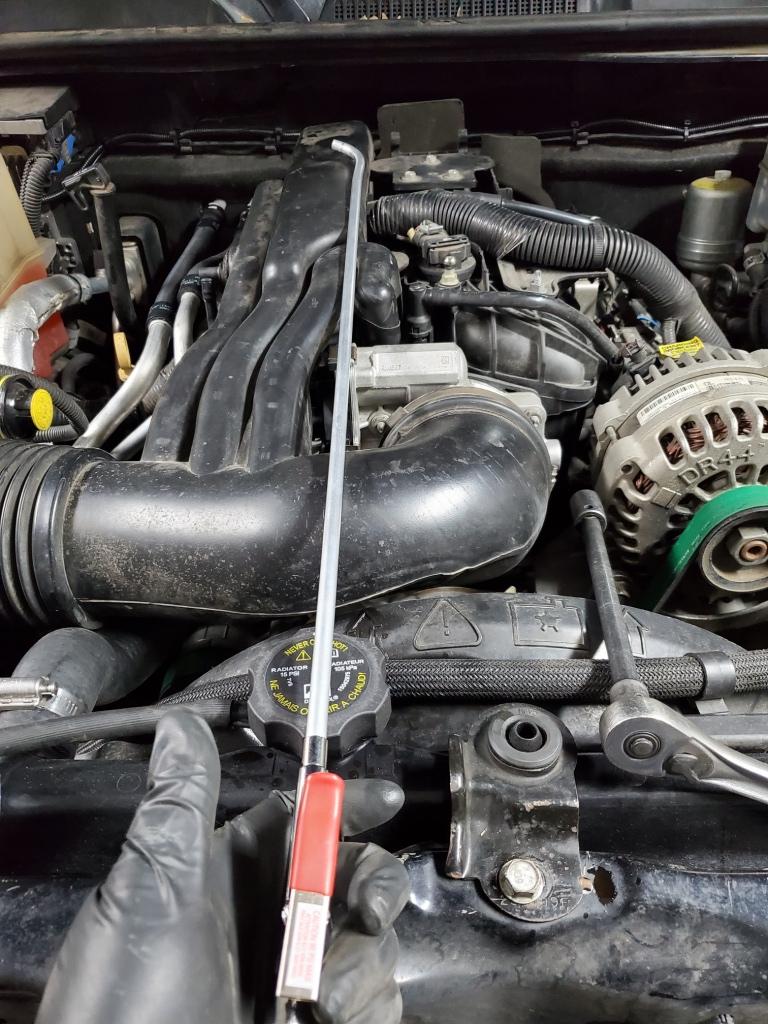
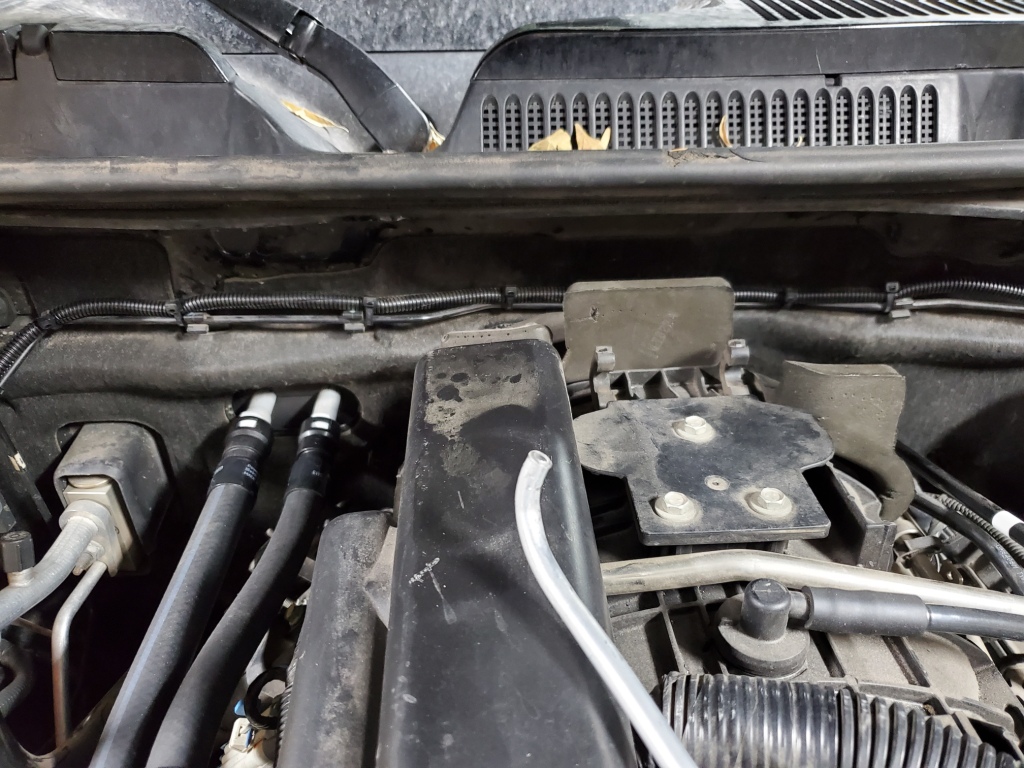
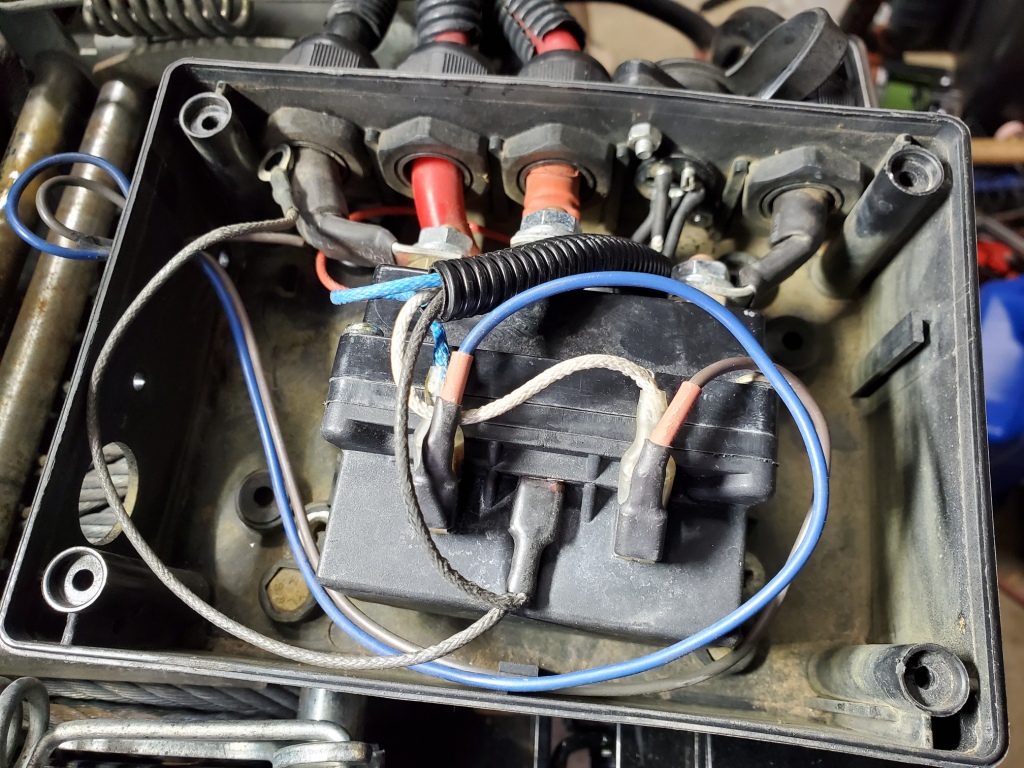
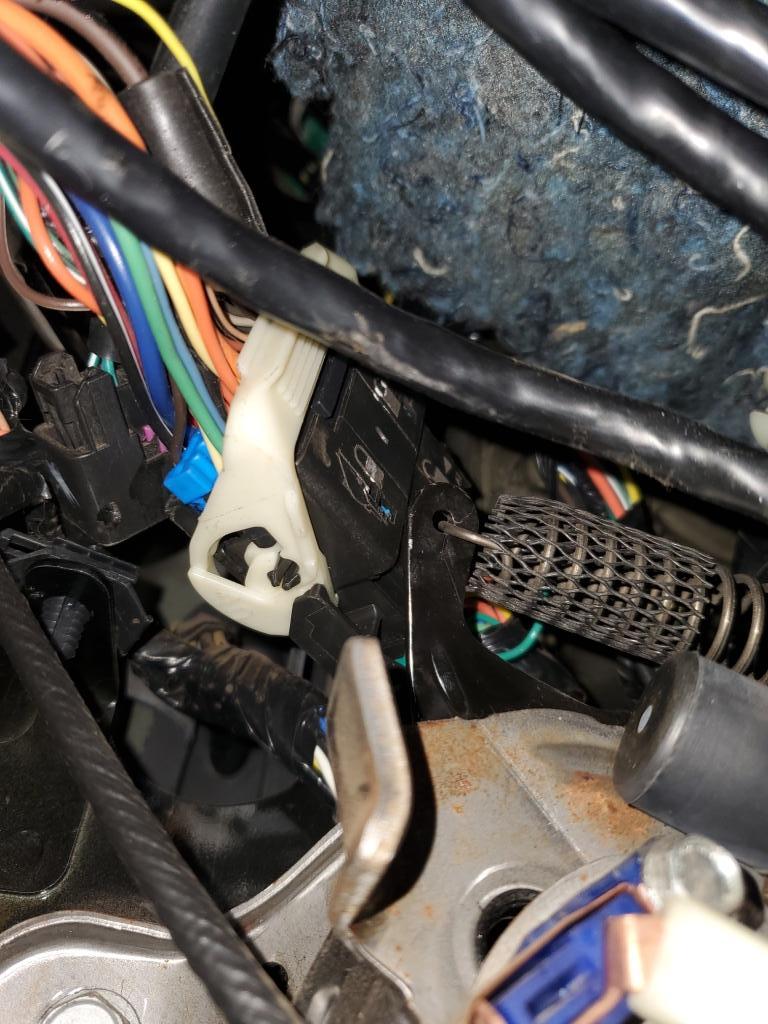
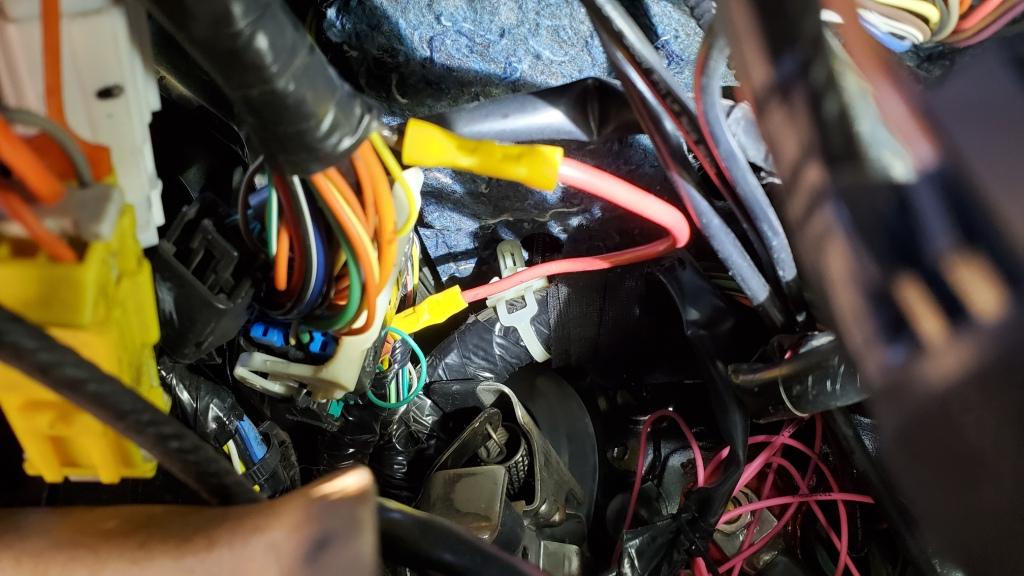
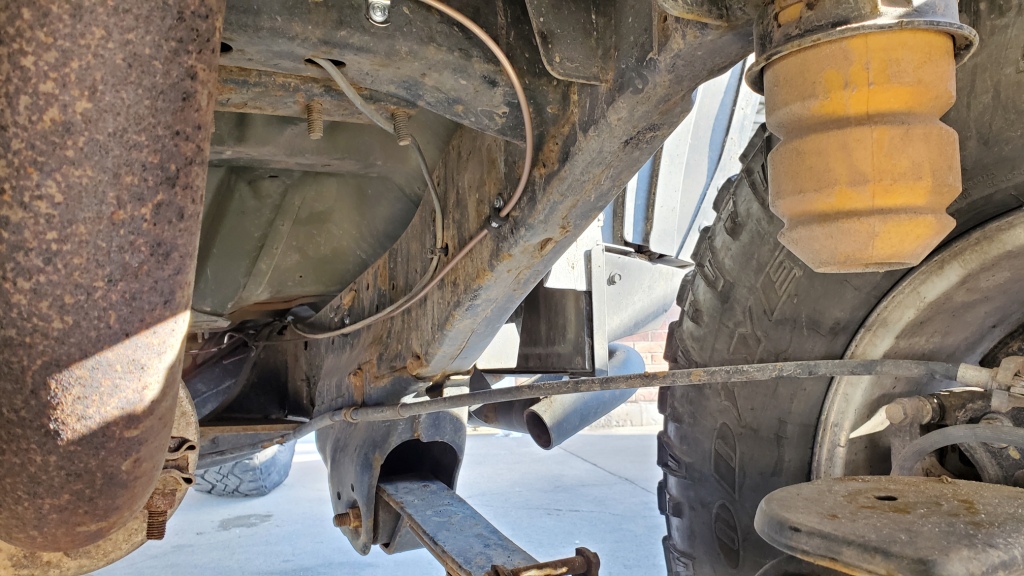
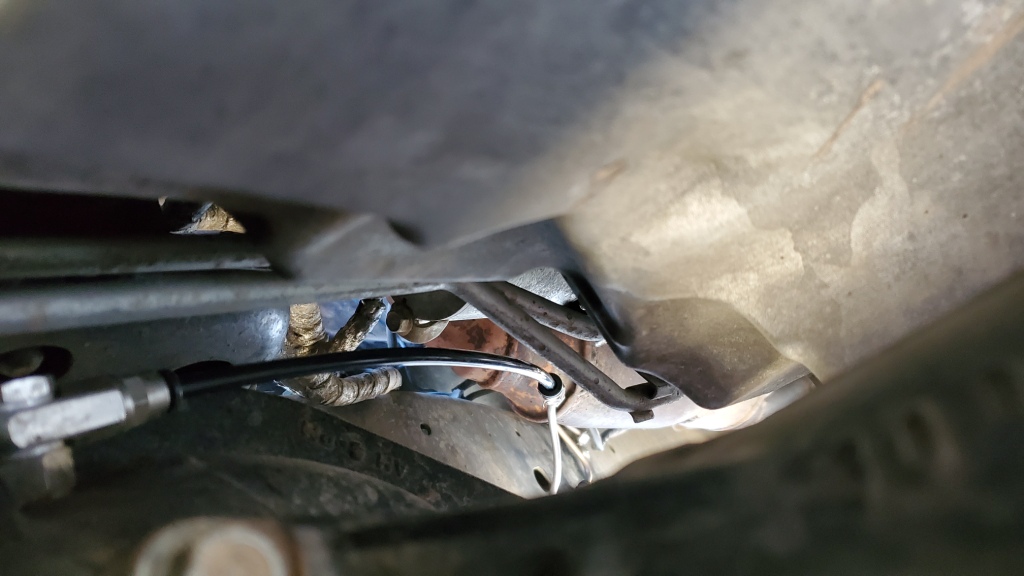
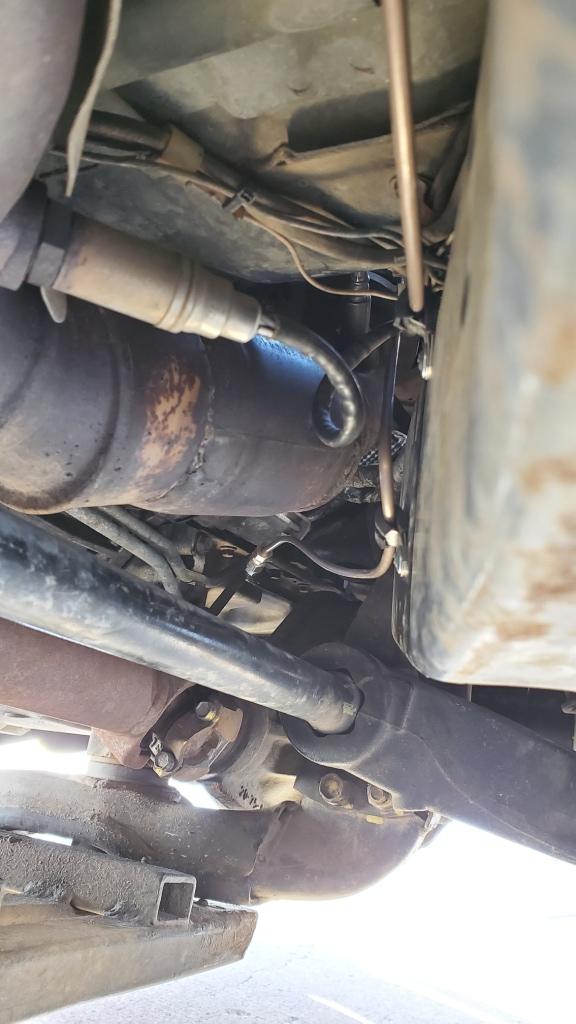
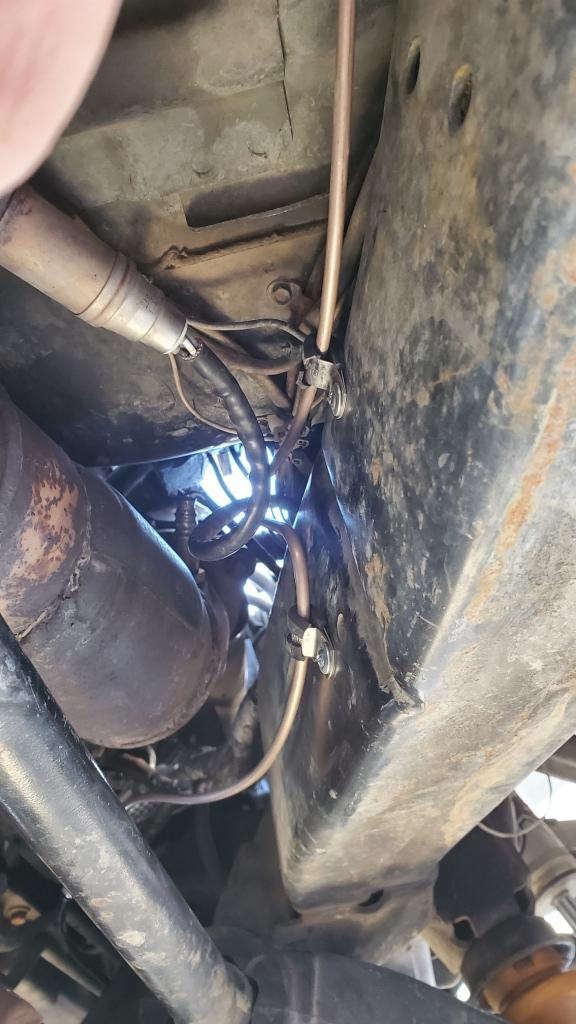
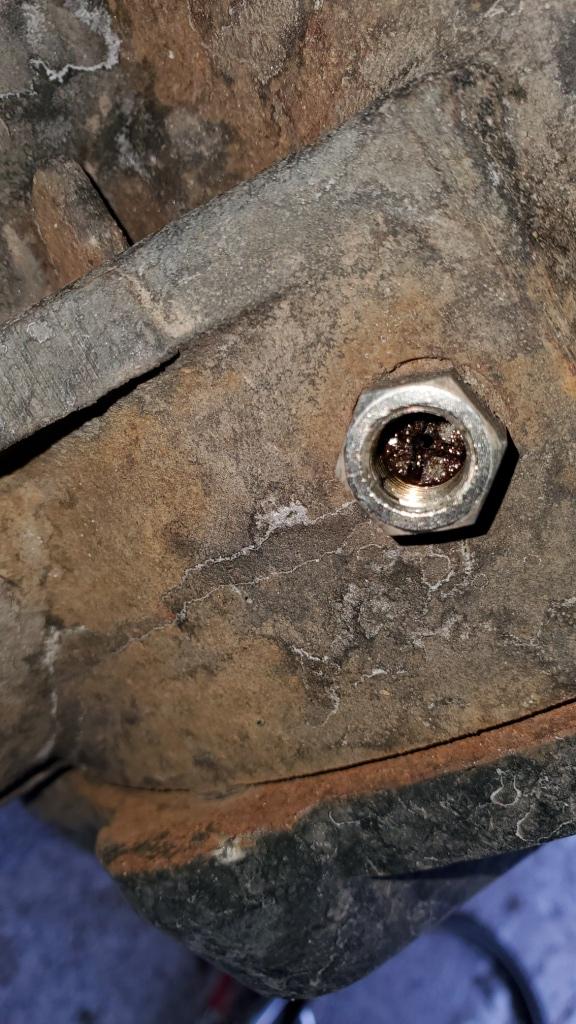
Since we have to be able to show the house at any given time, I haven't put any work into the Alpha at all. I'm still running without the front drivetrain, haven't touched any of the rear power setup or ARB compressor or anything. Tires are starting to get worn down enough to warrant replacing, but that needs to wait until next spring. And then today the crank position sensor threw a P0335 code again after the engine died on me at a stop light while idling. After replacing the throttle pedal assembly last time I had zero issues, so I'm not sure what it is now since everything is basically brand new in the engine management system as far as sensors go. Might be a connector or something. I might poke around at it this weekend.

I've been holding off doing any work on the Alpha since not only was I quite busy for a while getting half the house moved into a storage unit to get it listed and showable, but I was also hoping to have moved by now and working remotely which would let me start tearing stuff apart on the Alpha without needing to get it all back together in an evening or even a weekend, but no such luck. I might start working on the rear power system again, depending on how much time i have to put into the crankshaft sensor issue. Unfortunately starting next week we are also beginning to move our entire datacenter to a new location, so that's probably going to start chewing into my spare time as well. The fun just never ends.
 
  • Like
Reactions: Socal4X4

JPaul

Rank V
Member

Pioneer I

2,596
Mendon, UT, USA
First Name
Paul
Last Name
Allen
Member #

11021

Ham/GMRS Callsign
N1JPA
Finally was able to get the front differential put back in as well as replacing the steering rack and pump. Also got it cleaned out and vacuumed the truck to get it ready for further modifications and my trips this spring (Moab and Overland Expo West). Weighed the Alpha with a full tank of gas and nothing in it, nor did I have any skids on it. So basically bone stock and empty except for the Thor parts bumper and my winch. 5,320 pounds. GVWR is 6,001 lbs.

Not terrible, but certainly not what I was expecting to find. Front axle came in at 2800 pounds and the rear axle at 2520 pounds. Seems when I am in it 58% of that weight goes to the front and 42% to the rear axle. GAWR for the front is 3,050 lbs and the rear is 3,400 lbs, so I'm already super close to the front axle rating. So as it stands now just adding myself and one other passenger would put the truck over the front GAWR. Seems a bit ridiculous to me. Winch weighs around 85 lbs, not really sure about the Thor bumper but what I could find in my conversations with the manufacturer is the Gen 1 weighed roughly 90 lbs, I haven't seen numbers for the Gen 2 yet, but I'd estimate maybe another 40 pounds at least for the heavier pods. So say roughly 130 pounds for the bumper. So that is 215 pounds right there hanging off the nose.
 
Last edited:

JPaul

Rank V
Member

Pioneer I

2,596
Mendon, UT, USA
First Name
Paul
Last Name
Allen
Member #

11021

Ham/GMRS Callsign
N1JPA
I guess I am not quite done completely refurbishing this truck. The axles I put in have been replaced, again. I had one OEM and one Cardone or something. The OEM was one of the ones I bought only a year or two ago but the outer CV boot clamp had been popped off during last year's Moab trip. I had a boot kit but since everything was fine I simply added some more grease to replace what was lost and put the new clamp on.

By the way, those cheap CV boot clamp pliers you can get everywhere? Absolutely worthless. The crimping "teeth" (for lack of a better term) bent and snapped when I tried to use mine for the very first time. Ended up using some end nippers I had.

So back to replacing the axles again. When I was under the truck early last week I noticed that grease was coming out of the CV I put the clamp on. Maybe I didn't get it tight enough? Or maybe there was a hole I didn't notice. The clamp seems to still be tight, I can't spin or move the boot at all. So maybe just a hole. At any rate, I didn't want to screw around with it so I ordered two more brand new OEM axles. I only was using the Cardone on the other side because that was the best axle I had laying around, but I don't really trust them, especially with the V8. Of course though of the two I bought one of them had a tear in the boot right off the bat from mishandling in storage. So back it went and a new one sent back out. Thank goodness for Amazon, they had the cheapest price on the axles (still a bit pricey at $230 a piece) and it was great not having to fuss too much with sending the damaged one back.


So that brings us to Saturday (yesterday as I am typing this at 12:30 AM Sunday).

Finally got a chance to finish cleaning the garage and pulled the truck in to work on swapping the axles. Hoo boy...

A few things popped up. First was I noticed my coolant level in the reservoir tank was a good 2 inches lower than it should have been (I had marked the level with a paint pen because I had some suspicions about the coolant level but it had sat at the mark for several months). Uh oh.

Checked around and sure enough I discovered coolant on the front crossmember. Thought maybe it was the pump, but that was bone dry. Couldn't see anything on the engine, so I looked at the radiator. Sure enough the top tank is starting to leak at the joint between the tank and the core. Great. Seeing how I had driven the truck for months after banging it around in Moab with no coolant loss, it's apparently just giving up on its own. Since I am going to be replacing the radiator now, I might go ahead and replace the hoses and pump as a precautionary measure. The hoses are looking a bit old and the pump, while fine, is not something I have replaced yet and I'd rather do it all at once than piecemeal it over time as things fail. We'll see how that goes. If I do that then I'm looking at around $650 for all the parts.

But wait, that's not all I get! While looking at the coolant on the crossmember I noticed that I was getting power steering fluid as well. Since I re-used the old hoses and replaced the o-rings with my best guess as to what sizes they were when I replaced the pump and rack, I figured I misjudged the oring for the high pressure line at the pump since that was the hose that was wet. But it wasn't wet at the fitting, just the hose. Apparently it was just as well that I had ordered new hoses (that way I could make sure I had something with the right o-rings) since the high pressure line was leaking at the factory crimp for the hard line to flex line joint. Seemed to be a weird place to leak, but oh well. But nothing is ever easy or simple. When I went to undo the fitting at the pump, I had a tough time trying to get it out. Not sure how, but apparently I over-torqued the fitting when I installed it so instead of getting the fitting on the hose to unscrew, it unscrewed the entire inlet fitting from the pump itself! Oh joy.

After a lot of research to make sure I had all the parts (there were three, the inlet fitting, the flow control body, and the spring for the flow control body) and trying to figure out how much it needed to be torqued (looked for quite a while and found no mention of the torque specs for re-assembling a Saginaw TC pump) I ended up doing a best guess and got it all put back together. Got the new hoses installed and ran the power steering fluid through a coffee filter a couple times before putting it back into the reservoir. I only bothered with doing that because the fluid I used was full synthetic that I paid far too much for to simply throw out after only month or so.

So once it was all back together and fluid back in, I started the truck up, let it idle for 30 seconds or so to let the power steering charge up, and tried to turn the wheel. Key work there, "tried." It would not budge. Not one bit. Crap...

Shut it off. Thought everything through, trying to see if I missed something or put the parts for the pump back in wrong or anything like that. Checked the fluid level again, saw it had gone down a little but not as much as I would have expected. Crap. More thinking. Ok, let's hope that it was because there was too much air in the pump and it wasn't getting any fluid past the flow control or something like that. Yeah, that's got to be it. Started the truck up again. That must have been it, because I was immediately able to turn the wheel just fine. Thank the Lord. Check fluid level again, it's below the dipstick which was what I was expecting to see the first time. Top it off. Call it good. Crisis averted.


Now onto the third thing I found, which fortunately was not as big of a deal as the other two. Ever since I dropped the front right corner off a ledge in Moab it seemed like I might have tweaked the frame or something because there was a noticeable slant to the nose of the truck in that direction. In addition my bumper on the passenger side looked like it had been pushed back and was also much closer to the grille than the driver side. Since I wanted to weight the truck without the bumper on anyway I took the opportunity to take the bumper off and inspect the frame to see what was wrong. Turns out it was not the frame (which is great news) but rather the body itself had crumpled a bit from getting slammed down so hard (primarily the core support which has the front body mount bracket attached to it). Fortunately fixing that was pretty simple, a big C-clamp and a 1/4" thick flat steel piece and a 1" thick aluminum block I had laying around. I was able to press the sheet metal between the two and flatting it back out so now it should site roughly where it was before. I am probably going to want to check the sheetmetal at the body mount on that side that is just aft of the front wheel well, I wouldn't be surprised if that suffered some damage as well. Now it is still possible the frame itself has been tweaked, but if it has it was not noticeable to me. I'll probably still take some measurements just to be sure. As for the bumper looking like it had been pushed back, I realized I am missing a clip for the grill on that side that would have sucked the grille back about a half inch, so there really isn't anything wrong with how the bumper is sitting, I just need to get a new clip, and I think I have some old ones kicking around somewhere as well.


So, yeah. Lots of "fun" trying to get this rig back to fully operational status so that I can finally start working on the rest of the modifications I want to get done before my Moab trip in April. Hopefully nothing else will come up before then, I'd rather be spending my time and money on the fun bits. But I'll hopefully soon have a rig that is in top shape and can be used for all kinds of fun.
 

JPaul

Rank V
Member

Pioneer I

2,596
Mendon, UT, USA
First Name
Paul
Last Name
Allen
Member #

11021

Ham/GMRS Callsign
N1JPA
Weighed the Alpha again, this time without the Thor Gen2 bumper and 12k Badlands winch so that I could get some good comparisons.

W/ Thor bumper/winch, full tank of gas, no cargo/passengers
Front: 2,800 lbs
Rear: 2,520 lbs
Total: 5,320 lbs

W/O Thor bumper/winch, full tank of gas, no cargo/passengers:
Front: 2,560 lbs
Rear: 2,580 lbs
Total: 5,140 lbs

And for interest:

W/ Thor bumper/winch, full tank of gas, no cargo, 1 driver
Front: 2,940 lbs
Rear: 2,620 lbs
Total: 5,560 lbs

W/O Thor bumper/winch, full tank of gas, no cargo/passengers and me hanging my fat butt on the rear bumper:
Front: 2,460 lbs
Rear: 2,900 lbs
Total: 5,360 lbs

Stock ratings:
Front GAWR: 3,050 lbs
Rear GAWR: 3,500 lbs
Total GVWR: 6,001 lbs


So the Thor bumper w/winch weighs ~180 pounds according to the CAT scale. Obviously there is some rounding there since it was designed to weigh thousands of pounds so there is a little bit of resolution error. For example, I weigh almost 240 pounds, but the difference between the first weigh without me and the second weigh with me is only 220 pounds. So there is clearly some error margin there (about 0.2% which seems pretty darn accurate for something like this), part of which could be attributed to it being a different day and temperature. At any rate it's close enough for figuring. I weighed the bumper/winch on my bathroom scale however and it came up to 187 pounds. Which in any case is far less than I was expecting.

Another interesting thing I learned is that it is not as simple as "for every foot away from the axle weight transfer is 2x the weight being added" as someone told me recently. While that is true for a simple fulcrum and lever, it clearly is not that simple when dealing with a vehicle. Instead of that, I only saw a weight transfer of ~60 pounds from the rear axle to the front axle due to the weight of my bumper hanging off the front of the truck. So the total weight added to the front axle by simply adding the bumper and winch came out to a total increase of about 240 pounds, give or take 20 pounds. It's also apparent from the measurement when I stood on my rear bumper, only ~100 pounds transferred to the rear from the front axle. So the front bumper was a 33% increase on the front axle due to weight transfer, while the rear was 42%.

So while empty of cargo the front axle with me in the truck was almost to the GAWR of 3,050 lbs, once I start loading up the rear with cargo that is going to shift a little, plus it likely won't add as much to the front overall. I will re-weigh though once I have a standard load in the back to see where I end up at. I might be over the front GAWR afterwards but we'll see by how much.
 

JPaul

Rank V
Member

Pioneer I

2,596
Mendon, UT, USA
First Name
Paul
Last Name
Allen
Member #

11021

Ham/GMRS Callsign
N1JPA
Keep forgetting to share this. When I went to the shop to pick up the front diff from being re-geared and the ARB installed, the guy asked me if I had any noises from the front diff. I told him no and asked him why. He brought me over to the bench and showed me this:


That is one of the outer bearing races for the front diff. We have no idea when it happened exactly, and there was never any noise that I noticed, and the needles themselves all looked ok as well, so it is a bit of a mystery. He thinks it might have occurred when the diff was rebuilt previously if a case spreader wasn't used, but wasn't totally sure.

At any rate, it's apparently just as well that I decided to have it re-geared and the ARB installed. Otherwise this wouldn't have been caught and might have left me with a busted diff down the road. Might have been several hundred miles more, might have been several thousand. Either way, I am glad it was caught and is no longer an issue for me.
 

JPaul

Rank V
Member

Pioneer I

2,596
Mendon, UT, USA
First Name
Paul
Last Name
Allen
Member #

11021

Ham/GMRS Callsign
N1JPA
It's been a good thing that after buying my wife a new car we have her old one for me to use. The H3 is still sitting in my garage, and I keep finding more things to fix on it rather than getting the mods done I actually wanted to, aside from the ARB air lockers.

First up is this issue I had forgotten about, but remembered after pulling the bumper off:


The bracket for the bumper was partially cut away when a hidden winch mount was installed. When I transferred the Thor bumper I removed the hidden mount but didn't do anything about the cut out. Since I have it off again I figure it's time to fix it up. I picked up some 1/4" plate bar and cut and drilled some plates to go on the front of the factory brackets and will be welding them on later this week.

After getting the old cooling system pulled out I was able to get the new water pump installed. Old one was several years old and the bearings were starting to have a grating sound to them, so it probably wouldn't have been long before they failed.


Plus the water outlet was getting some odd buildup/corrosion/crystallization on it. I was a bit surprised it was still sealing with the hose.


JPaul

Rank V
Member

Pioneer I

2,596
Mendon, UT, USA
First Name
Paul
Last Name
Allen
Member #

11021

Ham/GMRS Callsign
N1JPA
Next up was replacing the 90 degree hoses to the heater. The old ones I had already cut down once before when rebuilding the engine to get a new sealing surface, so this time I went ahead and replaced them with new.

Since the original hoses were crimped with aluminum ferrules to the aluminum hardlines I wanted to try something different than hose clamps. While perusing hose clamps on RockAuto I found these from Gates:

Hose Clamps and Couplings

Gates Powergrip hose clamps. They are heat shrinkable thermoplastic. Seems they are used in commercial/industrial applications frequently so I figure I would try them. Some of the benefits they are supposed to have is the ability to evenly clamp, re-tighten every time the coolant goes through a heat cycle, keep the hose clamped when cold (apparently an issue with regular hose clamps is if it gets too cold they don't put enough pressure on as everything shrinks and coolant can leak out until it warms up), and they are low profile and look better than any other hose clamp.

You must be sure to get the right size as they only have about a 1/8" range they can clamp for. So one set that I used clamps between 15/16" and 1 1/16" OD. To shrink them down you just use a heat gun and shrink it until it is tight and gets a glossy shine to it. They went on well and so far seem to be holding fine, though I've only heat cycled the engine a few times since getting everything back together.


While I was at it I went ahead and cut into the transmission lines going to the cooler and added the thermal bypass I've had sitting around for a while. I noticed this last winter that it was taking an awful long time for the transmission to heat up, and where I live now it gets colder on average than down in the Salt Lake valley, so this should help keep the transmission fluid at a better temperature.

 
  • Like
Reactions: GITINOVRLND EXPLRR

JPaul

Rank V
Member

Pioneer I

2,596
Mendon, UT, USA
First Name
Paul
Last Name
Allen
Member #

11021

Ham/GMRS Callsign
N1JPA
When I removed the old radiator I noticed the rubber bushings for the lower radiator mounts were starting to dry rot, so I tried ordering some new ones and worked on the next issue that I had noticed.

Previously there was a custom dual battery system in the truck with a fabricated tray. I went with the single group 31 AGM so I modified the tray to fit it. Unfortunately over time the welds that were fastening the tray to the stock battery mount location started to fail and the whole thing was able to rock back and forth a bit.

I pulled the battery out and fortunately found that it wasn't the sheet metal that had failed but the weld itself. Since the tray wasn't ideal for the current battery I decided to cut the remaining welds and remove the fabricated tray. A bit of primer and then paint took care of the exposed metal.


Next up was finding a new tray to go in. Since I didn't have the funds to go with some fancy custom job I ended up picking up a cheap metal universal tray. To fasten it in place I went with M8 nutserts and did my best to get them in a fairly spread out pattern. I went with 6 total since I am slightly concerned they may try to pull out, but I think they should do OK. If I need to I can go back later and add a weld to them to keep them in place.


Bolted the tray in and checked to make sure the bolt heads wouldn't rub against the bottom of the battery, They just barely clear.


With the previous tray the positive cables going to the fuse block would rub a little bit on the corner of the tray (but never had any problems with it, just didn't like it) and now they can clear, if just barely.


Now the battery is better secured, fits better, and is sitting lower by about 3/4" compared to the old tray.


JPaul

Rank V
Member

Pioneer I

2,596
Mendon, UT, USA
First Name
Paul
Last Name
Allen
Member #

11021

Ham/GMRS Callsign
N1JPA
After waiting far too long for the radiator bushings that turned out to be on indefinite back order, I gave up and went ahead and used the old ones (the new radiator did not come with any unfortunately). Got the AC condenser fins blown out as best as I could and installed the new radiator, along with new lower and upper hoses, as well as also replacing the straight hoses for the heater lines, plus the quick connect fittings that attach the heater lines at the firewall. At first I wasn't sure if I should bother completely rebuilding the heater lines, but when I inspected the quick connect fittings I could see that at least one of the two O-rings inside were flattening out. After having been removed and attached several times now since I purchased the rig, I figure it was only a matter of time before they started leaking. They were inexpensive anyway, so it's cheap insurance. Plus a whole new set of heater lines would have cost over $120, and all told I think I spent maybe $50-$60 total for the straight and 90 degree hoses, Powergrip clamps, and quick connect fittings.

For the lower and upper radiator hoses I went with some Gates constant tension hose clamps. They are smooth all the way around inside and use spring washers to keep constant pressure on the hose regardless of temperature. I debated trying the Powergrip clamps on these as well, but decided that the radiator was something I was going to want to make sure I could easily work on while on the trail. The odds of the heater hoses having issues is far lower.


Heater lines:


JPaul

Rank V
Member

Pioneer I

2,596
Mendon, UT, USA
First Name
Paul
Last Name
Allen
Member #

11021

Ham/GMRS Callsign
N1JPA
I also finally started working on getting the air lockers working. I have the ARB twin compressor that I am eventually going to hard mount, but after looking into it I realized that in order to safely use that with the air lockers I need to run a pressure regulator as the lockers shouldn't really be operated with more than 100 psi from what I could find, and the ARB twin pumps up to 150 psi. When I bought the lockers ARB was running a promo where you could get a free air locker activation compressor, so I ended up with two of them since I bought a front and rear locker.

I decided that it would not only be simplest, but also better to just run one of the air locker activation compressors. That way I wouldn't have to worry about trying to get the twin hard mounted (that is a rather big project in and of itself that is also waiting on me finishing my rear power system) and a regulator setup installed, and if something failed on the little compressor then once I have the twin mounted I would have a backup plan for activating the lockers. I also had the perfect spot for it in the engine back, and thanks to one of the few vendors that makes aftermarket parts for the H3 (Outfitter Design) I received the inspiration I needed to figure out how to mount it. I'll be perfectly honest, I seriously considered just buying the mount they are making now, but for one I'm a bit short on funds due to this new house sucking our reserves dry within the first couple months of living here, and their bracket was specifically made to mount a Viair compressor, so I would have had to modify it anyway for the little ARB. It is a nice mount they make though and reasonably priced.

I used some 3/16" thick by 4" wide aluminum flat bar for the base, a 1" tall aluminum spacer with a longer bolt to go through the air box mounting point, and a 1" tall stainless coupling nut with some 1/4" by 1 1/4" stainless steel bar I had laying around for washers to mount the bracket to the fender.


Since just two bolts is a little wobbly and I was worried about fatigue fractures in the sheet metal I also drilled and tapped an additional hole in the corner of the bracket and threaded a bolt through to add a third point of support. The tip of the bolt sits down on the bung on the air box mount that was used for the wiring harness to the MAF sensor. This is a nice thick bit of plastic so while it will probably receive some wear, it would take a very long time indeed before it became an issue.

 
  • Like
Reactions: GITINOVRLND EXPLRR

JPaul

Rank V
Member

Pioneer I

2,596
Mendon, UT, USA
First Name
Paul
Last Name
Allen
Member #

11021

Ham/GMRS Callsign
N1JPA
And that brings us to today. I am going to be getting some new tires since my 5+ year old Duratracs are getting a bit thin in the tread. I have an extra set of 4 factory wheels I picked up a while ago, and am planning on getting the new tires mounted on those and leaving the Duratracs on the current wheels. Since I can't help but find more things for me to work on, instead of simply cleaning up the extra wheels and getting the tires mounted, I got the wild idea of also repainting them. Since my truck is black and I'm planning on going with dark grey as an accent color (woo, wild man here) I took a look at what choices there were for wheel paint.

After a bit of looking and research I decided to get a can of VHT graphite wheel paint. It's a polyurethane paint and is supposed to do pretty well. It's a trail rig, not a show car, so I figure if it gets banged up I can just re-coat it instead of being ticked I spent hundreds of dollars on either a professional paint job, or getting them powder coated. If the color scheme ends up working out then maybe in a year or two I'll get them powder coated. For now this will do.

I cleaned up one of the wheels, sanded down the chipped areas, and scuffed up the factory clearcoat. Next I did a few coats of Rustoleum self-etching primer (since that is what I had) and then did three coats of the VHT graphite. It went on really well and I only ended up with one little puddle in a corner from accidentally putting on too much during the third coat. It's hard to tell from the pictures but you can see the contrast best in the picture with the hubcap that is still the factory color. I'm probably going to go ahead and get some more paint and do the rest of the wheels this week so that they have time to cure before new tires go on. I have a few more weeks left before a shakeout camping trip with my family, which is the week before my trip to Moab with the rest of the Hummer guys, which is shortly before my trip down to Arizona in May for Overland Expo West.

Outside:


Inside:


With hubcap:


I'm still trying to decide if I am going to be painting the hubcap to match or just leave it the factory silver. May only paint the round portion and leave the tab silver. if I do that then I will probably also fill in the Hummer letters with the graphite paint. At any rate, I wanted something different than the blah silver wheels. But I also don't want to go crazy, and the factory wheels fit the overall image very nicely.
 

JPaul

Rank V
Member

Pioneer I

2,596
Mendon, UT, USA
First Name
Paul
Last Name
Allen
Member #

11021

Ham/GMRS Callsign
N1JPA
I also finished up routing the wiring and installing the air system for the ARB compressor. I still need to run the air lines and hook the compressor wiring up to my SwitchPros. I added a 125 psi safety pop off valve to the compressor, just in case the pressure switch fails closed and the compressor runs away on me. I have some 90 degree 1/8" NPT fittings coming so that I can route the lines properly. I'll be using the plastic air lines ARB provides only for the connections to the compress and at each axle. The rest of it will be 3/16" nickel copper brake line used for air lines.


When I was at Harbor Freight picking up the 1/4" NPT tee fitting for the compressor I also found they had a 2' long air blow gun. I modified the tip a bit and it's primary purpose will be to allow me to blow out the radiator from behind to help keep it clean. Pretty good for $5.


JPaul

Rank V
Member

Pioneer I

2,596
Mendon, UT, USA
First Name
Paul
Last Name
Allen
Member #

11021

Ham/GMRS Callsign
N1JPA
And here is the latest repair I discovered I need to do. While messing around with the A pillar trim and snorkel bracket, I noticed my roof channel trim was looking in bad shape so I decided to take it off and see what was up. When I did that I discovered that the weld seam was covered with some type of "sealant" (quotes because it's apparently actually fairly porous and good for nothing but helping the metal rust) that was starting to bulge up and crack in several places. A bit of picking with a screwdriver and...


Thanks a lot GM. I know I've seen earlier model H3's roofs that did not have this stuff on it. Maybe they started adding it in 2008? At any rate, it is crumbly and chips right off no problem. Almost seems like a type of dense celled foam? Looks like it should only be used for interior applications though. All it seems to do is hold the water in and help everything rust. The good news is that it is super easy to take off. The bad news is this is yet one more thing to deal with. My plan is to strip it all off, clean off the rust, prime and paint it, then seal it with some high quality urethane roof sealant. Probably something like what is used on RV's.

That of course was not the cause for the roof channel trim being wonky, it's just getting old and warped is all. I'll eventually replace them but they're over $200 a side, mainly because they include the U channel for the roof rails.
 
  • Like
Reactions: Socal4X4

GITINOVRLND EXPLRR

Rank III
Launch Member

Enthusiast II

509
Clever, MO, USA
First Name
Ben
Last Name
Runner
Member #

19661

Awesome work! It has definitely been a long road for a vehicle you like.
I was looking at an Alpha on cargurus today and started shopping for upgrades. I came across your post.
 

JPaul

Rank V
Member

Pioneer I

2,596
Mendon, UT, USA
First Name
Paul
Last Name
Allen
Member #

11021

Ham/GMRS Callsign
N1JPA
Well, it has been a while since I updated this. Life has been keeping me pretty busy this year between my job and the new house/property. All these people claiming to have tons of free time due to COVID seem a bit farfetched, I've never been busier.

Let's see, where was I? Oh yes, I had finally settled on using the ARB locker activation compressor for operating the lockers rather than the ARB twin, fixed the battery tray setup, and fixed one side of the roof weld seam. Still need to fix the other side.

A little bit after getting the compressor installed I ended up messing around with the winch control box and wiring. I had it on top of the winch for a while but didn't like it being right there, plus it was rubbing on the bottom of the grill, and the goofy mounting clips were coming loose due to the screws backing out. I ended up moving the winch controller connector to another side of the box so that I could mount the control box right behind the passenger bumper pod. Turned out pretty well and it has opened up the top of the winch and improved the airflow to the radiator a bit.

The old spot was on the left of this shot. I plugged it up with some aluminum and sealant.


New spot puts it between the wires to the winch.


I had to drill new holes for the mounting screws to tighten it up a bit due to the orientation I had to go with to make it fit between the cables.


Mounted behind the bumper pod.


It's a little tight getting to it, and I actually had forgotten where I had even put it when I had to use my winch in November to get myself turned around on a snowing mountain road while Christmas tree cutting, but it works well for me.
 

JPaul

Rank V
Member

Pioneer I

2,596
Mendon, UT, USA
First Name
Paul
Last Name
Allen
Member #

11021

Ham/GMRS Callsign
N1JPA
Skipping over the rest of spring, all of summer, and into fall (which all of that was spent working too many hours at my job, fixing up a ton of stuff around the new property and house such as sprinklers, windows, etc, also getting a 1/4 acre garden planted and tended to, more work, some vacation time with my family to South Dakota and a camping trip in the Uintah's here in Utah, more work, the elections, taking my oldest daughter shooting for the first time, and tons of other stuff), I finally started turning my attention back to the H3 a bit. Mainly because the blower fan stopped working again. Took me hours to run through all the troubleshooting I did last time this happened just to finally remember I had already figured out the problem and simply never got around to fixing it.

This connector has a bad connection in it for the power to the blower fan. Possibly due to being used as a tap to run several other medium draw circuits by a previous owner. At any rate, I wasn't about to try fixing the connector itself. Took a couple pictures of the connector and wire to remind myself of the repair that needed to be done, which wouldn't happen until a month later with the connection finally going out often enough that I got sick of trying to kick the wiring harness while driving to get the fan back on so that I wouldn't freeze while driving.

Here is the trouble child. It's the brown wire that is wrapped with self-vulcanizing rubber wrap to cover the spot a suitcase tap was added to feed the extra circuits that were added.


And here is the fix. I simply cut the wire on either side of the connector, stripped it, and added a splice in with some crimps. Sounds a lot easier than it actually was. I ended up having to take the lower panel off the dash and even then it took a bit of cursing and several attempts and questioning my life before I finally got them crimps done. Problem is permanently solved though. I highly doubt I will ever need to take this apart, and if I do I can just cut out one of the crimps and add some spade connectors instead or something.
 

JPaul

Rank V
Member

Pioneer I

2,596
Mendon, UT, USA
First Name
Paul
Last Name
Allen
Member #

11021

Ham/GMRS Callsign
N1JPA
In between the end of October when I had to recall the issue with the body harness connector and the blower fan and the end of November when I actually fixed it finally, I ended up buying a 16' 6k lbs car hauler trailer to use for, well, anything really. I needed a trailer to be able to transport my riding mower and leaf sweeper and cart and whatnot over to my in-laws on the other side of the valley to help them clean up their yard from leaves a couple times. My father in law is getting up there and he has prostate cancer that is limiting his ability to get much done so I am glad I am able to help them out. Plus it gave me an excuse to get a trailer.

I ended up going with the car hauler since it was the max weight my H3 can tow (6k pounds) and would give me the most flexibility. I don't have a truck and this being 16' will allow me to haul pretty much any building material I could need and even small vehicles and other heavy-ish items. I am going to build sides for it and may even build a fold down ramp for it to make loading and unloading my riding mower and ATV's more readily. I'd like to also add a winch to it for pulling vehicles and such up onto the trailer. I'll probably upgrade the winch on the H3 and put the Badlands 12K winch from the H3 onto the trailer.

Eventually I want to get a 10K car hauler to use for heavier items, particularly my H3 for rock crawling trips. But I need to get a truck that can pull a 10K trailer first, according to my wife anyway. So this will do for now.


JPaul

Rank V
Member

Pioneer I

2,596
Mendon, UT, USA
First Name
Paul
Last Name
Allen
Member #

11021

Ham/GMRS Callsign
N1JPA
This now brings me to the last couple weeks. I finally had some time off of work and since I got a good sized bonus this years (surprisingly) I was able to afford to finally get new tires for the H3. I've been running the same set of 33" Duratracs since my first H3 clear back in 2014. 6 years on a set of tires and I'm not sure anymore how many tens of thousands of miles is pretty good, but the Duratracs are definitely done for. 2 years ago in Moab I noticed I was slipping in areas I had never had issues before, and this winter when I went to go Christmas tree cutting they did pretty badly really.

After much hand wringing, googling, debating, and soul searching, I finally chose a replacement. While the Duratracs are great tires and great in the winter, especially when new, they just aren't as tough as I would like for the types of trips I want to be able to start doing. Now that I don't have to drive it every day (I have my wife's old Charger to use for commuting now) I can afford to have it become more purpose driven for off-roading. So not only did I decide to go with a different model tire, I also decided to bump up to 35" tires. I settled on 315/75R16 General Tire Grabber X3's. I really wanted to try the Firestone MT2's, but there is so little information out there about them that I had a really hard time being able to go with them. The Grabber X3's on the other hand supposedly do really well in the winter for a MT, and they have a lot of good reviews overall. Of course though no one had any in stock up here in way northern Utah, and no one could even order any. I ended up having to go through Discount Tire down in Ogden and they had to have them shipped out from Georgia.

So, no pictures of them yet, they just barely arrived to the store this morning, and while I would have gone down today to get them installed, what I ran into after ordering them has put a damper on that hope unfortunately.

Since I was getting new tires, and finally had the time to work on this, I decided I was finally going to finish hooking up my ARB lockers to the compressor. I wasn't in any kind of hurry before since all my trips ended up being cancelled due to the pandemic, and I figured it would be fine since the bulkheads on both axles were plugged with a short piece of line that was folded over.

First, onto the good part of this story.

I chose to run hardline along the frame rail and only use the nylon tubing ARB provided between the differentials and the hardlines, and between the solenoid valves and the hardlines. This way the tubing wouldn't be too much of a concern since the hardline would hold up best to any hazards underneath, including high heat from the exhaust.

I used 3/16" copper-nickel brake line along with compression fittings and female/female fittings to be the main runs. I ran the line for the rear along the passenger frame rail (the driver frame rail is inaccessible in the rear due to the fuel tank and I wasn't about the drop that) and up the firewall using retaining tabs screwed to the frame and the firewall to hold it all in place. I routed it across a rear crossmember to be just over where the bulkhead fitting on the diff housing was. I used some boiling water to help form the nylon line into a 90 degree angle and left a couple loops of line to allow for the travel of the diff.


For the front locker I only had to run a short bit of hardline along the frame rail and up the firewall. This spot is where I was worried about heat damaging the nylon tubing since the cat is right there.


Then both lines come out at the top of the firewall and are connected to the solenoids via the nylon tubing.


While working out all the fittings, I discovered two problems. First, the female/female couplers I purchased off Amazon turned out to not be 1/8 NPT, but rather 1/8 BSPP. For those of you that are either not from outside the US or aren't familiar with BSPP, that stands for British Standard Parallel Pipe. Which not only is not tapered like NPT, but it is also a slightly different thread pitch, 28 TPI instead of 27 TPI. I had no idea this was a thing, but it turns out a lot of the fittings you get from China tend to be BSPP or BSPT (British Standard Pipe Tapered), rather than NPT. Hence reviews that complain about them either not fitting at all or fitting loosely, depending on which way you're going with fittings. On top of that the 6mm push connect fittings I had purchased were 1/8 BSPT. So while they would fit OK into the 1/8 BSPP female couplers, the 1/8" NPT 3/16" compression fittings I had purchased didn't go in AT ALL. So my idea was to get a 1/8-27 NPT tap and die and make adjustments that way. It worked, sort of. Turns out my fear of the coupler cracking came to reality on at least one of the connections. So I ordered some proper 1/8-27 NPT couplers and also ordered the ARB 6mm push connect fittings since it turns out there is a "universal" type that works with NPT, BSPP, and BSPT, mainly due to having special threads and an o-ring to provide the actual sealing. Once those all come in I will redo the connections to get them setup proper and leak-free.

For now I have wired the compressor and the solenoids to my SwitchPros SP9100. I did just order an extension cable for the ARB harness though so that I can run that into the cabin and use the spot the old rocker switches were for the electric lockers. $14 for a premade harness vs me spending time splicing the existing harness to be longer is worth it to me.

After getting everything hooked up I jacked up the front of the truck and tested the front locker. Success!

Sadly, this is where the good part of the story ends...
 

JPaul

Rank V
Member

Pioneer I

2,596
Mendon, UT, USA
First Name
Paul
Last Name
Allen
Member #

11021

Ham/GMRS Callsign
N1JPA
When I went to the rear and jacked it up to test the rear locker, to my dismay it would not engage. Granted, it has been a year and a half since the locker was installed so I thought maybe it was just a little stuck or something.

To spare you all the gory details, I'll summarize. I checked the airline, air was getting to the locker just fine. Took it for a drive to warm the diff up (it's been below freezing here for a while and has been getting down into the teens or lower at night). No dice. Hooked my pancake compressor up to the locker directly (the push connect fitting screws into the end of an air gun decently enough) and started going from 90 psi to 110, 120, all the way up to 150 psi in case it needed a shove. Still nothing. Not hearing any air leaks inside the diff.

Ended up taking the cover off. Still nothing. Locking sleeve isn't moving a micron. No air leaks. Now I will mention that when I pulled the bit of line out that was acting as a plug for the push connect fitting on the bulkhead fitting I noticed that it was pretty dirty and the end was not cut square but instead at an almost 45 degree angle. I was concerned about this but hoped that it had still sealed up.

But by this point I was starting to realize that might not have been the case. I unscrewed the push connect fitting from the bulkhead fitting and then found this sight:


I wasn't totally sure what I was looking at when I took that photo, but I would figure it out soon enough. I undid the bulkhead fitting and discovered that the jam nut (which turns out to be steel) used to seal the copper line inside the bulkhead fitting was rusted. That means that water had gotten inside. Great. If water got in then that means dirt had likely gotten in as well. So it was possible the copper line inside the housing that goes to the seal housing on the carrier was plugged. Since it was in a U shape (the installer had left most of the copper line inside) I was hoping that it would have acted like a trap and kept all the water and junk in the U bend and not made it's way to the seal housing. I cut the copper line close to the seal housing (I could always splice it back together) and cleared out the cut off portion. Sure enough gunk came out, but also diff oil. That had me hopeful, but it was misplaced hope. I hooked the bulkhead fitting directly to the now shortened copper line to the locker and tried the shop air again. Still nothing. I ran a piece of wire inside the line and measured to see if it was plugged, it didn't appear to be. I thought maybe it was the locking sleeve was seized for some reason so I sprayed it with carb cleaner first and then a bunch of PB Blaster. Still nothing. Heated it all up good and hot with a heat gun. Still nothing. Left it overnight and tried again the next day. Nope.

Crud. The only thing left to do was to pull the carrier out and disassemble it to figure out why exactly it wasn't working. I did that but noticed when I loosened the bearing caps the carrier was loose enough to come right out, no pulling or prying needed! That seemed wrong. Everything I had read was that you'd need to pry it out due to the amount of preload used for the bearings. Great.

Got the carrier out and tried it out on the bench. Still not moving. Ended up taking the ring gear off and splitting the carrier open. The locking sleeve came right out. So that wasn't it. I then had to pull the bearing off the end so that I could take the seal housing off and see if it was a plugged airway after all. Surprisingly I got the bearing off without destroying it by using a bearing splitter, a big chunk of I-beam, a couple pieces of angle iron, and my 20-ton shop press. Came right off, easy peasy.

Took the seal housing off and looked at the opening. Sure enough, it was plugged with crud. Brilliant. Cleaned it out and a bunch of crud came out. Everything else looked ok so I attempted to put the seal housing back on. Of course I didn't notice the lip of the flange it goes onto was not chamfered so I buggered up one of the o-rings a bit. Which calling them o-rings in the parts diagram is a disservice. They are not o-rings. They are circular seals that actually have a X shaped profile. So not something you'll find at any parts store. Or even online in the USA for that matter. Only can get them from either overseas suppliers or ARB themselves. Nice.

Anyway, got the seal housing back on after chamfering the lip and then put air to it. The bonded seal that acts as a piston against the locking sleeve popped right out. Good. I guess.

Put the bonded sleeve back in after cleaning everything up and closed the carrier back up. Moment of truth. Applied air. Locker works! Except now it leaks air like crazy past the bonded seals. Good grief...

So now I have ARB sending me a new set of seals for the seal housing and the bonded seal. They were really good about it and did it under warranty.

Made a splice coupling for the copper line by taking a brass 3/16" tubing splice (the "Christmas tree" kind), cutting the ends off to leave just the middle part, and drilling it out with a 9/32" drill bit and then soldering it all back together with high strength lead free solder.

So now the locker is all cleaned up and just waiting on the seals to arrive and then I can get it put back together. I have been trying to talk to the guy that did the diff originally and he says he is willing to fix it for me, though I'm not sure if I want to go to the trouble of having to take the axle housing off the H3 and transporting it almost 2 hours south to his shop and then waiting on him to put it all back together for me. I'm concerned about the apparent lack of preload as well. I have never done a diff before which is why I took it to someone else in the first place, but after this I doubt I'll ever do that again. There are literally only two things I have never had to rebuild myself before on a vehicle. Transmissions and differentials. I've done pretty much everything else. Automatic transmissions are pretty touchy from what I have gathered (and for the price I got my rebuilt transmission with warranty it was worth it to just go that route) and diffs were a bit overwhelming to me with how easy it supposedly was to do it wrong and wreck the gears. After this though I think next time I'll just take care of it myself. If I can rebuild an engine no problem a diff shouldn't be too hard either.


Here is a closer look at the jam nut before I put it in some Evapo-rust to clean it up, but after I cleaned it with a wire brush:


And here is the splice in the copper line: