Trail Mechanic II
- 4,246
- First Name
- Michael
- Last Name
- Gain
- Member #
22999
- Ham/GMRS Callsign
- WRUM572
Finally got rid of those small stock wheels and tires for a set of AEV saltas and some 37” BFG”s.
Looks great!
Trail Mechanic II
22999
Finally got rid of those small stock wheels and tires for a set of AEV saltas and some 37” BFG”s.

Explorer I
25205
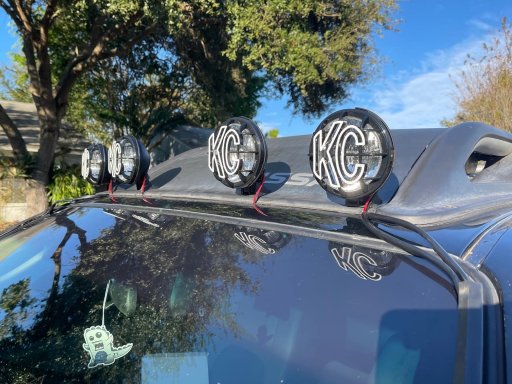
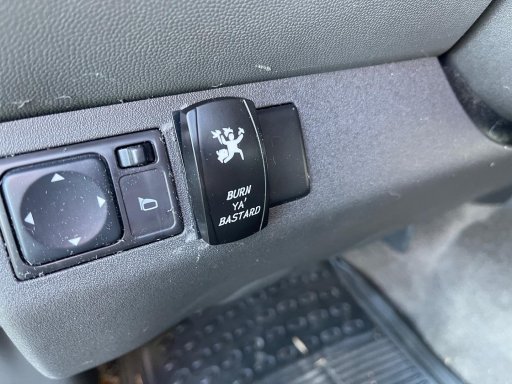
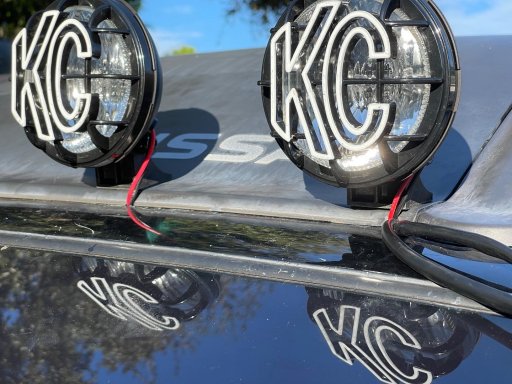
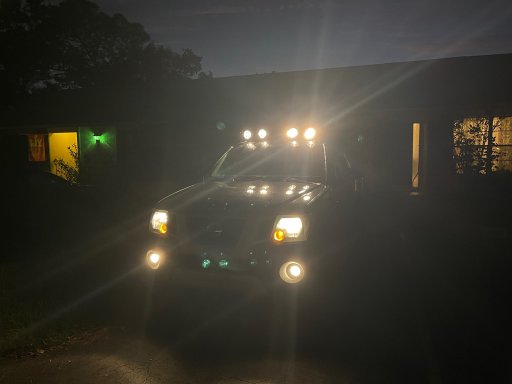
Finally had a chance to wire in the KC Hilites lights and install a switch this weekend. I know LEDs are probably brighter, and the lights
would look better in a cage, but I gotta work with what I’ve got and I don’t like LED light bars.
Finally had a chance to wire in the KC Hilites lights and install a switch this weekend. I know LEDs are probably brighter, and the lights
would look better in a cage, but I gotta work with what I’ve got and I don’t like LED light bars.
They look great!

Trail Mechanic III
29878
Finally had a chance to wire in the KC Hilites lights and install a switch this weekend. I know LEDs are probably brighter, and the lights would look better in a cage, but I gotta work with what I’ve got and I don’t like LED light bars.

Off-Road Ranger I
31136
Explorer I
23711

Pioneer II
1632
Now that looks better ;-)Finally got rid of those small stock wheels and tires for a set of AEV saltas and some 37” BFG”s.
Explorer I
25205
Now that looks better ;-)Finally got rid of those small stock wheels and tires for a set of AEV saltas and some 37” BFG”s.

Protector II
Off-Road Ranger I
0745


Off-Road Ranger I
31136
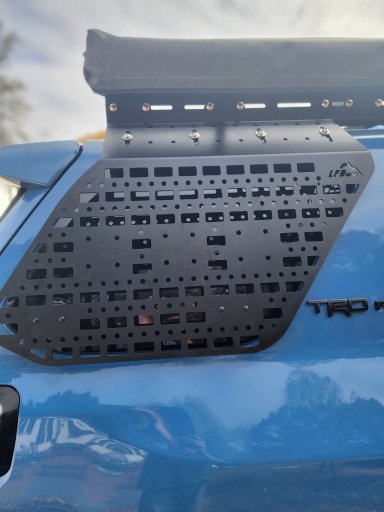
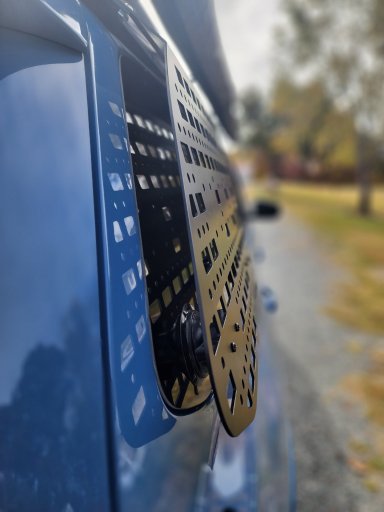
Installed the all new @lfd_off_road Multi Purpose Window Panel.
Coming in at only $199.99 + Tax & Shipping.
Made from Laser cut 11 Gauge (.120) steel with a two stage zinc base layer powder coating. Uses two heavy-duty RAM Mount suction cups on the rear window for stability. Installation hardware (for LFD Racks) and RAM Mount Suction cups included.
Mounted, this panel is very sturdy. Allowing you to add any accessories, trail gear, or Rotopax at a more accessible level than on your roof rack. Use caution when mounting items and common sense. Also, be cautious on tighter trails. I feel that this also adds security and safety to the 3rd window.
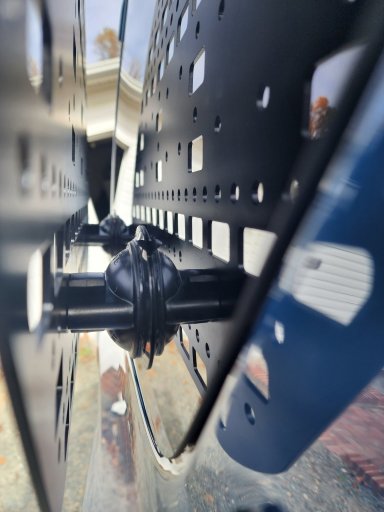
Using the provided RAM Mount suction cups to hold in place while I centered and installed the bolts into the panel and roof rails, I was able to install this by myself,
Although a second person would be beneficial. Install time was just short of 1 hour. Mostly due to me trying to find that perfect center spot that I wanted.
I would say a suggested install of 30 minutes to 1 hour. Especially if you do have that second person.
Explorer I
23711

Protector III
22608

Member II
20275
Installed the all new @lfd_off_road Multi Purpose Window Panel.
Coming in at only $199.99 + Tax & Shipping.
Made from Laser cut 11 Gauge (.120) steel with a two stage zinc base layer powder coating. Uses two heavy-duty RAM Mount suction cups on the rear window for stability. Installation hardware (for LFD Racks) and RAM Mount Suction cups included.
Mounted, this panel is very sturdy. Allowing you to add any accessories, trail gear, or Rotopax at a more accessible level than on your roof rack. Use caution when mounting items and common sense. Also, be cautious on tighter trails. I feel that this also adds security and safety to the 3rd window.
Using the provided RAM Mount suction cups to hold in place while I centered and installed the bolts into the panel and roof rails, I was able to install this by myself,
Although a second person would be beneficial. Install time was just short of 1 hour. Mostly due to me trying to find that perfect center spot that I wanted.
I would say a suggested install of 30 minutes to 1 hour. Especially if you do have that second person.

Influencer III
19540
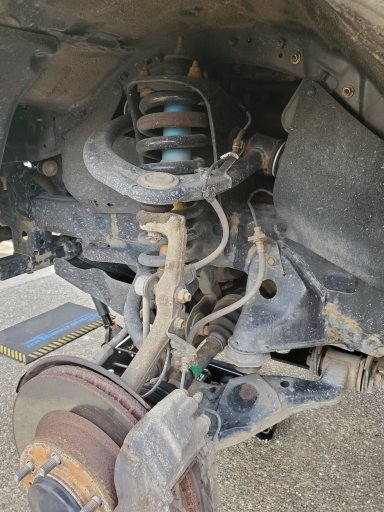
Looking at it, the top seems pretty well mounted. The suction cups help stabilize the bottom edge. It’s an interesting approach for sure.I don't trust suction cups for my phone or camera on the inside much less strapping heavy stuff on the outside. I have had go pros fall off of my winshield with 3M tape. Good luck!

Off-Road Ranger II
Trail Mechanic III
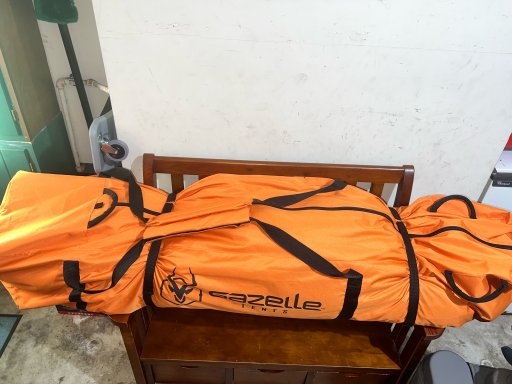
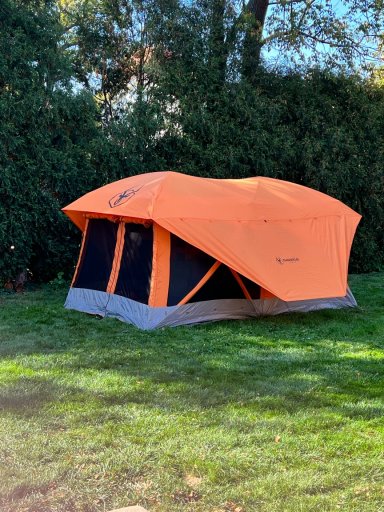
29878
Not so much a “what did you do with your rig today” but, I was able to score a “new to me” Gazelle T4 Plus tent. In fact, it was gifted to me by some extremely generous individuals. Thankful!
Influencer III
19540

Protector III
22608