
Got ran into this morning, minimal damage to rear bumper, just a few scratches....... But the perfect excuse to get a metal bumper with swing out carriers.
What Did You Do With Your Rig Today?
- Thread starter iamout
- Start date
You are using an out of date browser. It may not display this or other websites correctly.
You should upgrade or use an alternative browser.
You should upgrade or use an alternative browser.

Explorer I
- 4,285
- First Name
- Michael
- Last Name
- Denniston
- Member #
3030
- Ham/GMRS Callsign
- KJ7LYZ
I kind of thought the same thing. After I cut the big one out I thought "Man, I hope I can pull this off".I figured you'd have something cool planned for it. I just saw two holes and said, whoa!
Explorer I
- 4,285
- First Name
- Michael
- Last Name
- Denniston
- Member #
3030
- Ham/GMRS Callsign
- KJ7LYZ
Ha, I tried to drill the radiused corners with a big inhibit. I bit pretty good right at the end. It will all end up covered.Jeeeeeezus, looks like you cut the first hole with a forest axe :D
Explorer I
- 4,285
- First Name
- Michael
- Last Name
- Denniston
- Member #
3030
- Ham/GMRS Callsign
- KJ7LYZ
I will post progress and the finished results here.I'd still keep my cut outs for the next owner although he could use aluminum sheets to cover and pop rivet over the holes unless you sell it to another off roader.
Looks like it will make a tidy installation I would like to see when your finished. I might do something similar to the fiberglass panel in the rear of my LRD2 in an existing compartment that has only access from top, to be able to install my solar charger, amp meter and Inverter in the recess instead of a surface mount.

Off-Road Ranger I
- 1,579
- First Name
- Dave
- Last Name
- M
- Member #
19695
- Ham/GMRS Callsign
- CB Handle: Buckaroo, UK FM Ch.30
Off-Road Ranger I
- 1,579
- First Name
- Dave
- Last Name
- M
- Member #
19695
- Ham/GMRS Callsign
- CB Handle: Buckaroo, UK FM Ch.30
that'll be about 2 grand for that little lot :-)Got ran into this morning, minimal damage to rear bumper, just a few scratches....... But the perfect excuse to get a metal bumper with swing out carriers.
Iv got a heavy-duty bumper sat waiting just need to fab up the carriers, iv got an idea and some "scrap" steel so shouldn't cost to much.that'll be about 2 grand for that little lot :-)
Off-Road Ranger I
- 1,579
- First Name
- Dave
- Last Name
- M
- Member #
19695
- Ham/GMRS Callsign
- CB Handle: Buckaroo, UK FM Ch.30
Just did the heavy duty bumper thing myselfIv got a heavy-duty bumper sat waiting just need to fab up the carriers, iv got an idea and some "scrap" steel so shouldn't cost to much.


Pathfinder I
Silver linings..... :)Got ran into this morning, minimal damage to rear bumper, just a few scratches....... But the perfect excuse to get a metal bumper with swing out carriers.

Member III
- 2,827
- First Name
- Jim
- Last Name
- covey sr
- Member #
16986
- Ham/GMRS Callsign
- none - BREAKER BREAKER HAND HELD CB AND WALKIE TALKIE
Hey good idea. Why didnt I think about that. Slam on your brakes , let the guy behind yo smack you good, then let His insurance buy you a new off road bumper (or most of it), smart thinking BinghamGot ran into this morning, minimal damage to rear bumper, just a few scratches....... But the perfect excuse to get a metal bumper with swing out carriers.

Pathfinder I
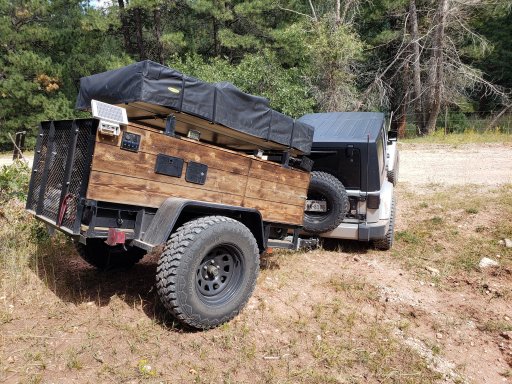
I used it to bring home landscaping materials and plants. Then with all of the unseasonal rain and snow falling in the Sierra I made a meme.

Influencer III
- 4,312
- First Name
- Rex
- Last Name
- Drake
- Member #
19540
- Ham/GMRS Callsign
- KI5GH
- Service Branch
- Air Force
I added a RAM mount for my navigation tablet.


Member III
- 2,827
- First Name
- Jim
- Last Name
- covey sr
- Member #
16986
- Ham/GMRS Callsign
- none - BREAKER BREAKER HAND HELD CB AND WALKIE TALKIE
You did great job on those ammo boxes too. Great idea, good craftsmanship.

Enthusiast III
Influencer III
- 4,312
- First Name
- Rex
- Last Name
- Drake
- Member #
19540
- Ham/GMRS Callsign
- KI5GH
- Service Branch
- Air Force
You did great job on those ammo boxes too. Great idea, good craftsmanship.
Thanks. I posted more pics of them in the DIY section here.
Member III
Hello,
I promised to share some pictures of my mods done to my ARB front bumper.The stock ARB Winch bumper has the winch completely inclosed in a box with no access to the winch spool. Maybe, not so much a problem with synthetic cable, but I still did not like the thought of having to pull the whole bumper to get a stuck cable working again! I wanted to have access to the Winch spool if I ever had a bad backlash or get all the cable stuck on one side of the the winch spool. I think it turned out great. One bad thing, I still need to reach under the bumper to the winch control lever. See what you think? Still need a relocation kit to mount the winch solenoid under the hood.Vance.


I promised to share some pictures of my mods done to my ARB front bumper.The stock ARB Winch bumper has the winch completely inclosed in a box with no access to the winch spool. Maybe, not so much a problem with synthetic cable, but I still did not like the thought of having to pull the whole bumper to get a stuck cable working again! I wanted to have access to the Winch spool if I ever had a bad backlash or get all the cable stuck on one side of the the winch spool. I think it turned out great. One bad thing, I still need to reach under the bumper to the winch control lever. See what you think? Still need a relocation kit to mount the winch solenoid under the hood.Vance.
Member III
- 2,827
- First Name
- Jim
- Last Name
- covey sr
- Member #
16986
- Ham/GMRS Callsign
- none - BREAKER BREAKER HAND HELD CB AND WALKIE TALKIE
Hello,
I promised to share some pictures of my mods done to my ARB front bumper.The stock ARB Winch bumper has the winch completely inclosed in a box with no access to the winch spool. Maybe, not so much a problem with synthetic cable, but I still did not like the thought of having to pull the whole bumper to get a stuck cable working again! I wanted to have access to the Winch spool if I ever had a bad backlash or get all the cable stuck on one side of the the winch spool. I think it turned out great. One bad thing, I still need to reach under the bumper to the winch control lever. See what you think? Still need a relocation kit to mount the winch solenoid under the hood.Vance.View attachment 118128View attachment 118129View attachment 118130
Looks very usable to me Vance. Did you have to cut out the bumper from the top to get access to the spool ? How did the winch lever end up on the bottom side of the bumper ? I see now... your winch is bolted to the bumper face instead of to the bottom so that makes your winch lay on it's side. Hmmm I never thought of doing that but did you have a reason for doing that, like no bottom on your bumper. It looks like you welded a winch plate to the face of the bumper for strength, is that true.
Member III
Lanlubber,Looks very usable to me Vance. Did you have to cut out the bumper from the top to get access to the spool ? How did the winch lever end up on the bottom side of the bumper ? I see now... your winch is bolted to the bumper face instead of to the bottom so that makes your winch lay on it's side. Hmmm I never thought of doing that but did you have a reason for doing that, like no bottom on your bumper. It looks like you welded a winch plate to the face of the bumper for strength, is that true.
I have a bad habit of high jacking posts, so will answer your questions in “ The Daily Thread”. I enjoy looking and learning from DIY mods other post here! Vance.
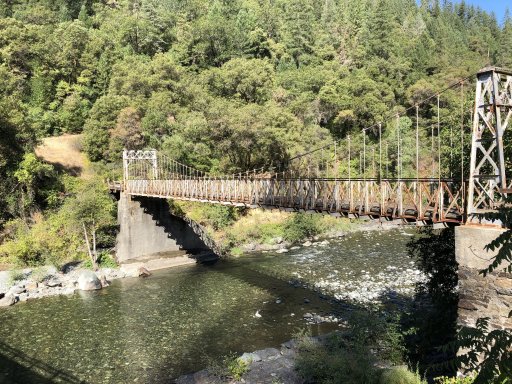
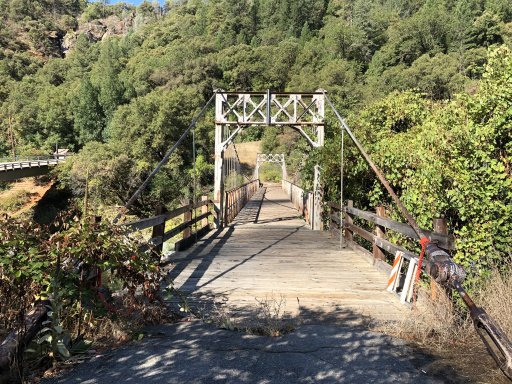
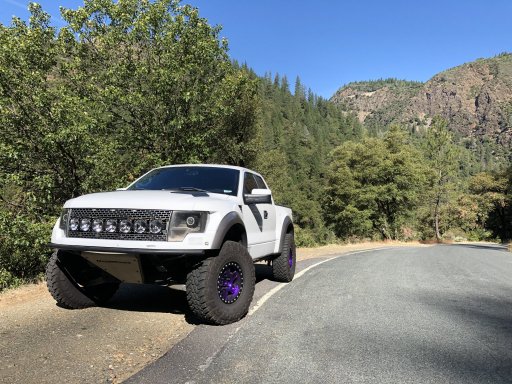
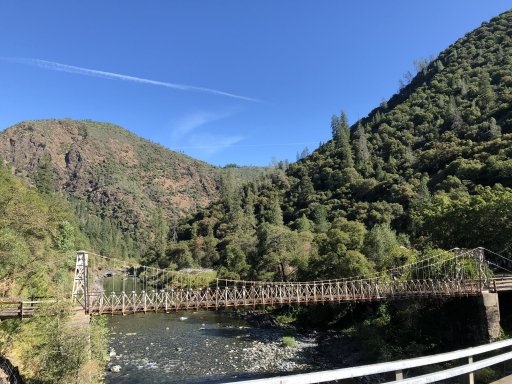
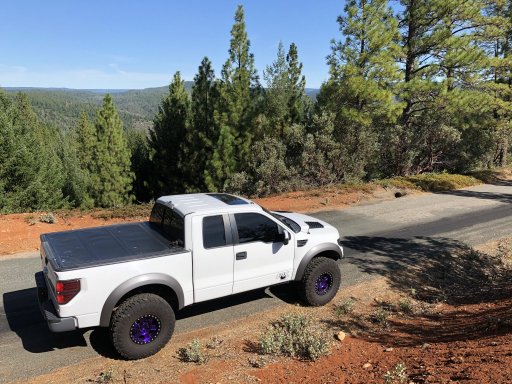
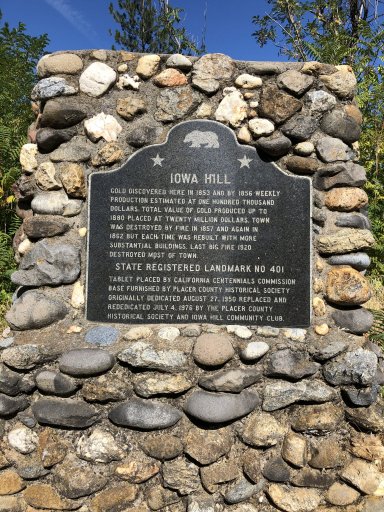
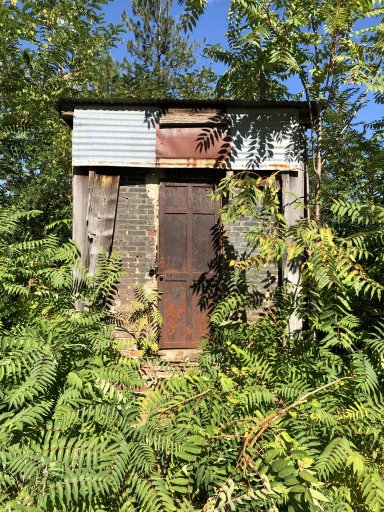
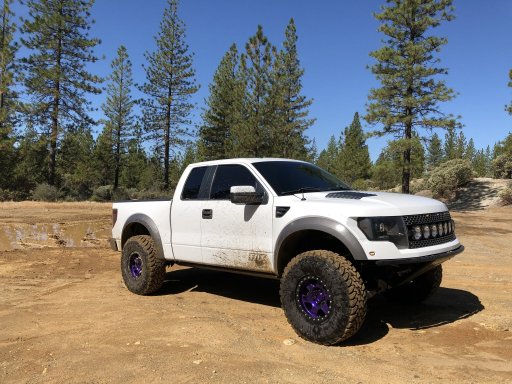
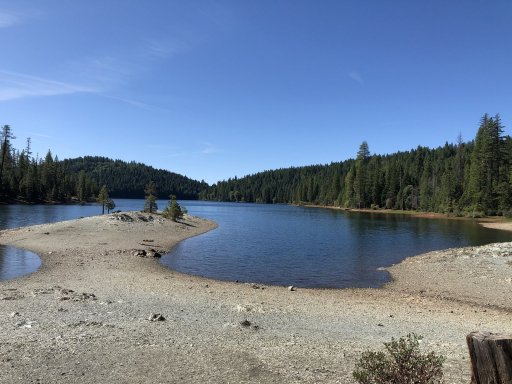
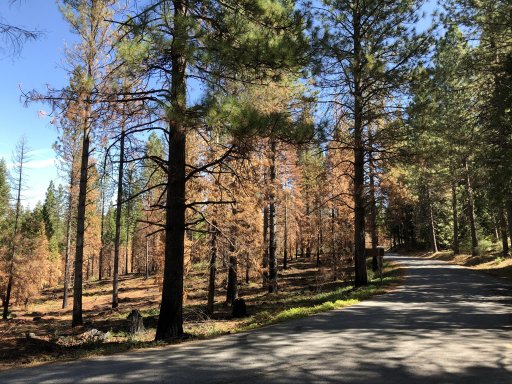
Took my truck out and did some exploring around Auburn/Colfax area (Northern CA)
I was by myself so I didn’t want to get too far into anything that might get me into trouble.
I was by myself so I didn’t want to get too far into anything that might get me into trouble.
Attachments
-
 EDE5852B-669D-49C6-8CCD-F9FEDD51DF34.jpeg1.3 MB · Views: 20
 -
 EE7AC38E-CDA5-4094-822D-CCD2504C987A.jpeg1.3 MB · Views: 21
 -
 EED930B5-EC42-4866-B628-4E9D90FE7431.jpeg1.1 MB · Views: 20
 -
 7E878151-757D-42EE-BE4E-12DCA507A94C.jpeg900.3 KB · Views: 19
 -
 7198DD34-CA22-41DF-9415-8D511454C656.jpeg994.1 KB · Views: 19
 -
 9A07A31F-1E80-4845-95CE-03F051CB030B.jpeg1.3 MB · Views: 20
 -
 3517ED43-3F3F-4DAC-B9FB-83F61E5BA0F4.jpeg1.3 MB · Views: 20
 -
 6104E41B-88C1-4A9E-9D5F-D9CDD364405B.jpeg869.6 KB · Views: 20
 -
 89B233F2-7825-4879-A0E5-1BCEE4537566.jpeg769.5 KB · Views: 19
 -
 6B796639-15F4-433B-AB2E-1C3F7898691C.jpeg1.2 MB · Views: 18
Last edited:

Advocate I
I did some more front bumper trimming, though there's still more to do. I also did a little more research on the ZJ washer-bottle conversion for my WJ, if that counts.
-TJ
-TJ
