Third try - now a Bison!

  • HTML tutorial

TheBison

Rank V
Member

Trail Blazer III

2,028
Hartsel, CO
First Name
Brian
Last Name
Foltz
Member #

27816

Ham/GMRS Callsign
AA0BF / WRMI426
Service Branch
U.S. Army
I'll start my build thread here and see how quickly our build progresses - or not! This is our third off-road vehicle that we've built for more serious backcountry use, and the lessons learned from those builds will definitely influence this one.
154299572_10158012534678434_7188352226277564310_n.jpg
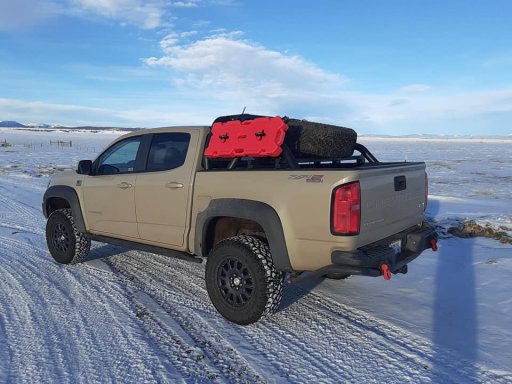
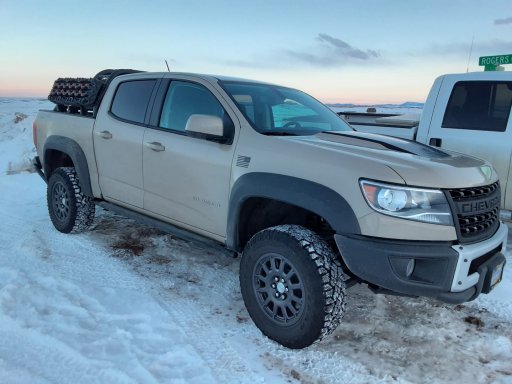
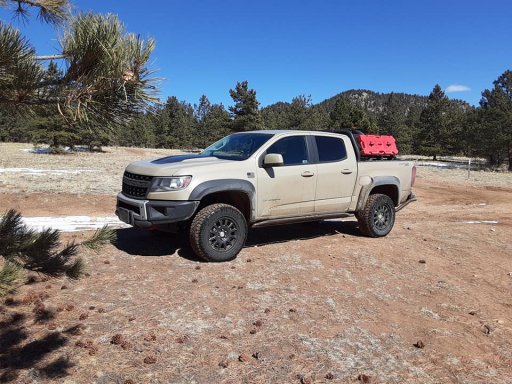
In December of 2020 we decided to splurge and purchase a new 2021 Chevy Colorado ZR2 Bison in Sand Dune Metallic. It's basically a standard AEV Bison edition; it doesn't have much additional other than the Bison package. We chose the gas engine versus the diesel (we had the Duramax in our 2018 Colorado Z71) for some reasons we'll cover later on. We've started the build and this thread will cover mods as we do them, so it'll be more "live" versus a summary of things we already did.

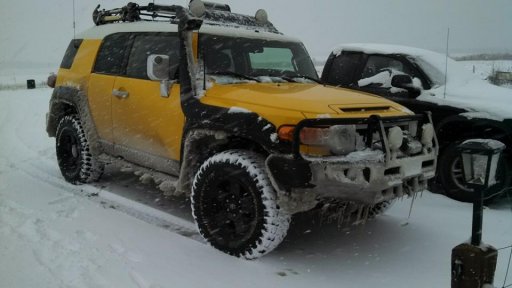
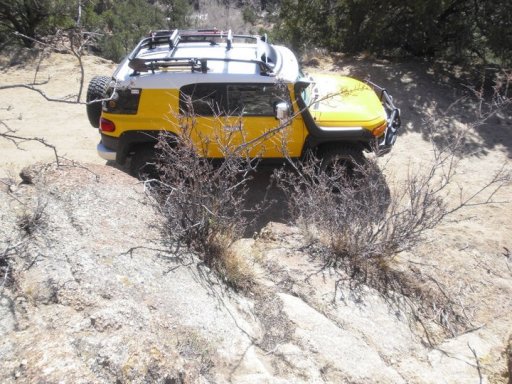
It's important to go over "where we came from" with vehicle builds. Our first rig that could be considered built for Overlanding - though that wasn't really a term in use at the time - was a 2007 Toyota FJ Cruiser in Sun Fusion Yellow. I ordered it with a manual transmission due to the flexibility that allows, and it came with front and rear lockers, Hella bumper and roof lights, the roof rack, and sliders. We slowly built it up until we sold it in 2014: ARB front bumper with Smittybilt winch, front leveling kit to allow 285/75/16 BFG Mud Terrains on blacked-out factory 16" wheels, ARB snorkel, a custom internal storage solution (not drawers, but more like cubbies/compartments) and ham and CB radios. We had a lot of fun with this rig, including doing an FJ Cruiser Summit in Ouray where we did Black Bear, Imogene, Engineer, Ophir, Cinnamon, etc. - all the famous passes. We also did a really fun trip to Yellowstone and through Idaho and Utah. We sold the FJC in 2014 because our family had outgrown it's admittedly cramped interior, and we sort of fell out of the off roading (now "overlanding") for a few years.
224783_10150160370273434_664887_n.jpg10296767_10152158055848434_3027080820099832254_n.jpg
 

TheBison

Rank V
Member

Trail Blazer III

2,028
Hartsel, CO
First Name
Brian
Last Name
Foltz
Member #

27816

Ham/GMRS Callsign
AA0BF / WRMI426
Service Branch
U.S. Army
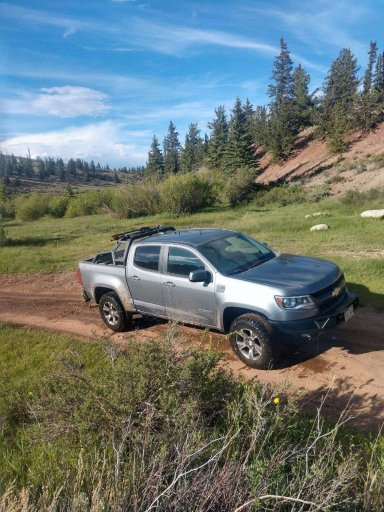
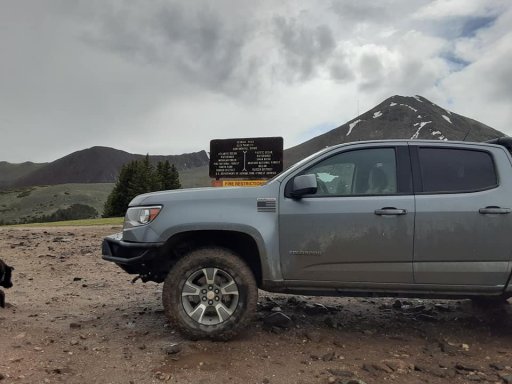
As I mentioned before, for a number of reasons we got out of the overlanding scene for a few years until we bought a 2018 Chevy Colorado Z71 in dark grey with the 2.8L Duramax. We wanted the diesel because our other vehicles are diesels (an F250 and a tractor) so it simplified fuel logistics, and also because of the amazing fuel mileage it offered (we do a lot of driving - 60 miles round trip daily to work). The truck stayed stock for about a year and a half, then we started out by upsizing the tires to 265/70/17 Goodyear Ultra Terrain tires accommodated by a 2" front level kit. We did this first simply because it was time for new tires anyway so it made economical sense. With this tire and level combo we didn't run into any rubbing issues. We also trimmed the air dam off the front bumper because it had led to more than one "stuck" situation. We also installed a dual-band ham radio (I'm a comms geek by profession). Our next steps were to replace the front bumper with a Westin tubular model and skid plate, and we added an Armordillo bed rack with spare tire carrier. We chose the bumper due to cost, light weight, and clearance; we chose the bed rack because we liked it a lot more than the factory Chevy bed rack and the spare tire carrier got the spare out from under the vehicle (VERY important to us) but it also kept the spare out of the bed to maximize our storage options. The build was at this state in December 2020 when we ran into a problem with the Duramax that required it to be in the dealership for several weeks waiting for parts for the DEF system after getting stuck with it in limp home mode for almost 150 miles back to a dealership. This issue with the complex diesel exhaust emissions system of modern trucks (our F250 doesn't use DEF or have any of that emissions crap and it's been flawless for 12 years) and the potential of being stranded because of it, coupled with the very cold climate we live in (it sometimes reaches almost -40 degrees at our house and -50 on our commute to work) made us realize we need at least one gas vehicle to handle this and without the complex emissions system. While the Z71 was at the dealer, we pulled the trigger on the Bison because we'd always liked the AEV bolt-ons and fell in love with the new tan color.
105281364_10157442257273434_4087327961128989176_o.jpg106967878_10157481555978434_4445988380518047861_n.jpg

We had a long wish list of things we planned to do with this Z71, including skids, lights, some sort of bed storage system, etc. We took many of these ideas and modified them to continue the plan with the new Bison...
 

TheBison

Rank V
Member

Trail Blazer III

2,028
Hartsel, CO
First Name
Brian
Last Name
Foltz
Member #

27816

Ham/GMRS Callsign
AA0BF / WRMI426
Service Branch
U.S. Army
We brought the Bison home with the understanding that we now had a "head start" with the things we had been planning to do with the Z71. We now had more appropriate (not plastic!) front and rear bumpers, skids, sliders, etc. We knew we were trading fuel mileage for reliability going with the gas engine, but we chose the cat-back exhaust option for a little more fun. The truck came with the factory bed rack that we quickly deep-sixed for the Armordillo rack from the Z71 (we removed it before trade in). Our first new mods have been to mount a Rotopax fuel can (to address the fuel range reduction) and some off-brand traction boards on the sides of the bed rack. We used the Rotopax dual mounting plates on both side and added some hardware to hold the traction boards (a really easy mod) in case we ever decide to hold an additional Rotopax on that side. We bought the traction boards on Amazon because quite frankly they were a third of the price and had really good reviews compared to MAxTrax - and we try really hard not to get stuck in the first place so if these only survive a use or two that's fine.
144465437_10157944943373434_4462845144596293461_n.jpg144102501_10157948162778434_1586183102264411393_o.jpg
 

TheBison

Rank V
Member

Trail Blazer III

2,028
Hartsel, CO
First Name
Brian
Last Name
Foltz
Member #

27816

Ham/GMRS Callsign
AA0BF / WRMI426
Service Branch
U.S. Army
A side note about reliability - this Bison mysteriously went into limp-home mode and wouldn't shift correctly when it had about 350 miles on it. After a tow into the dealership it was determined that a sensor wiring harness for the transmission was bad and it was replaced under warranty (obviously). We now have about 4,000 miles on the truck and it hasn't been a recurring problem, so we're hoping it was just a factory dud part. You'll be sure to hear about it if it happens again!
 

TheBison

Rank V
Member

Trail Blazer III

2,028
Hartsel, CO
First Name
Brian
Last Name
Foltz
Member #

27816

Ham/GMRS Callsign
AA0BF / WRMI426
Service Branch
U.S. Army
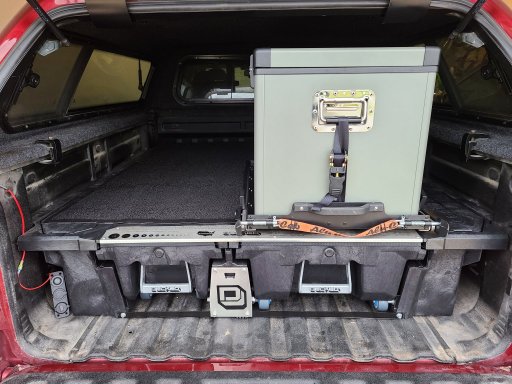
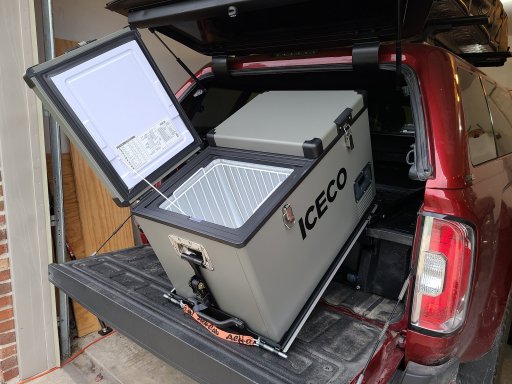
EDIT 12/29/22! We're moving the second battery and fridge to the truck bed from the trailer and swapping out the Armordillo rack for a Leitner rack! Details to follow!

Here are our planned major mods so far:
  • Armordillo bed rack Leitner rack
  • Decked bed drawer system (installed 3/7/21)
  • Lighting - forward, rear, and side facing, plus some in the bed. (mostly done, still waiting on rear facing)
  • Fridge/freezer (moved to trailer project) Moving from trailer to bed.
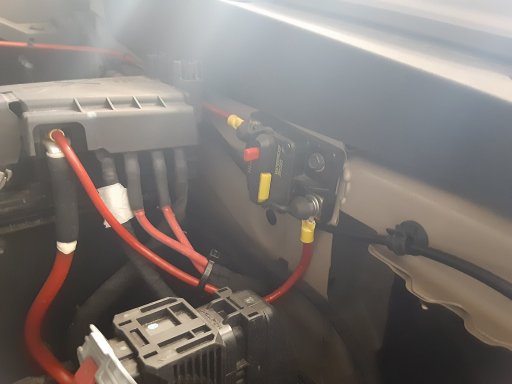
  • Dual battery setup and solar panels (moved to trailer project) Moving from trailer to bed.
  • Winch option for AEV bumper
  • Additional underside armor (shock skids done 12/22, still need transmission skid)
  • Internal organization (MOLLE panel for the driver's seat and a seat delete) (installed throughout April and May 2021)
  • Tablet computer with mount for mapping (installed July 2021)
  • Snorkel
  • Roof rack with storage boxes (installed 5/29/21)
We'll see how this progresses and how long it takes!
 
Last edited:

RoarinRow

Rank V
Launch Member

Member III

2,771
Elk Grove, CA, USA
First Name
Rolando
Last Name
Nispiros
Member #

17011

Ham/GMRS Callsign
KN6JJS
Here are our planned major mods so far:
  • Decked bed drawer system (on order)
  • Lighting - forward, rear, and side facing, plus some in the bed.
  • Fridge/freezer
  • Dual battery setup and solar panels
  • Winch option for AEV bumper
  • Additional underside armor
  • Internal organization (MOLLE panels for the seats)
  • Tablet computer with mount for mapping
  • Snorkel
  • Roof rack with lighting and RTT
We'll see how this progresses and how long it takes!
Good list so far!
 
  • Like
Reactions: TheBison

AppalachianGoat

Rank II

Enthusiast III

473
Dillsburg, PA, USA
First Name
Matthew
Last Name
XXXX
Service Branch
USN
Identical to my “sand bison”. I also have the decked drawers installed (don’t flip the forward most mounting clips), very easy install. Also my xbull boards fit perfectly between the end of the decked drawers and tailgate so that’s where I stash my boards, it’s almost impossible to remove without opening the tail gate. My biggest gripe is internal organization so I also added Molle seat panels and a Molle system to wrap around the center console to mount my gmrs. I’ll be watching closely, seems like we are doing down the same path minus rack and RTT.
 
  • Like
Reactions: TheBison

DRAX

Rank V
Member

Advocate I

1,451
Monticello, IL
First Name
Hogan
Last Name
Whittall
Member #

28590

Ham/GMRS Callsign
W9DRX
Congrats! The Bisons are definitely cool and capable, best of luck with it!
 
  • Like
Reactions: TheBison

TheBison

Rank V
Member

Trail Blazer III

2,028
Hartsel, CO
First Name
Brian
Last Name
Foltz
Member #

27816

Ham/GMRS Callsign
AA0BF / WRMI426
Service Branch
U.S. Army
Identical to my “sand bison”. I also have the decked drawers installed (don’t flip the forward most mounting clips), very easy install. Also my xbull boards fit perfectly between the end of the decked drawers and tailgate so that’s where I stash my boards, it’s almost impossible to remove without opening the tail gate. My biggest gripe is internal organization so I also added Molle seat panels and a Molle system to wrap around the center console to mount my gmrs. I’ll be watching closely, seems like we are doing down the same path minus rack and RTT.
Thanks for the Decked tips! It's here so it'll be going in this weekend. And trust me, the rack/RTT is a year or more off $$$$$$...
 
  • Like
Reactions: AppalachianGoat

DRAX

Rank V
Member

Advocate I

1,451
Monticello, IL
First Name
Hogan
Last Name
Whittall
Member #

28590

Ham/GMRS Callsign
W9DRX
I think you'll like the Decked system, I have one as well and it's a great product for the money for people like me that have little to no woodworking tools or experience so building my own storage would end up costing more (literally and figuratively in terms of my patience). Having a custom-built storage done by a local woodworker would've cost twice as much as the Decked.

Install was easy, I was able to do 99% of it myself even with the topper on the truck. I only needed my wife to help out with providing leverage when trying to get the bolts for the lids into the nuts at the front of the bed since they didn't line up close enough to get them threaded in. I also ended up with one missing bolt for the lid and got two Left ammo can lids, so I shot them an email and they shipped me a Right lid and a bag of spare hardware no questions asked.

Been really happy with it, smooth operation, solid, and mounted my fridge slide to it without issue.

20201114_153804.jpg 20201114_153830.jpg
 

TheBison

Rank V
Member

Trail Blazer III

2,028
Hartsel, CO
First Name
Brian
Last Name
Foltz
Member #

27816

Ham/GMRS Callsign
AA0BF / WRMI426
Service Branch
U.S. Army
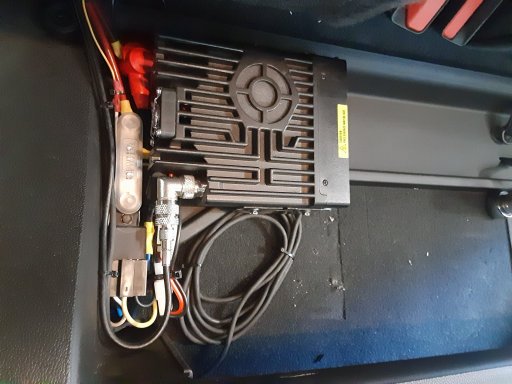
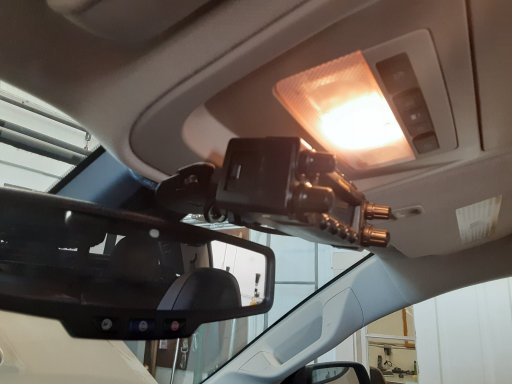
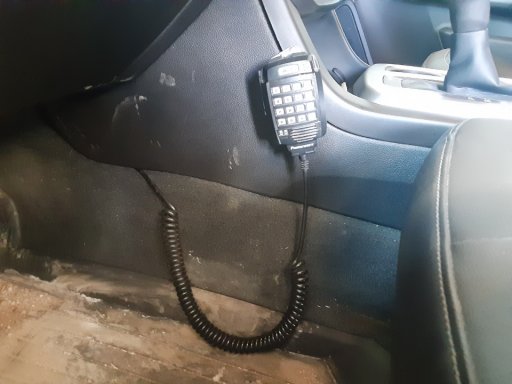
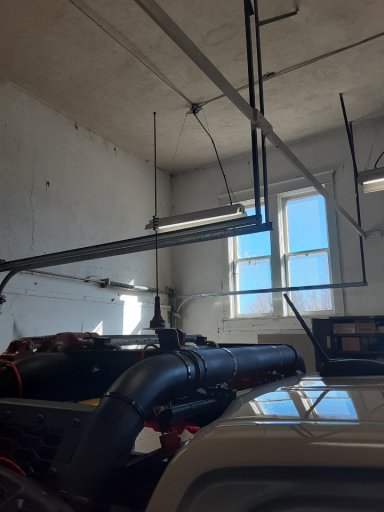
I finished up my ham radio installation today. It's a Powerwerx DB-750X dual band that is both Part 97 (ham) and Part 90 (LMR) certified (I do a lot of volunteer communications work with my county). Pretty basic setup: an 80 amp breaker under the hood feeds a power bus under the back seat (future expansion for CB, cell booster, and auxiliary lighting controller). A relay that is switched by an ignition hot lead feeds the radio that has its own inline fuse, and is also mounted under the back seat; the remote head unit is above the rear view mirror, the mic is on an extension cable and comes out under the dash, and the speaker is under the seat. As you can tell, I don't like cables showing :). The antenna is on a mount fabbed by me from a scrap of steel and is mounted to the bed rack in the back. Pretty much a run-of-the-mill installation.
20210302_145338.jpg20210302_145121.jpg20210302_145059.jpgResized_20210302_145036.jpegResized_20210302_145132.jpeg
 

TheBison

Rank V
Member

Trail Blazer III

2,028
Hartsel, CO
First Name
Brian
Last Name
Foltz
Member #

27816

Ham/GMRS Callsign
AA0BF / WRMI426
Service Branch
U.S. Army
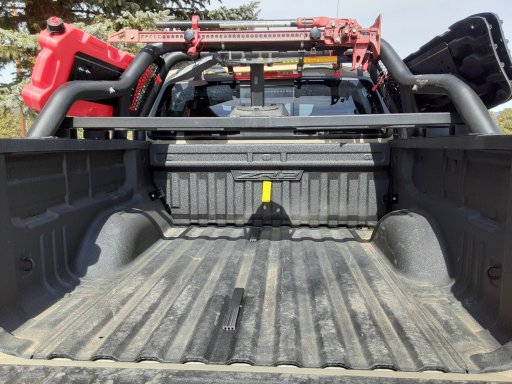
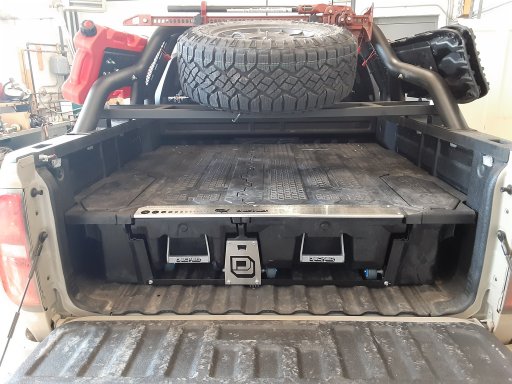
We installed the Decked system over the weekend. It's as everyone described - very straightforward and although it was nice having help to speed assembly and lift parts into place it could be a solo job. The only dig against Decked is we discovered one of the roller wheel axles was missing (probably fell out during shipment if I had to guess) meaning one of the drawers was sans a wheel for a few days. Big credit to Decked though - I called them first thing Monday morning and described what was missing, and I had the correct parts on my doorstep Wednesday afternoon. The left drawer will be dedicated to a permanently-assigned collection of tools and recovery gear that stays with the truck, and the two "ammo can" wells will be filled with additional recovery gear and some spare fluids that I don't want floating around in the drawers themselves. The wide drawer will be the "mission dependent" load - filled as needed for camping, hiking/snowshoeing, hell maybe even trips to the grocery store... It'll be the flexible storage option. We're still playing with loadout configurations, so that may be the subject of a future post.

Before - with the spare tire removed from its carrier:
20210307_120153.jpg

After - with the spare tire back in place:
20210312_133323.jpg

There's about a foot of clearance between the top of the deck and the bottom of the spare tire carrier, so the plan is to fit some plastic boxes we have for camping etc. right under there for a good fit; tents, sleeping bags, camp chairs, etc. will go in the space ahead of the spare tire. A cooler (and eventually a fridge/freezer) will mount to the deck aft of the spare. Need to figure out where to mount a 5 or 10 pound propane tank too.
 

TheBison

Rank V
Member

Trail Blazer III

2,028
Hartsel, CO
First Name
Brian
Last Name
Foltz
Member #

27816

Ham/GMRS Callsign
AA0BF / WRMI426
Service Branch
U.S. Army
Been kinda quiet lately, needing to spend money on other priorities. But, since the last post we've added a MOLLE panel on the back of the driver's seat with first aid kit in easy reach and a hydration bladder. I've found that I often don't drink enough water while driving because my hands are full or busy and I don't think of taking the time to hold a beverage even for a sip, so hopefully having the drinking tube over my shoulder will help that!

We also added some inexpensive LED bed lighting for obvious reasons. I wired in a tailgate switch so the light come on when the tailgate is open and vice versa. I tapped power from the trailer wiring harness so it was all pretty straightforward.

We have big plans for the next few months though!
 

El-Dracho

Ambassador, Europe
Moderator
Member
Supporter
Investor

Inventor I

13,232
Lampertheim, Germany
First Name
Bjoern
Last Name
Eldracher
Member #

20111

Ham/GMRS Callsign
DO3BE
Been kinda quiet lately, needing to spend money on other priorities. But, since the last post we've added a MOLLE panel on the back of the driver's seat with first aid kit in easy reach and a hydration bladder. I've found that I often don't drink enough water while driving because my hands are full or busy and I don't think of taking the time to hold a beverage even for a sip, so hopefully having the drinking tube over my shoulder will help that!
Very good! These are two very good modifications in any case! It is essential to have a good first aid kit reachable at hand. Also the issue of hydration respectively dehydration is often underestimated. For example on a demanding and beautiful route or a long stage in desert-like areas with a beautiful scenery, regular drinking is quickly forgotten and dehydration can occur which could have severe symptoms and consequences. We all know that. Also irregular eating while out is a problem. Important topics, therefore, to which we should always pay attention!

What kind of hydration bladder did you install at the molle panel? Is there something special to fit the molle system?

By the way, that is a super cool rig!!! Enjoy!
 
  • Like
Reactions: TheBison

TheBison

Rank V
Member

Trail Blazer III

2,028
Hartsel, CO
First Name
Brian
Last Name
Foltz
Member #

27816

Ham/GMRS Callsign
AA0BF / WRMI426
Service Branch
U.S. Army
Very good! These are two very good modifications in any case! It is essential to have a good first aid kit reachable at hand. Also the issue of hydration respectively dehydration is often underestimated. For example on a demanding and beautiful route or a long stage in desert-like areas with a beautiful scenery, regular drinking is quickly forgotten and dehydration can occur which could have severe symptoms and consequences. We all know that. Also irregular eating while out is a problem. Important topics, therefore, to which we should always pay attention!

What kind of hydration bladder did you install at the molle panel? Is there something special to fit the molle system?

By the way, that is a super cool rig!!! Enjoy!
Thanks! The MOLLE panel is just one I found on Amazon. It's hard plastic and pretty rigid which is good; in our old Z71 we bought seat covers with MOLLE webbing but without a stiffener they were so flimsy they wouldn't hold anything still at all - everything flopped around and we could never get the seat covers tight enough to make the MOLLE webbing tight. We just purchased a 3L hydration bladder carrier off of Amazon and just a generic 3L bladder - nothing special - though we did make sure to get one with a bite valve cover to keep trail dust etc. off the mouthpiece. As anyone with a Camelbak or similar can attest - a dirty bite vale is nasty!
 
  • Like
Reactions: El-Dracho

TheBison

Rank V
Member

Trail Blazer III

2,028
Hartsel, CO
First Name
Brian
Last Name
Foltz
Member #

27816

Ham/GMRS Callsign
AA0BF / WRMI426
Service Branch
U.S. Army
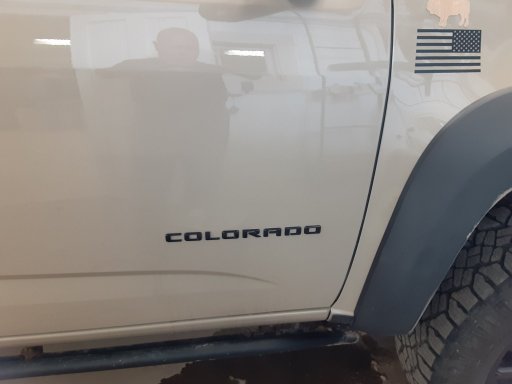
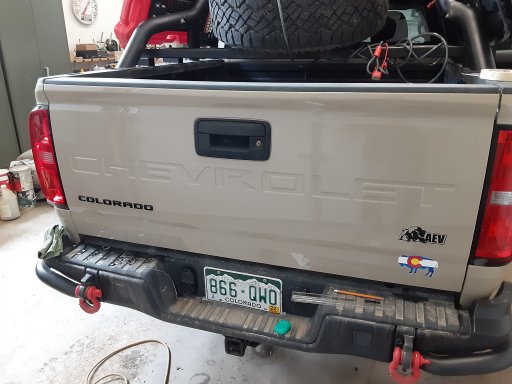
So, starting to get some movement again! Prinsu roof rack has arrived and hopefully it'll go on this weekend (if it ever stops raining long enough to drill holes in the roof) and our new 23Zero 180° awning and walls should ship next week. In the meantime, I took the opportunity today to remove all of the chrome Colorado lettering and AEV badge and replace them with black. Looks much better!20210521_105713.jpg20210521_120528.jpg
 

TheBison

Rank V
Member

Trail Blazer III

2,028
Hartsel, CO
First Name
Brian
Last Name
Foltz
Member #

27816

Ham/GMRS Callsign
AA0BF / WRMI426
Service Branch
U.S. Army
Well, I went to lay out the hardware for the Prinsu rack last night in preparation for installing it this weekend. Lo and behold, not only was I shipped the wrong hardware pack but I was shipped the wrong side rails as well! Their customer service was pretty responsive and supposedly the correct parts will get shipped first thing Monday, but still... This little hiccup is setting me back a week on my build plans...
 
  • Like
Reactions: MazeVX