Benefactor
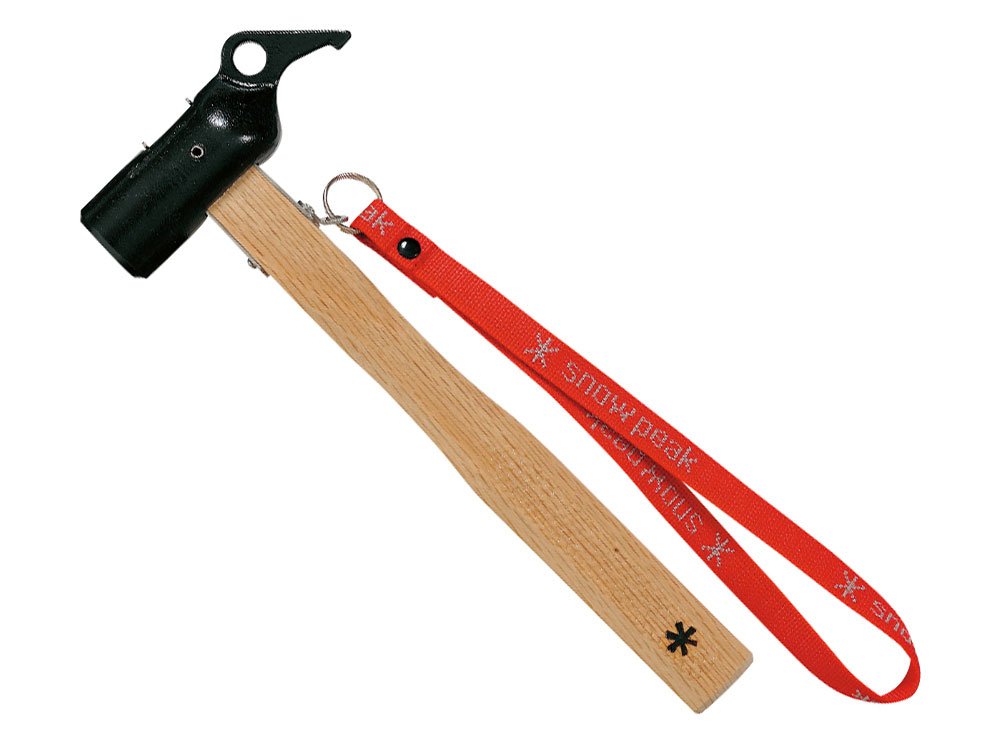
For the longest time, I never gave tent stakes a second thought. They come in their own little bag with the tent ready for the simple task of securing it to the ground. Hopefully that will hold true in windy conditions too! But then the inevitable happens. You find that one hard spot underground, halfway through driving the stake in. You hope it just a root and keep pounding away until the hooked end is just touching the ground. Fast forward to when it's time to pack up and leave and you pull that stake out. Only now it's got a nice curve to it, so you bash it until it's mostly straight and toss it back into the bag. Eventually most of the stakes look like this and no matter what the ground is like, they start to bend when you hammer them. This seems to be the case with most of the supplied aluminum stakes. They also tend to be a little shorter than you want, mostly for the weight savings I assume.
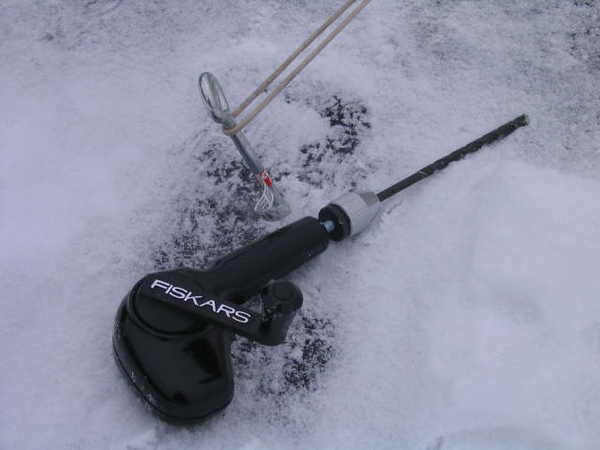
And what about staking your tent in the snow or sand? There could be a layer of ice that will act like a rock underground and bend the stake. Or the snow is too powdery to hold the stake. Sometimes the snow melts around the stake and it will slide right out of the hole. In sand the wind can blow the sand away from a stake in no time. Crazy desert winds can also make the case where the supplied stakes just don't make the grade.
Here are some options I've used over the years that have held up well for each situation.
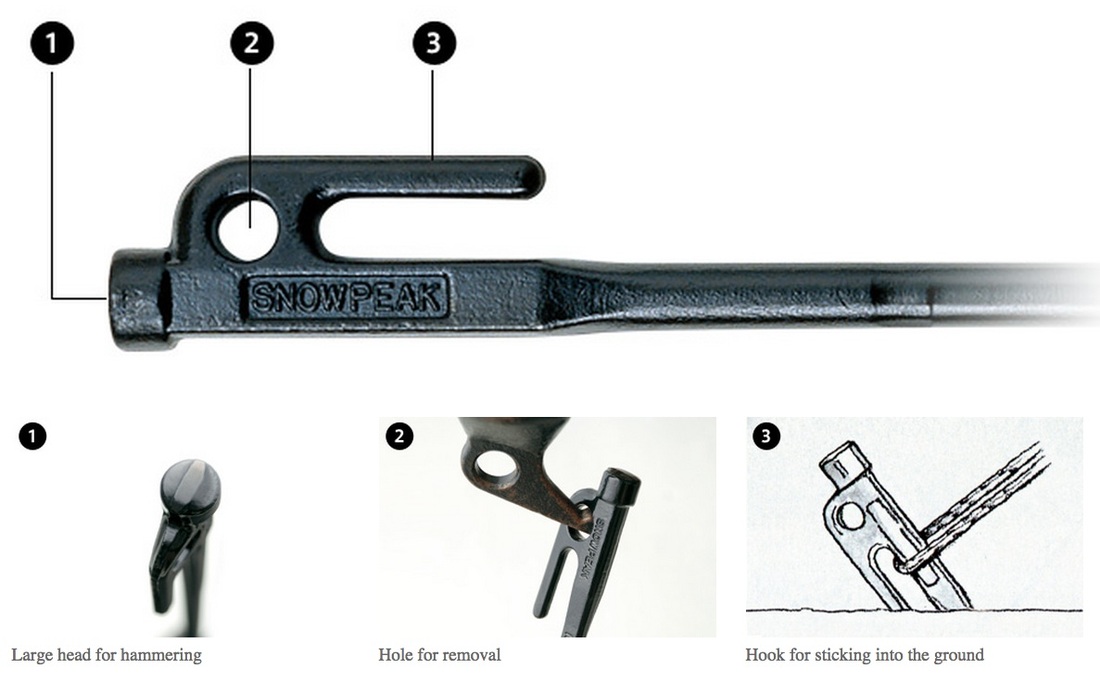
Steel Stakes - These are probably the most common "upgrade" you can get. They are usually a few inches longer than what comes with your tent and are larger in diameter. They still have the hooked end and can take a beating much better. Between the increased length and diameter, you're already a step ahead.
Removal is always a chore, but I've found that using a sturdy screwdriver and the grip end of a breaker bar works well. Slip the working end of the screwdriver under the stake's hook. The grip of my breaker bar has a groove that cradles the screwdriver and helps it not slip. Lift up on the other end of the breaker bar and the stake will slowly, but easily come up. Slide the handle of the screwdriver towards the stake and lift again. You'll increase the angle each time and lift more. Eventually the stake will be out enough where you can use the screwdriver as T-handle and pull the stake all the way out.
Nail Spikes - These are what you typically get with an E-Z Up. About the same length as the steel stake, but wider, these have a flat head instead of a hook. I've found these to be perfect if you use a tarp for a ground sheet in front of the tent. They just fit inside the grommets and are less of a tripping hazard than a normal tent stake.
Removal can be tricky because there's not a large area to get a lot of purchase. For this I'll use 2 flathead screwdrivers. You want to hold them in a V, much like a panel puller, and again use something like a breaker bar as a leverage point. If you happen to have a claw hammer that can go quicker, assuming the opening of the claw will fit around the spike.
Rebar - This is when you have to pull all the stops to make sure nothing will blow away. It's perfect for The Playa at Black Rock Desert. They have been used for a 10'x20' shade structure with x6 8' legs. The 18" rebar can be ground to a spike on one end to make it easier to drive into the ground. The shade structure legs have a set screw (actually a 3/8" bolt) with a couple nuts to lock it against the rebar. Even a ground tent can benefit from the rebar setup. Just be sure to slip empty bottles or the orange mushroom shaped caps over the ends to prevent injury. It sounds like overkill, but believe me, it can stand the test of Burning Man.
Removal can be tough. Like so tough you begin to think how you can rig the winch to pull it out. Wearing gloves and yanking up while someone hits the stake around the ground might work but it can take forever. Sometimes pouring a little water can help, but it can also turn the ground into cement, or create a vacuum making it tougher. You can make a small T-shaped tool from square tubing to slip over the rebar. It uses the same set screw setup as the shade structure and is hammered up out of the ground. Know that the rebar will mushroom out from pounding into the ground, so the removal tool needs to be a little wider.
Sand/Snow Stakes - These aren't what you typically think of when you hear stakes. They actually look more like a small parachute and work wonderfully for loose terrain. They are made from a fabric like nylon or polyester and have rope attached at the corners. Use the ropes to loop around the tie down point on the tent. Then all you have to do is dig a hole as deep as the corner rope and lay the fabric flat. Fill the hole with the sand or snow and tamp it down with your foot. In sand you can pour water to compact the sand even more. They hold extremely well, pack down and weigh next to nothing.
Removal from sand is easy. You can usually just pull them right out of the ground. In snow, they may freeze intoa ball, and you may have to chip away to get at them. Just make sure you don't poke a hole in them, or cut one of the corner ropes. Or, dig around the stake and whack it with the face of the shovel's head t break up the ice/snow.
Sand Screw - These aren't very common (I've only seen one person use them before), but are out there. They are usually made of plastic and look just a big screw with wide threads. There's a handle on top to drive them into the ground and are generally used for larger structures. Because of their size, storage can be an issue but the amount of surface area they have make them work really well.
Removal should take about as much effort as insertion.
There are variations for some of these stakes, but in general, you want to think about where you're going and the type of terrain you'll be sleeping on. Some places are just rocky dirt, and almost nothing will seem to work well. Go to REI, or the hardware store and see what you can come up with. Almost anything you find will be better than the stakes that came with your tent.
Oh, and one last tip. Buy a couple extra stakes and hold on to the ones that came with the tent. Thet're still usable and you never know when one of them will get left behind, or someone else might need to borrow one. For extra security you could even use two stakes in an "X" for more security.
And what about staking your tent in the snow or sand? There could be a layer of ice that will act like a rock underground and bend the stake. Or the snow is too powdery to hold the stake. Sometimes the snow melts around the stake and it will slide right out of the hole. In sand the wind can blow the sand away from a stake in no time. Crazy desert winds can also make the case where the supplied stakes just don't make the grade.
Here are some options I've used over the years that have held up well for each situation.
Steel Stakes - These are probably the most common "upgrade" you can get. They are usually a few inches longer than what comes with your tent and are larger in diameter. They still have the hooked end and can take a beating much better. Between the increased length and diameter, you're already a step ahead.
Removal is always a chore, but I've found that using a sturdy screwdriver and the grip end of a breaker bar works well. Slip the working end of the screwdriver under the stake's hook. The grip of my breaker bar has a groove that cradles the screwdriver and helps it not slip. Lift up on the other end of the breaker bar and the stake will slowly, but easily come up. Slide the handle of the screwdriver towards the stake and lift again. You'll increase the angle each time and lift more. Eventually the stake will be out enough where you can use the screwdriver as T-handle and pull the stake all the way out.
Nail Spikes - These are what you typically get with an E-Z Up. About the same length as the steel stake, but wider, these have a flat head instead of a hook. I've found these to be perfect if you use a tarp for a ground sheet in front of the tent. They just fit inside the grommets and are less of a tripping hazard than a normal tent stake.
Removal can be tricky because there's not a large area to get a lot of purchase. For this I'll use 2 flathead screwdrivers. You want to hold them in a V, much like a panel puller, and again use something like a breaker bar as a leverage point. If you happen to have a claw hammer that can go quicker, assuming the opening of the claw will fit around the spike.
Rebar - This is when you have to pull all the stops to make sure nothing will blow away. It's perfect for The Playa at Black Rock Desert. They have been used for a 10'x20' shade structure with x6 8' legs. The 18" rebar can be ground to a spike on one end to make it easier to drive into the ground. The shade structure legs have a set screw (actually a 3/8" bolt) with a couple nuts to lock it against the rebar. Even a ground tent can benefit from the rebar setup. Just be sure to slip empty bottles or the orange mushroom shaped caps over the ends to prevent injury. It sounds like overkill, but believe me, it can stand the test of Burning Man.
Removal can be tough. Like so tough you begin to think how you can rig the winch to pull it out. Wearing gloves and yanking up while someone hits the stake around the ground might work but it can take forever. Sometimes pouring a little water can help, but it can also turn the ground into cement, or create a vacuum making it tougher. You can make a small T-shaped tool from square tubing to slip over the rebar. It uses the same set screw setup as the shade structure and is hammered up out of the ground. Know that the rebar will mushroom out from pounding into the ground, so the removal tool needs to be a little wider.
Sand/Snow Stakes - These aren't what you typically think of when you hear stakes. They actually look more like a small parachute and work wonderfully for loose terrain. They are made from a fabric like nylon or polyester and have rope attached at the corners. Use the ropes to loop around the tie down point on the tent. Then all you have to do is dig a hole as deep as the corner rope and lay the fabric flat. Fill the hole with the sand or snow and tamp it down with your foot. In sand you can pour water to compact the sand even more. They hold extremely well, pack down and weigh next to nothing.
Removal from sand is easy. You can usually just pull them right out of the ground. In snow, they may freeze intoa ball, and you may have to chip away to get at them. Just make sure you don't poke a hole in them, or cut one of the corner ropes. Or, dig around the stake and whack it with the face of the shovel's head t break up the ice/snow.
Sand Screw - These aren't very common (I've only seen one person use them before), but are out there. They are usually made of plastic and look just a big screw with wide threads. There's a handle on top to drive them into the ground and are generally used for larger structures. Because of their size, storage can be an issue but the amount of surface area they have make them work really well.
Removal should take about as much effort as insertion.
There are variations for some of these stakes, but in general, you want to think about where you're going and the type of terrain you'll be sleeping on. Some places are just rocky dirt, and almost nothing will seem to work well. Go to REI, or the hardware store and see what you can come up with. Almost anything you find will be better than the stakes that came with your tent.
Oh, and one last tip. Buy a couple extra stakes and hold on to the ones that came with the tent. Thet're still usable and you never know when one of them will get left behind, or someone else might need to borrow one. For extra security you could even use two stakes in an "X" for more security.