

Protector II
- 8,868
- First Name
- Dave
- Last Name
- Addington
- Member #
-
10123
- Ham/GMRS Callsign
- KN6BKH
Drawers can be cheap or certainly get up there in price, just all depends on your budget and needOver $1000 for some drawers
Protector II
10123
Drawers can be cheap or certainly get up there in price, just all depends on your budget and needOver $1000 for some drawers

Expedition Master I
13728
Check out Boss Strong Box, I have there drawer system. It’s super strong, only weighs 115 lbs and cost is under $1,000.00Over $1000 for some drawers
Expedition Master I
13728

Pathfinder I
Can you please message to confirm the overall length of the surface? With the gate closed.@geekyadam
Sure. The platform is based on the free plans from @TheAdventureIndex (https://theadventureindex.com/shop/) which I modified to fit my needs. (one of the mods was to add the sleeping platforms.)
Here ya Go:
Showing the front of the box with the platform supports in place (platforms stored on top of box):
View attachment 104164
2nd row seats flipped down and Passenger side platform in place:
View attachment 104165
View from Rear Hatch with Passenger Side platform in place:
View attachment 104166
View from Drivers rear door showing that I should have made the platforms about 2" longer. They work fine but I need to move the front seats back a bit to ensure that back seat bottoms don't compress allowing the front lip of the platform to fall forward. Doing it this way saved me $80 using up existing cutoffs and not buying another sheet of plywood:
View attachment 104167
Here are a few Sketch Up renders of what I built (Click through for full size):
View attachment 104170View attachment 104171View attachment 104172
Boort
Protector II
10123


Influencer I
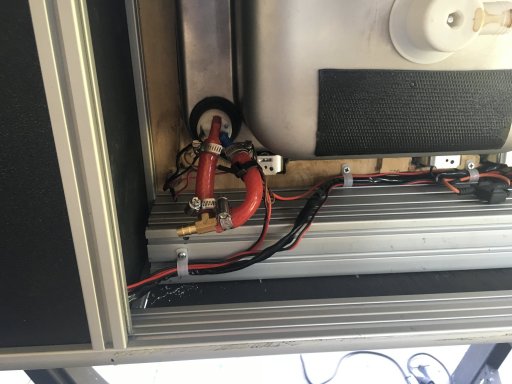
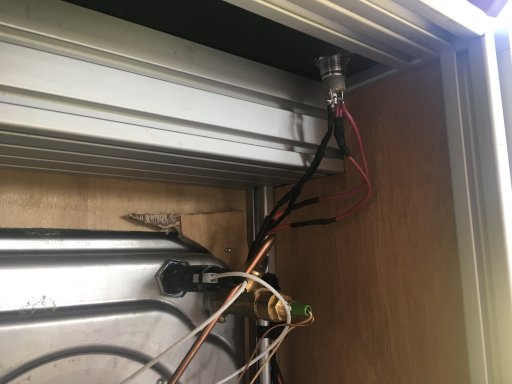
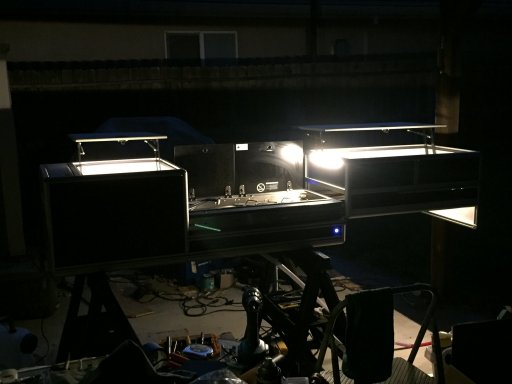
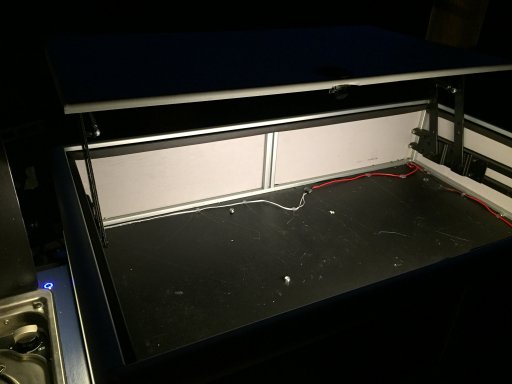
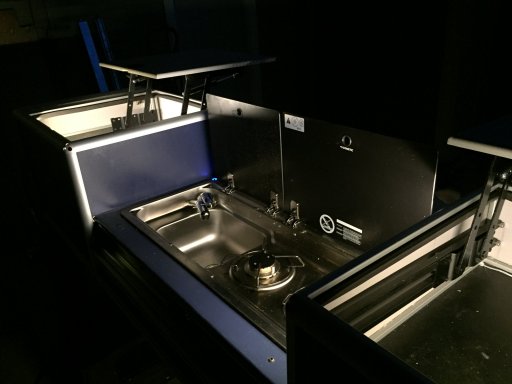
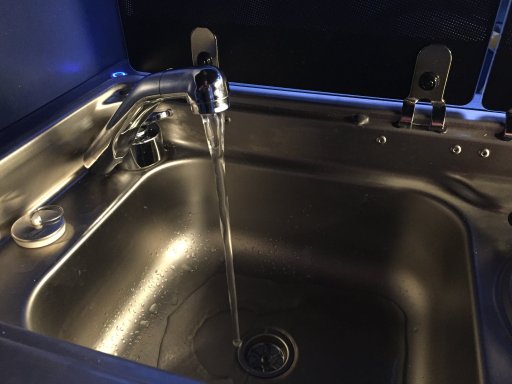
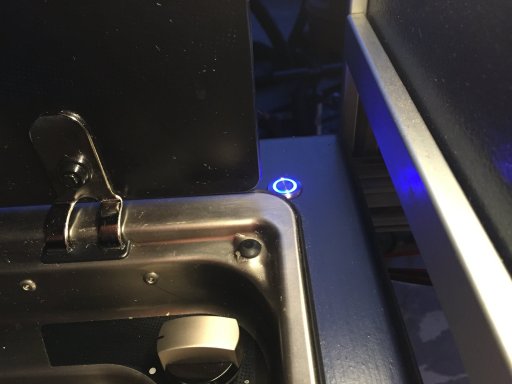
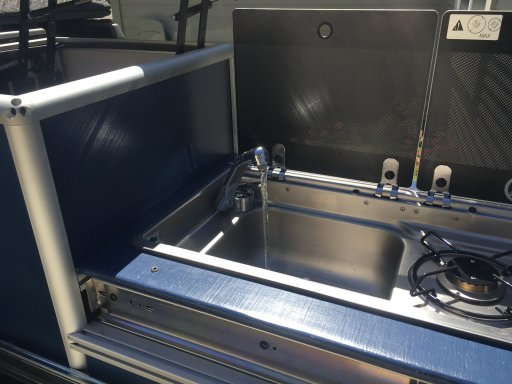
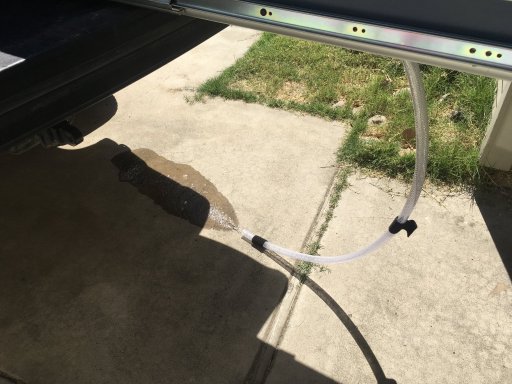
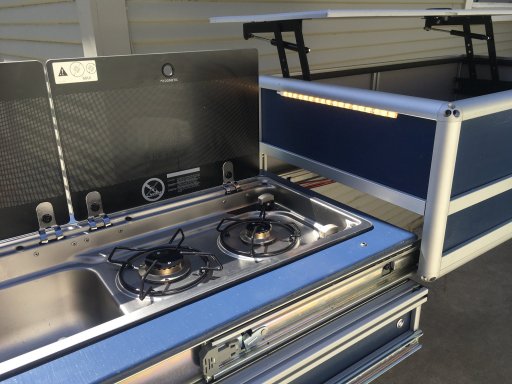
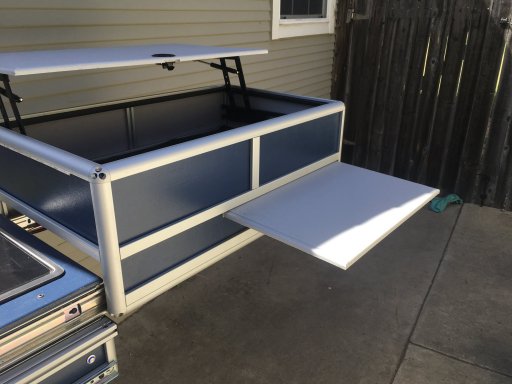
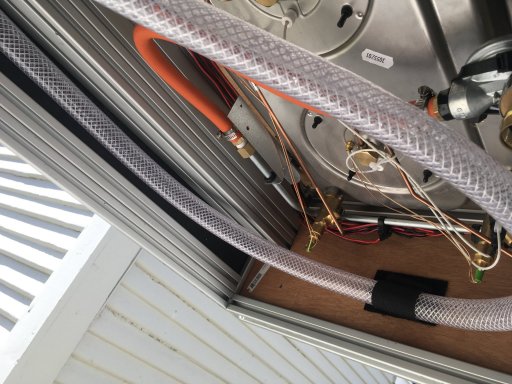
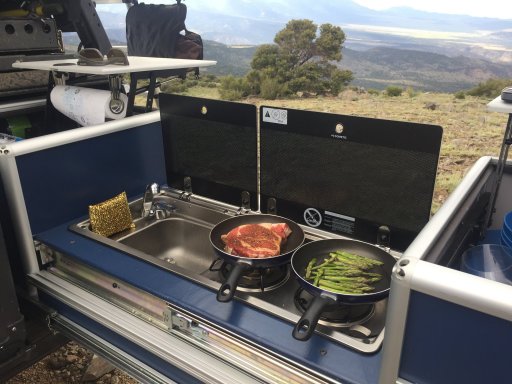
WOW! The lighting is awesome!Yesterday I got my wiring done on the drawer. I have 3 switches which control the lights and power for the sink. The main power switch is set up at the end of the drawer and it is illuminated all the time in the truck. That way at night I can see where the switch is as it turns on the interior drawer lights and ground lighting underneath. When the drawer is open to expose the sink and burner there are 2 more switches accessible. One by the sink controls the power for the sink pump, it doesn’t turn on the pump as that is actuated by the sink handle. The third switch is by the burners and that controls the light that specifically illuminates the cooking surface. I hate cooking by flashlight, I know 1st world problems. Those two switches illuminate blue when switched on so it’s easy to make sure I don’t leave the sink pump on. This sink/burner set came with a water container and pump which I tested the duration and it gives me 6:30 minutes of continual water, not bad.
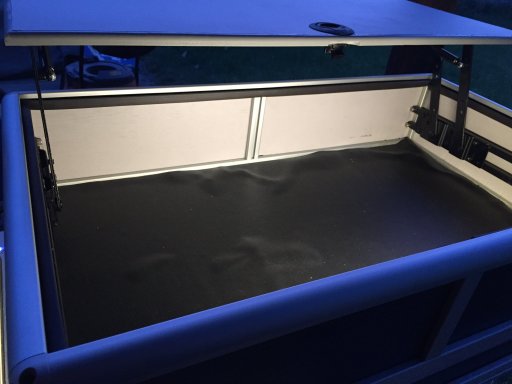
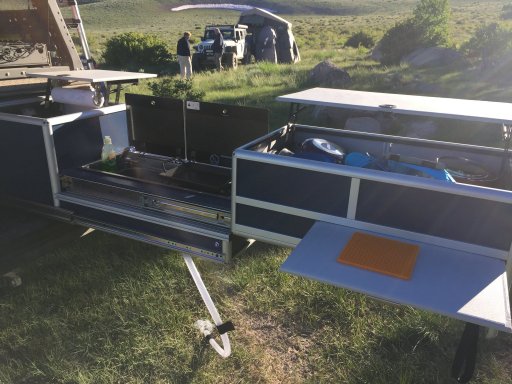
I still need to add the rubberized drawer liners which will cover the wires inside the drawers.
View attachment 106699View attachment 106700View attachment 106701View attachment 106702View attachment 106703View attachment 106704View attachment 106705View attachment 106706
Protector II
10123
Protector II
10123

Protector II
10123

Advocate III
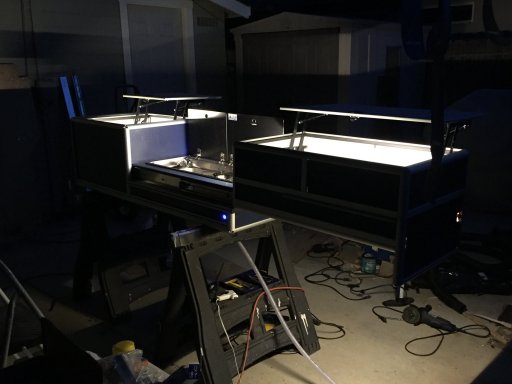
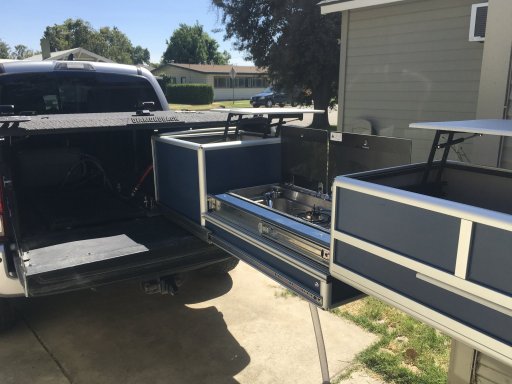
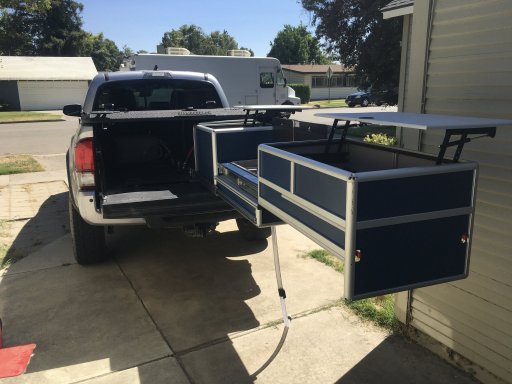
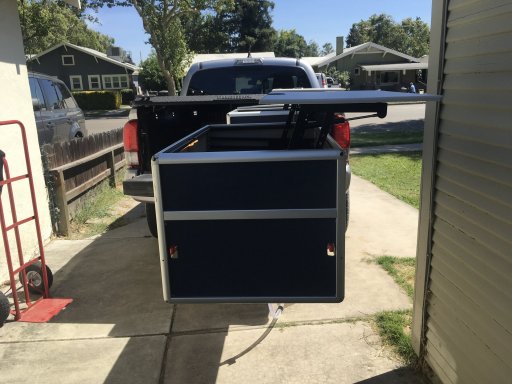
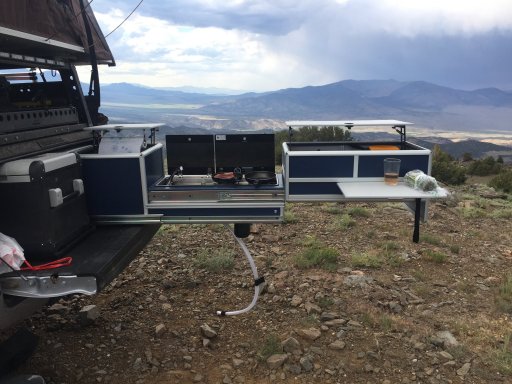
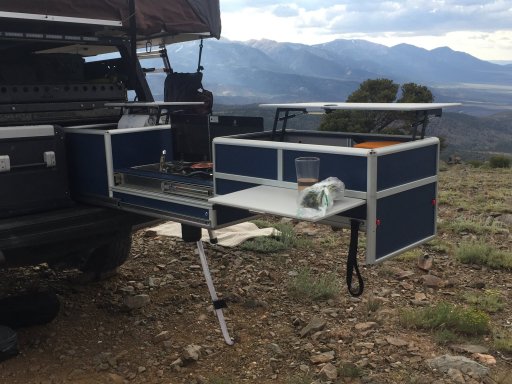
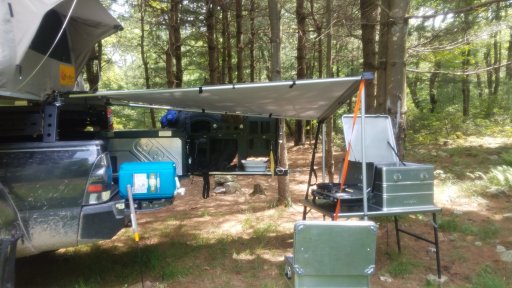
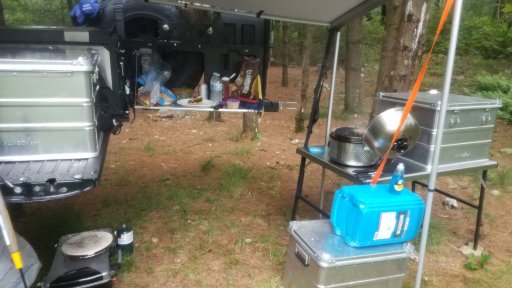
.Out on the trail it has worked great! It really shortens my set up and break down time significantly. Overkill? You betcha! Useful, 100% so. View attachment 108013View attachment 108014View attachment 108015View attachment 108012View attachment 108016
Protector II
10123
Thanks! It’s been a labor of love for sure.
Slick, professional, and well-thought out, man. Really nice work.
.
Protector II
10123
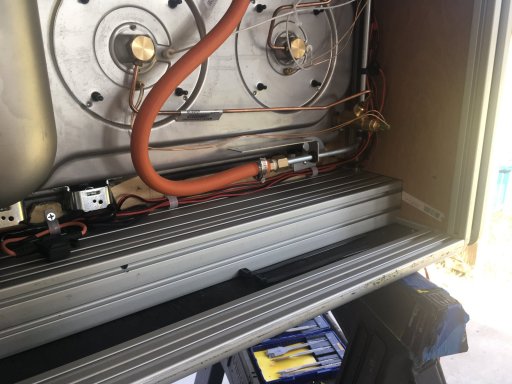
So the Dometic 9722 sink/burner combo I purchased off eBay came as a bundled set that included hoses, sink, tap, faucet and pump. It’s a Comet submersible pump that I would say is pretty quiet. I can barely hear it when my drawer is extended and running the sink. It works greatNice job. What did you use for a water pump? Is it quiet?
Todd

Enthusiast III
Just saw one of these pics on IG had had to find the thread. I think of myself as pretty handy but this is impressive. It's obvious how much forethought and planning went into version 2.0. And the execution sure looks flawless to me.Out on the trail it has worked great! It really shortens my set up and break down time significantly. Overkill? You betcha! Useful, 100% so. View attachment 108013View attachment 108014View attachment 108015View attachment 108012View attachment 108016
Protector II
10123
Thats an interesting question. Btw thanks for your feedback, it was a ton of thought and work and I’m happy with how it came out.Just saw one of these pics on IG had had to find the thread. I think of myself as pretty handy but this is impressive. It's obvious how much forethought and planning went into version 2.0. And the execution sure looks flawless to me.
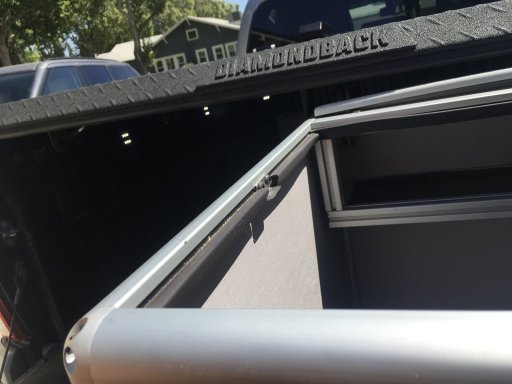
I'd love to get my kitchen out of aluboxes. Total pain to load and unload now that my fridge is in place. But then I wouldn't be able to access the back couple feet of my long bed. And to top it off my bed is open under my mid height bedrack and rtt. Picture below for clarification. Im kinda thinking if I accept the additional weight of hdpe, I could construct the sides with that too and be almost waterproof. Since you've just been through this, any thoughts you don't mind sharing?
Enthusiast III
Thanks so much for such a detailed response. And quick! I was thinking about the water run-off too, especially on the side that will be exposed because it wouldn't be under the rtt. I'm not too concerned about the extra weight of the hdpe, it's worth the trade for weather resistance. And my spring pack has been upgraded to carry 500lbs more than the stock pack. Still budget weight but have more wiggle room. I also am considering getting shortbed sides for the bedrack which would give me access to the front of the bed from the sides, if I shift the whole rack and rtt towards the tailgate. But don't love that idea either. Regardless, food for thought. Thanks again.T
Thats an interesting question. Btw thanks for your feedback, it was a ton of thought and work and I’m happy with how it came out.
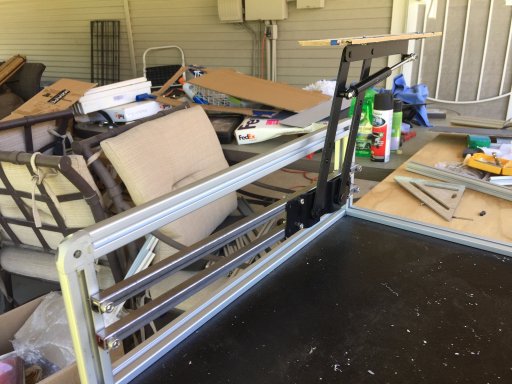
1/4” HDPE is heavier than 3/16” ply, but like you said weather resistant. Water pooling on top would be my concern in the elements, especially where the panel slots into the extrusion. However you could design your kitchen where the top sections lie completely flat on top of the whole box so that water would simply run off the sides. My coffee table lift hinges place the top within the 4 sides of the top of the drawer like this photo shows. I used standard door weather stripping to make the seal, and it slipped right into the extrusion slot. My design is under a cover and would leak in your application.
View attachment 108288
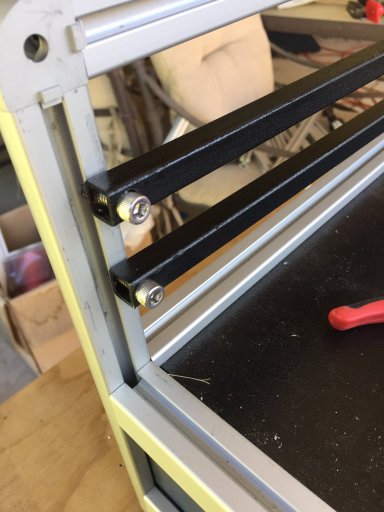
If your tops came down on top you’d solve that issue. One thing to consider with extrusion vs wood is you have to construct hard points for hinges and such, it took awhile but I was able to tap the edge and add 1/2” square tube to overcome this. If the box is wood you just simply screw your hinge wherever you want it.
View attachment 108287View attachment 108286
Because you don’t have a cover you can go higher in your design as well, which gives more options for space and utility. The 80/20 site, under the panel section, has these rubber strips that are meant to keep panels from rattling but they might serve to help keep water out as well as they slide in between the panel and the extrusion slot for a tight fit.
Hope that helps a little

Off-Road Ranger I
Protector II
10123
The sliders came from cabinetparts.com. They are 56” locking slides for my application. When extended it doesn’t need an additional leg as the sliders are rated for 500lbs. Thanks!Just saw the walk around on YouTube, beautiful work. Couple of questions? Where did you get the long slides you mounted it all to? And does it need a brace at the end when extended?

