The evolution
My history has always been with modifying vehicles, whether it was lowered cars in high school being part of the car club and show scene or functional off road vehicles. Evolving into offroading was an easy transition from the street scene because most of my hobbies warranted it. A lowered car doesn’t not bode well camping, hunting, snowboarding or taking the dirt bike to Glamis or Pismo Beach. After being part of the off roading racing scene for the better part of 10 years I eventually moved more towards wanting to explore our beautiful back countries. I needed something that was more reliable, capable and much more nimble than the long travel race type trucks I had been driving. I also wanted to slow it down because I now had 2 small kids and I wanted to safely share these experiences with them.
I had owned Jeeps in the past so I went looking at the new Jeep Wranglers, I also checked out the Toyota Tacoma’s. I knew from experience that the Jeeps were very capable offroad rigs right out of the lot, I had heard the same about the Tacoma’s from friends so I made the decision based off of features and intended purpose. The Tacoma’s simply had a lot more room that fit my need.
The Plan:
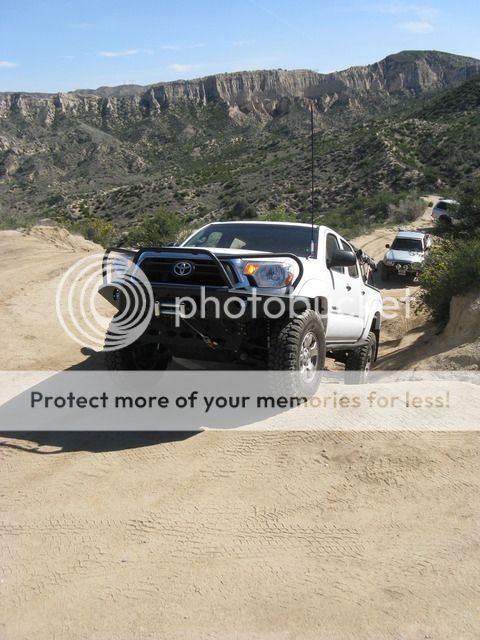
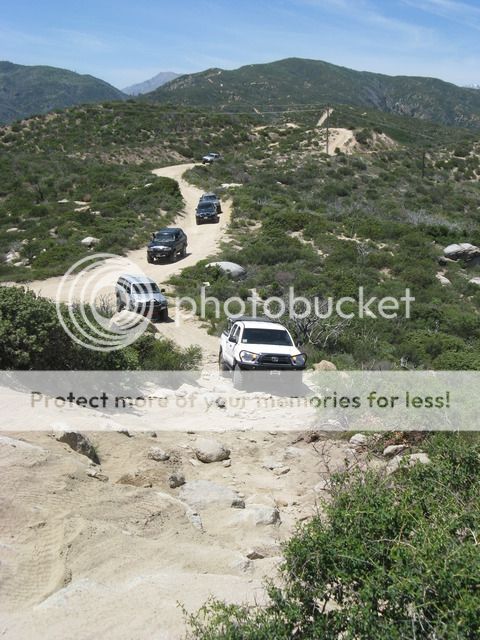
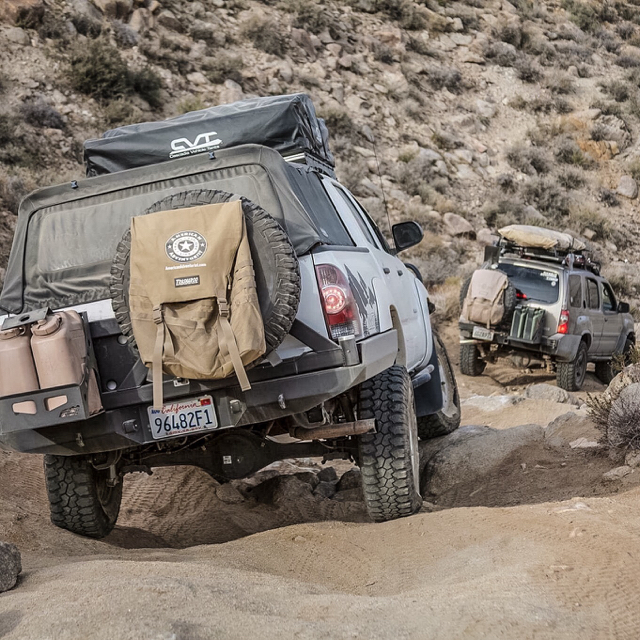
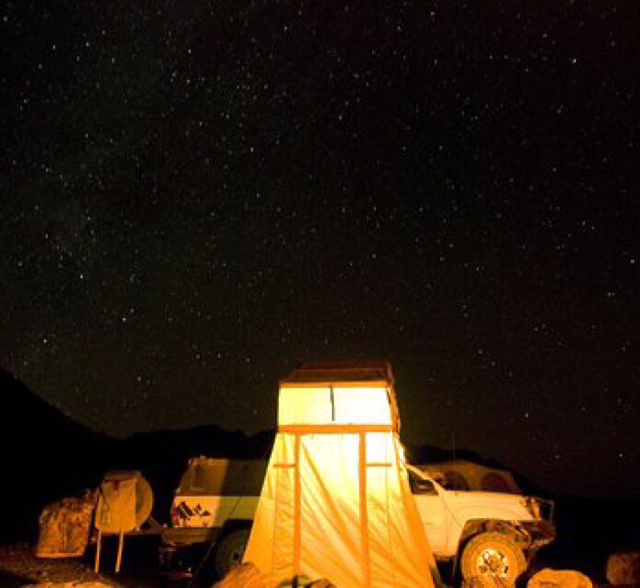
The general plan was to build an overland type rig for camping and hunting with the family but of course I wanted to be able to get out and explore and run some of the trails when the opportunity presents itself. The only way to do that was careful planning and avoiding the pitfall of building the rig so it was stuck being overly top heavy.
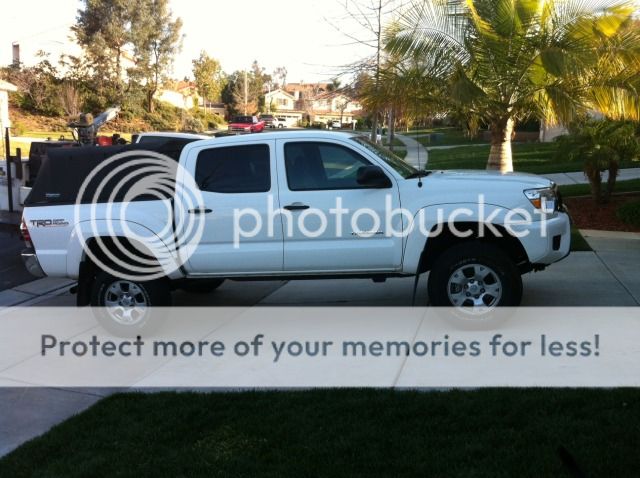
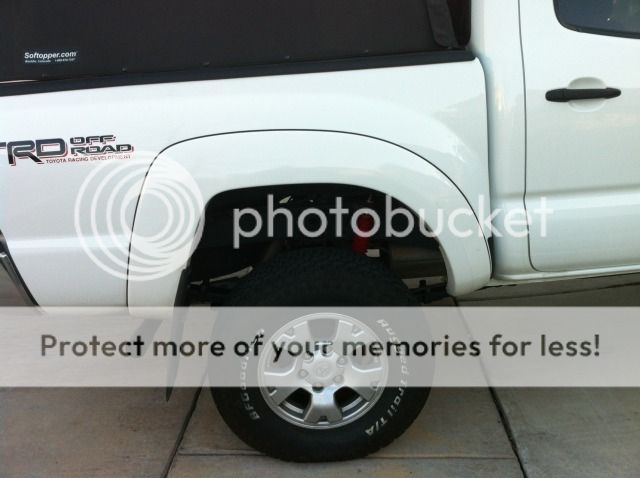
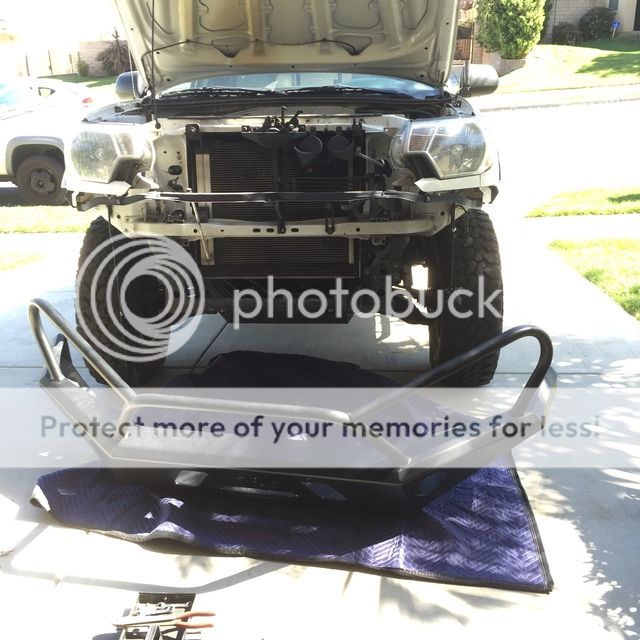
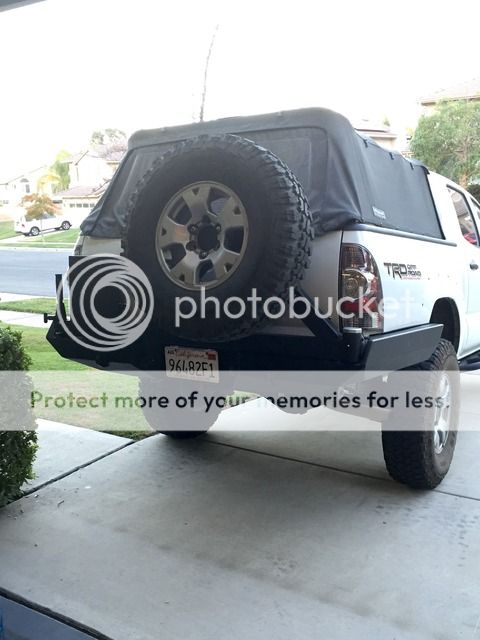
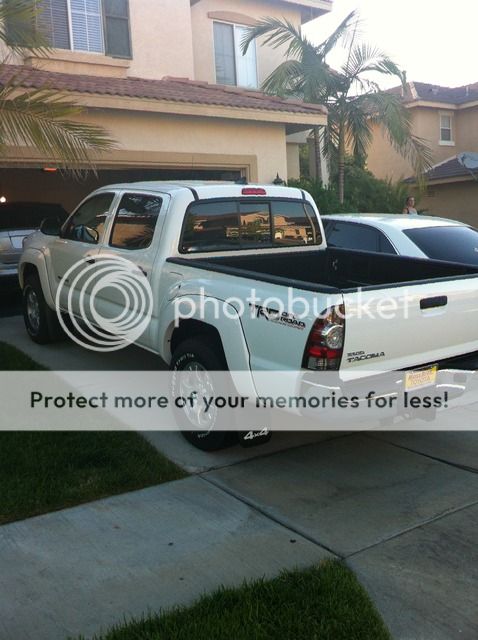
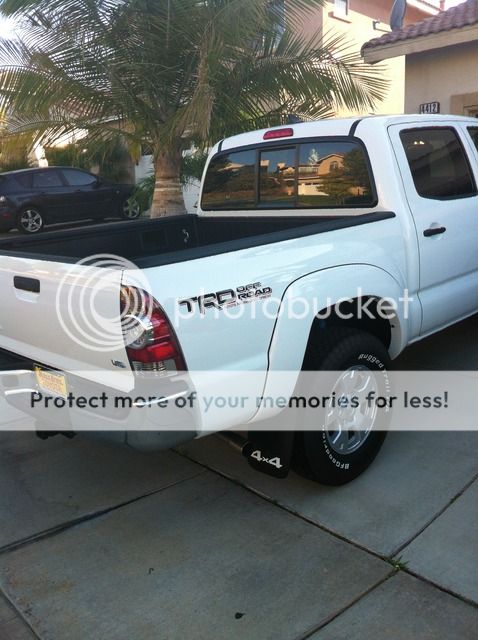
New from the Showroom

]
]
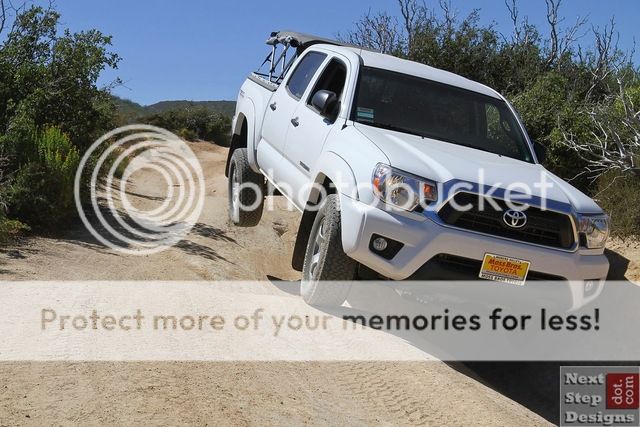
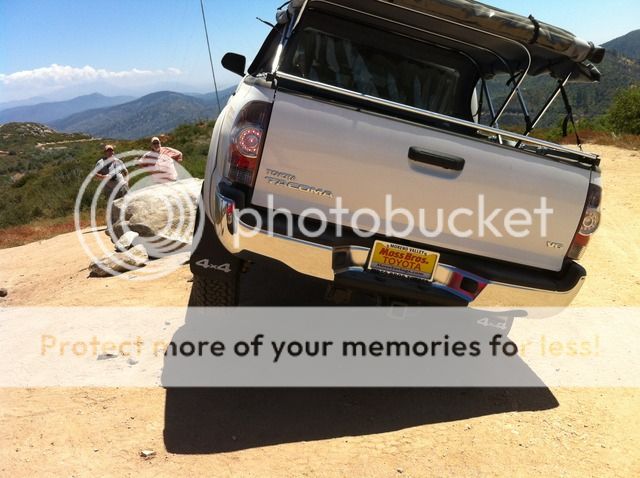
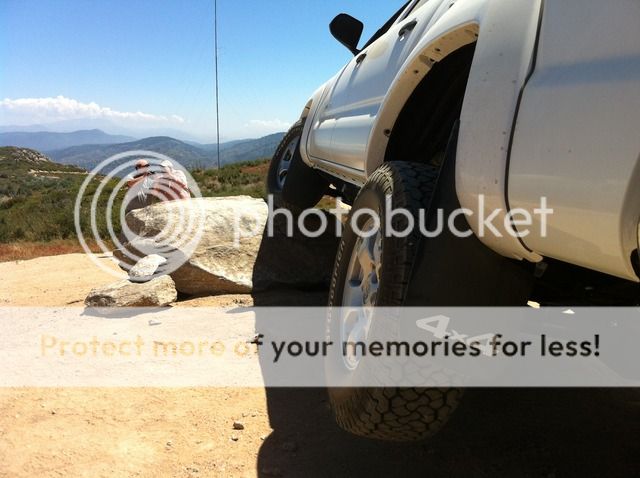
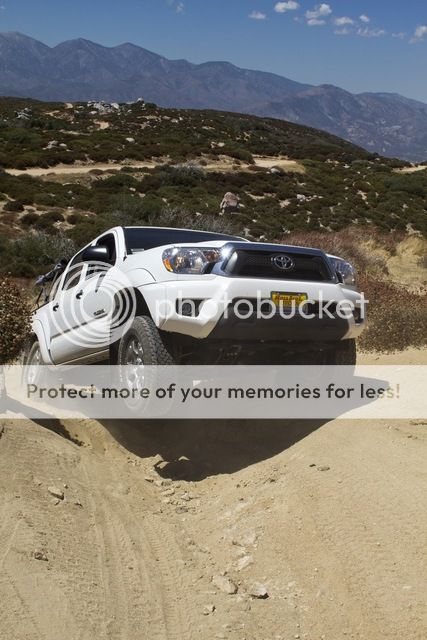
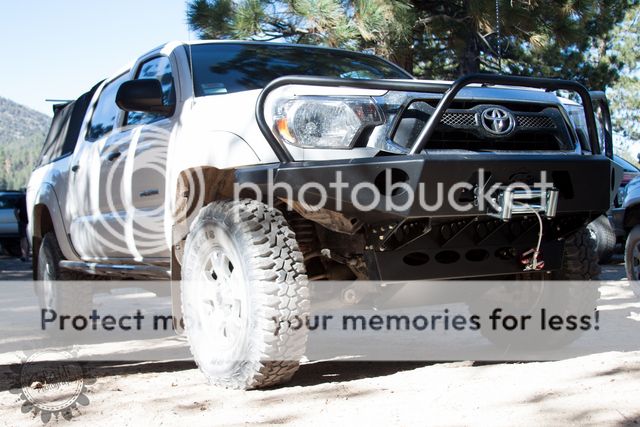
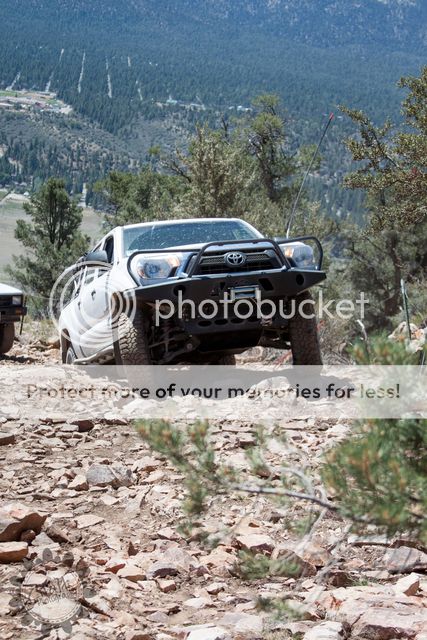
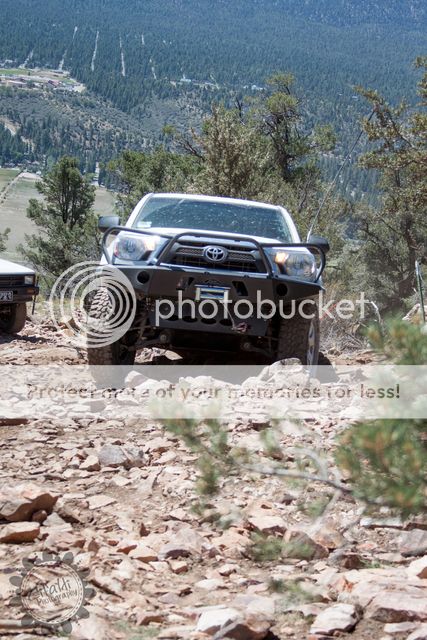
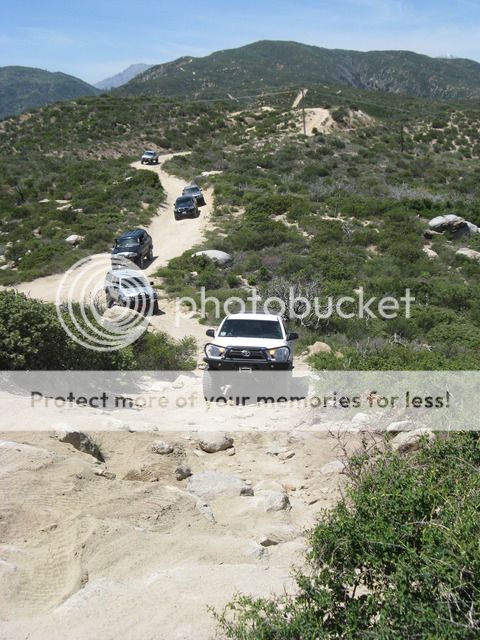
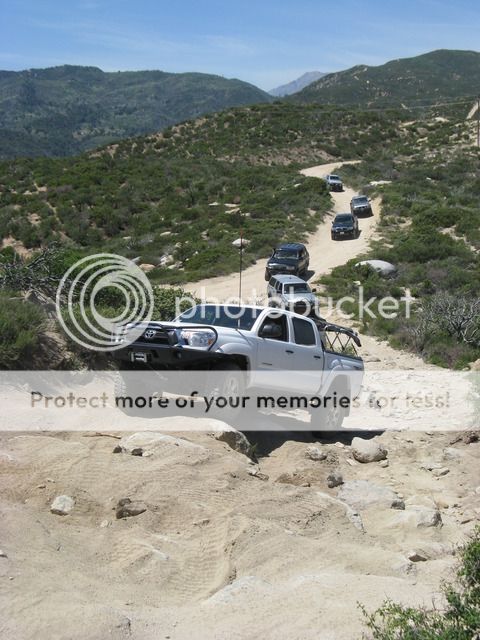
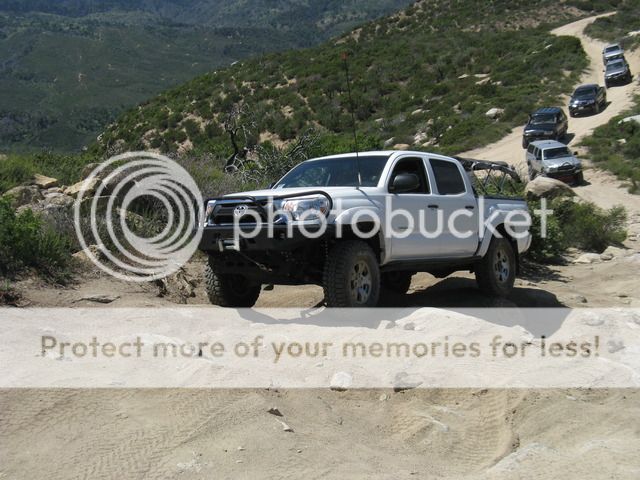
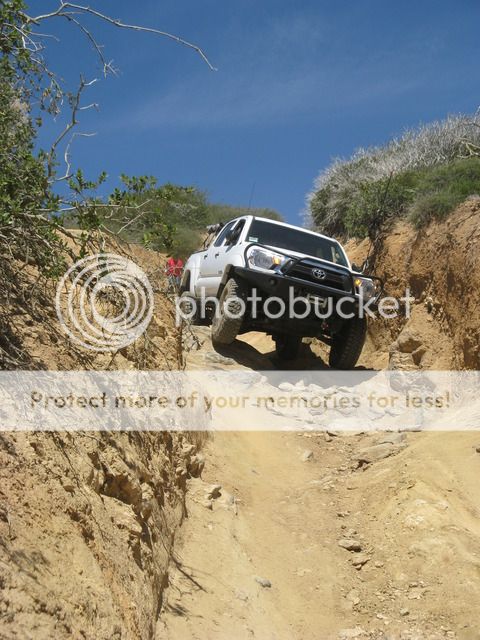
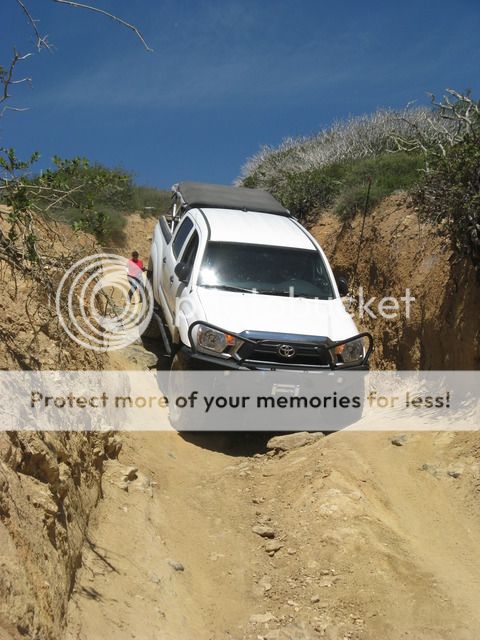
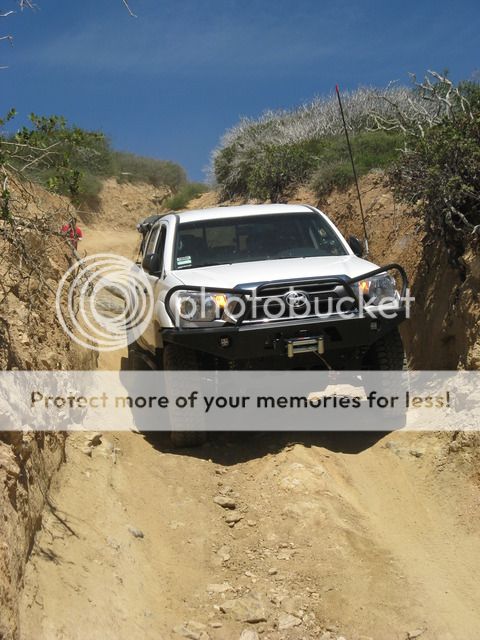
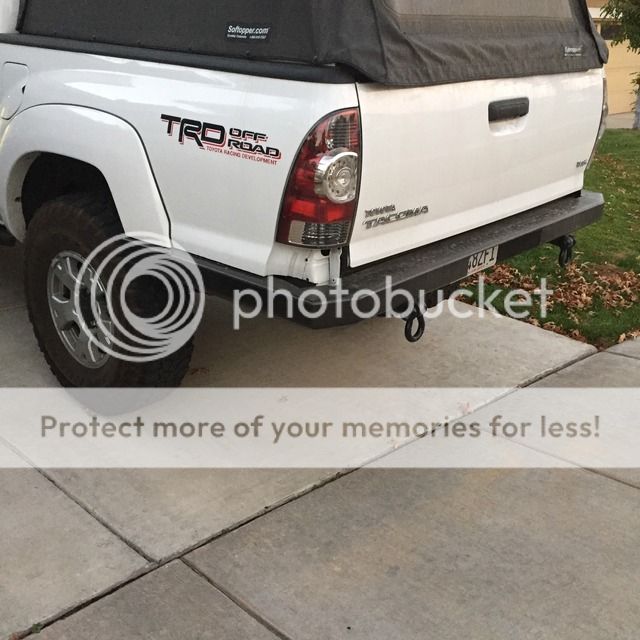
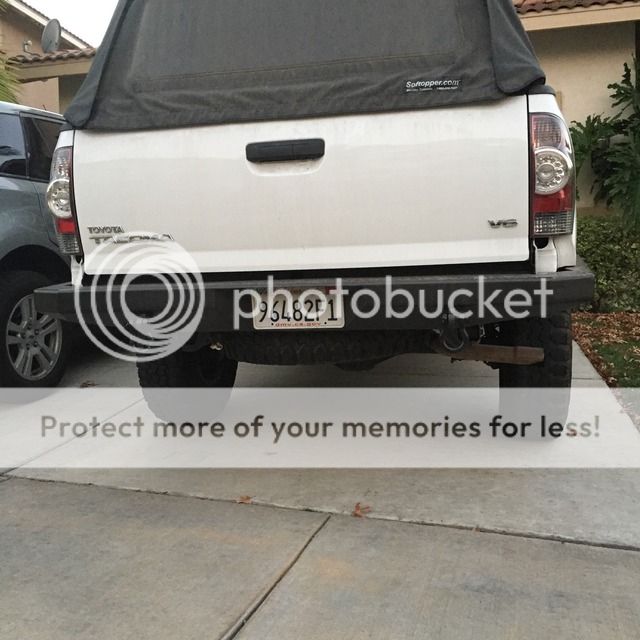
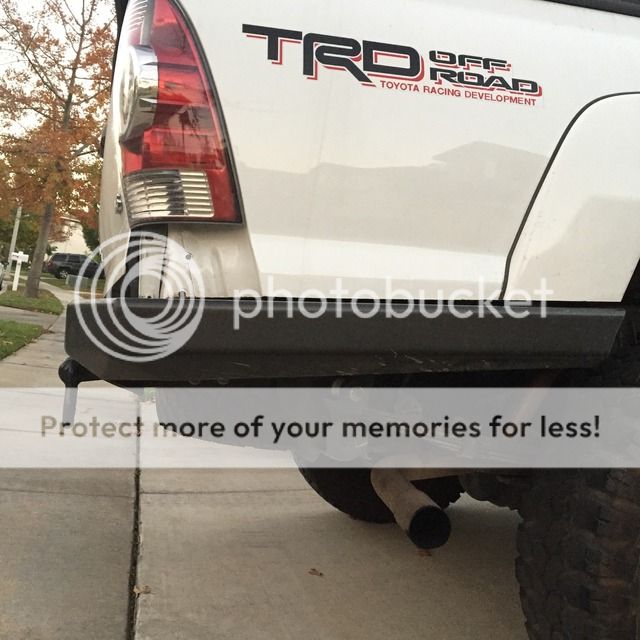
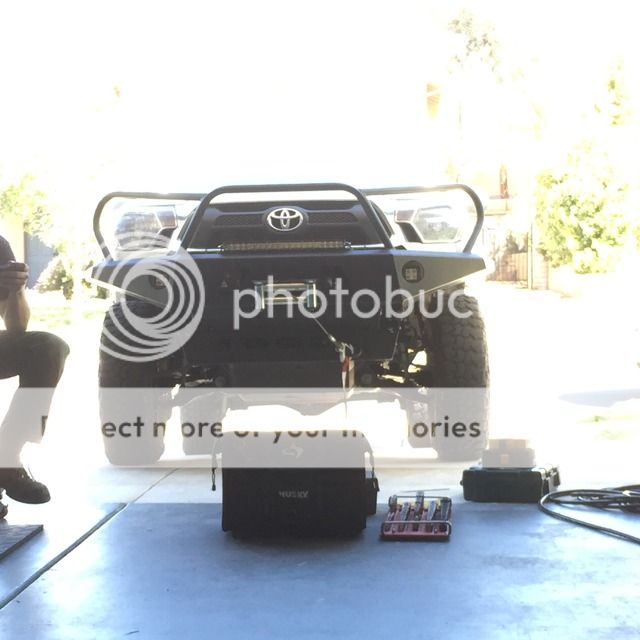
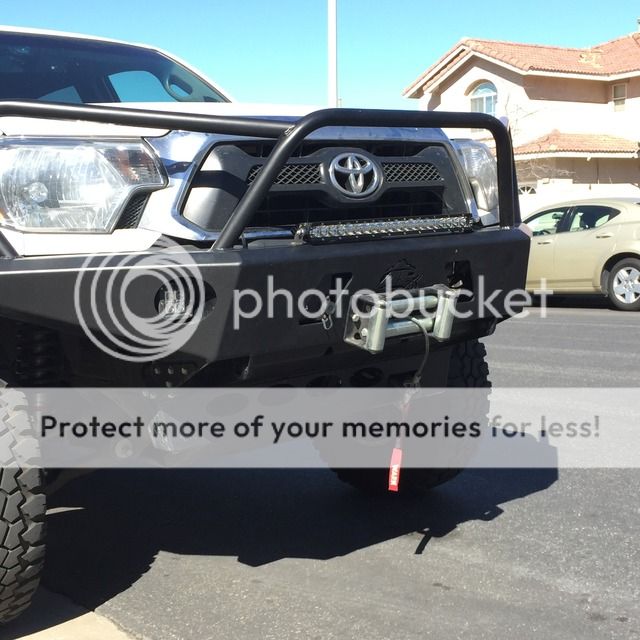
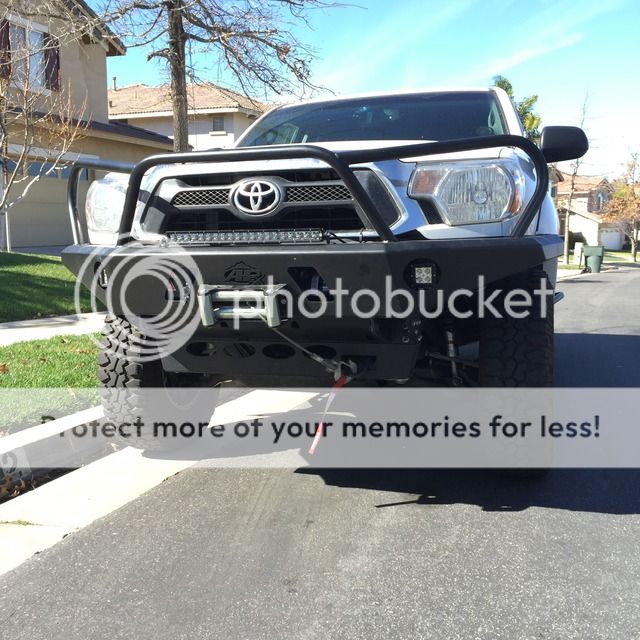
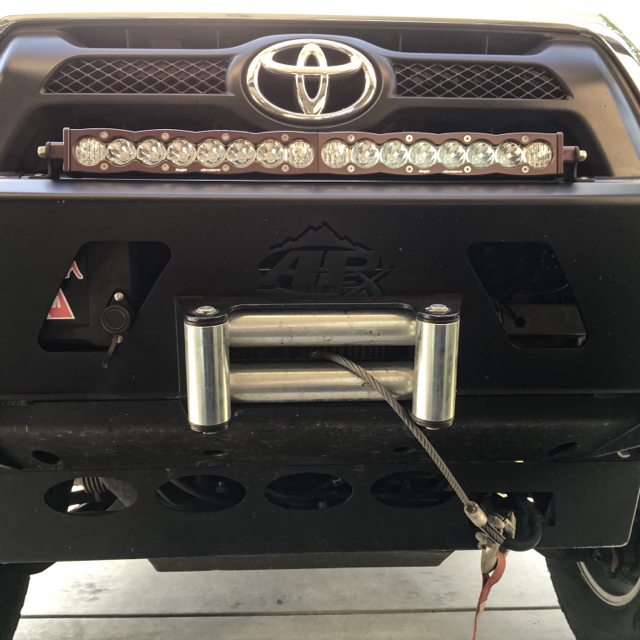
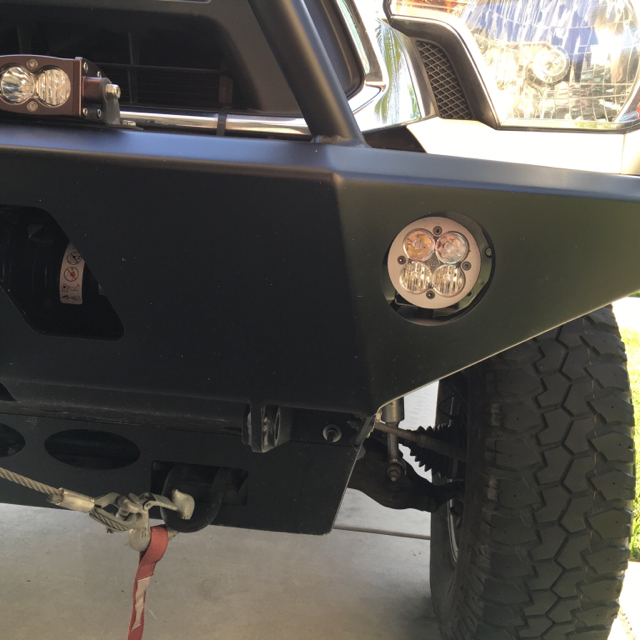
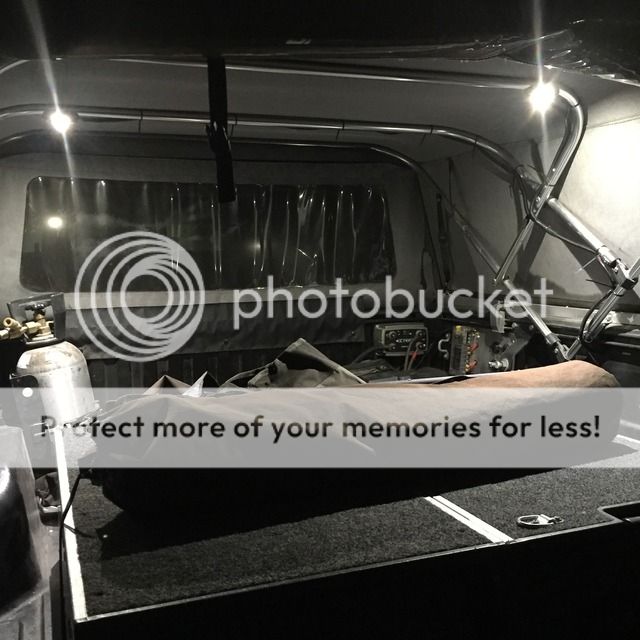
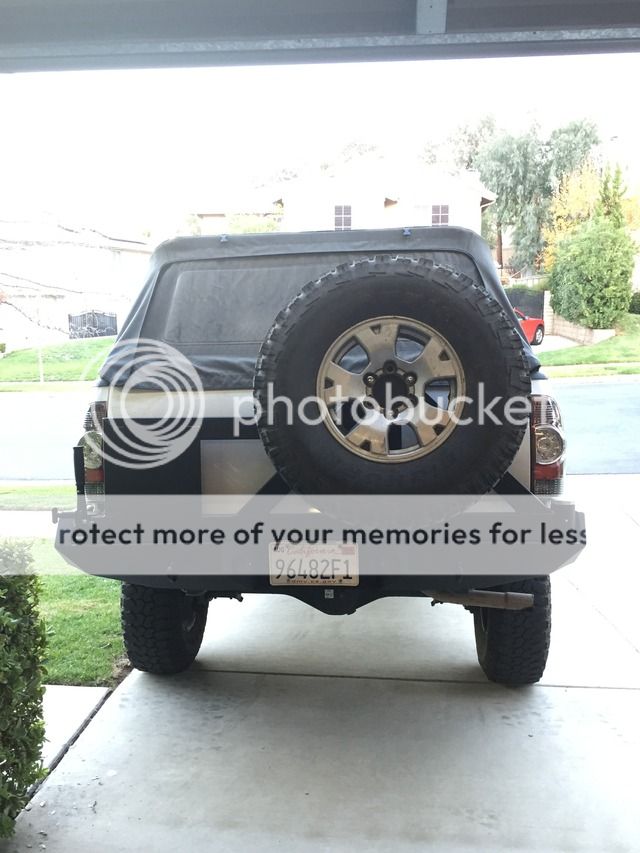
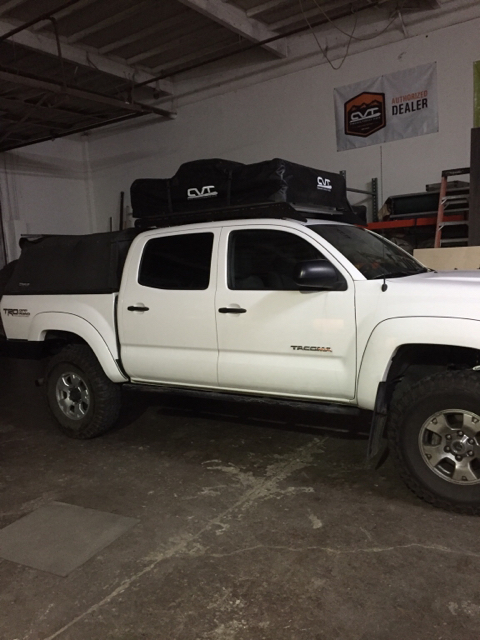
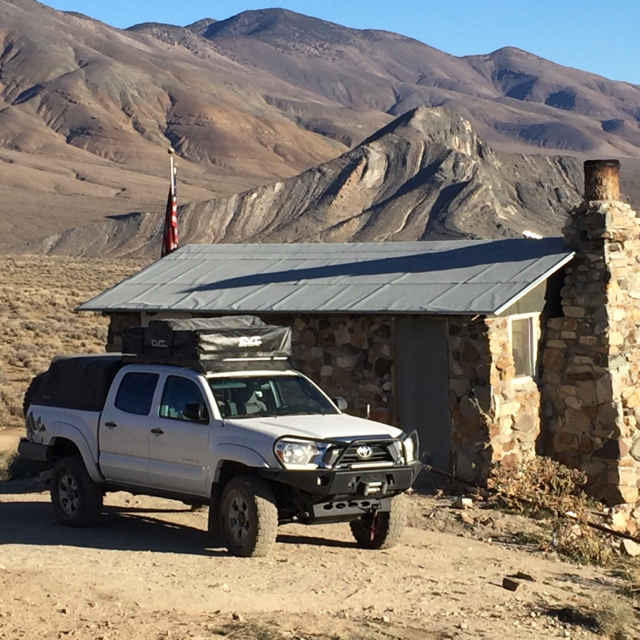
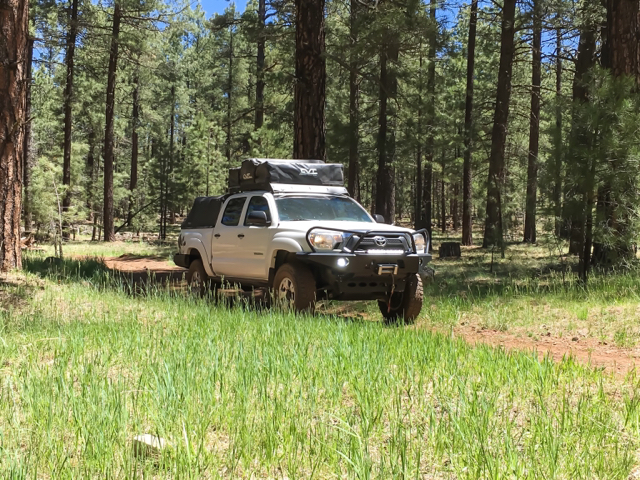
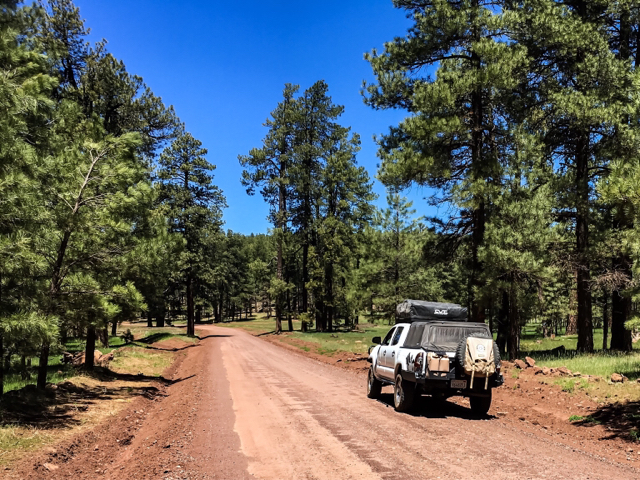
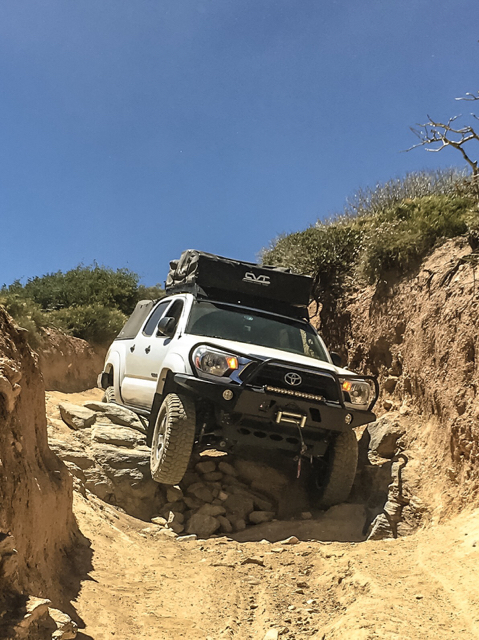
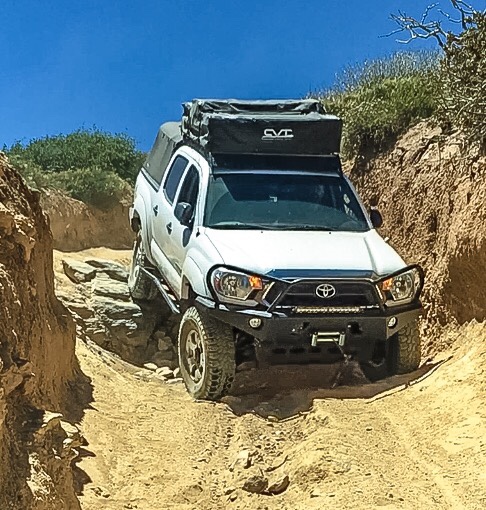
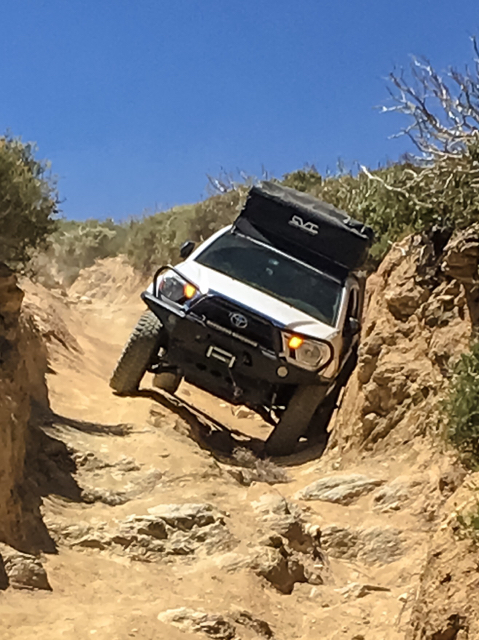
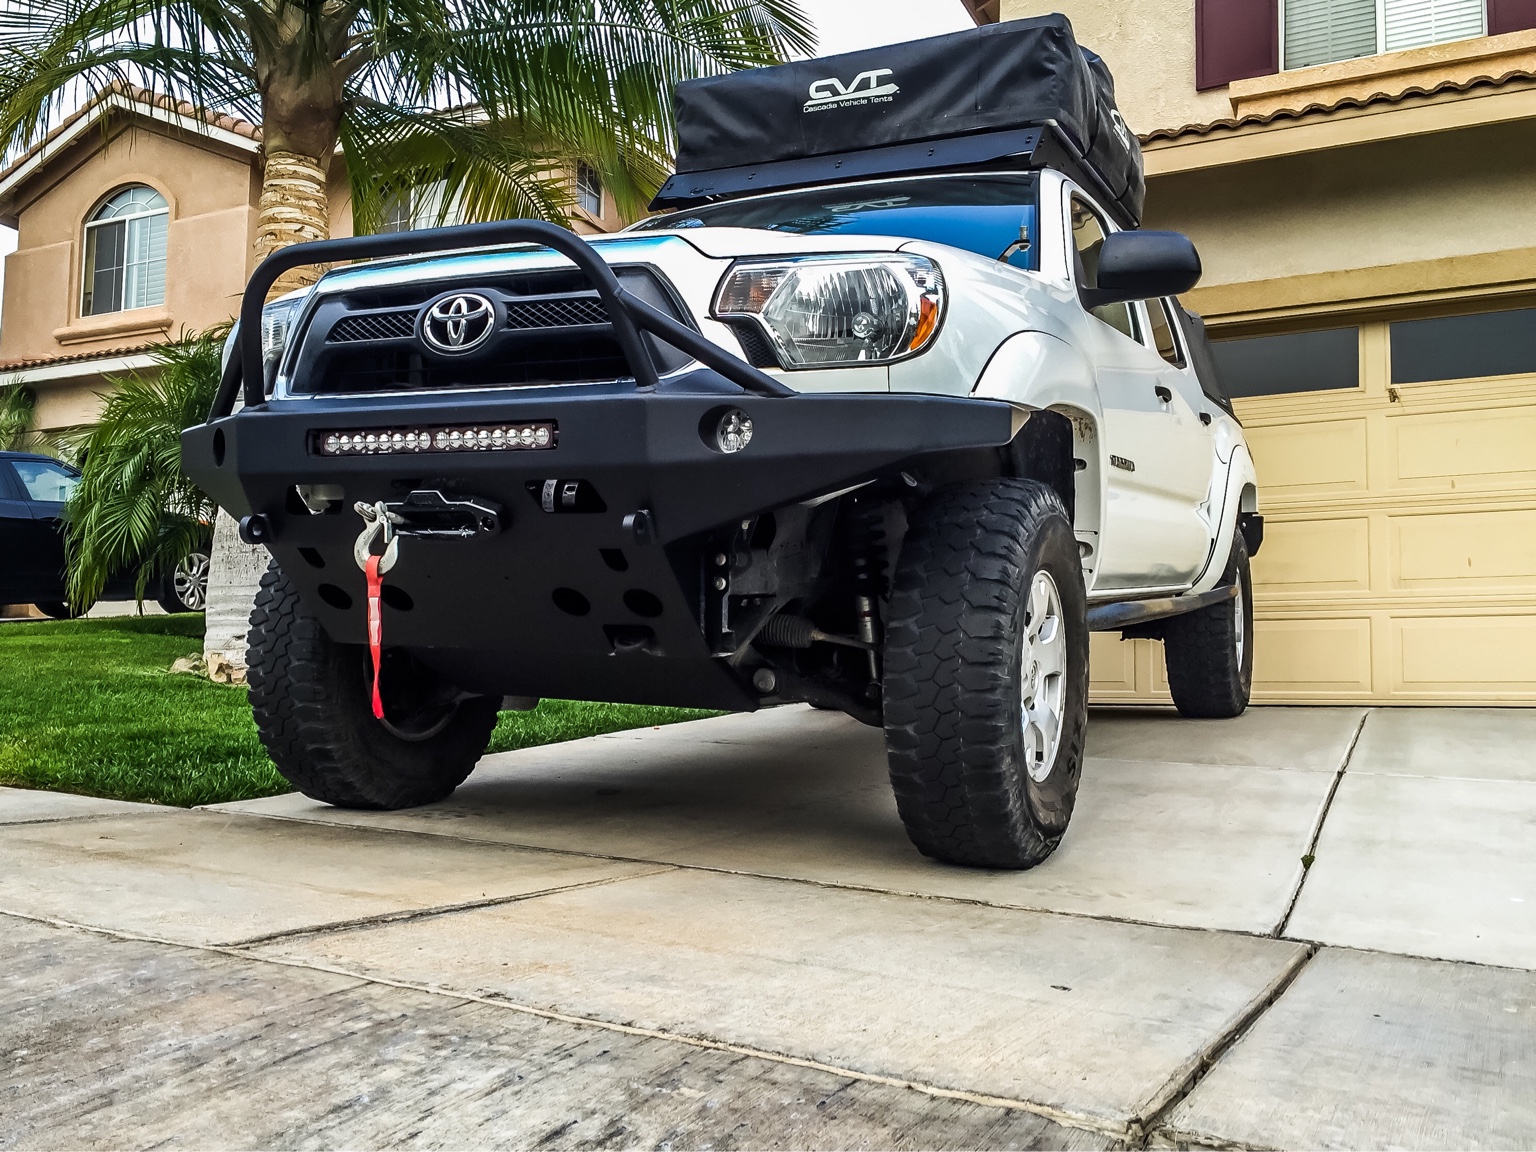
How it sits today
Where it All Started:
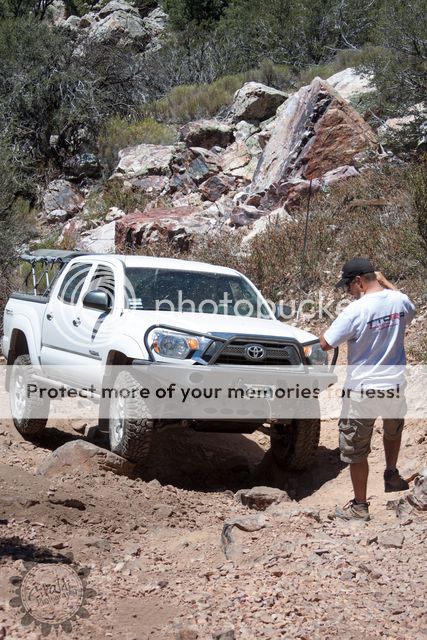
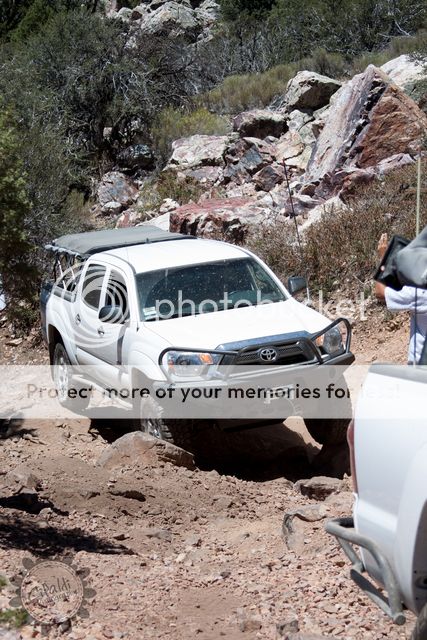
When I first picked up my 2012 Gen 2 Toyota Tacoma TRD Off Road, a discussion was immediately started up with Danny Walker of Rancho Suspension on the development of their new Toyota line of suspension. We came to the agreement that I would be involved in the development of their suspension, my role was to test, critique and give feedback on the equipment. So I started out by wheeling my truck bone stock to see what it was capable of, then do the same or similar trails with the firs iteration of their suspension system on and give overall feedback and so on.
So the Journey was started!
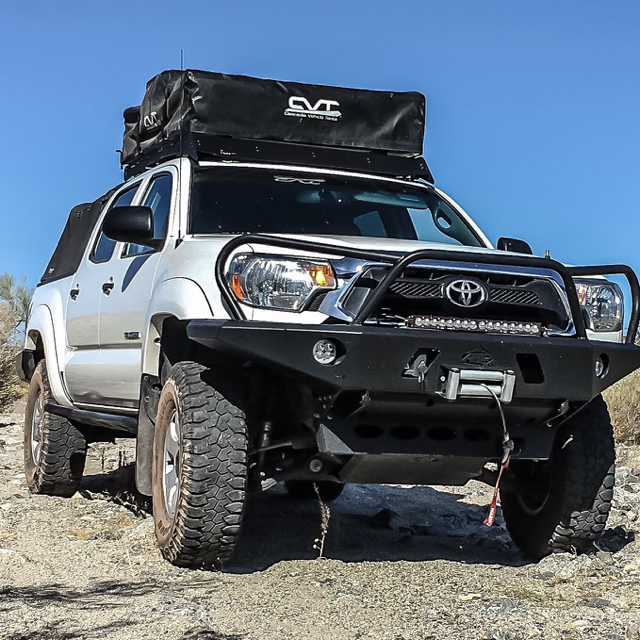
My Tacoma Tech Stats
I will create links as I have time
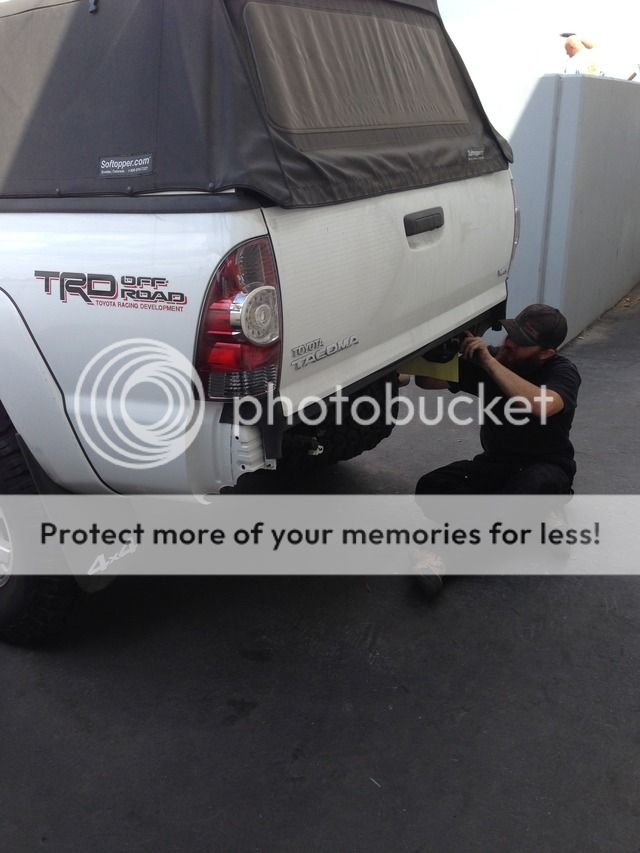
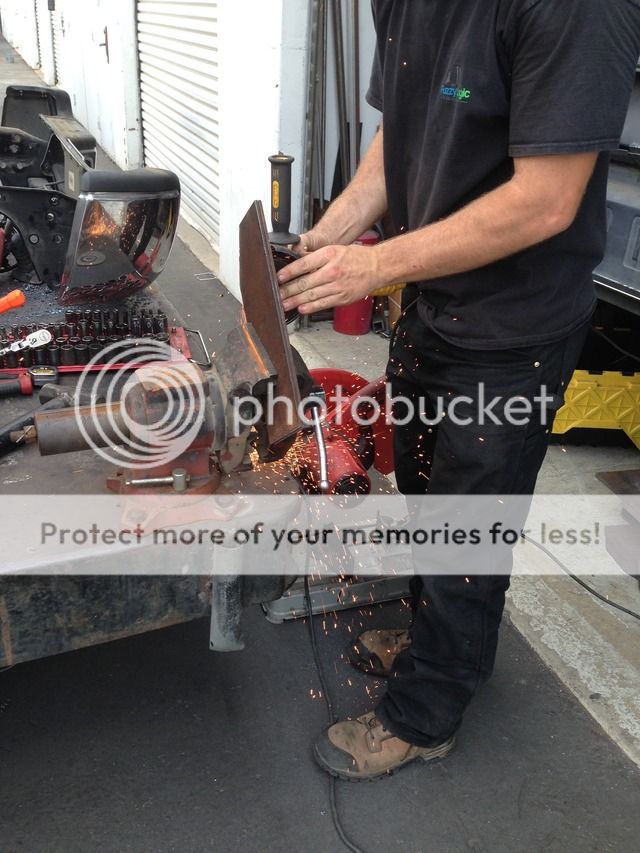
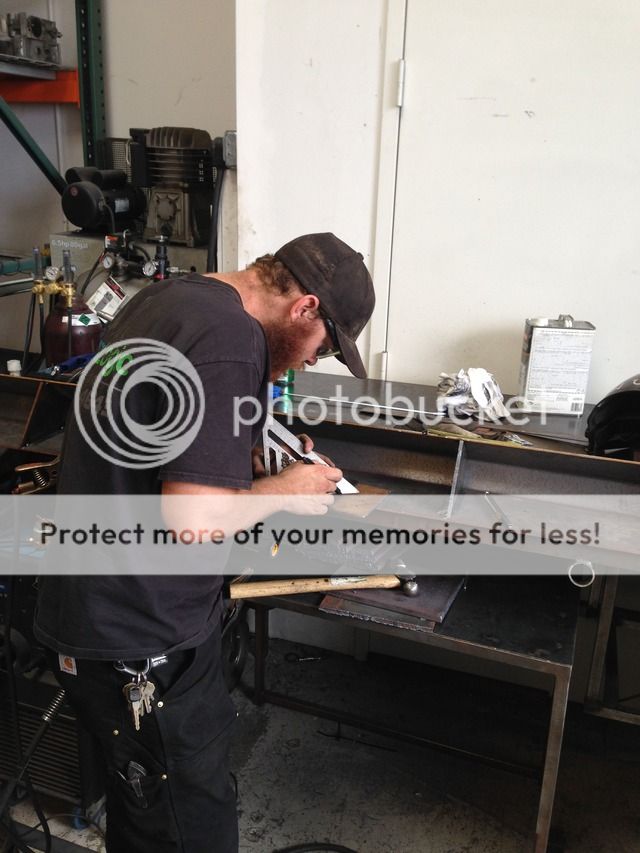
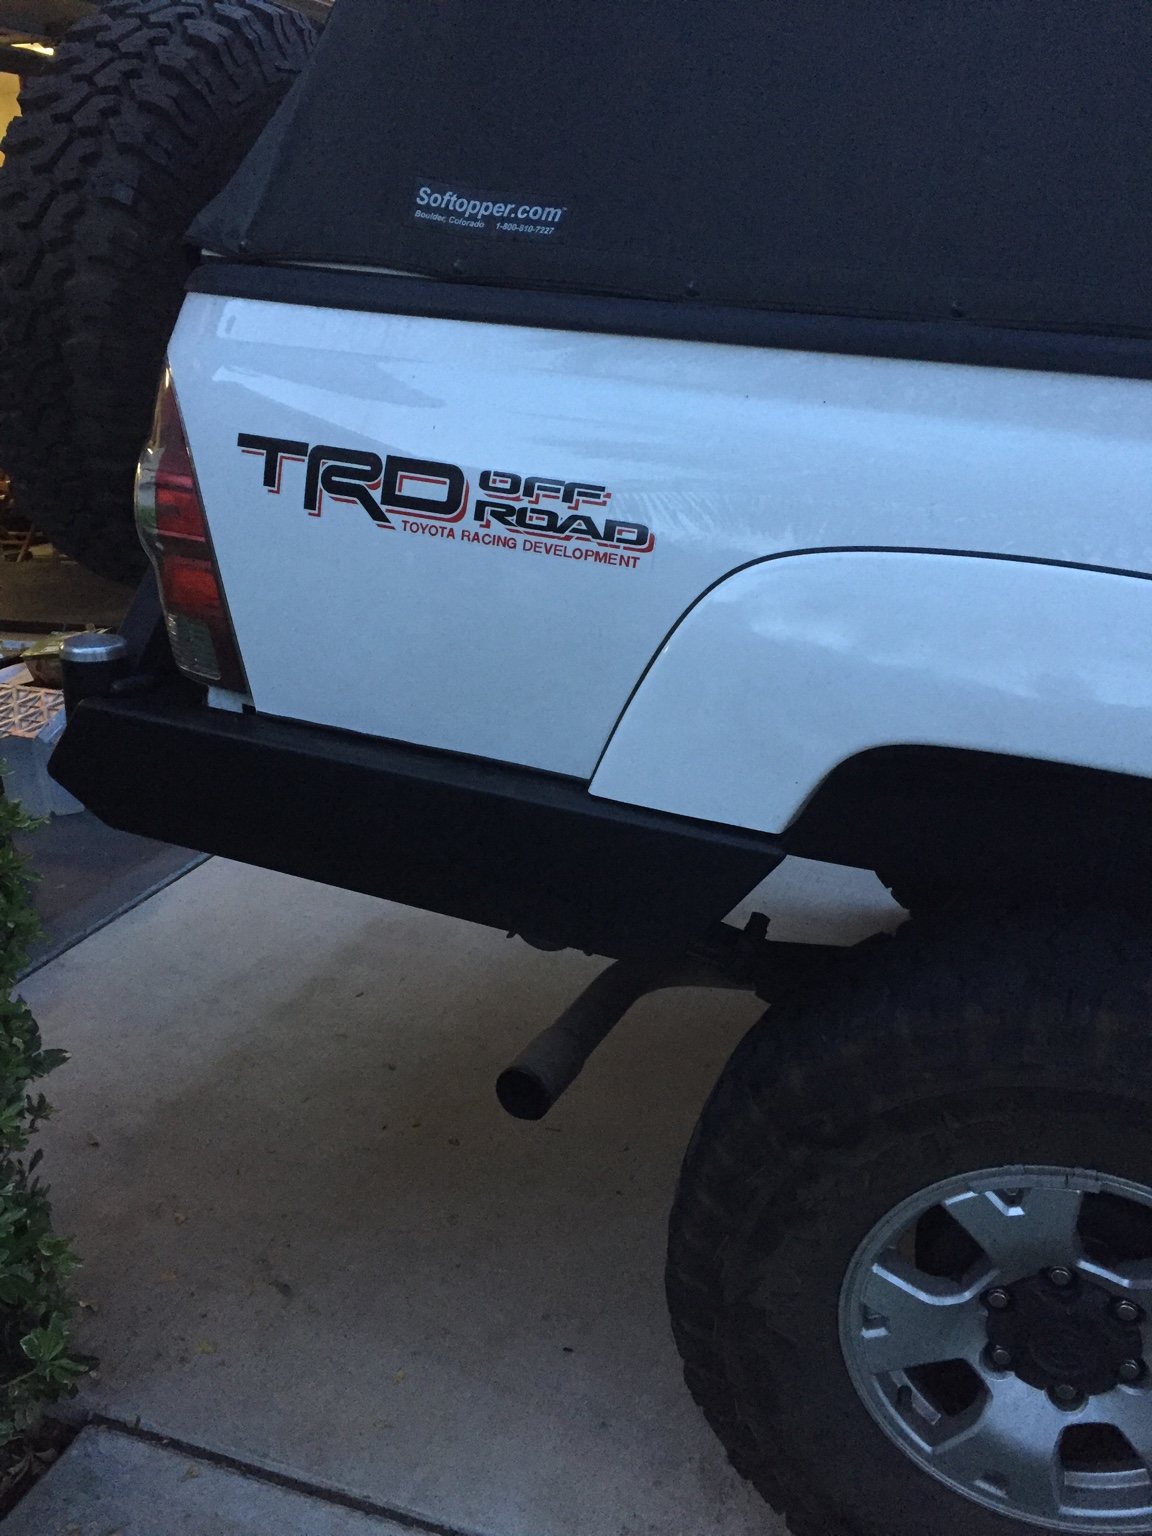
ARMOR:
Pelfreybilt Offroad Aluminum Plate Bumper
Pelfreybilt Offroad Hi-Clearance Rear Bumper
Pelfreybilt Offroad Steel IFS Skid
All-Pro Trans Skid
All-Pro Transfer Case Skid
All-Pro APEX Rock Sliders
FRONT SUSPENSION:
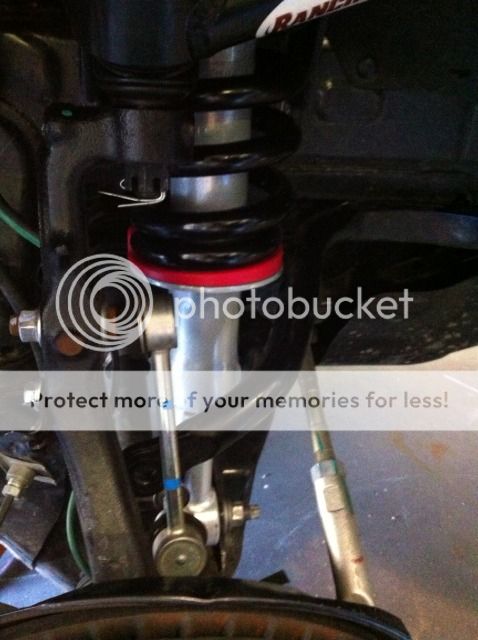
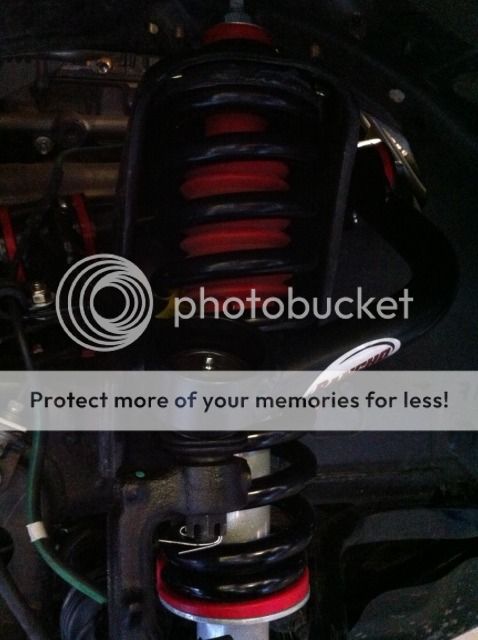
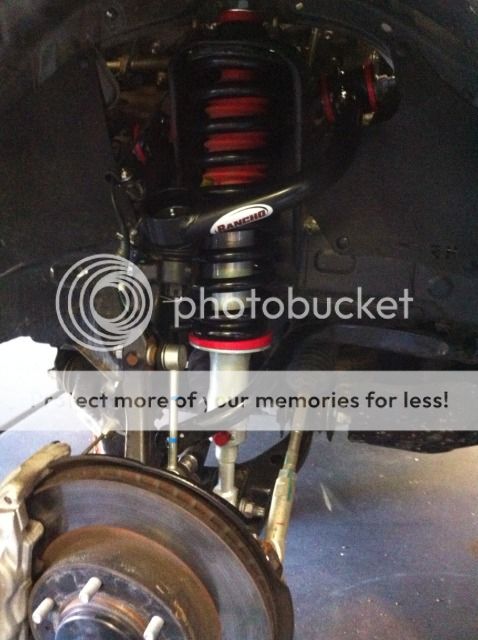
Rancho Suspension 2.5” Suspension System w/UCA’s
Rancho Suspension RS7000MT
REAR SUSPENSION:
Old Man Emu Dakar Leaf Spring Set (being upgraded to the HD Leafs)
Rancho RS7000MT (longer than their normal part for added droop)
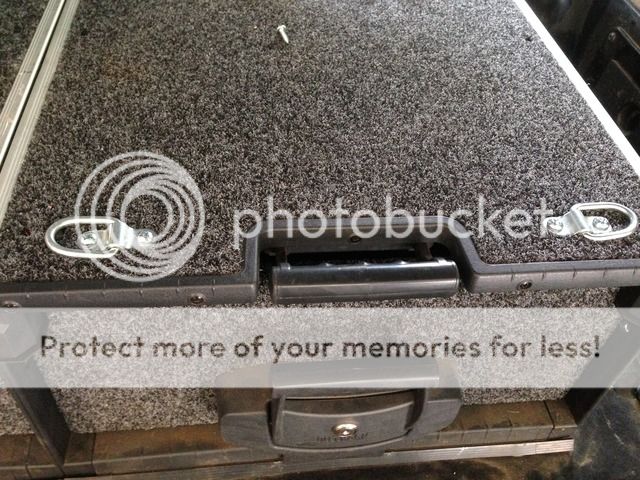
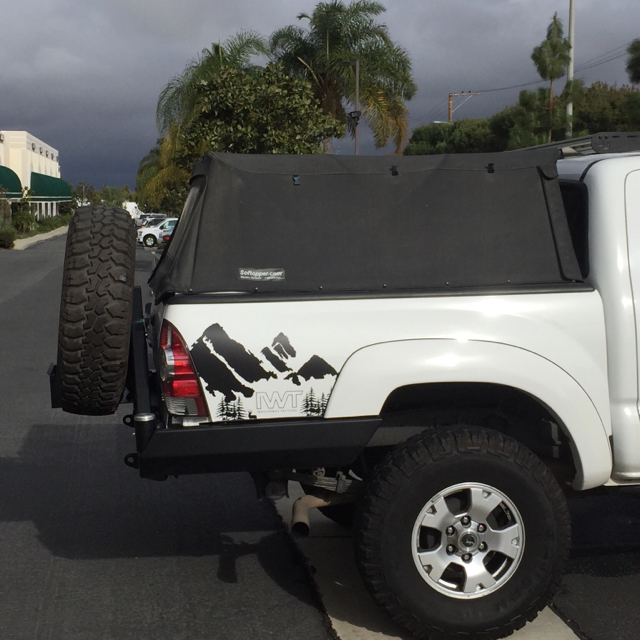
OVERLAND GEAR:
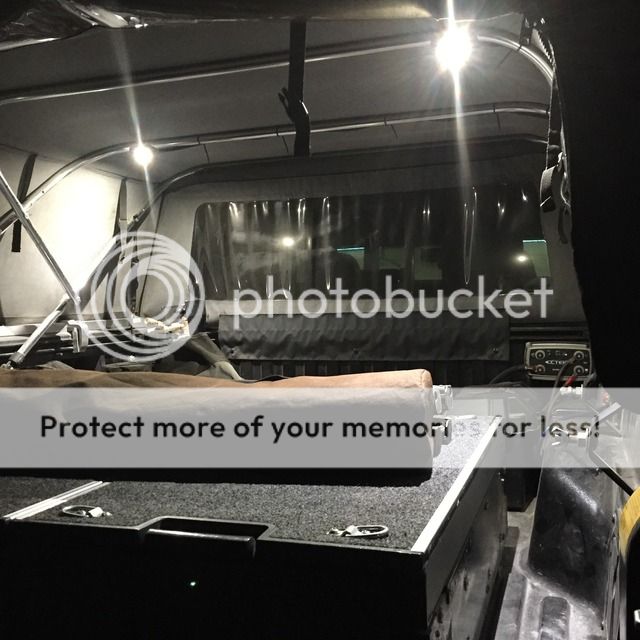
CVT Mt. Shasta RTT
Prinsu Design Studios CABRAC roofrack
Softopper Soft Bed Top
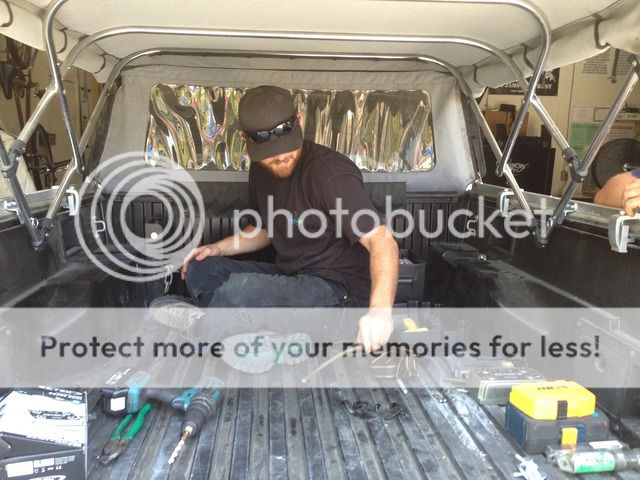
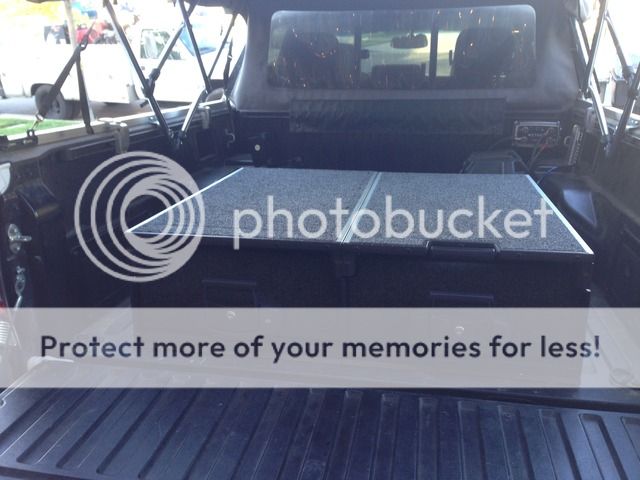
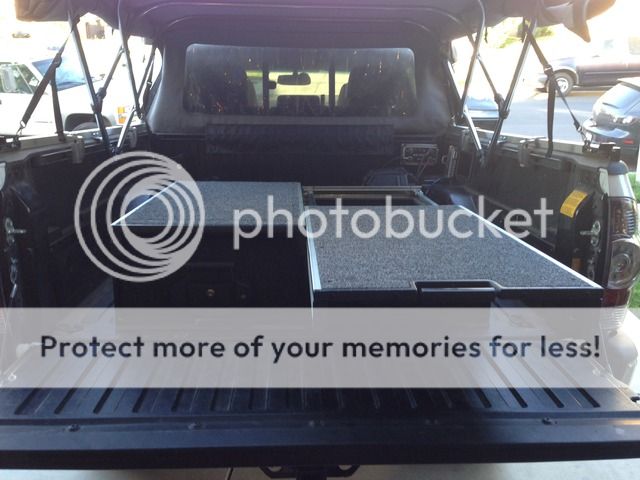
ARB Outback Solutions Roller Drawers
Indel B 41qt fridge/freezer
Airflow Snorkel (waiting to be installed)
RECOVERY:
Warn VR8000 Standard Duty Winch
Warn Medium Duty Winching Accessory Kit
Hi-Lift 48” Red All Cast Jack
WHEELS / TIRES:
OEM Toyota TRD Off Road Wheels
255/85R16 Maxxis Bighorns (being replaced by Falken Wildpeak A/T3W)
LIGHTING:
Baja Designs 20" S8
Baja Designs Squadron Sports (4)
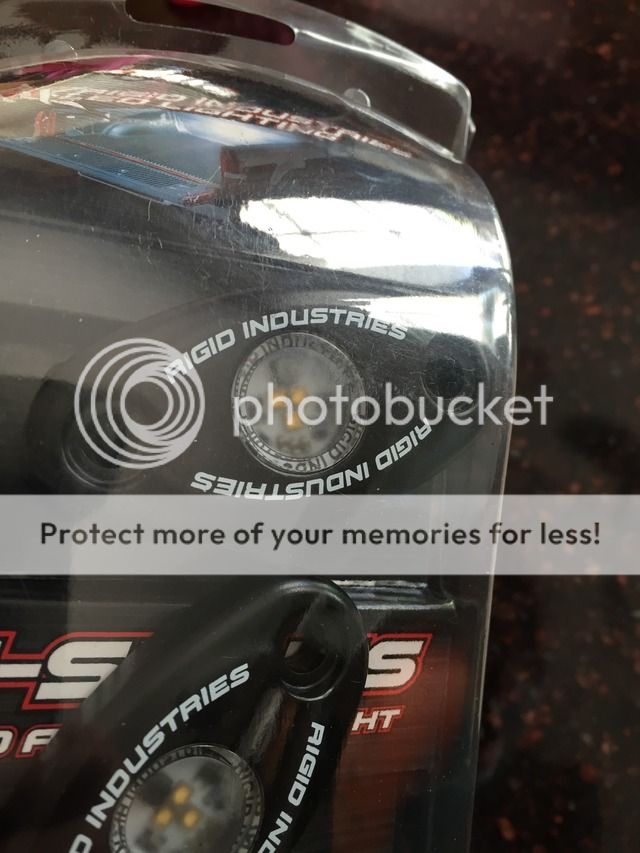
Rigid Industries A-series Low Power Natural White (2)
All Lighting is controlled by Switch Pros
MISC:
Cobra 75 WX ST CB radio
Yaesu FT-2900R
ARB On-Board High Performance 12 volt air compressor
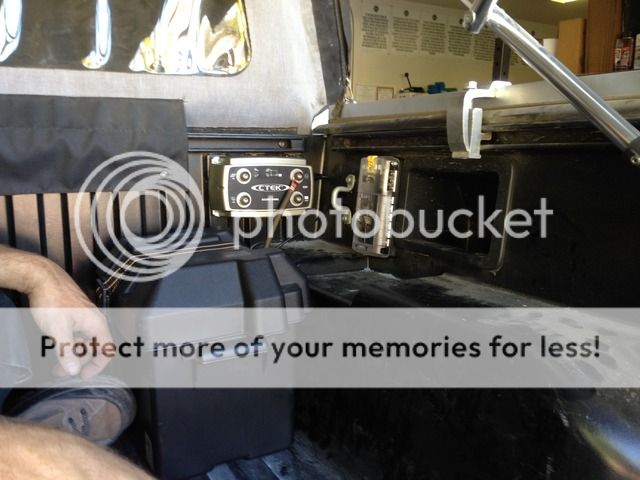
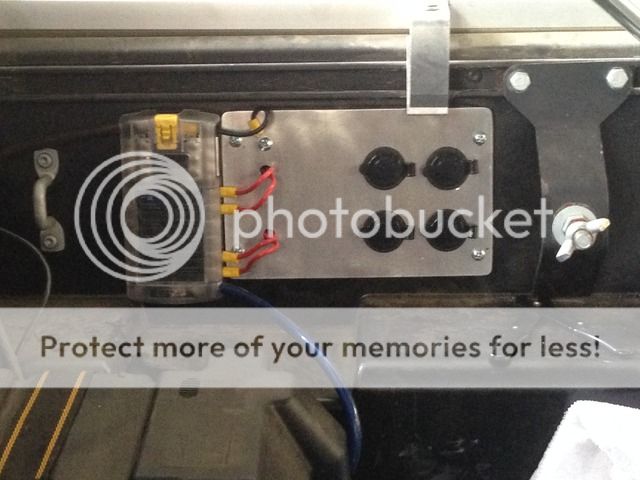
CTEK D250S DUAL Battery controller
Tech Deck w/RAM Mounts
Garmin Oregon GPS (RAM Mount)
Ipad Air (RAM Mount)
AGM house battery
Cab Mount Chop (pending)
CBI Offroad Dual Jerry Can Carrier
CBI Offroad Ditch Light Brackets
My history has always been with modifying vehicles, whether it was lowered cars in high school being part of the car club and show scene or functional off road vehicles. Evolving into offroading was an easy transition from the street scene because most of my hobbies warranted it. A lowered car doesn’t not bode well camping, hunting, snowboarding or taking the dirt bike to Glamis or Pismo Beach. After being part of the off roading racing scene for the better part of 10 years I eventually moved more towards wanting to explore our beautiful back countries. I needed something that was more reliable, capable and much more nimble than the long travel race type trucks I had been driving. I also wanted to slow it down because I now had 2 small kids and I wanted to safely share these experiences with them.
I had owned Jeeps in the past so I went looking at the new Jeep Wranglers, I also checked out the Toyota Tacoma’s. I knew from experience that the Jeeps were very capable offroad rigs right out of the lot, I had heard the same about the Tacoma’s from friends so I made the decision based off of features and intended purpose. The Tacoma’s simply had a lot more room that fit my need.
The Plan:
The general plan was to build an overland type rig for camping and hunting with the family but of course I wanted to be able to get out and explore and run some of the trails when the opportunity presents itself. The only way to do that was careful planning and avoiding the pitfall of building the rig so it was stuck being overly top heavy.
New from the Showroom
]
]
How it sits today
Where it All Started:
When I first picked up my 2012 Gen 2 Toyota Tacoma TRD Off Road, a discussion was immediately started up with Danny Walker of Rancho Suspension on the development of their new Toyota line of suspension. We came to the agreement that I would be involved in the development of their suspension, my role was to test, critique and give feedback on the equipment. So I started out by wheeling my truck bone stock to see what it was capable of, then do the same or similar trails with the firs iteration of their suspension system on and give overall feedback and so on.
So the Journey was started!
My Tacoma Tech Stats
I will create links as I have time
ARMOR:
Pelfreybilt Offroad Aluminum Plate Bumper
Pelfreybilt Offroad Hi-Clearance Rear Bumper
Pelfreybilt Offroad Steel IFS Skid
All-Pro Trans Skid
All-Pro Transfer Case Skid
All-Pro APEX Rock Sliders
FRONT SUSPENSION:
Rancho Suspension 2.5” Suspension System w/UCA’s
Rancho Suspension RS7000MT
REAR SUSPENSION:
Old Man Emu Dakar Leaf Spring Set (being upgraded to the HD Leafs)
Rancho RS7000MT (longer than their normal part for added droop)
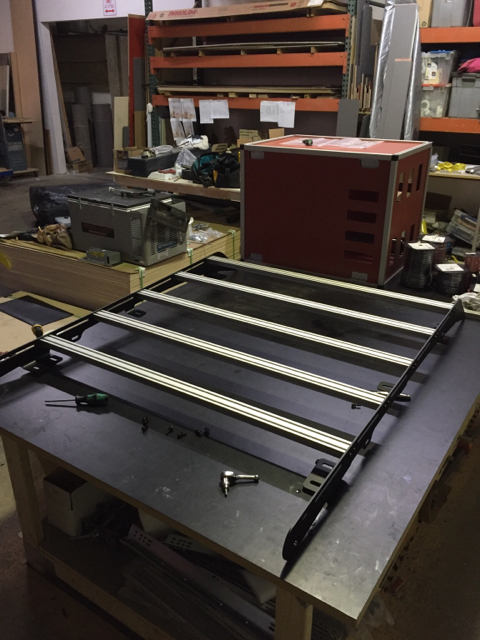
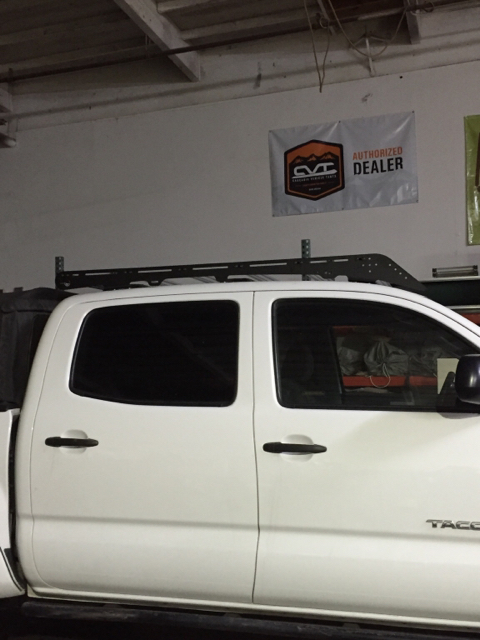
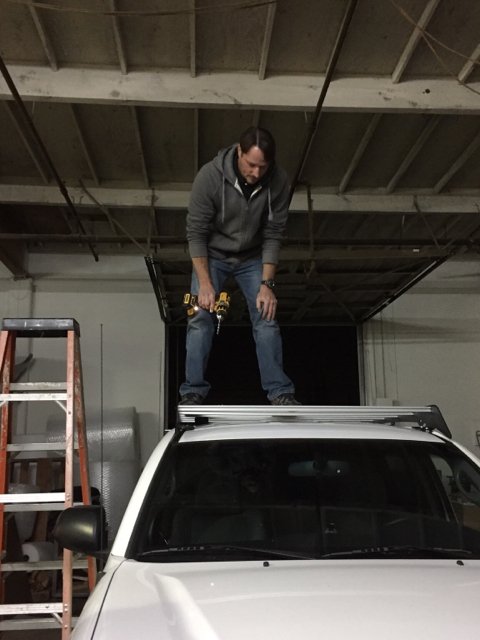
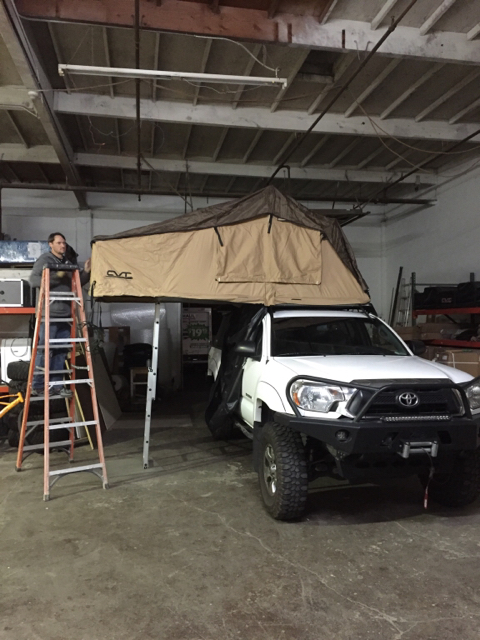
OVERLAND GEAR:
CVT Mt. Shasta RTT
Prinsu Design Studios CABRAC roofrack
Softopper Soft Bed Top
ARB Outback Solutions Roller Drawers
Indel B 41qt fridge/freezer
Airflow Snorkel (waiting to be installed)
RECOVERY:
Warn VR8000 Standard Duty Winch
Warn Medium Duty Winching Accessory Kit
Hi-Lift 48” Red All Cast Jack
WHEELS / TIRES:
OEM Toyota TRD Off Road Wheels
255/85R16 Maxxis Bighorns (being replaced by Falken Wildpeak A/T3W)
LIGHTING:
Baja Designs 20" S8
Baja Designs Squadron Sports (4)
Rigid Industries A-series Low Power Natural White (2)
All Lighting is controlled by Switch Pros
MISC:
Cobra 75 WX ST CB radio
Yaesu FT-2900R
ARB On-Board High Performance 12 volt air compressor
CTEK D250S DUAL Battery controller
Tech Deck w/RAM Mounts
Garmin Oregon GPS (RAM Mount)
Ipad Air (RAM Mount)
AGM house battery
Cab Mount Chop (pending)
CBI Offroad Dual Jerry Can Carrier
CBI Offroad Ditch Light Brackets
Last edited: