rusted's Overland Trailer Build

  • HTML tutorial

rustED

Rank 0

Traveler I

98
Hello, I'm new to the forum, and thought I would share my overland trailer I've been working on. I started building the trailer almost 4 years ago. Life's potholes have a way of slowing down progress on projects, but Ive began working on it again recently and thought that by sharing it might help keep me motivated and keep the momentum going! When I started the project I was without a pickup. I had sold my dd ford F150 to build my dream Toyota 4runner, so my goal for the project was to have a utility trailer that I could also use for camping and exploring some rougher terrain. Over the next few days I will post up pics to show the progress up to it's current status. I'm open to all questions, comments, and suggestions. As all really SLOW projects go, enough time has gone by since I first started this project that there are a lot of things I would have done differently. I will try to comment on these when I get to them, some things I might change eventually, but my priority is to get it functional by the end of July, then make changes as time/money allows. Thanks in advance for looking!


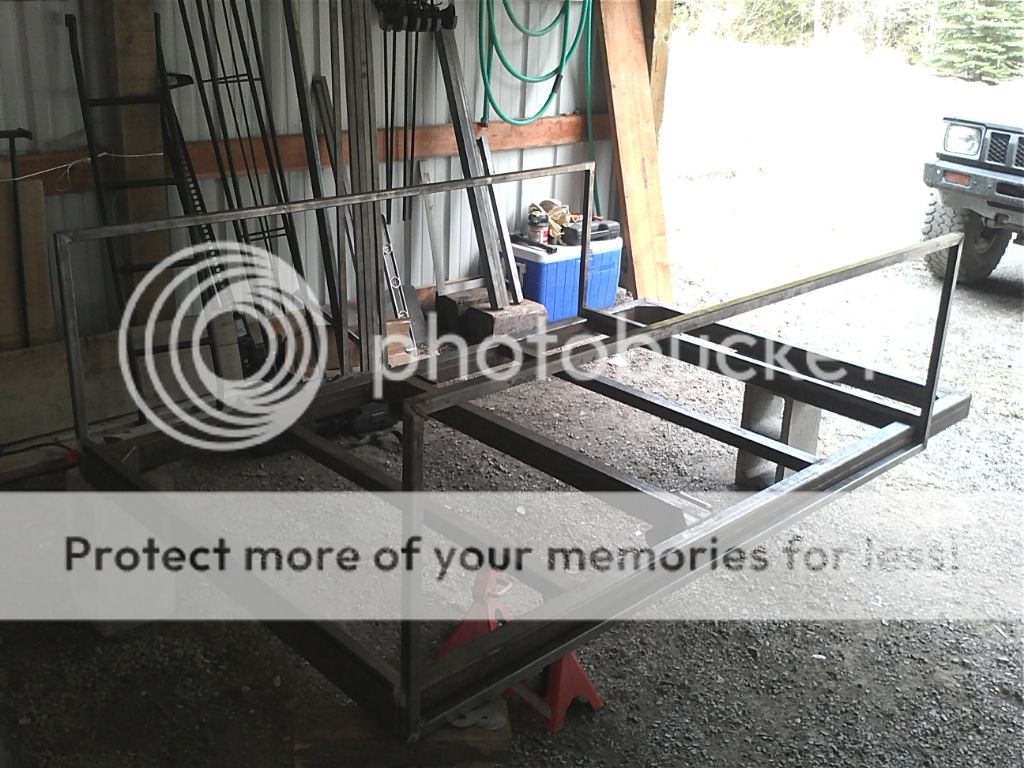
^Here's a pic of the main frame under construction. Dimensions are 50"Wx86"L and is built out of 2"x3"x.125"Thick tubing. The trailer tub 73" long. That will leave a 13"x50" area for jerry cans storage etc in front of the tub body. All the tub frame work is 1" square tube. The stringers are 18" on center and line up with the stringers on the main trailer frame.


^I used gussets in all the corners of the frame


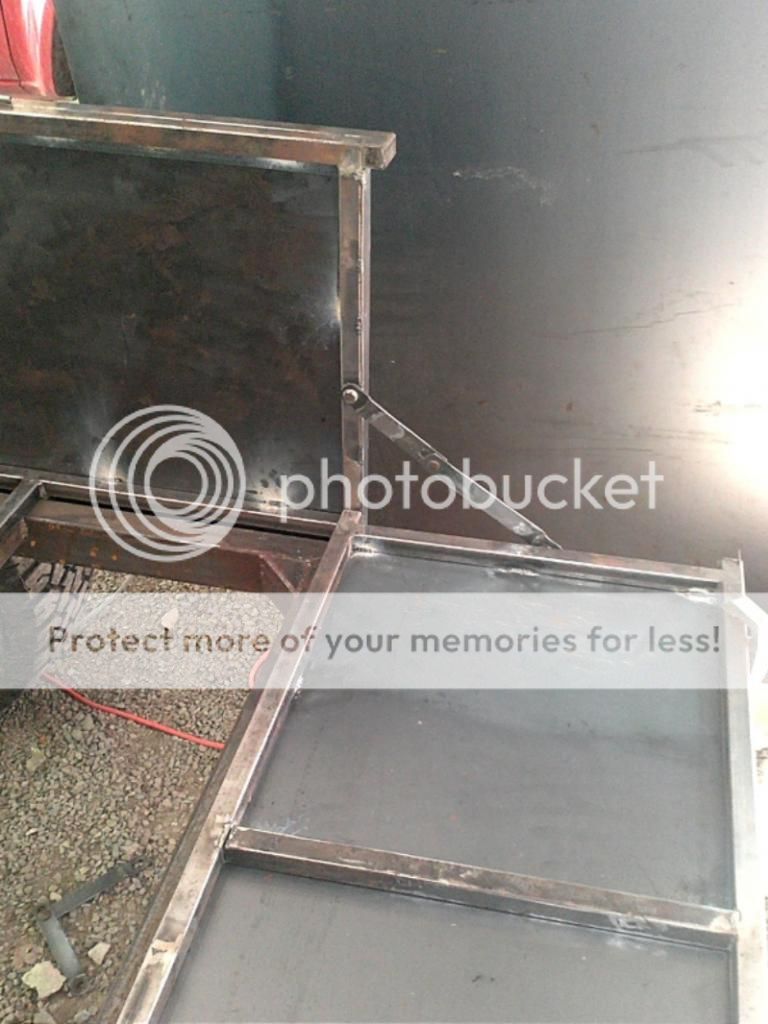
^One thing I had to change was the width of the trailer tub. The main trailer frame being 50" wide, if I made the tub flush with the main trailer frame width, the tailgate opening would have been exactly 48", which would have made it difficult to slide plywood or sheet rock into without getting it wedged and stuck in there. So I made the tub frame width 52" and overlap the main trailer frame sides. This is one thing I would have done differently, I would have made the main frame 52" wide to begin with. In the first pic you can see how the tub frame work overlaps the trailer frame. The tub measures 73"L x52"W. The sides of the tub are 24" high if you count the 3" that overhangs the main frame. Inside the tub is actually 20" deep.
 
Last edited:

rustED

Rank 0

Traveler I

98
Did I mention I'm doing a 3-link? I was originally going to use jeep TJ coil springs, but ended up getting Firestone airbags. This is something I would do differently as well. After doing some more research I wish I would have built a trailing arm suspension. This is something I might change in the future, but since I'm nearly done with the 3-link, I'm going to go ahead and see how it performs.


^The axel is rated at 3500lbs, and is 6 x 5.5" lug pattern to match my 4runner. I think it's 61" from wms to wms, which ended up being another problem I had to remedy. After widening my tub and over lapping the main trailer frame, my tires where rubbing, so I had to buy wheel spacers.


^^^I used some square tube as spacers to take the place of my airbags and to help mock up the suspension, this way I could continue welding and not worry about ruining my airbags.

^built the trailer tongue. I'm going to go back and plate the area where the gussets are. I also plane to add a receiver tube so I can switch hitches from a ball to a 360° swivel/Offroad hitch.


^Started skinning the trailer tub with 14 gauge sheet metal. I used one 5'x10' sheet for the floor because I didn't want any seams. And one 4x8' sheet pretty much did the sides. I had enough left to skin the front of the tub and the tailgate. Unfortunately not enough left to build fenders, but I did have enough scrap to build a handy lockable armrest/storage box with cup holder for my 4runner!
 
Last edited:

rustED

Rank 0

Traveler I

98
TAILGATE:


^Another thing I would have done differently is I would have made the tailgate 1" taller, and moved the tub stringer forward 1" so when the tailgate was opened it was flush with the trailer floor, as it is currently, it's elevated an inch higher than the floor as you can see in the top 2 pics. I'm not sure this will really pose any problems, it's just one of those things I look back on a and it's like, " what was I thinking"!

◇◇EDIT◇◇ I WILL LEAVE THE TAILGATE AS IT IS, SINCE IT SITS AN INCH ABOVE THE FLOOR WHEN IT'S IN THE DOWN POSITION I THINK THIS WILL GIVE ME EXTRA CLEARANCE FOR THE REAR BUMPER AND KEEP THE TAILGATE FROM MAKING CONTACT.◇◇


^One thought I had was by putting the tailgate handle on the inside, and with a hard tonneau cover closed and locked, there was no need for a lock on the tailgate...we'll see how that plays out, I may need to change that also.

^Added a place for the license plate. I will fab up a rear bumper and mount the tail lights in it
 
Last edited:

rustED

Rank 0

Traveler I

98
I got a little done today on the trailer lid. Started building the frame out of some square 1" tube. I decided to keep it simple and just make it flat. Got it all tacked together.


I got all the parts cut out to build the fenders today, it's alot faster now that I finally have a metal chop saw, with the exception of the work i did the last 2 days on the lid and fenders, everything else was cut with a 4-1/2" Mikita grinder.

Here's a couple pics of the tube fenders, I only got the driverside tack welded together, I also built side steps that will go in front of the fenders, didn't get any pics of those. Not sure if I'm going to put steps behind the fenders yet, I might put Jerry can mounts there instead.


  • Like
Reactions: Luis Merlo

rustED

Rank 0

Traveler I

98
I got a good deal on some 2" wheel spacers off CL, should fix my over site on the axel width, I guess that's what happens when you start changing dimensions halfway through the build, lol. I also got some tabs from Ballistic Fab to finish up my 3link.


  • Like
Reactions: Luis Merlo

rustED

Rank 0

Traveler I

98

^^^I finished one side step, and got the second tacked welded together.

Here's a pic of the passenger step in place.


It didn't take long to burn through 80 feet of 1" square tubing, I have just enough to finish the driverside step and add some braces between the stringers on the lid to tie it all together and make it all little stronger.
 
Last edited:

rustED

Rank 0

Traveler I

98
I bought another 100 ft of 1" square tubing and started working on the cargo/safari rack. It measures 4'W x 5'L by 10" deep.


^^^I got the safari rack mostly done, added more cross bars for support, just need to wrap the 45° corners with sheetmetal to give the exposed cut 1" tubing a more finished look, and weld up the rest of the seams. Switched gears for awhile and worked on the the trailer tongue.


^^^I didn't like the way I originally built the front portion of the trailer frame for the tongue, so I welded in a temporary brace (not shown) to keep the frame rails true, and cut off the end of the tongue A frame. Then I notched out the frame rails for the new peice to fit in, by doing it this way the ends are boxed in, and should be stronger. Then I cut out the square hole for my 2" by 1/4" wall tube to slide through. I'm alot happier with it now. pics below of the revised tongue. Still need to finish up welding the tongue and the receiver.


^^^This brings my build up to it's current status. I'm off work the next 2 days and plan to finish the cargo rack, and hopefully the lid. Thanks for looking!
 
Last edited:

rustED

Rank 0

Traveler I

98
I got a little work done on the trailer today, not nearly as much as I hoped. I got the cargo rack finished, wrapped the 45° corners with 16 gauge sheet metal. I thought it looked kinda plain, so I added the holes, really wish I had a press and dimple dies, that would have really given it a nice look, but I'm pretty satisfied with how it turned out.

I also finished the tongue, got the receiver tube welded on and the ball/hitch bolted on, still need to add the safety chains. Added the rear steps behind the fenders, got both sides finished.


Here's a quick list off the top of my head, of things that still need to be done.

□ Add safety chain to the tongue
□ Finish adding braces to the lid, skin the lid, weld on hinges, add weatherstripping.
□ Skin the fenders and steps
□ Build a Jerry can rack across the front of the tub body (aprox. 13-1/2" by 52" wide
□ Weld on the suspension tabs for the last link (already built) mount the airbags, run the airlines, mount the shocks, limit straps and bumpstops
□ Bolt on the tailgate, add weather stripping
□ Run the wiring, mount the tail lights, side marker lights license plate light, mount the junction box.
□ Build a highlift jack mount
□ Build a rear bumper out of 2x3" rectangular tube, add a receiver
□ Paint/DIY roll on bedliner (thinking Monstaliner)
□ Get some matching 35"x12.50 mud Terrians on black "D" window steel wheels

....that's all I can think of right now, I'm open to any questions, comments, or critiques!!!
 
Last edited:

rustED

Rank 0

Traveler I

98
That's a nice trailer! You may want to open up your own Off Road Trailer Shop!
Thank you. I don't know about opening my own shop though, it would be a very long waiting list as this project has taking over 4yrs and counting, lol!!!
 
  • Like
Reactions: Luis Merlo

rustED

Rank 0

Traveler I

98
Thanks for the compliments JusticeZ33, I agree, there is a certain satisfaction in building one from scratch over buying one.

O.Dfj, the 4runner has a Edelbrock AVS Thunder series 600cfm 4 barrel carb on it right now. I'd like to go with fuel injection someday. I've been doing a little research on Mega SQUIRT systems, still have alot to learn, lol.
 
  • Like
Reactions: O.Dfj

rustED

Rank 0

Traveler I

98
Jealous of the trailer and the truck! Love the seat in the bed!
Thanks xKennyx! One of the things that made me fall in love with the first generation 4runners is the factory removable hardtop. The rear seat was a factory option on all 84'-89' toyota 4runner's. I say option, because they were also available with a "rear seat delete" which was a metal cover that filled in the void where the seat would normally go and make it look more like a regular pickup bed.
My rear seat was missing, so I had to modify a rear seat out of a 90-95' 4door 4runner to fit. I also added shoulder harness seatbelts that attach to the factory location provided on the rear rollbar to replace the factory lap belts, I felt it was added safety for my kids when they ride back there!
 
Last edited: