Ram Build 2.0 - OVRLND Camper

  • HTML tutorial

Roam Bearded

Rank V

Enthusiast III

2,191
Ogden, Utah 84403, United States
First Name
Jason
Last Name
Cramer
Member #

17305

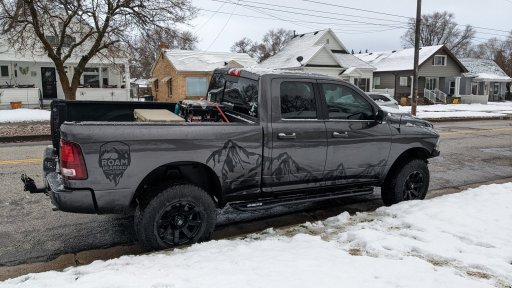
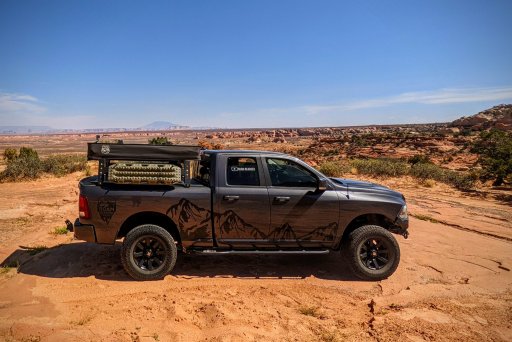
The ball is in motion and the next generation of our setup is underway. We recently did a walkaround of the Ram, in it's current state, on our YouTube channel and the main reason I wanted to do that was to document the current setup before the revamp. So I guess this will be more of a rebuild thread. Here's the starting point.

What won't be changing just yet goes a little like this -
* 2014 Ram 1500 Sport Quad Cab w/6'4" bed, 5.7L Hemi, 8 speed transmission and 3.92 gears
* 4" ProComp lift
* Icon 1.5" dual rate rear springs
* Hellwig rear sway bar
* ProComp AT Sport tires - 35x12.5-18
* 18x9 Dick Cepek wheels
* White Knuckle Off Road rock sliders
* Chassis Unlimited Octane winch bumper
* Smittybilt X20 12K winch
* Three pairs of KC Highlights pod lights in the bumper - white spot, white flood and amber spot
* A pair of MaxTrax recovery boards,
* The infamously deadly Hi-Lift Jack
* Shorty shovel from Home Depot
* Fiskar Axe

The following will be finding adventures with some other explorers
* iKamper X-Cover Rooftop Tent
* KB Voodoo Max Modular Rack
* Retrax One MX bed cover
* Rhino Rack Batwing Awning Compact
PXL_20210923_184631742_2.jpg


Roam Bearded

Rank V

Enthusiast III

2,191
Ogden, Utah 84403, United States
First Name
Jason
Last Name
Cramer
Member #

17305

There was a lot of research, thought and discussion on what would benefit us the most for our next setup. It's not that our current system was bad, in fact there's really not much wrong with it for how we spend our time outdoors. In the end we settled on the idea of of the pop-up shell style system and committed to OVRLND Campers. Of course there are pros and cons to all of the options available this day and age, as well as several decision factors on what brand of shell camper to choose. A little bit on our thought process -

How do we comfortably extend our camping season, from starting earlier in the spring/tail end of winter to late fall/early winter and maybe even truly year long? When it gets dark early and the temps drop significantly, one can rotisserie themselves by the fire for only so long. And while the RTT is spacious, we're still sitting pretzel style, playing cards, and can only stretch out by laying down. This is the same situation in a healthy rain storm, gnarly winds etc. We want something we can comfortably stand and move around in.

Why not a slide in camper? First is the weight, and while we all know a half ton truck is/can be perfectly capable of supporting some slide in campers, this truck is still my daily driver. I wasn't comfortable maxing out or tipping over the payload for something I'm still driving to work everyday. Keeping it 1000 pounds lighter is also better for my fuel mileage.
We also don't require all the amenities built into most campers. We cook outside and don't need a stove inside the camper most of the time, but if we do, the Coleman will work just fine inside as well.
We manage to keep clean without a 'proper' sink, water tank, pump and grey tank so we not interested in a permanently mounted water system.
The furnace - we have a buddy heater and even camping in cold climates we've only actually used it a handful of time. Sure, the insulated tent probably holds heat better than an aluminum shell will until its properly outfitted but again, hauling around a permanently mounted heating system just isn't efficient for where we are camping.

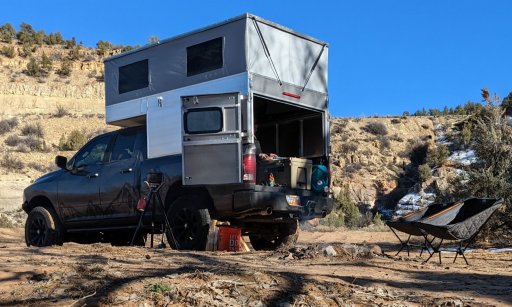
What was the draw to OVRLND Campers? The straight wall design for starters. This will allow for a larger sleeping area and on our truck it's looking like that'll be an oversized queen bed. Also the ease of customizing it without dealing with a slanted wall. And space, it's still a small footprint inside the bed of a truck so the extra space will feel nice. We ordered ours with the full barn doors, not an option on most of the other shell model available but one we find to be beneficial. And proximity - Based in Flagstaff it's less than 9 hours away to have it installed.

What we came back to more than anything is that we go camping to be outside, to live outside, to cook over fire and soak up the beauty and the healing nature provides us. It benefits us more to have the gear we can use inside when we need to, rather than built in amenities. And if we decide we wanted to add some typical camper luxuries to this setup, it can easily be done.
 
  • Like
Reactions: Speric and DugzKine

Roam Bearded

Rank V

Enthusiast III

2,191
Ogden, Utah 84403, United States
First Name
Jason
Last Name
Cramer
Member #

17305

We now have our options dialed in for the shell. We tried to keep them pretty minimal with the idea that with a bit of ingenuity and time we could save some dollars and customize some things ourselves. But here is what we chose to have completed upon pickup -

Full barn doors - This was one of the biggest selling points to choosing Ovrlnd Campers for our build. Eliminating the tailgate will allow for a pretty easy access point in and out of the camper.

Barn door windows - The canvass has windows facing the sides of the truck but not front and rear, I wanted to have have some vision from all for directions from inside the camper. which then leads to...

Cab side sliding window - Again the visibility is an important factor but now I will have a slight bit of vision through the rearview mirror to the rear of the truck. The sliding window will work well in a rainy situation where we can now pull air through with the roof fan.

Roof installed MaxxFan - I've sent them an upgraded version of what they offer, we wanted the MaxxFan Deluxe with the rain shield so they are installing that for us.

Additional 2" of cabover height - This is a pretty cool option they have which will add just a little extra space in the cabover area when closed. This will allow for more bedding, thicker mattress and/or mattress topper to be stored.

Lift struts - Offered as an option but highly recommended for the full-size shells. We'll also be installing some solar to the roof so it just makes sense to have an assist to raise the roof.

We're keeping it simple and customizable. This will allow us to add what we need, where we need and when we need it. It's about adapting the camper to our needs rather than adapting ourselves to the camper.
 
  • Like
Reactions: Speric

Roam Bearded

Rank V

Enthusiast III

2,191
Ogden, Utah 84403, United States
First Name
Jason
Last Name
Cramer
Member #

17305

Apologies for the long pause, Life can be a four letter word!

We picked up the camper mid March, it's certainly a well built unit and Jay is a cool dude that has put a lot of thought into making sure you know what you have. We spent the weekend hitting up a couple National Parks for the initial test and fell in love with it's simplicity. It is a tin box and it did get chilly in the overnights but that was expected and just set the stage to the priority list for upgrades.
No Camper.jpg OVRLND before.jpg Open Barn Doors.jpg

Insulation - I went with Sika 1" foam board, a nice R6 value, to fill in the spaces between the studs. After taking all of the measurement I used the Cutlist Optimizer online software to get the best bang out of my cuts and then covered all of the seams and studs with Nashua Extreme Weather foil tape.

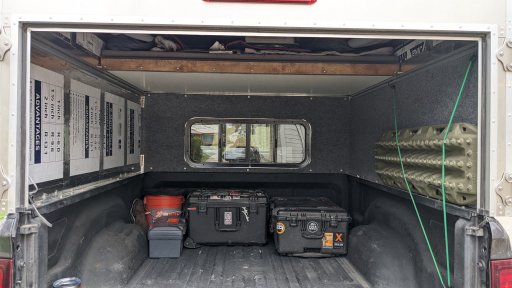
Walls - I decided to go with carpeted walls thinking it could assist in sound insulating while inside and well, I kinda like the idea of it lol. So 3/8" plywood was used with some outdoor carpet. I got some 1/4-20 threaded rivets and the Harbor Freight rivet tool to attach the walls. Drilling holes in your brand new camper, not intimidating at all...lies! Haha. All went well and now we have some places to create storage.
Some Walls.jpg

The mattress - We ordered custom sized foam from Foam By Mail, two pieces 68"x40" so they can stack in the cab-over when the bed is put away. While the weather didn't always cooperate for carpet glue or working outside there was a project that kept be inside...the mattress covers. Rather than having custom covers made I decided to invest in a sewing machine and learn to make them myself. With some duck canvas and upholstery thread they came together pretty well, even added a zipper to them in case we'd need to wash them. It was a fun project although there are a few sketchy stitches, but it'll hold for the time being.

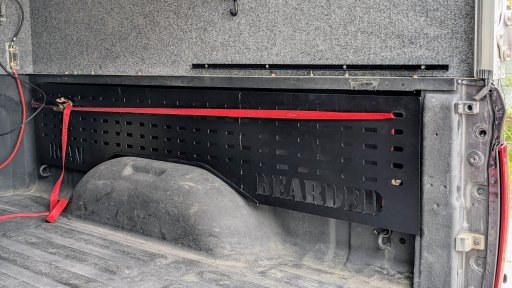
Storage panel - I reached out to a friend of mine, Wes from Salt City Steel, and we collaborated on creating a molle type panel for the passenger side of the bed. He was able to also cut my moniker into it, which is a pretty cool personal touch. It's mounted with rivnuts in the bed of the truck, also not at all an intimidating project, lol.
Molle Panel.jpg

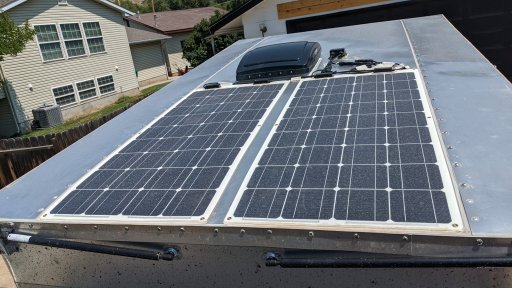
Solar - So I had originally ordered the 200 watt solid panel solar kit with MPPT controller from Renogy for this project. After much deliberation I decided to go with the flexible panels instead. Weight savings trumped the efficiency and longevity the solid panels would provide. The panels are mounted with VHB tape along with a bead of silicone along the front edge for further protection. The MPPT charger if keeping a 100AH lithium battery from HQST alive.
Solar.jpg

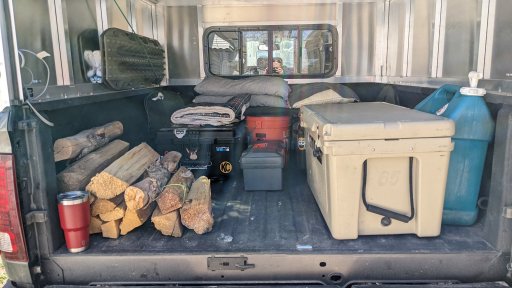
Next came adding all of the camp stuff...
 

Roam Bearded

Rank V

Enthusiast III

2,191
Ogden, Utah 84403, United States
First Name
Jason
Last Name
Cramer
Member #

17305

Have you been using this a lot? How's it working out for you
We use it all the time and love it each time we set up. It takes us so little time to lay out camp and pack it up again and we comment on that nearly every time we go out.
It also gets a lot of use to freshen up after a MTB ride or run. We just pop it open wedge style, do our thing and pull it closed.