old_man's Offroad Teardrop Trailer Build Thread

  • HTML tutorial

old_man

Rank V
Launch Member

Member III

2,827
Loveland, Colorado
First Name
Tom
Last Name
Houston
Member #

8300

Ham/GMRS Callsign
WØNUT Extra
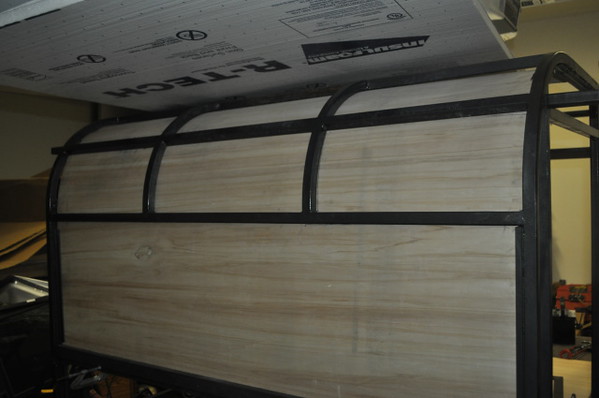
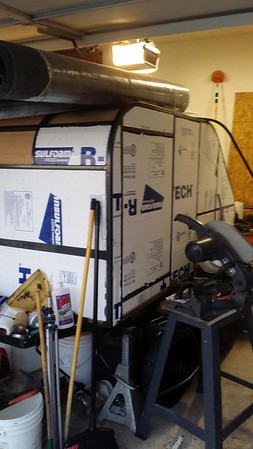
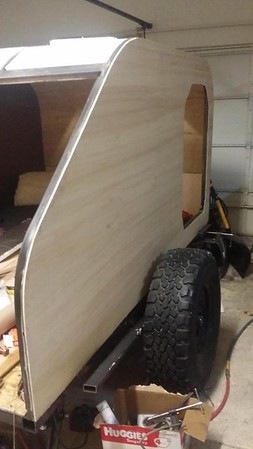
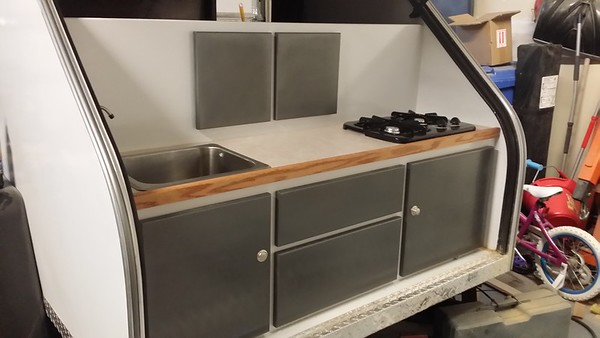
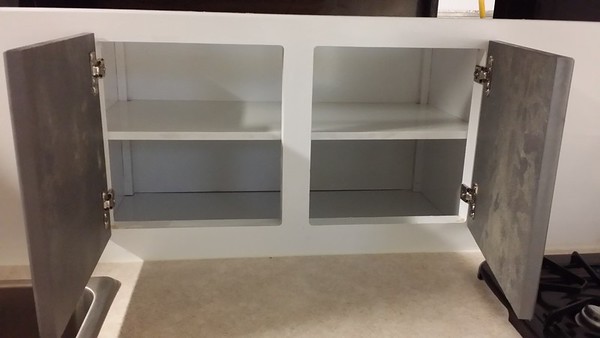
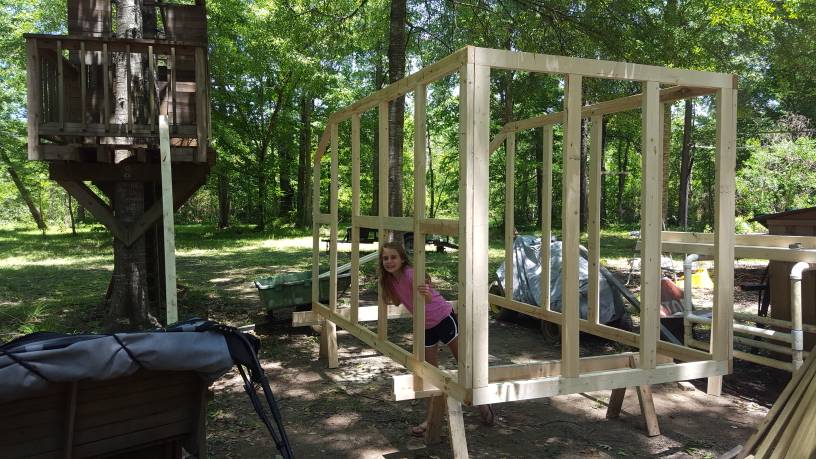
"Welcome to my build thread". My purpose was to design from scratch and build an offroad “teardrop” trailer.
While technically, the shape is not a pure teardrop, the same purpose is the goal. This was built as a prototype for a possible product.
My design goals were to be able to pull it on severe off road trails behind my 1985 Jeep Cherokee XJ. I’ve had it for over 22 years and it is extremely capable but I got tired of sleeping in the back of my rig and that really doesn’t work for my “city girl” wife.


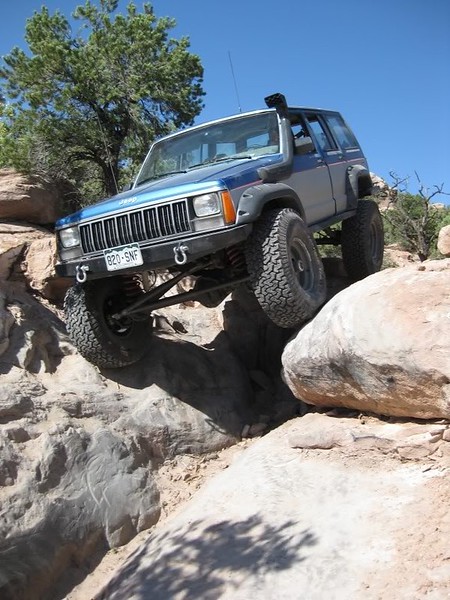
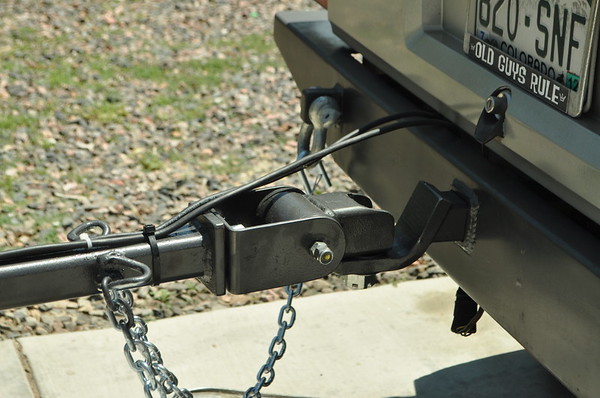
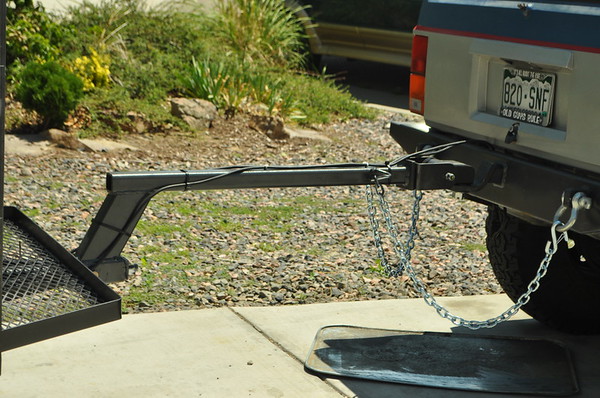
The Jeep is on 35’s and the hitch sits pretty high so the tongue will be non-traditional. The trails I take are really rough and require a lot of twist and rotation as well as being able to take a pounding without beating up the contents.

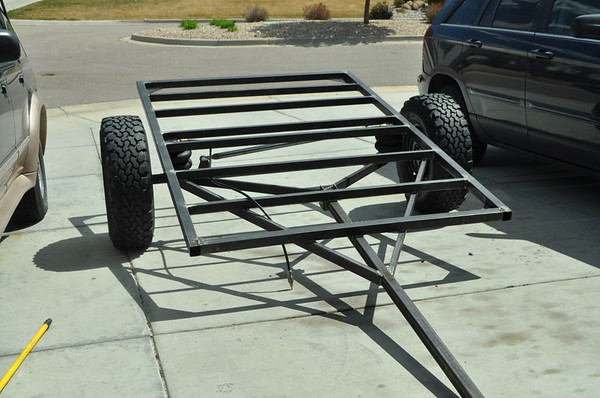
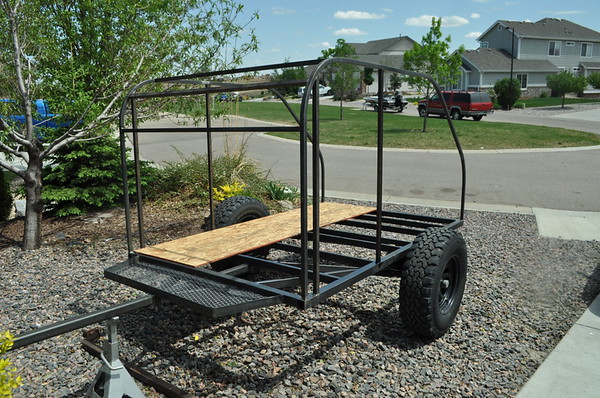
Here is the final result.


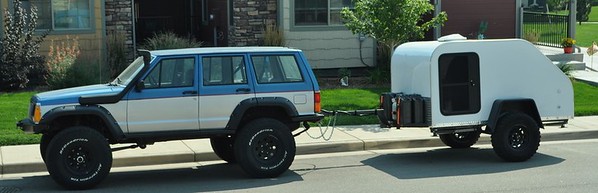
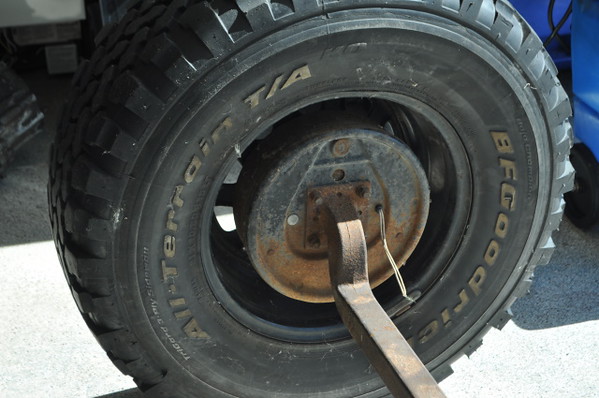
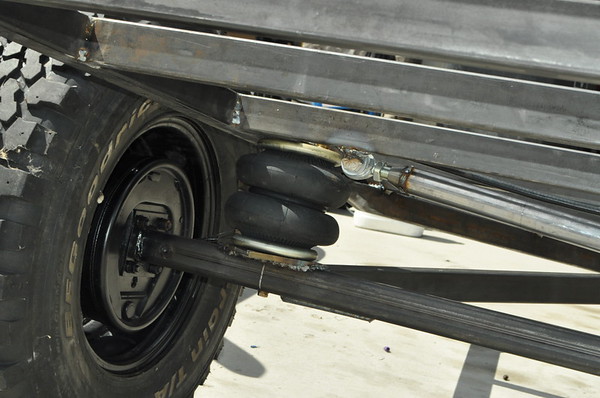
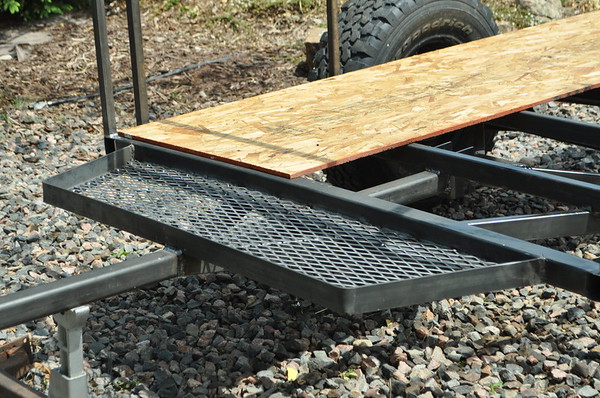
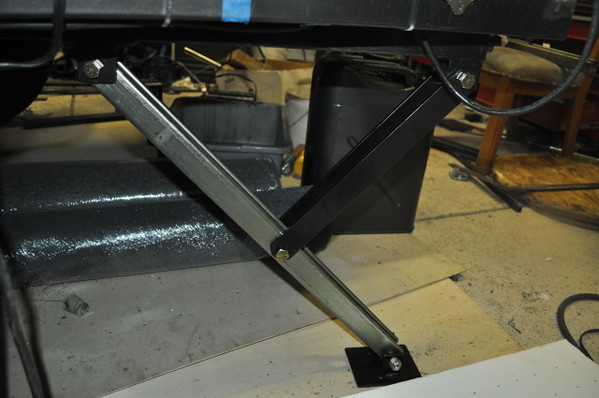
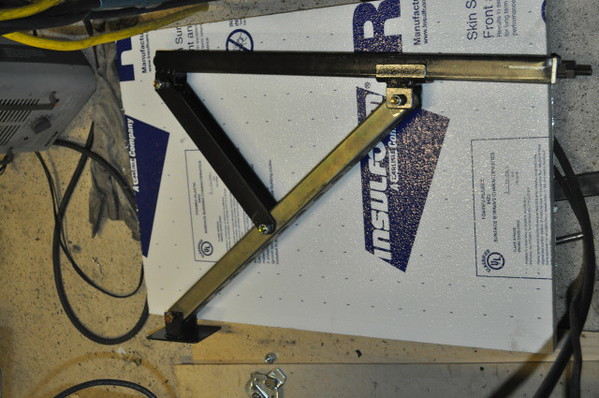
My suspension design utilizes a dual air bag suspension with shocks using 31" tires.

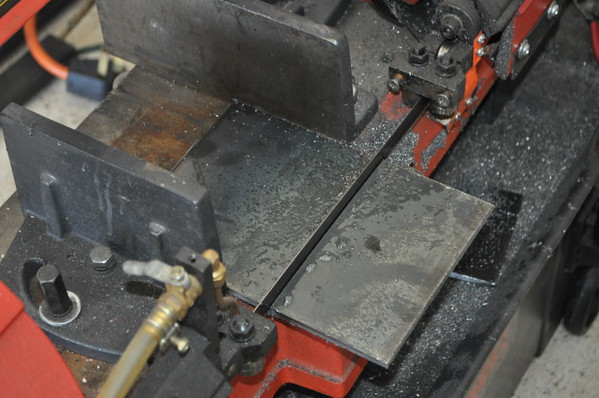
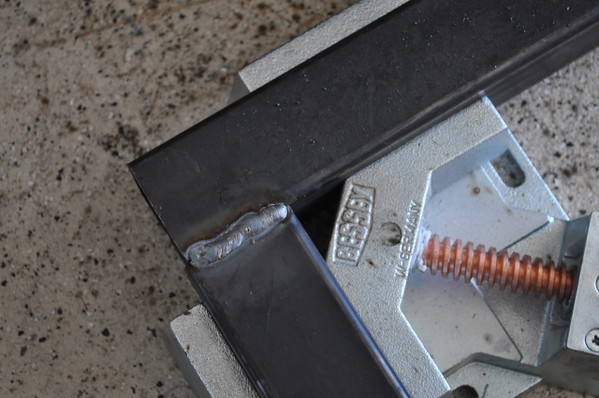
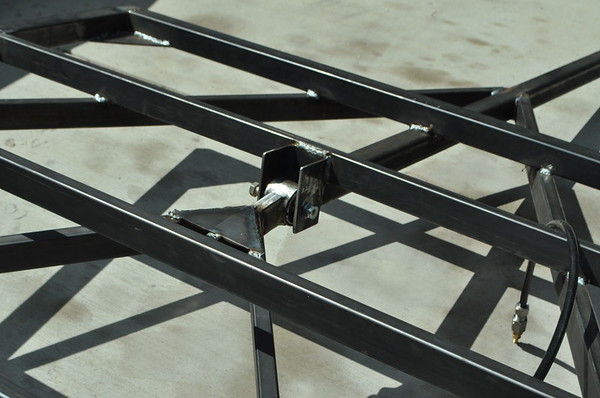
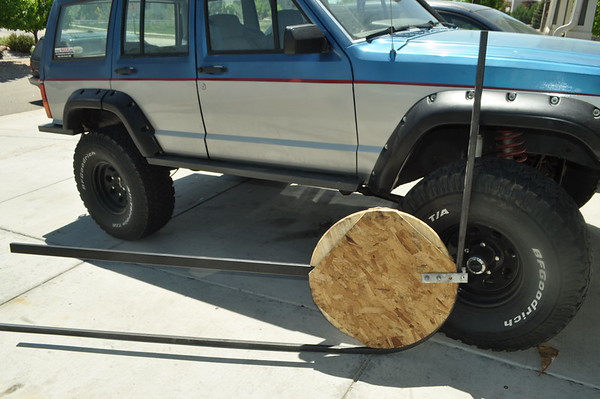
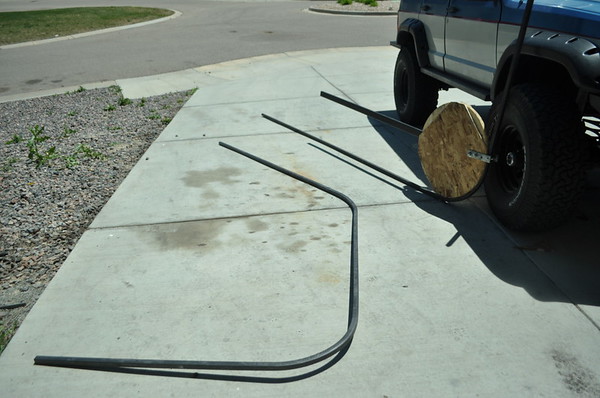
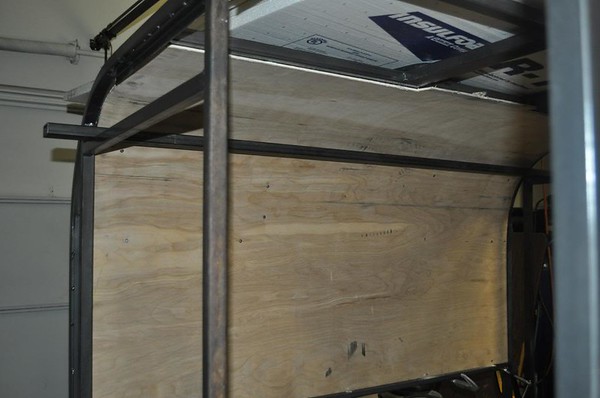
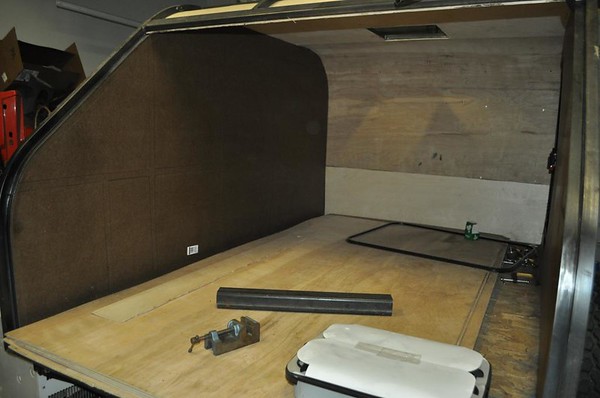
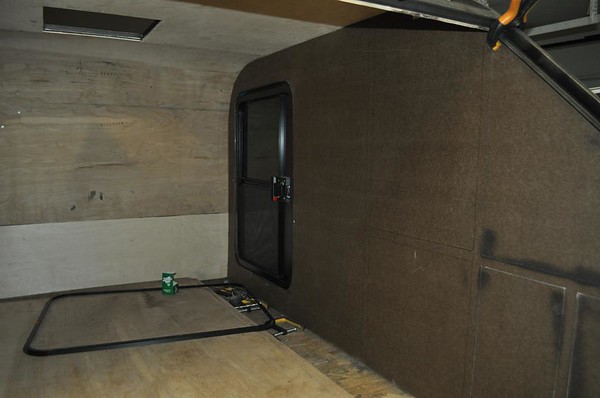
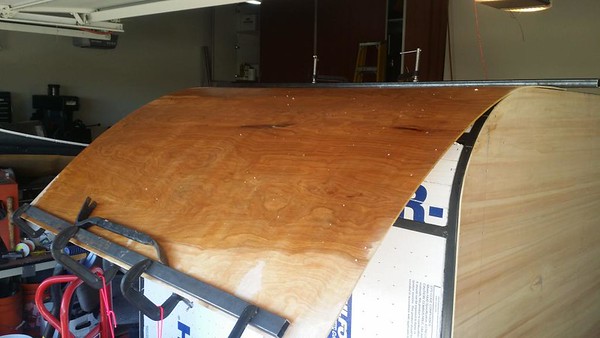
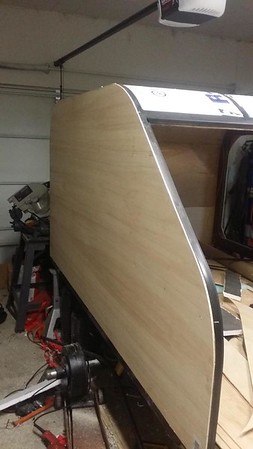
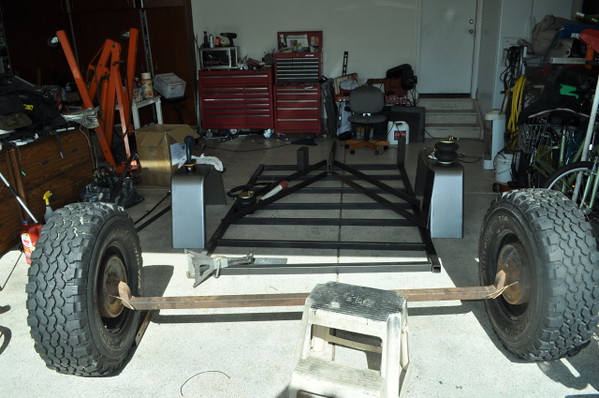
Unlike most builders, I didn’t start with a trailer. I started with a pile of steel on the floor.
 

old_man

Rank V
Launch Member

Member III

2,827
Loveland, Colorado
First Name
Tom
Last Name
Houston
Member #

8300

Ham/GMRS Callsign
WØNUT Extra
The frame is 2x2 square tubing with 1x2 cross stringers. Getting it precise, square, and flat is important.


Once welded, each weld on the top was ground down flush.


Due to how much I run in the mountains I used electric brakes, even though the trailer weights less than 1000 lbs.

Here is the basic trailer out in the sun for the first time. The suspension is quite different than I have ever seen.
 

old_man

Rank V
Launch Member

Member III

2,827
Loveland, Colorado
First Name
Tom
Last Name
Houston
Member #

8300

Ham/GMRS Callsign
WØNUT Extra
I designed and fabricated a single link utilizing a spherical bearing and a pan hard bar.


The axle is supported by dual airbags and dampened by shocks. The shocks are what make it ride so nice. The airbags make it infinitely adjustable ride height.
In tricky extreme off camber situations where rollover is a possibility, I have been known to air one side all the way up and the other side all the way down. The Schrader valves are mounted on the side of the frame behind the tires on the passenger side.


Next came building the steel upper frame. The frame is mostly 1”x1” thin wall steel. Many people simplify things by working with hard/square corners. Being the pain in the ass perfectionist, as my wife calls me, I wanted a more flowing shape. Bending a repeatable large diameter curve is almost impossible without some sort of tool. Having grown up on the farm/ranch and later being trained as a tool and die maker and fabricator, I came up with a simple bending tool that worked flawlessly. I started with a round table top blank from Lowes. I modified it with some OSB shoulders to hold the tubing on the bender.


I bent and matched the two sides. This was no easy task getting them to match exactly.
 
Last edited:

old_man

Rank V
Launch Member

Member III

2,827
Loveland, Colorado
First Name
Tom
Last Name
Houston
Member #

8300

Ham/GMRS Callsign
WØNUT Extra


Having welded the sides up and adding some structural bracing, I added a storage area to the front.


A straight trailer tongue would not have lined up with the Jeep’s hitch. That combined with wanting to be able to remove the tongue for security and storage reasons, I added an offset to the tongue.
I also made a seperate tongue with the height of my normal family vehicle.
 
Last edited:

old_man

Rank V
Launch Member

Member III

2,827
Loveland, Colorado
First Name
Tom
Last Name
Houston
Member #

8300

Ham/GMRS Callsign
WØNUT Extra
My PIA Engineer self, wanted to build a hitch that could handle all the extreme angles required. A standard trailer hitch ball just does not provide enough movement for the places I go. Many people use a military style pintle hitch but I don’t like the noise and sharp shock you get with those, so I developed a rubber shock isolated section into the hitch.


It works flawlessly and you really don’t feel the trailer at all. It also provides significant security if you have to leave your trailer somewhere because it simply won’t hook up to anything else.

If you look at the hitch, it is a significant distance from the ground to match the Jeep. By flipping the goose neck over, it lowers the hitch lever to where it will work on a compact car.

Next was to put a floor on the trailer. I used outdoor OSB and hit the bottom side with an alcohol primer and then a coat of rubberized undercoating before flipping it over and screwing it down on the frame.
 
Last edited:

old_man

Rank V
Launch Member

Member III

2,827
Loveland, Colorado
First Name
Tom
Last Name
Houston
Member #

8300

Ham/GMRS Callsign
WØNUT Extra
Lots of cross members and pieces were added to the upper frame. The location of the doors was finalized and also framed in. The next step took a bit of figuring and planning in order to get the interior ply installed. The sides were fairly easy, but making the sheathing follow the contour of the top took a lot of work.


The ply had to be soaked for quite a few hours and then forced to follow the radius with metal bars and clamps.


This was a lot harder than expected.


Once the top was installed, the interior walls were next.


old_man

Rank V
Launch Member

Member III

2,827
Loveland, Colorado
First Name
Tom
Last Name
Houston
Member #

8300

Ham/GMRS Callsign
WØNUT Extra
The trailer is designed to be a four season trailer and the 1” space provided is filled with rigid Styrofoam.

Once the interior walls were covered, the task became to weld a lip that followed the hatch radius for the weather stripping to mount to and then lay the base for the interior cabinets and the galley counter top.


The galley has a sink and two burner stove top built in.


Once that was in place, I turned my efforts into covering the exterior. I covered it with ¼” ply . The sides were easy, the top was a job. No matter how much I soaked the ply, I couldn’t get it to conform to the front radius without sanding it down thinner at the radius. I ended up causing some cracking that I ended up having to fill, sand, and re-radius.


Notice the cutout for the Passenger side door.


The doors were the most expensive part of the build. At the time I framed for both doors but did not cut out for the Driver’s side door.


Later when I had some extra bucks I just cut out the second door and added the door.
 
Last edited:

old_man

Rank V
Launch Member

Member III

2,827
Loveland, Colorado
First Name
Tom
Last Name
Houston
Member #

8300

Ham/GMRS Callsign
WØNUT Extra
Many people simply paint the exterior but I used contact cement and glued Filon to all the exterior. Filon is kind of like Formica but is fiberglass based and is what is used to cover the high end motor homes.
Getting the weather stripping angle formed to the radius and welded up required determining what weather stripping was going to be used followed by a bit of calculating. The hatch was fabricated using ¾” square tubing formed to the radius of the 1” frame. It took a bit of fudging to use the bender to do a slightly different radius due to the smaller tubing. It was insulated and covered both sides and the exterior covered with the same Filon sheeting.
It took quite a bit of experimenting to figure out the mounting locations for the nitrogen springs and their size and pressure. Once done, the hatch will slowly raise by itself and stay in the upright position.
Sorry for the lack of pix but I was doing it on a day or two a month when I could get back home from working out of state.
Once done, focus went back to figuring out the cabinets. I stick built all the cabinet frames and doors. I even stick built the drawers. The counter top was covered with Formica.


The area under the sink houses a deep cycle AGM battery, a shore power to 12v converter and charger. A 1000w sine wave inverter, fuse block, stereo amp with Bluetooth and FM radio, and shore power/battery transfer switch. The battery can be charged from the vehicle or the charger and can even be tied back to the vehicle to jump start the vehicle.
The stove side contains a 5 gallon water container and a on demand water pump for the sink.
Both the galley and interior have 12v outlets and 120v outlets.
I will work on posting up more pix of the galley and the interior when I get time.
 

Contributor I

60
Excellent build. Top notch!

How did you attach your wood panels to the frame? We're building something similar but may go with 2" of XPS as it hits both extremes here in Ontario. I'm interested in that exterior material too, I'll look into it. How do you like the trailer now? Is it warm enough in the cold in the mountains?

Cheers

Sent from my Lenovo TAB 2 A10-70F using OB Talk mobile app
 
  • Like
Reactions: sully3

Contributor I

60
My PIA Engineer self, wanted to build a hitch that could handle all the extreme angles required. A standard trailer hitch ball just does not provide enough movement for the places I go. Many people use a military style pintle hitch but I don’t like the noise and sharp shock you get with those, so I developed a rubber shock isolated section into the hitch.


It works flawlessly and you really don’t feel the trailer at all. It also provides significant security if you have to leave your trailer somewhere because it simply won’t hook up to anything else.
This was one of the most impressive parts of your build. Well done, wow.
 

old_man

Rank V
Launch Member

Member III

2,827
Loveland, Colorado
First Name
Tom
Last Name
Houston
Member #

8300

Ham/GMRS Callsign
WØNUT Extra
Excellent build. Top notch!

How did you attach your wood panels to the frame? We're building something similar but may go with 2" of XPS as it hits both extremes here in Ontario. I'm interested in that exterior material too, I'll look into it. How do you like the trailer now? Is it warm enough in the cold in the mountains?

Cheers

Sent from my Lenovo TAB 2 A10-70F using OB Talk mobile app
I used panel glue and countersunk metal screws.
 
  • Like
Reactions: Function > Form

old_man

Rank V
Launch Member

Member III

2,827
Loveland, Colorado
First Name
Tom
Last Name
Houston
Member #

8300

Ham/GMRS Callsign
WØNUT Extra
Even without a heater, the trailer was pretty warm, but the wife was not comfortable. The one inch of Styrofoam really works. I am going to add a gasoline powered heater normally used on Diesel Truck cabs for overnight parking.
 
Last edited:

old_man

Rank V
Launch Member

Member III

2,827
Loveland, Colorado
First Name
Tom
Last Name
Houston
Member #

8300

Ham/GMRS Callsign
WØNUT Extra
Tons of people have asked. So here it is. I itemized the cost of all the materials. It turns out that I spent around $5k including everything. I fabricated everything instead of building premade. I even did the 4 trailer jacks.
 
Last edited:

old_man

Rank V
Launch Member

Member III

2,827
Loveland, Colorado
First Name
Tom
Last Name
Houston
Member #

8300

Ham/GMRS Callsign
WØNUT Extra
Life kept intervening with 4 surgeries and becoming handicapped, two moves, a wedding, 5 grandkids, working out of state almost 2 years and a 60 hour a week back home. With all of that, I spent a touch over 4 years on it. Much of that was design time. Figuring out how to do everything in the best possible way was the number one goal. You would not believe how much effort was expended just finding the best parts at the best price. I have a plan to someday manufacture these. I learned that it takes a ton of time and work, even with optimizing how everything goes together.

I have rethought completely manufacturing these, but I am thinking about a redesign utilizing aluminum framing with custom extrusions, doing prefab sections, gathering all the parts, writing an assembly manual, develop an online support site, and putting together a "kit" for someone mildly competent. It also saves a ton on shipping. With all the parts cut, the walls, top, and hatch fabricated ready to go together, my thoughts are it could be assembled and finished in about two to three months.

Don't know if I will ever get it off the ground but everybody needs a dream.
 
Last edited:

old_man

Rank V
Launch Member

Member III

2,827
Loveland, Colorado
First Name
Tom
Last Name
Houston
Member #

8300

Ham/GMRS Callsign
WØNUT Extra
Having a nice flat bed is an important. Lots of people use vertical screw jacks/jack stands. I wanted something that I didn't have to take off and store. I looked at jacks but due to the design, they had to be pretty tall. I wanted one on each corner for stability. It would have cost $800 for the four jacks. NOOOOOO THANKS.

The designer in me would not rest. I designed the jacks to utilize a 1/2-10 Acme screw rod and unitstrut. I wanted galvanized to cut down on corrosion. I fabricated four and welded one in each corner. I run them up and down with my battery impact wrench. Works great, but don't do it at 7am in a campground.


Since I camp in all kinds of soft ground, I made 5x5 removable pads for floatation.


When the pads are removed, the jack down arm tucks up flat and actually works well as a slider over obstacles.

I saved probably $700.