Not a build as much as a resurrection?

  • HTML tutorial

jim lee

Rank V
Launch Member

Influencer I

2,846
Anacortes, WA
Member #

12180

Ain't that the truth.

The worst is when you find one, sometimes complete, and its sitting out in the grass somewhere. You talk to the owner and you get the "Oh no, I'm going to restore that some day." Or you get the "That's worth a lot of money!" And it sits, for years and you watch it dissolve into the dirt. Until the guy dies or something. But by that time there's nothing left of it to work with.

Mark, the guy who sold my truck to me, told me a story like that where the owner was "Going to restore it." He tried to buy it a few times, but no, the old guy had plans for it. Then one day he drove by and was just in time to see them crushing it. The guy had died and the estate had "that old piece of junk" crushed and hauled off.

Years later Mark's still pissed about that one.

I'm sure there's people out there that see what I've been doing with my carryall and are horrified that I'm just beating it to death. (In their eyes)

-jim lee
 

jim lee

Rank V
Launch Member

Influencer I

2,846
Anacortes, WA
Member #

12180


Little teaser. Took the machine to a local professional. I needed the rot holes in the side of the body fixed. The plan was to chop out the section with the rot and replace it with a new bit of steel. We found the rot went further than we'd realized and my donor piece of body side was about 1/3 as long as we needed. So what does he do? He makes up a set of dies for his metal press that match the body seam exactly and uses that to make up a new custom body panel. The picture above is him finishing up welding the new panel in. Next he erased the seams with his welder and hand grinder about as fast as you could erase a pencil line with an eraser. I was shocked to say the least! He got the truck yesterday afternoon and I shot these picture this afternoon (Saturday).

-jim lee
 

Jedi

Rank VI
Staff member
Launch Member

Off-Road Ranger I

3,402
Ferndale, WA USA
First Name
Brian
Last Name
McClory
Member #

12406

Ham/GMRS Callsign
K6JDI

Little teaser. Took the machine to a local professional. I needed the rot holes in the side of the body fixed. The plan was to chop out the section with the rot and replace it with a new bit of steel. We found the rot went further than we'd realized and my donor piece of body side was about 1/3 as long as we needed. So what does he do? He makes up a set of dies for his metal press that match the body seam exactly and uses that to make up a new custom body panel. The picture above is him finishing up welding the new panel in. Next he erased the seams with his welder and hand grinder about as fast as you could erase a pencil line with an eraser. I was shocked to say the least! He got the truck yesterday afternoon and I shot these picture this afternoon (Saturday).

-jim lee
That is just awesome. A little welding from a pro and Franklin will be as good as "new".
 

PCO6

Rank V
Launch Member

Member III

2,268
Newmarket, Ontario
First Name
Stew
Last Name
Beatty
Member #

12534


Little teaser. Took the machine to a local professional. I needed the rot holes in the side of the body fixed. The plan was to chop out the section with the rot and replace it with a new bit of steel. We found the rot went further than we'd realized and my donor piece of body side was about 1/3 as long as we needed. So what does he do? He makes up a set of dies for his metal press that match the body seam exactly and uses that to make up a new custom body panel. The picture above is him finishing up welding the new panel in. Next he erased the seams with his welder and hand grinder about as fast as you could erase a pencil line with an eraser. I was shocked to say the least! He got the truck yesterday afternoon and I shot these picture this afternoon (Saturday).

-jim lee
That's pretty neat! About 30 years ago I took an auto restoration night course. It was taught by a panel beater so that's what we focused on. I learned a lot a hammer welding, metal shaping and how to piece things together but his approach to things is what impressed me most. Nothing was impossible and things could be made with the most simple of tools. We made some pretty basic hardwood dies and use a shop press to form some panels. The panel he made for you was really pretty simple … FOR HIM! lol

You have a great truck BTW!!!
 

jim lee

Rank V
Launch Member

Influencer I

2,846
Anacortes, WA
Member #

12180

Show them the money!


Tuesday, November 20, 2018


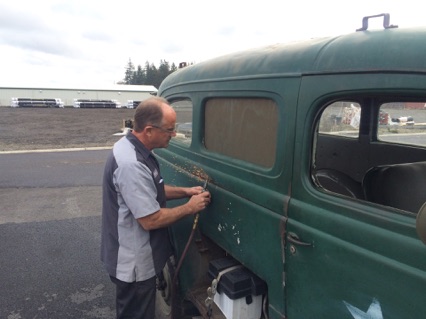
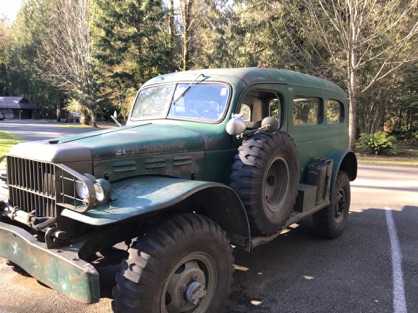
Last week I’d started ripping into the leaking window and rotted truck side issue. This, like all projects, snowballed beyond anything I could ever foresee. Also this time, instead of buying a bunch of tools and struggling for weeks to learn how to use them.. I threw money at the project. I, gasp, hired some professional help. Here’s the story.


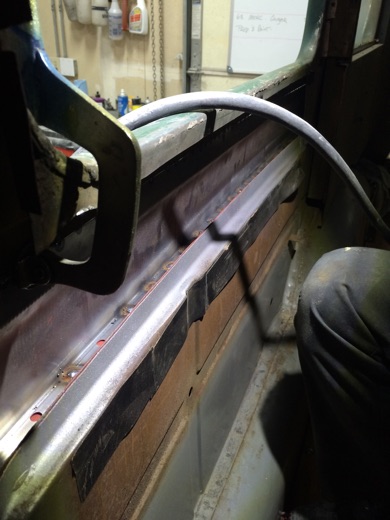
Out comes the window box. They are/were held in by a couple welds on the top edges, about half way up the window opening, and tack welded along the lower window lip.

The bottom of the box is held up by two sheet metal angle brackets welded to the wall. Most of this was missing. Luckily the brackets were still there and they helped for showing how things should be lined up later for reassembly.

I grabbed the air grinders and cut it out.


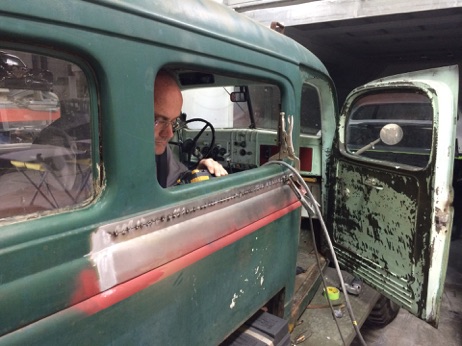
Tom and I cut a piece of thin plywood, gave it a coat of Army Olive paint and clamped it in place of the missing window. Now we can at least still use the truck as things are being worked on.


This is Chris of Extreme Metal and Paint here in Anacortes, WA. The locals pointed me to him as the guy that could handle a repair like this.

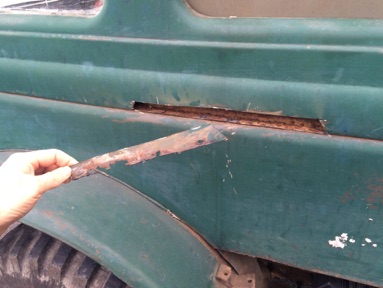
The original plan was to chop out this little piece of rotted metal, get the area sand blasted bring the truck back and have a patch welded in the hole.

Patch repair : $500 - estimate
Sand blasting? $200 - guess
Fabricate box : $200 - guess

$900? Ok, figure about a grand? Ok, lets do this!


I mean, its not all that big of a repair. Not a big deal..


I even supplied a donor body piece to get the metal from. I got this when bought the truck.

Although the lower shape that we need was correct. Chris noticed that the window cutout edge didn’t match up correctly. Body lines up there were wrong. There’s an extra body line that’s not on the truck.


In the sand blasting booth, ready for blasting. We had it done at Skagit Powdercoating. This is a really popular shop with the locals. They were somewhat reluctant to sandblast the truck because they knew sand would go just everywhere inside, no matter what measures they tried to mask it. I told them that I understood and do it anyway.


And they did it, both inside and out. It was a mess inside, but not the end of the world.

Sandblasting : $350

$1050.. Still ok.


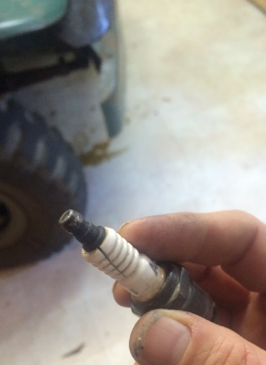
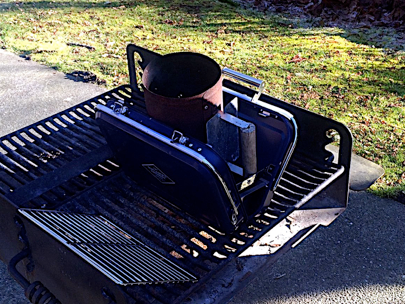
While showing off the truck at the sand blaster, they’ve done a lot of stuff for this project but this was the first time seeing the machine, we noticed I had a cracked spark plug.

I guess its time for a set of new spark plugs. I wonder what cracked that one?

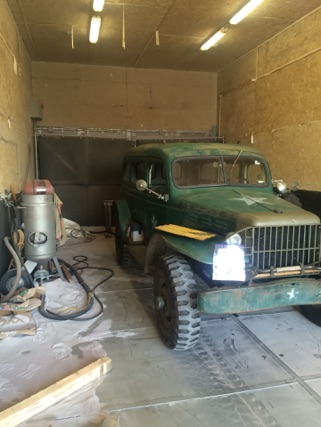
Anyway, after sand blasting, I ran the truck down to the body shop on Friday. Lets hope it doesn’t sit there for months like I’ve seen happen at other custom shops.


Find out they are on it Saturday morning. Cool!

I get there to take pictures to find the entire section being replaced.

What the? Where did you find that big shiny new piece of carryall wall to weld in there?

And why?


A peek inside.

Turns out the damage was a lot more extensive that what was showing originally. Actually, not terribly surprising.

Well, that covers the “why”. Now where did the metal come from?


Here’s how.

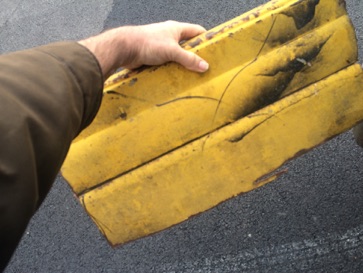
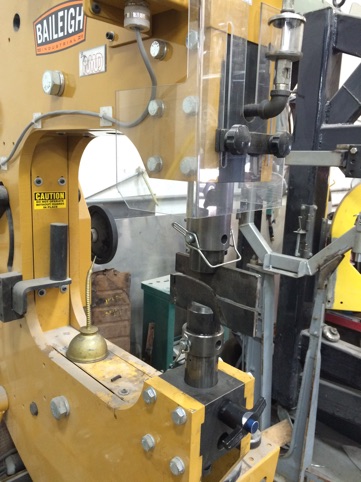
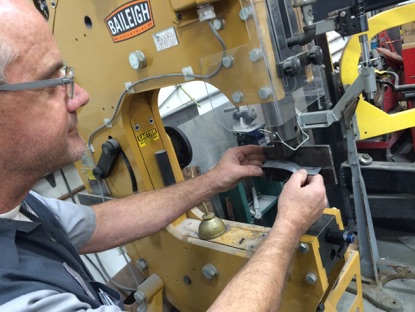
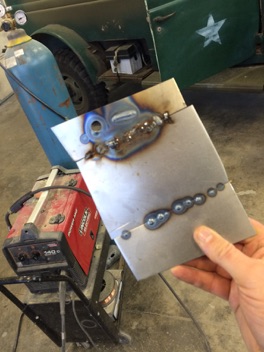
Using the piece of donor body panel, Chris made up a set of dies for this machine. Turn it on, push through a strip of sheet metal and it gives you yards of carryall body panel. How cool is that?


Stamping out an example piece. That machine was really impressive. He has dies for all sorts of common body parts that rust out. A couple examples were for 1970s pickup truck windshield gutters.

Having it be easy to just stamp out different shapes makes fixing body rot so much easier. When in doubt, cut it out.

I never thought that this could be an approach to take. Everywhere else I’ve seen body panels painstakingly fabricated by hand.


Then he chopped out all the rot, and did a little more sand blasting to clean up what was exposed.

Actually, not all the rot was chopped out. To get at it all we would have had to pull out the rear window as well. I hadn’t done that because it wasn’t leaking and I was trying to limit the size of the project.

Futile, I know.


Weldable primer going in. This was a really poor design to begin with, with nothing put in to seal out water. No wonder so many carryalls are missing this part of their bodies.


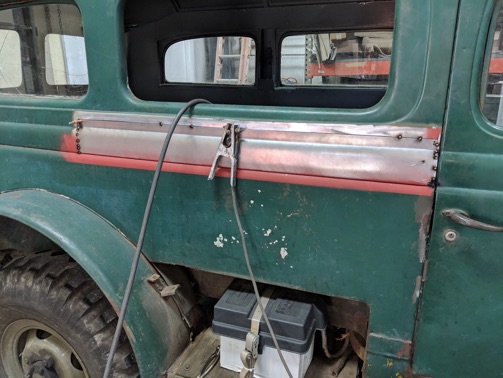
New body wall, ready to weld in.


New panel being tacked in. It was really neat seeing how all this was accomplished.


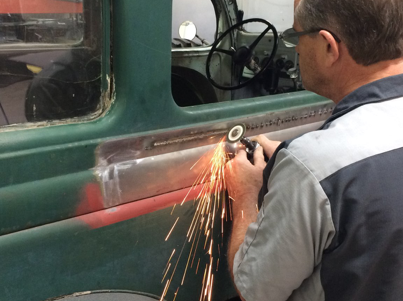
Once everything was tacked together he welded up the seams. Then, using the grinders, erased them.

It was shocking how fast he could replace body panel parts.


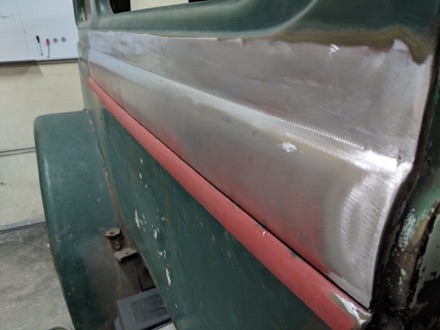
Seam erased. Inside now sealed with body sealant.


Then I got lazy and told him I’d like it ready for paint.

Smoothed out, body filler added and block sanded.


Primer going on..


Primer on, ready for paint.

Its just AMAZING how much custom work you get around here for just $500. Mostly done over the weekend as well. I was able to pick up the machine all completed that Monday morning.

I think we probably went past the $500 mark some time ago though..

Bodywork : $1600 and change.

Ok, not what I budgeted for. But wow! They did such a great job! Because, some times I just cringe at what I’ve seen body shops do to cars.

$2150, this is starting to hurt..


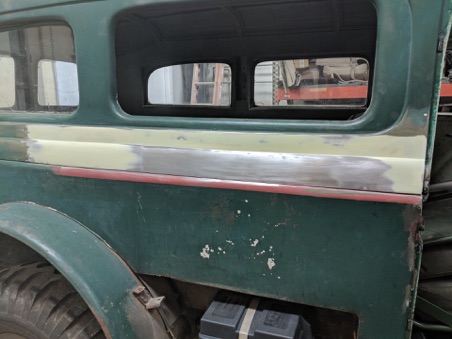
Took the truck home. Window plug back in. Sprayed some Olive drab over the repair to make things less obvious. I don’t know when, if ever, I’ll get around to painting the rest of the body.

This’ll be fine for now.


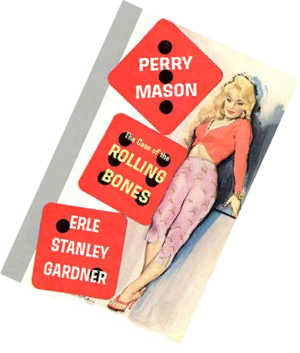
Now remember I found a 1934 Perry Mason Novel inside the body panels? I discovered that you could get these for your Kindle (Digital book viewer) And bought one.

And got completely hooked on them.

I’m reading my 20th Perry mason novel as I type.

Oh boy..


Meanwhile, back in the garage, I’ve been looking into the possibility of having, at least this window, complete with the ability to roll up and down. I was completely surprised to find the rolling mechanicals were in great shape. Except, that they had been bashed at some point and the pinion gear on the crank had been shattered.

And parts were not available.

But Midwest had a replacement for $150. Ok, fine. Bring it on. I thought it was going to be a reproduction, but it turned out to be NOS part, so it needed some cleanup.

$2,300 Woo hoo!


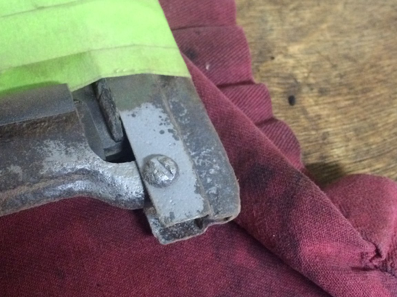
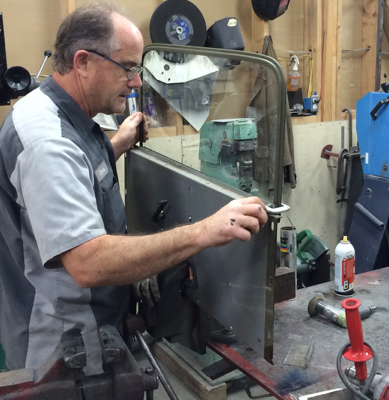
I wanted to replace the old cracking seal between the window frame and the glass. In order to get the frame apart I needed to clean up where the two bottom screws attached to top and bottom frame pieces together.

Mask and sand blast.


Cleaned up nice, but it didn’t help any. I still had to grid these out of the frames.


Then I felt bad. I really need to clean these up while I’m here. Also, I couldn’t get the frames apart.

I took it to the body shop, they pulled it apart and sand blasted the parts for me.

I painted the frames and took everything to the local auto glass shop. Same guy that put in my rear windows. He took one look at the frames and said “Old Dodge huh?” That made me feel better.

I had him put in new glass seal and assembly. $75

$2,375


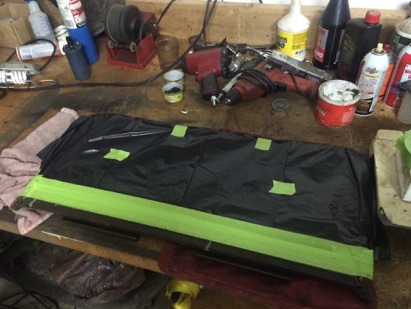
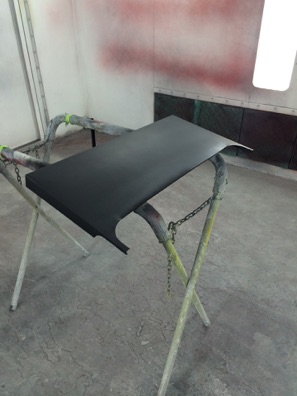
I’d been waiting for the window box being fabricated by Superior Systems. My usual guy was out on vacation and it seemed they were pretty loaded down with work. So it took longer than I expected. Typically these guys are pretty speedy quick.

But its ready for installation now. Here it is at the body shop getting its primer coat.

Box fabrication : $400

$2,575


Another Saturday and Chris is test fitting the box.

Now there had to be a lot of guess work on all of this. We had most but not all of the original box. So we weren’t positive about the size. The angle brackets were still on the wall but in pretty bad shape. There were quite a few compromises and “splitting of differences” in the final assembly of all this.


Hours of work, trimming, welding..


Assembling the new window to the crank panel.


The mounting brackets for the crank panel hadn’t been attached so Chris had to figure out where they were supposed to go. These are critical because it locates the window glass into the window.


While we were struggling with all this, I’d been thinking about how Chris could weld like a madman with his electric MIG welder. Never having tried one of these modern machines, I wanted to try it. So I asked him, “While your on the clock, could you let me try a little bit of welding on that machine of yours?” He was all,

“Sure!”

He hopped out and set me up to play around with the welder. Showed me a bunch of stuff on how to weld sheetmetal. Do’s and don’ts. It was a lot of fun.

WAY easier than the old stick welding I used to attempt back in the day.


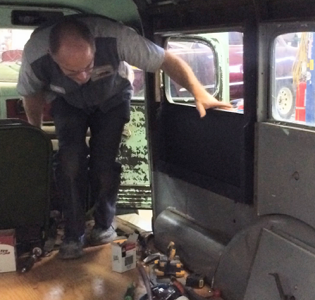
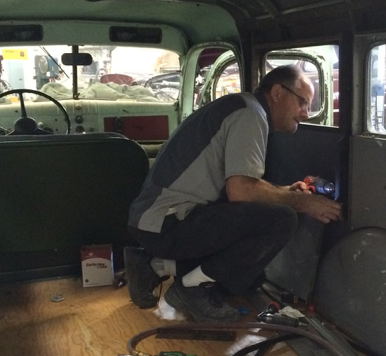
Sunday morning the window and all the interior is in and working. There are some screw holes that need re-drilling and I agreed to take care of that. Along with the drain plumbing.

Back at home, center punching for the new screw holes.

Finishing and imstalling window box, reinstalling the window and interior bits $1,100.

$3,675 And I’m sure there were other bits I missed.


The truck sits on level ground with a few degrees of nose down rake. Ok, fine. But they put the drains at the rear of the window boxes.

Really?

Also, as carryall owners pretty much all know, they just dump the water between the body panels and let it find its own way out.

Really?

And where it ends up is still on Julie’s pillow!

So I had them put drains in both ends of the box, just in case. Last night I decided to just use the front one. A handy body rot hole allowed me to run the hose out the bottom of the body to drain completely away.


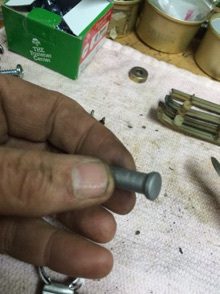
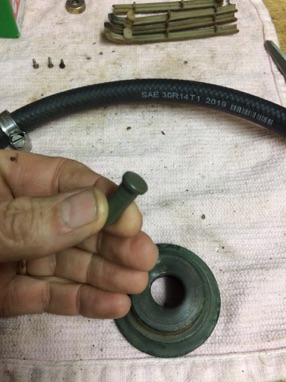
So, I needed to plug the rear drain hole. Tired and out of clever ideas, I came up with this. Its a piece of double flared steel tubing with a chunk of sheet steel soldered to the end of it.

Look at them dirty hands!


Painted to slow down rusting..


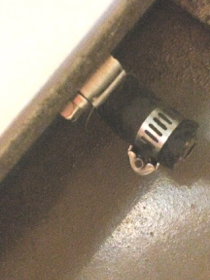
The flared part is between the hose clamps.


All together, sealed up with working winder and drains. As they say in Project Binky,

Sorted!


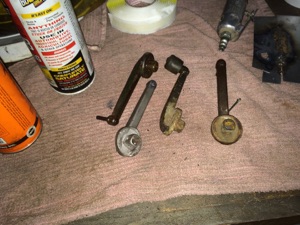
Actually, I’ve been working on the window cranks but haven’t gotten anywhere with them yet.

So in conclusion. Paying to get stuff done? It costs a LOT. No matter where you go, it’ll cost a lot. I’m lucky because I live in an area that has people with mad skills. If I had taken it to some Bozo, this would have been a disaster.

Also, I had to deal with guilt the entire time. Paying to push my hobby forward? Is this right? What am I doing?

I justified it by telling myself that it was about tools and skill-set that I don’t have. But the real reason was, I needed it done to use the truck. As it turns out, my hobby is shifting from working on the truck, to using the truck.
 

Jedi

Rank VI
Staff member
Launch Member

Off-Road Ranger I

3,402
Ferndale, WA USA
First Name
Brian
Last Name
McClory
Member #

12406

Ham/GMRS Callsign
K6JDI
Nice to see he is coming together... even if it is costing some cash.
 

joe.schigel

Rank IV

Enthusiast III

1,212
Detroit, MI
Don't feel bad about calling in extra help. Know what you're capable of and what you're not will make a project go faster. On my old '76 baja bug, I outsourced all the body and paint work since I'm terrible at that nor did I have a welder, paint booth, big enough air compressor, etc... Anyway, epic build! I love reading about your truck! It helps keep me motivated on mine.
 
  • Like
Reactions: Rusty burbin

PCO6

Rank V
Launch Member

Member III

2,268
Newmarket, Ontario
First Name
Stew
Last Name
Beatty
Member #

12534

... All together, sealed up with working winder and drains. As they say in Project Binky,

Sorted!
I'm really enjoying your build ... and it's nice to see someone else that is following the "Project Binky" build. I'm not big on Minis but the fabrication work they are doing on that car is incredible. There's no way that they could have fully planned out that build and the adjustments they've made along the way have been pretty neat. It's a fun series to follow.
 

jim lee

Rank V
Launch Member

Influencer I

2,846
Anacortes, WA
Member #

12180

Thanks guys!

The build is kinda' been put on back burner right now. Off doing other projects. And, the machine has actually been almost reliable for awhile. We were able to use it on a 3 day anniversary trip. It only broke down once and I was able to fix it in the Hotel parking lot. (After sleeping on it and realizing what the problem was.)

Project Binky is just beyond amazing! And fun to watch as well! I can't wait for the next episode. I love the way they do CAD design work. :)

-jim lee
 

PCO6

Rank V
Launch Member

Member III

2,268
Newmarket, Ontario
First Name
Stew
Last Name
Beatty
Member #

12534

... Project Binky is just beyond amazing! And fun to watch as well! I can't wait for the next episode. I love the way they do CAD design work. :)

-jim lee
I agree. I couldn't drink that much tea though ... if that's what it really is. :grinning:
 

jim lee

Rank V
Launch Member

Influencer I

2,846
Anacortes, WA
Member #

12180

This one is for Sascha.


Wednesday, January 30, 2019

This update is not a lot about the carryall. It’s mostly just to let you know what’s been going on and why there have been no blog updates for awhile. I’ve been told I should let people know. Sorry about that.

After getting the window fixed, I left the machine out in the rain to see how everything sealed up. The new window seems fine. There are leaks around the rear door, the passenger door and all the other windows. So it looks like, for now, I’m still going to need a tarp to keep the rain out.

Bother!

That was pretty discouraging and, I really needed a break. On top of all this, the truck, besides the leaking, is starting to act almost like a reliable vehicle. So I decided to to take a break and work on other things I’ve been meaning to get to for some time now.


Thanksgiving! Big feasting day for Americans. Danny, our kid in college up in Bellingham, wanted the family to come up to his place to celebrate. Cool, I’ll bring up the girls in Franklin. Its about an hour drive in a modern car from our home.

As we’re packing I find this has been broadcast online by daughter Alex. (of WABDR Fame).

No faith, I tell ‘ya.


See? We made it. That’s Dan’s college house in the background. Think “Animal house” and you get a pretty good picture. He was the only one there for the holidays. So at least it wasn’t a giant college party. Just us.


Mmmm.. Turkey dinner...


Then Julie and I took Franklin for a trip to celebrate our 27th anniversary. The plan was to go to Port Townsend on the Ferry. But at about the time we got to the ferry landing, both ferries broke down. So much for that idea..

Plans were changed and we drove off to the southern end of Whidbey island. Found a really ritzy hotel. (Had a great time)


Came back from fancy seafood dinner to find someone had plugged Franklin into the Tesla charger. I wonder how well that worked out?

There was a round about way to get to Port Townsend and that was to take a ferry over to the Seattle/Everett area, then another further south back out to the islands, cross a bridge, head back north... Took all morning. But I’d picked out a really cool restaurant for lunch.


The restaurant was right across the street from the water. Next to the wooden boat building school. I was starving.


“We don’t serve lunch, sorry.”

Really?

So we went out to locate a hotel for the night. And that’s when things started coming a bit unglued..

After checking into the hotel, across the cove from the restaurant, we hopped back into the truck to go have dinner and.. Franklin was dead.

Oh lord! Is the battery dead? Is the generator broken? Fan belt too loose and it ran down? Or did the starter fail? How am I going to get this thing home from way out here?!

In the midst of me freaking out about the truck, Julie gets a text from Alex.


Shelby, our youngest, is in the hospital with a dislocated shoulder! Both Alex & Shelby live in Seattle. Shelby had tried a trapeze class and something had gone wrong.

So here we are, stuck out on the wrong side of the water with a broken truck and our kid’s in the hospital. I looked into getting the machine towed home, but was getting nowhere. Julie was like a caged animal. Rough night.

After a bunch of texting back and forth with Alex, we got the word that she’d gotten Shelby home to her dorm. Julie finally fell asleep. And as I was nodding off, it came to me what had to be wrong with the truck.

First thing next morning I opened up the battery box and sure enough. The battery cable had come loose. 3 minute fix and we were back on the road.


As we were traveling I’d been working on parts of my next project. I’d decided to build my own cell phone.

Its not as hard as it sounds. You see, when companies set out to make cell phones, they buy pre-made cell phone chips. Basically all they do is make up a case and tie everything together with some software.

I’d already bought two pieces of hardware that had the cell phone chips on them along with a Arduino type processors.

This is my setup for testing the hardware. In the plastic can hanging out the window on the mirror arm is the cellphone hardware. This is tied in to my laptop bungie corded to the map board in Franklin. Using this setup Julie and I were able to text back and forth to the kiddies. Now all I needed was a case and some code.. No problem!


3D printed case with all the phone guts installed and wired in.

Ok what are we looking at here?

On the far left the big blue board with the silver thing at the top is the touchscreen. The silver thing is a SD card slot. (SD card = Hard drive)

On the far right, the brownish board with the white square on top is the cell phone hardware. Actually the cell phone is the white square with the red stripe on top. This would be the chip that cell phone companies would buy and build their phones around. The rest of the board is a pack of supporting goodies one needs to build cellphones. Power supply, battery charger, microphone amplifier, speaker drivers etc.

But the cell phone board only has 2k of RAM. Not enough to do much, especially trying to run a touch screen. So I added the little middle board. This has 64K of RAM so it ends up being the controller of everything and the one interacting with Mr user.

Above the boards is the antenna, speaker and underneath that a little rechargeable LiPo battery.

Since thanksgiving or so I’ve been writing code for this thing. 95% is going into the little processor to run the user interface. The phone works, its just really tough to get it to work like you’d expect a phone to work.

During the holidays I did make a wreath for Franklin. Julie shot a short clip of it here.


Home screen. Notice the cool icons along the bottom? I stole those off the internet. They were so much cooler looking than the original ones I made myself.

Phone, Text, Contacts, Calculator, Question game & Breakout game.

I already written the calculator & Breakout game some time ago. I set this machine up to host multiple programs, just like a real phone.


Phone dialing screen. This part really works. You can call people and actually have conversations with them.


Contact list. You can add contacts, delete them, call them. You can’t text them and you can only have four because I’m not finished writing scrolling or sorting of them. That’s what I’m working on now.

What I thought would be a quick diversion, is turning into a massive code writing extravaganza. I’ve been at it for three months without a break. Now that I’m “rolling my own” I’m amazed at the complexity of what ties all your contacts, messages, call logs and everything else together. And, using our smart phones, we all take it for granted.


My calculator. About four years ago, the origin of this project began when I got tired of looking for a calculator and just wrote my own. It was a originally a Mac application. Then I ported it to one of these little processors with a touch screen.

Now I‘ve rolled it into my phone.


The question game. This was a test application for the file handling code that the contact list is built on. I polished it up some and added it in as well.

Basically tries to guess what your thinking of by asking yes/no questions.


Breakout! Another game I wrote some time ago. Nasty reflexion on the screen there, sorry. The other picture was worse.

This was originally written for a tiny 1.5”x1.5” screen with a control knob. I’m using this as a test bed for scrolling stuff.

Scrolling stuff that I’m not working on tonight because I’m writing this.


But yesterday...

You truck people still reading this?

That geeky bit was probably pretty boring & painful. A bit of a rough patch there.

Yesterday was bright and sunny, so Julie drug me and my truck out to test out our new portable BBQ.

It looks kinda’ like a lunch box that folds out into a BBQ.


Trying to set it up.

This was before we realized the legs weren’t folded out yet.

We were actually successful in that we got it going (using charcoal). We cooked two cheeseburgers on it. Then figured out the burner box had legs too. That would have been much better.

But it worked, we’ll do better next time, and the truck made it home unassisted. Yay!

Anything else? No.. that about covers it. Sorry to be so light on the wrenching, but that’s how it goes sometimes. Franklin is having a spot of reliability. I’ve been running him as my daily driver for awhile now.

Oh wait! One other thing. Julie is liking the camping so much, she made me buy her a rooftop tent for her 4Runner!

The world changes..
 

Dilldog

Rank V
Launch Member
Investor

Influencer I

2,358
Spokane, WA.
First Name
Dillon
Last Name
Wilke
Member #

20298

Ham/GMRS Callsign
KJ7LVO/ WRQL275
Service Branch
USAF
I have always liked the old Dodge 4x4 wagons. Great work.
 
  • Like
Reactions: Drifterman